How to Set Up a Grow Tent: A Complete Step-by-Step Guide
Setting up a grow tent may seem intimidating the first time you do it, especially when you’re surrounded by poles, connectors, lights, ducting, fans, and a pile of accessories. The good news is that most grow tents follow a similar assembly process, and once you understand the basics, putting one together becomes much easier.
A properly installed grow tent does much more than hold your plants. It creates a controlled growing environment where you can manage temperature, humidity, airflow, lighting, and odors more effectively than an open room. Taking the time to set it up correctly from the beginning will help prevent problems later, from poor ventilation to uneven lighting and unnecessary heat buildup.
Whether you’ve purchased a complete grow tent kit or you’re building your own setup using individual components, this guide will walk you through every step. I’ll also explain how to build a simple DIY grow tent if you don’t want to buy a commercial kit.
Let’s start with everything you’ll need before assembly.
Read More: how to set up a hydroponic grow tent
What You’ll Need
The exact equipment depends on your growing goals, but most indoor setups include the following items:
Essential Equipment
- Indoor Grow tent
- Grow lights
- Inline fan
- Carbon filter (optional but recommended)
- Flexible ducting
- Oscillating fan
- Timer
- Thermometer and hygrometer
- Plant containers
- Growing medium
Helpful Accessories
- Rope ratchet hangers
- Extension cords
- Power strip with surge protection
- Zip ties or Velcro straps
- Trellis netting
- Humidifier or dehumidifier (if needed)
If you purchased a grow tent kit, many of these items may already be included.
Read More: how to set up a grow tent for drying
Step 1: Choose the Right Location
Before assembling anything, decide where your grow tent will permanently sit.
Although grow tents can be moved later, doing so after installing lights, fans, and plants is difficult and time-consuming.
Look for a location that offers:
- A flat, level floor
- Easy access to electrical outlets
- Enough ceiling height
- Good air circulation
- Stable room temperature
- Space to open all tent doors
Avoid placing the tent directly against a wall. Leaving several inches of clearance around the sides makes it much easier to connect ducting, route electrical cables, and perform maintenance.
If possible, choose a room where temperatures remain fairly consistent throughout the day. Rooms that become extremely hot or cold can make environmental control much more challenging.
Read More: how to set up a mushroom grow tent
Step 2: Unbox and Check Every Part
Before assembling the frame, unpack everything and verify that no parts are missing.
Most grow tents include:
- Steel poles
- Corner connectors
- Fabric shell
- Roof support bars
- Hanging straps
- Floor tray
- Assembly instructions
Inspect the fabric for tears, damaged zippers, or missing stitching. Also check that all poles are straight and that the connectors aren’t cracked.
Finding a missing part now is much easier than discovering it halfway through the build.
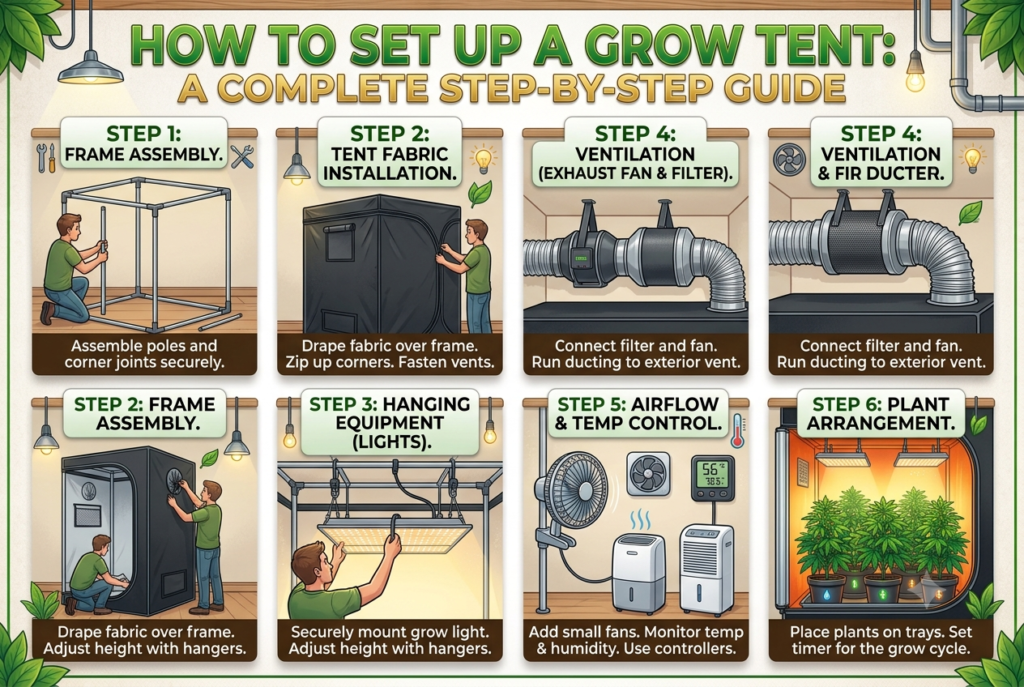
Step 3: Assemble the Frame
The frame forms the foundation of your entire setup.
Start by connecting the base using the supplied poles and corner connectors. Once the bottom section is complete, install the vertical support poles before attaching the top frame.
Most manufacturers label each pole with letters or numbers, making assembly straightforward.
As you work, make sure every pole is fully inserted into its connector. A partially connected frame may become unstable after the grow lights and ventilation equipment are installed.
Once finished, gently shake the frame.
It should feel rigid without excessive movement.
Step 4: Install the Grow Tent Fabric
With the frame complete, it’s time to install the tent cover.
This is usually the most awkward part of the setup, especially with larger tents.
If possible, ask another person to help lift the fabric over the frame.
Start from the top of the frame and slowly pull the fabric downward until the entire structure is covered.
Next:
- Close every zipper.
- Check that all corners fit properly.
- Make sure the reflective interior is evenly stretched.
- Install the waterproof floor tray.
Don’t force the zippers if they feel tight. Instead, adjust the fabric until everything aligns correctly.
Once installed, inspect the inside of the tent for any visible gaps or tears that could allow light to escape.
At this point, your grow tent is fully assembled and ready for equipment installation.
In the next section, I’ll show you how to install your grow lights, inline fan, carbon filter, ducting, oscillating fans, timers, and environmental monitors to create an efficient indoor growing system.
Installing Lights, Ventilation, and Core Equipment
Now that the grow tent frame and fabric are fully assembled, the next step is turning it into a working indoor growing environment. This stage is where most of the performance of your setup is actually determined, especially lighting and airflow.
If you install equipment correctly here, you will avoid common problems like heat buildup, poor light distribution, and humidity imbalance later.
Step 5: Install Grow Lights
Grow lights are the most important part of your setup. Before hanging them, check the manufacturer’s recommended hanging height and coverage area.
Use rope ratchet hangers or adjustable straps to suspend the light from the top support bars of your tent.
Key tips:
- Keep lights centered for even coverage
- Leave room to adjust height as plants grow
- Avoid placing lights too close to fabric walls
- Ensure cables are neatly routed and not under tension
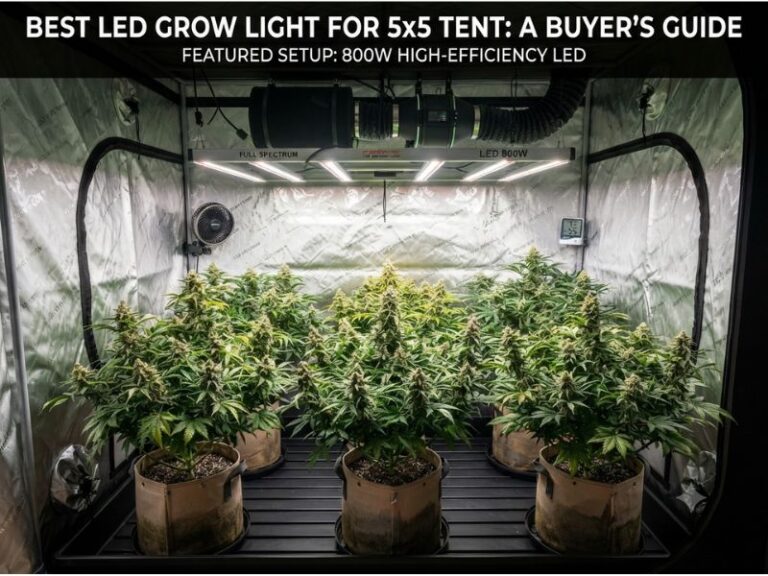
If you’re using multiple lights in a larger tent like a 4×8, space them evenly to prevent dark zones in the canopy.
After installation, test the light outside the tent first to ensure it is working properly before final positioning.
Step 6: Install Inline Fan and Carbon Filter
Ventilation is critical for temperature control, humidity regulation, and odor management.
Most setups use an inline fan connected to a carbon filter.
Recommended placement:
- Carbon filter at the top inside the tent
- Inline fan attached to the filter or nearby
- Exhaust duct leading outside the tent or room
This setup pulls hot air upward and out of the tent while filtering odors at the source.
Make sure all connections are tight and sealed properly using duct clamps or aluminum tape. Any air leak will reduce efficiency.
Step 7: Set Up Airflow (Oscillating Fans)
Even with an exhaust system, internal air movement is still necessary.
Place one or more oscillating fans inside the tent to:
- Prevent stagnant air pockets
- Strengthen plant stems
- Improve transpiration
- Reduce mold risk
Avoid pointing fans directly at plants for long periods. Instead, aim for gentle movement across the canopy.
In larger tents, place fans at different heights for better circulation.
Step 8: Install Ducting and Air Exhaust Path
Connect flexible ducting from your inline fan to the exhaust exit point.
Keep ducting:
- As short as possible
- With minimal bends
- Properly sealed at joints
Long or twisted ducting reduces airflow efficiency and increases fan workload.
If you’re exhausting air into another room, make sure that room also has fresh air intake to prevent negative pressure buildup.
Step 9: Install Environmental Monitoring Tools
At this stage, install your thermometer and hygrometer inside the tent at canopy level.
This helps you monitor:
- Temperature
- Humidity
- VPD (if using advanced setups)
Place sensors away from direct airflow or light exposure for accurate readings.
If you’re using timers for lights or fans, connect and test them now. Automation helps maintain stable growing conditions without constant manual adjustments.
Step 10: Power Setup and Cable Management
Before adding plants, organize all electrical wiring.
Best practices:
- Use a power strip with surge protection
- Keep cables off the floor where possible
- Avoid crossing water lines and electrical cords
- Secure wires using clips or zip ties
- Leave easy access to switches and timers
Good cable management not only improves safety but also makes future maintenance much easier.
At this point, your grow tent is fully functional as an indoor growing environment. Lighting, airflow, and monitoring systems are all in place.
In the final section, I’ll show you how to arrange plants or pots, fine-tune environmental conditions, perform a final airflow check, and build a simple DIY grow tent if you want an alternative setup approach.
Final Setup, Testing, and DIY Grow Tent Guide
Now that your grow tent is fully assembled with lighting, ventilation, and monitoring equipment installed, the final step is to fine-tune the environment and prepare it for plants. This stage is often overlooked, but it has a major impact on long-term performance.
A properly balanced setup will maintain stable temperature, humidity, and airflow without constant adjustments.
Step 11: Arrange Pots and Plan Your Layout
Before placing plants inside, plan your layout carefully.
Start by positioning your pots based on:
- Grow tent size
- Plant size at maturity
- Pot size
- Light coverage footprint
- Airflow direction
Make sure each pot has enough space around it for air circulation and future growth. Avoid placing pots too close to the walls, as this can create light loss and uneven growth on outer branches.
If you’re using multiple plants, arrange them in a grid pattern for better light distribution. In larger tents like 4×4 or 4×8, leave a small walkway or access gap if possible to make maintenance easier.
Step 12: Run a Full System Test
Before introducing plants, run your grow tent for at least 24 hours.
During this test, check the following:
- Temperature stability
- Humidity levels
- Airflow strength
- Light intensity and coverage
- Fan noise and vibration
- Ducting leaks or weak airflow
This test helps you identify issues early. For example, if temperatures are too high, you may need to increase exhaust fan speed or adjust room ventilation. If humidity is too low, you may need a humidifier depending on your environment.
Small adjustments at this stage can prevent bigger problems later.
Step 13: Light Leak and Airflow Check
Darkness and controlled airflow are essential for a stable grow environment.
Turn off all external lights in the room and check inside the tent for any light leaks. Pay special attention to zippers, duct ports, and seams.
If you find leaks:
- Adjust fabric alignment
- Tighten zippers properly
- Use lightproof tape if needed
Next, check airflow by placing your hand near intake and exhaust points. You should feel steady air movement without strong resistance.
Poor airflow often indicates blocked ducting or an undersized fan.
Step 14: Common Grow Tent Setup Mistakes
Even a well-built setup can underperform if small mistakes are made.
Avoid the following:
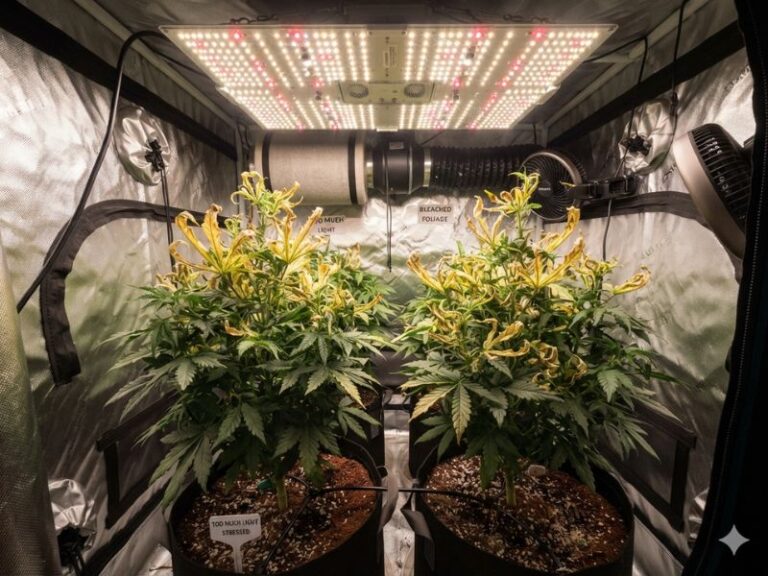
- Hanging lights too close to plants
- Overcrowding pots inside the tent
- Poor cable management
- Blocking intake or exhaust vents
- Ignoring humidity levels
- Skipping system testing before planting
Most indoor growing problems start with setup errors, not plant care.
Step 15: DIY Grow Tent (Simple Alternative Setup)
If you don’t want to buy a commercial grow tent kit, you can build a basic DIY grow tent using simple materials.
Basic DIY materials:
- PVC pipes or wooden frame
- Reflective mylar or emergency blanket sheets
- Zip ties or connectors
- Heavy-duty plastic sheet for floor
- Hooks for lights and fans
Basic process:
- Build a rectangular frame using PVC pipes or wood
- Cover the frame with reflective material to improve light efficiency
- Secure all sides using tape or clips to prevent light leaks
- Add a waterproof base layer to protect the floor
- Install lighting and ventilation equipment similarly to a standard tent
While a DIY setup is cheaper, it may not provide the same level of durability, lightproofing, or airflow control as a commercial grow tent. However, it is a good option for beginners who want to experiment before investing more money.
Final Thoughts
Setting up a grow tent is not just about assembling equipment. It is about building a controlled environment where light, airflow, temperature, and humidity work together to support healthy plant growth.
If you take the time to set everything up correctly, test your system, and avoid overcrowding, you will create a stable indoor growing environment that is much easier to manage long-term.
Once your grow tent is running smoothly, you can focus on optimizing plant growth, improving yields, and refining your setup over time.
In the next step of your journey, you can explore advanced topics like environmental control, plant training techniques, and improving light efficiency to take your indoor garden to the next level.

I’m Maya L. Greenwood, a lifelong plant lover who believes anyone can grow something beautiful with the right guidance. After years of testing soil mixes, pruning methods, irrigation tricks, and pest-safe solutions, I started EasyGardenTips.com to turn hard-won lessons into step-by-step advice. From seed starting and container gardens to composting and seasonal checklists, my goal is to make gardening simple, sustainable, and fun.