
Finding reliable cheap complete grow tent kits can be difficult because packages that look similar may include very different equipment. One kit may provide a properly matched light, ventilation system, carbon filter, and controller, while another may leave out important components.
For most beginners, the VIVOSUN 4×4 WiFi Grow Tent Kit is my top overall recommendation. It combines a spacious grow tent with the main lighting, ventilation, monitoring, and setup accessories needed to begin indoor growing.
Choosing the grow tent kit can result in poor light coverage, insufficient airflow, excessive heat, unstable humidity, or equipment that does not work properly together. You may then need to replace individual components, making a low-priced package more expensive in the long run.
To help you avoid these problems, I researched and compared 10 popular grow tent kits for beginners available in the USA. I evaluated each package based on tent construction, LED coverage, ventilation capacity, carbon filtration, controls, included accessories, setup difficulty, and overall value.
The recommended VIVOSUN package includes a 400W full-spectrum LED light, 6-inch inline fan, carbon filter, ducting, GrowHub WiFi controller, grow bags, trellis net, and other useful accessories. Its 4-by-4-foot floor also provides 16 square feet of growing space.
This means you can receive the main components in one package instead of purchasing and matching the tent, light, fan, filter, and controller separately.
However, the best grow tent kit will still depend on your available space, budget, preferred level of automation, and future expansion plans. The reviews below explain what each package includes, who it suits, and which limitations you should consider before buying.
10 Best Cheap Complete Grow Tent Kits
| Image | Product Name | Check Price |
|---|---|---|
Best Choice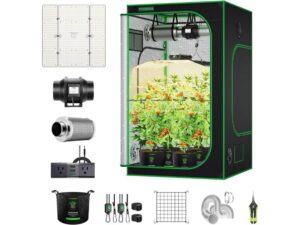 | VIVOSUN 4×4 WiFi Grow Tent Kit – Best Overall for Beginners | Check Price |
Second Best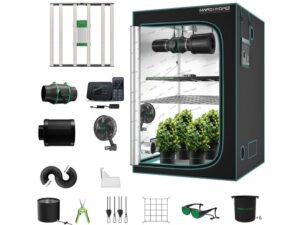 | MARS HYDRO 4×4 Smart Grow Tent Kit – Best Smart 4×4 Package | Check Price |
Third Choice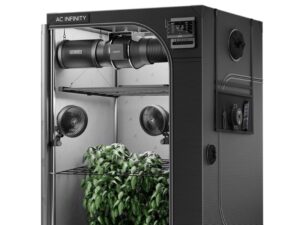 | AC Infinity AI Grow System Pro 5×5 – Best Premium Automated Kit | Check Price |
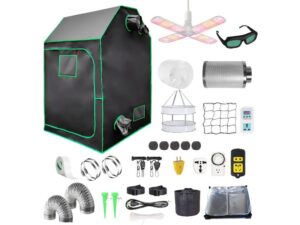 | iMeshbean 4×4 Complete Grow Tent Kit – Best Low-Cost Large Package | Check Price |
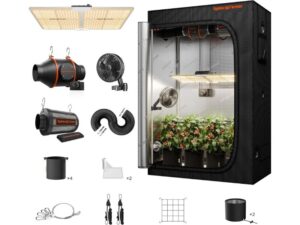 | Spider Farmer SF2000 2×4 Complete Kit – Best for Narrow Spaces | Check Price |
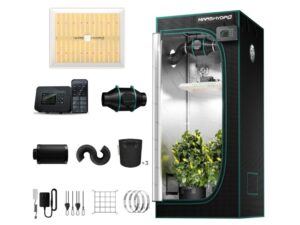 | MARS HYDRO 32×32 Smart Grow Tent Kit – Best Compact Smart Kit | Check Price |
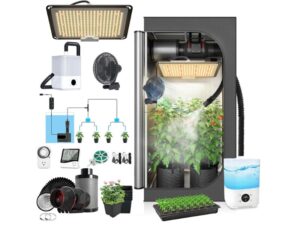 | TopoGrow 2×2 Automated Grow Tent Kit – Best Accessory-Rich Small Kit | Check Price |
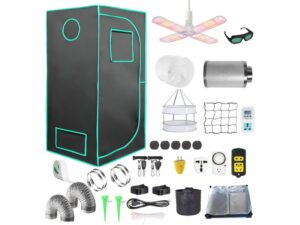 | iMeshbean Complete Grow Tent Kit – Best Flexible Size Range | Check Price |
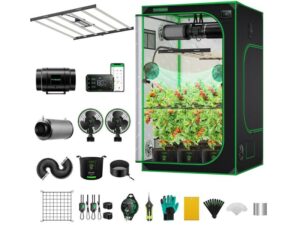 | VIVOSUN GIY 5×5 Smart Grow Tent Kit – Best Large Connected System | Check Price |
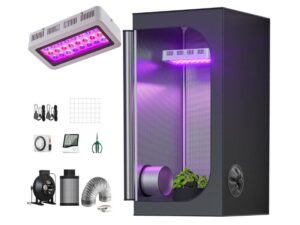 | TopoGrow 32×32 Complete Grow Tent Kit – Best Basic Budget Setup | Check Price |
1. VIVOSUN 4×4 WiFi Grow Tent Kit – Best Overall for Beginners
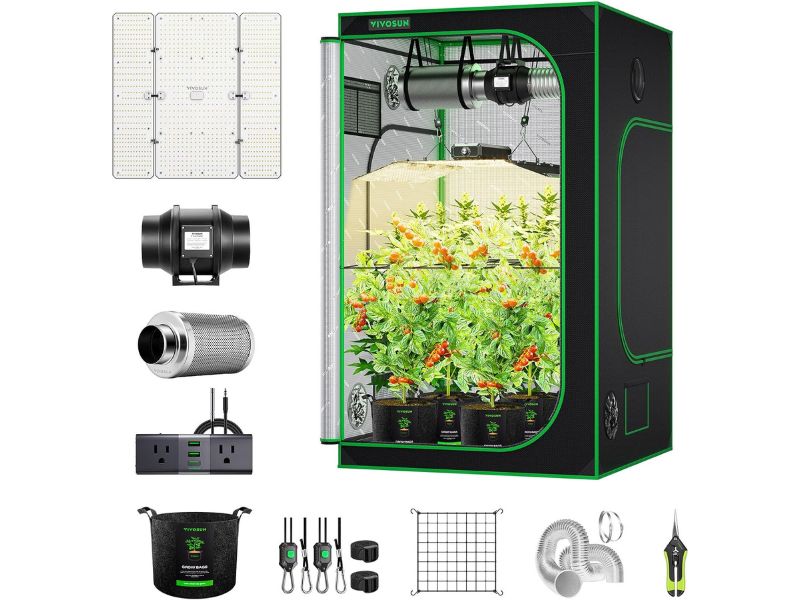
The VIVOSUN 4×4 WiFi Grow Tent Kit is a balanced option for beginners who want a roomy package without selecting the light, exhaust system, filter, and controller separately. The linked configuration uses a 48 x 48 x 80-inch metal-frame tent, giving you 16 square feet of floor space and enough height for common overhead equipment.
The package includes a 400W full-spectrum LumaLight, 6-inch R6 inline fan, carbon filter, ducting, clamps, prefilter, GrowHub A22 controller, five 5-gallon grow bags, trellis net, pruning shears, rope hangers, and hanging straps. VIVOSUN rates the fan at up to 390 CFM and says the WiFi controller can schedule connected equipment and respond to temperature settings through its app.
The main advantage is compatibility. You receive the major components together, reducing the chance of ordering a light or ventilation system that is poorly matched to the enclosure. However, the package does not include every possible environmental device, so a circulation fan, humidifier, dehumidifier, or heater may still be needed depending on the room.
Other sizes currently shown on the listing include 24 x 24 x 48, 32 x 32 x 63, 36 x 36 x 72, and 48 x 24 x 60 inches. The included light and other components can change with the selected size, so confirm the variation before checkout.
Pros: Practical 4×4 footprint, WiFi control, matched lighting and ventilation, carbon filter, and useful starter accessories.
Cons: Requires a fairly large room, and additional climate equipment may still be necessary.
My Verdict: This is the strongest all-around choice among these cheap complete grow tent kits for beginners who want convenient automation without moving into a premium 5×5 system.
2. MARS HYDRO 4×4 Smart Grow Tent Kit – Best Smart 4×4 Package
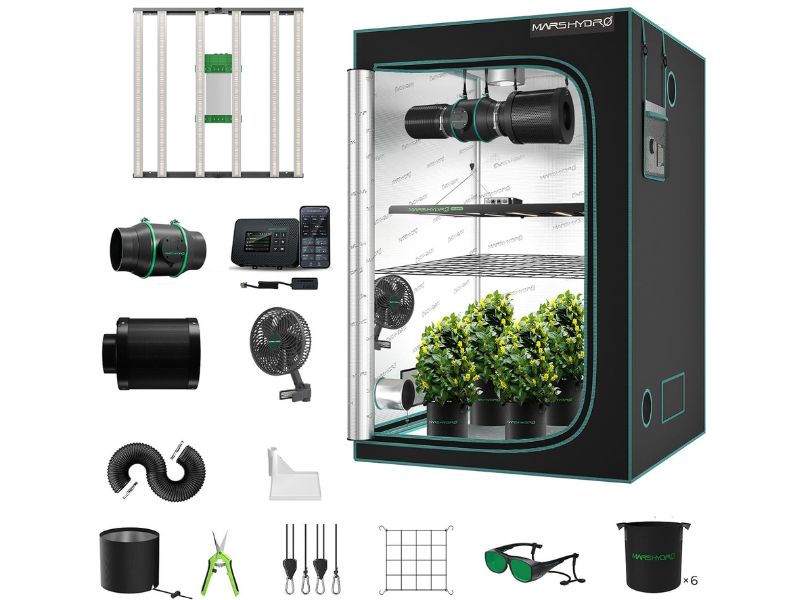
The MARS HYDRO 4×4 Smart Grow Tent Kit is a performance-focused package for beginners who want a substantial light, thick tent material, and integrated control. Its 48 x 48 x 80-inch enclosure uses 1680D reflective Mylar canvas, double stitching, a metal frame, and a manufacturer-rated 110-pound support capacity.
You receive the 480W FC-E4800 foldable bar LED, a 6-inch inline fan rated at 402 CFM, carbon filter, 25 feet of ducting, 6-inch clip fan, Controller 43, six grow bags, trellis netting, clamps, rope hangers, corner shelves, and pruning shears. The light is dimmable from 0 to 100 percent, while the controller can coordinate compatible equipment and monitor environmental conditions.
This system reduces compatibility research and includes more circulation equipment than many basic packages. The bar-style fixture also spreads across the 4×4 ceiling instead of concentrating light in one small panel. However, the larger component list makes installation more involved, and the smart functions depend on correct sensor and device setup.
The listing currently shows 24 x 24 x 55, 32 x 32 x 63, and 39 x 39 x 71-inch alternatives, including selected versions with Controller 43. Light power, fan size, and accessories can differ between variations, so check the package list after selecting a size.
Pros: Thick 1680D tent, dimmable bar light, smart controller, carbon filter, clip fan, and broad accessory package.
Cons: Higher cost than basic kits, more complicated assembly, and substantial room requirements.
My Verdict: This is one of the best grow tent kit choices for buyers who want a smart 4×4 package with strong core components and fewer early upgrades.
3. AC Infinity AI Grow System Pro 5×5 – Best Premium Automated Kit
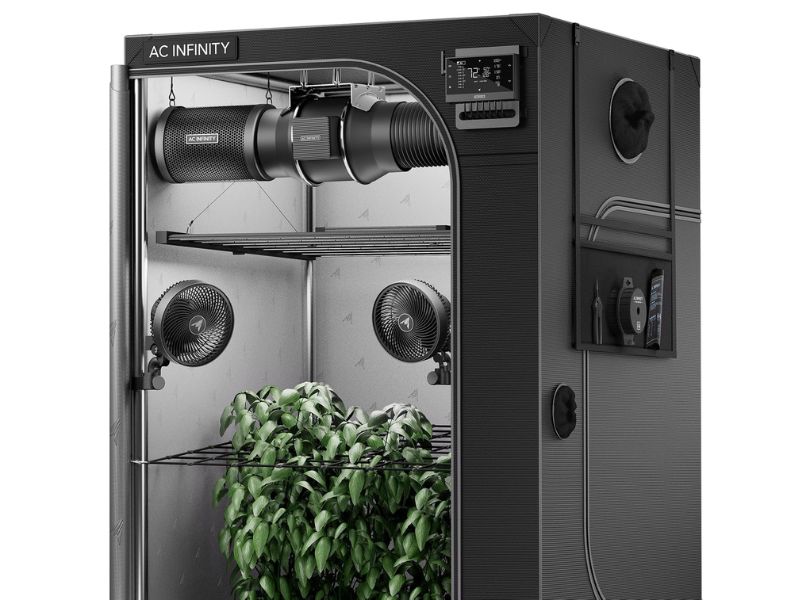
The AC Infinity AI Grow System Pro 5×5 is not the cheapest option here, but it is a premium alternative for beginners who value automation and heavy-duty construction. The 60 x 60 x 80-inch CLOUDLAB 866 tent provides 25 square feet of floor space and uses reflective Mylar, a reinforced steel frame, improved light-blocking features, and a tall viewing window.
The package includes the Controller AI+, 6-inch CLOUDLINE PRO inline fan, refillable carbon filter, IONFRAME EVO8 bar light with Samsung LM301H EVO LEDs, two CLOUDRAY S6 oscillating clip fans, ducting, clamps, straps, hangers, controller cable, and cable ties. The controller uses sensor data and previous operating results to adjust connected lighting and airflow, while the WiFi app supports remote monitoring.
Its main advantage is ecosystem integration. The fan, light, circulation fans, filter, and controller are designed to work together, which can reduce configuration problems after installation. The refillable carbon-filter design may also reduce the need to replace the complete housing.
However, a 5×5 system requires a dedicated area, suitable electrical capacity, and careful climate management. The advanced controller adds convenience, but beginners still need to understand temperature, humidity, airflow, and safe equipment placement. This linked product is specifically the 5×5 configuration; do not assume related AC Infinity sizes include the same components.
Pros: Advanced automation, premium tent construction, efficient bar lighting, two circulation fans, and integrated control.
Cons: Premium price, large footprint, heavy package, and a steeper learning curve.
My Verdict: Choose this indoor grow tent complete kit when automation and construction quality matter more than finding the lowest-priced package.
4. iMeshbean 4×4 Complete Grow Tent Kit – Best Low-Cost Large Package
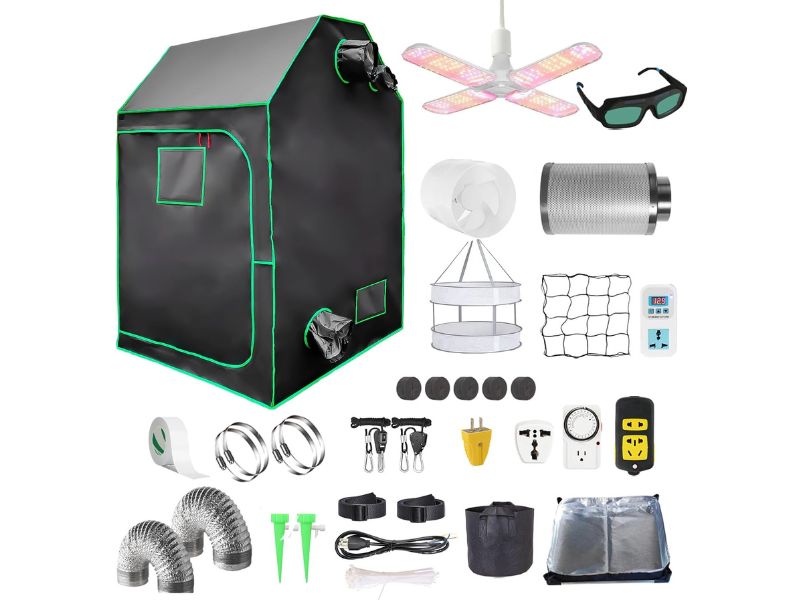
The iMeshbean 4×4 Complete Grow Tent Kit targets shoppers who want a large enclosure and many basic accessories at a lower package level. Its tent measures 48 x 48 x 83 inches, providing slightly more height than a standard 80-inch 4×4. The enclosure uses 600D Oxford fabric, reflective Mylar, alloy-steel framing, double-pull zippers, and fabric flaps intended to reduce light leakage.
The package includes a full-spectrum LED fixture, two extraction fans, two air ducts, an adjustable fan controller, timer, thermostat, water droppers, floor tray, planting bag, power supply, flanges, and additional accessories. The listing describes the light as a 150W model but also states a 38W power-consumption figure, an important distinction when comparing actual electrical draw and likely coverage.
This kit may appeal when initial cost and accessory quantity are the main priorities. It gives a beginner an enclosure, basic lighting, airflow equipment, and setup items without requiring many separate orders. The 83-inch height also leaves more room for hanging hardware.
The limitation is component matching. A light drawing roughly 38W is modest for fully illuminating a 4×4 canopy, so a stronger fixture may be needed. The package lists extraction fans but does not clearly include a carbon filter, and the lesser-known ecosystem may offer fewer upgrade resources. The page currently presents this 48 x 48 x 83-inch configuration without a verified size menu.
Pros: Large, tall tent, reflective interior, timer, thermostat, two extraction fans, and many starter accessories.
Cons: Modest listed light draw, carbon filter not clearly included, and limited smart control.
My Verdict: This cheap grow tent package may suit light-duty indoor gardening, but check lighting and odor-control requirements before ordering.
5. Spider Farmer SF2000 2×4 Complete Kit – Best for Narrow Spaces
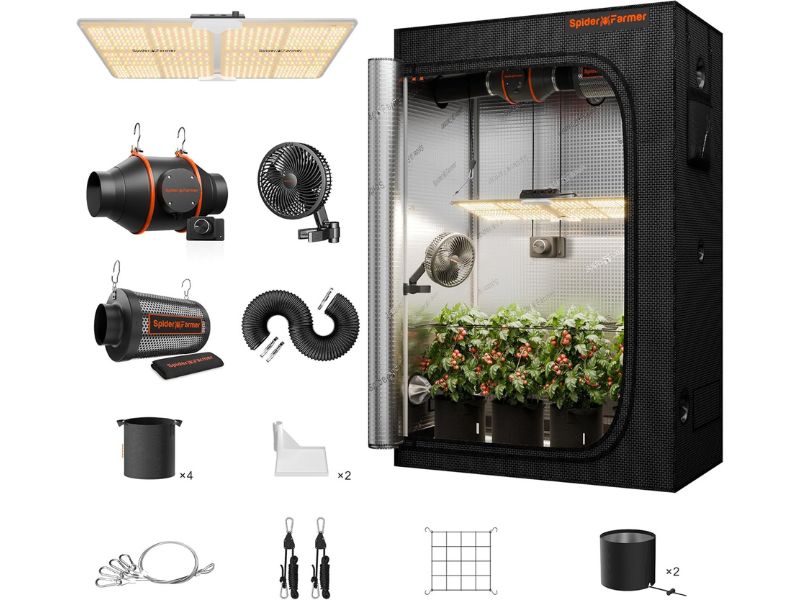
The Spider Farmer SF2000 Complete Kit is designed for growers who need a full system that fits along a wall rather than occupying a square room section. Its 24 x 47 x 71-inch tent uses 1680D Oxford cloth, reflective Mylar, double stitching, an alloy-steel frame, SBS zippers, multiple ports, a viewing screen, and a removable floor tray.
The package combines a dimmable 200W SF2000 full-spectrum LED with a 4-inch inline fan, carbon filter, flexible ducting, and a 6-inch clip fan. The linked listing identifies the light as a 200W fixture and emphasizes its updated diode layout, while the ventilation components are sized for the narrow enclosure.
The 2×4 shape is useful in apartments, laundry rooms, basements, and spare rooms where a 3×3 or 4×4 tent would obstruct movement. Because the light, filter, exhaust fan, and circulation fan arrive together, beginners do not need to match the major parts separately. The 71-inch height is workable, although overhead equipment reduces the remaining plant space.
Amazon currently shows the standard 24 x 47 x 71-inch package, a version with a GGS controller, a compact SF1000D 2×2 kit, and an SF1000 2.3×2.3 kit. Specifications change between sizes, so the 2×4 review should not be applied directly to smaller packages.
Pros: Narrow footprint, thick tent material, matched 200W light, carbon filtration, clip fan, and useful access features.
Cons: Moderate height, less expansion space than a 4×4, and no smart controller in the standard variation.
My Verdict: This is the best beginner grow tent kit here for anyone who wants a capable package that fits neatly against a wall.
6. MARS HYDRO 32×32 Smart Grow Tent Kit – Best Compact Smart Kit
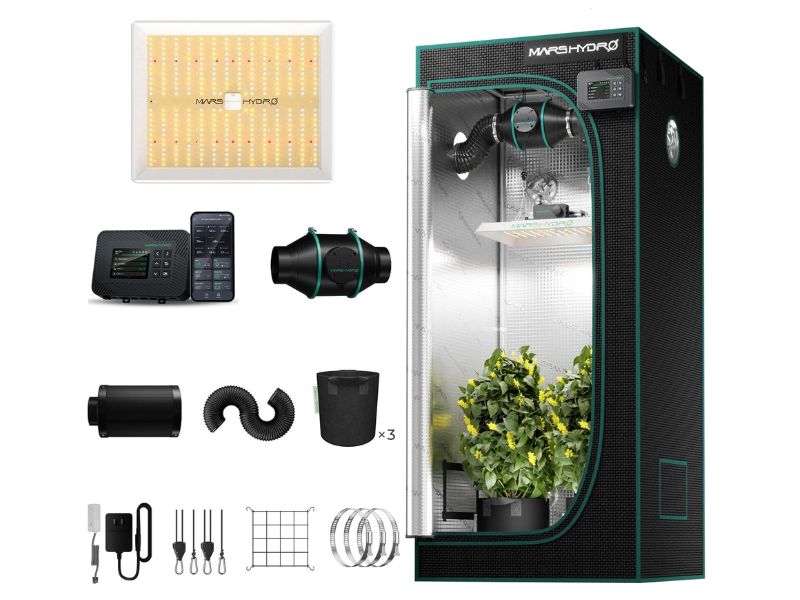
The MARS HYDRO 32×32 Smart Grow Tent Kit offers automation in a footprint that is easier to manage than a 4×4 system. The selected configuration includes a 32 x 32 x 63-inch enclosure made with 1680D reflective Mylar, double stitching, a light-blocking zipper flap, and a metal frame rated by the manufacturer to support up to 88 pounds.
Its TS1000 LED draws 150W and adjusts from 0 to 100 percent. The package also includes a 4-inch inline fan rated at 205 CFM, carbon filter, 25 feet of ducting, Controller 43, temperature-humidity sensor, four grow bags, trellis netting, clamps, glasses, and rope hangers. The controller can schedule compatible equipment and use environmental readings for automated ventilation and lighting adjustments.
This indoor grow tent complete kit is a practical middle ground for a beginner who wants smart functions but lacks room for a large enclosure. The smaller internal volume is generally easier to light and ventilate than a 4×4 or 5×5 tent. However, the 63-inch height requires careful arrangement of the filter, light, and containers.
The listing includes 24 x 24 x 55, 32 x 32 x 63, 39 x 39 x 71, 48 x 24 x 71, and 48 x 48 x 80-inch options. Several are offered with or without Controller 43, and one 32-inch version uses an FC1500 light, so inspect the selected variation.
Pros: Compact footprint, 1680D tent, dimmable light, smart controller, carbon filter, and environmental sensor.
Cons: Limited vertical room, smaller growing area, and potentially confusing variation names.
My Verdict: This is one of the strongest grow tent kits for beginners who need a compact connected system with matched core equipment.
7. TopoGrow 2×2 Automated Grow Tent Kit – Best Accessory-Rich Small Kit
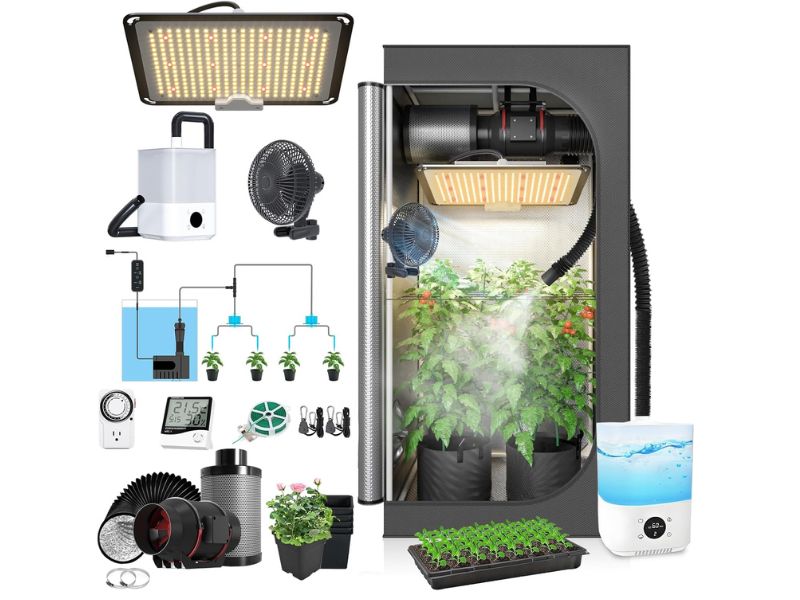
The TopoGrow 2×2 Automated Grow Tent Kit is aimed at beginners who want a compact package with more accessories than a basic light-and-fan bundle. The selected tent measures 24 x 24 x 48 inches and uses 600D Oxford fabric, reflective diamond Mylar, double stitching, large zippers, mesh vents, and a metal frame.
The included S1000 LED consumes about 100W and dims from 10 to 100 percent. The ventilation package contains a 4-inch inline fan rated at approximately 190 CFM, carbon filter, 25 feet of ducting, and clamps. TopoGrow also includes nursery pots, a 5-gallon fabric pot, thermometer, timer, trellis netting, nursery tray, irrigation items, humidifier, clip fan, and rope hangers.
This accessory set makes the kit convenient for someone starting without existing equipment. You receive lighting, exhaust, odor control, circulation, humidity, and basic container supplies in one order. The 2×2 footprint also takes less room and is easier to manage than a large package.
Its main limitation is the 48-inch height. After allowing space for the light, filter, hanging hardware, pot, and canopy distance, vertical room becomes tight. The kit also uses manual devices such as a standard timer rather than a fully integrated WiFi controller. Amazon currently shows 24 x 24 x 48 and 32 x 32 x 64-inch variations; the larger version may include different components.
Pros: Compact size, dimmable 100W light, carbon filter, clip fan, humidifier, irrigation items, and timer.
Cons: Very limited height, basic controls, and variable accessory quality.
My Verdict: This is a useful complete grow tent kit for beginners who want a small all-in-one package and accept limited vertical space.
8. iMeshbean Complete Grow Tent Kit – Best Flexible Size Range
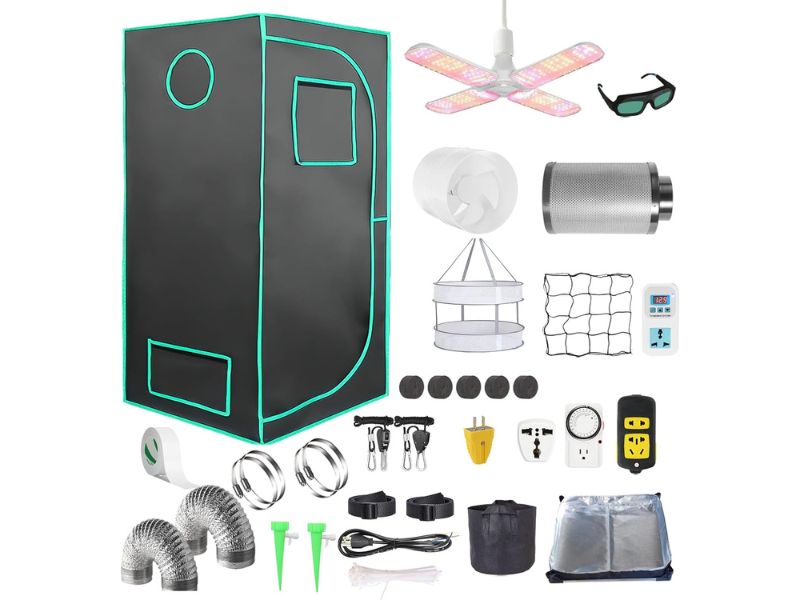
This iMeshbean Complete Grow Tent Kit is useful for shoppers who want several enclosure sizes under one listing. The linked ASIN is associated with a 48 x 24 x 80-inch configuration in indexed product data, creating a narrow 2×4-style footprint with more height than many compact packages. The tent uses a steel frame, 600D Oxford-style material, reflective Mylar, an observation window, and a removable tray.
The listed package includes a full-spectrum LED light, extraction fan, carbon filter, two ducts, fan plug, timer, thermostat, water droppers, goggles, drying rack, hydroponic sponges, planting bag, power supply, flanges, and other accessories. The indexed description lists the LED at 38W of power, so judge it by actual draw rather than assuming it matches a modern 200W fixture.
Its main appeal is affordability and package breadth. A beginner receives basic lighting, exhaust, odor filtration, monitoring, and cultivation accessories without placing many separate orders. The tall rectangular enclosure can also fit against a wall while providing useful vertical clearance.
Available configurations shown for this listing family include 24 x 24 x 55, 32 x 32 x 63, 40 x 40 x 80, 48 x 24 x 80, 48 x 48 x 80, and 48 x 48 x 83 inches. Since the included light and airflow equipment may change—or be undersized for larger tents—confirm the exact contents after selecting a size.
Pros: Multiple sizes, carbon filter, observation window, timer, thermostat, and many basic accessories.
Cons: Low listed light draw, generic components, and variation details require careful checking.
My Verdict: This is one of the more flexible cheap grow tent packages, but its value depends on whether the included light suits your selected size.
9. VIVOSUN GIY 5×5 Smart Grow Tent Kit – Best Large Connected System
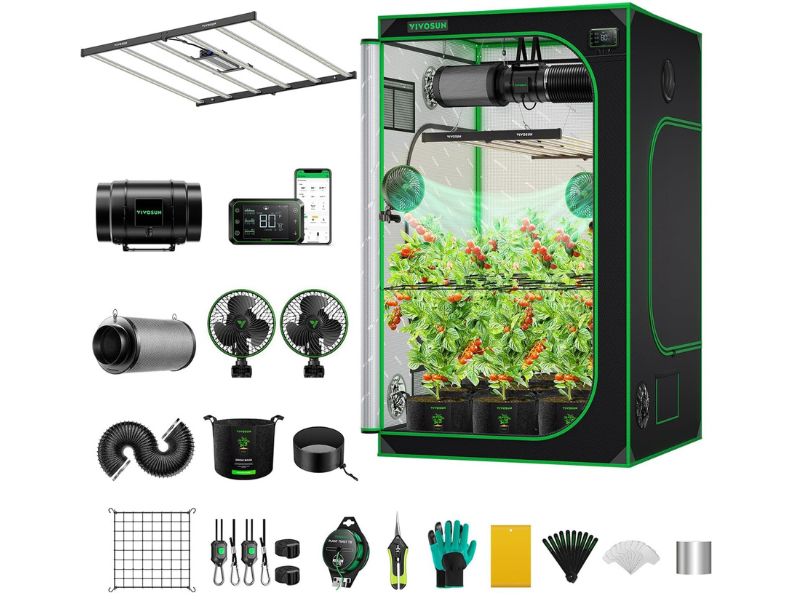
The VIVOSUN GIY 5×5 Smart Grow Tent Kit is intended for buyers who want a large connected system rather than a compact starter enclosure. Its 60 x 60 x 80-inch tent provides 25 square feet of floor space and uses a metal frame with reflective Mylar and layered fabric construction.
The package combines a 645W six-bar full-spectrum LED, 8-inch ventilation kit, and GrowHub E42A controller. The listing identifies automated ventilation, clip fans, WiFi app control, and ten 5-gallon grow bags as part of the broader system. VIVOSUN’s product data confirms that the main included groups are the 5×5 tent, 645W six-bar light, and 8-inch ventilation kit.
This configuration reduces the difficulty of sourcing equipment powerful enough for a 5×5 enclosure. The bar light spreads across a wide ceiling area, while the larger exhaust system is better suited to the increased internal volume than a small 4-inch fan. App-based schedules and environmental controls can also reduce repetitive adjustments.
The disadvantages are scale and cost. A 5×5 package needs floor space, suitable outlets, and surrounding clearance for doors and ducting. It can also consume more electricity and produce more heat than compact grow tent kits with lights. The linked product is specifically the 5×5 system; I could not verify a selectable size menu on this exact page, and related VIVOSUN sizes may use different packages.
Pros: Large matched system, 645W bar light, 8-inch ventilation, WiFi controller, clip fans, and ten grow bags.
Cons: High total cost, large room requirement, and greater heat and power demand.
My Verdict: Choose this package when you need a complete 5×5 system from the start; otherwise, a smaller kit will be easier and cheaper to operate.
10. TopoGrow 32×32 Complete Grow Tent Kit – Best Basic Budget Setup
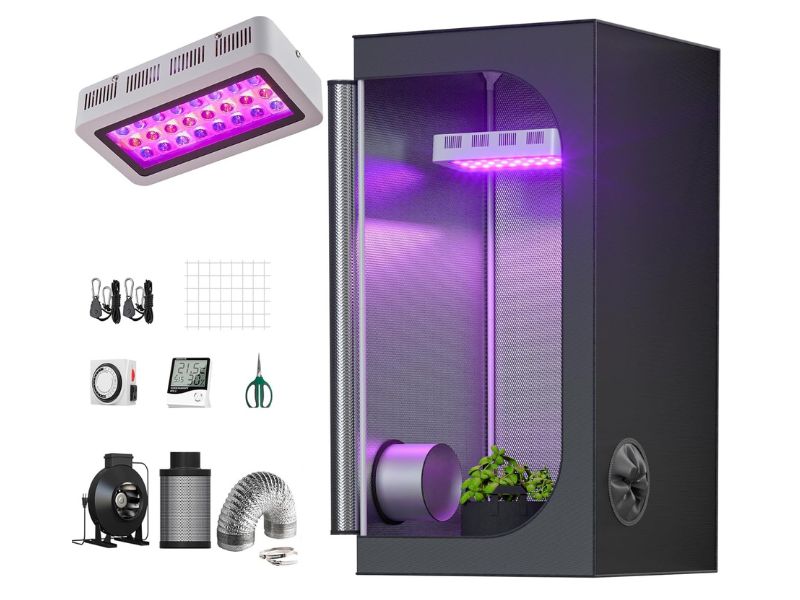
The TopoGrow 32×32 Complete Grow Tent Kit is a straightforward package for beginners who prefer basic manual equipment over app-based controls. Its 32 x 32 x 63-inch tent uses 600D Oxford fabric, reflective waterproof diamond Mylar, double stitching, zipper flaps, mesh intake vents, and a metal frame with plastic connectors.
The bundle includes a “300W” full-spectrum-style LED panel made with 100 three-watt chips, although that label should not be treated as confirmed wall draw. The fixture uses two cooling fans. Ventilation is handled by a 4-inch inline fan rated at about 190 CFM, carbon filter, 25 feet of ducting, and clamps. A thermometer-hygrometer, timer, pruning shears, trellis net, and adjustable rope hangers are also included.
This package covers the basic equipment categories needed for an enclosed setup: tent, light, exhaust, odor filtration, monitoring, and timing. Its approximately 2.7-by-2.7-foot footprint provides more working space than a 2×2 tent while remaining easier to place than a full 3×3 or 4×4 package.
The older panel-style light and built-in cooling fans may produce more noise than modern passively cooled fixtures. The 63-inch height also limits overhead arrangement, and the system lacks smart environmental triggers. I could not verify multiple selectable tent sizes on this exact listing, so this review applies specifically to the linked 32 x 32 x 63-inch configuration.
Pros: Affordable complete system, useful mid-size footprint, carbon filter, timer, hygrometer, trellis, shears, and hangers.
Cons: Older actively cooled LED, unclear actual light draw, basic controls, and limited height.
My Verdict: This is a practical best beginner grow tent kit candidate for shoppers who want essential equipment at a budget level without WiFi automation.
Quick Comparison of the Best Complete Grow Tent Kits
| Product | Selected Tent Size | Included Light | Ventilation | Control Type | Best For |
| VIVOSUN 4×4 WiFi Kit | 48 x 48 x 80 in. | 400W full-spectrum LED | 6-inch fan and carbon filter | WiFi GrowHub | Best overall |
| MARS HYDRO 4×4 Smart Kit | 48 x 48 x 80 in. | 480W bar-style LED | 6-inch fan and carbon filter | Smart Controller 43 | Smart 4×4 setup |
| AC Infinity AI Pro 5×5 | 60 x 60 x 80 in. | EVO bar-style LED | 6-inch fan and refillable filter | AI and WiFi controller | Premium automation |
| iMeshbean 4×4 Kit | 48 x 48 x 83 in. | Entry-level full-spectrum LED | Two extraction fans | Timer and thermostat | Low-cost large package |
| Spider Farmer SF2000 Kit | 24 x 47 x 71 in. | 200W dimmable LED | 4-inch fan and carbon filter | Manual controls | Narrow spaces |
| MARS HYDRO 32×32 Kit | 32 x 32 x 63 in. | 150W dimmable LED | 4-inch fan and carbon filter | Smart Controller 43 | Compact smart setup |
| TopoGrow 2×2 Kit | 24 x 24 x 48 in. | 100W dimmable LED | 4-inch fan and carbon filter | Timer-based controls | Small starter setup |
| iMeshbean Multi-Size Kit | 48 x 24 x 80 in. | Entry-level full-spectrum LED | Fan and carbon filter | Timer and thermostat | Flexible size choices |
| VIVOSUN GIY 5×5 Kit | 60 x 60 x 80 in. | 645W bar-style LED | 8-inch ventilation system | WiFi GrowHub | Large connected system |
| TopoGrow 32×32 Kit | 32 x 32 x 63 in. | Panel-style LED | 4-inch fan and carbon filter | Manual timer | Basic budget setup |
The VIVOSUN 4×4 package offers the strongest balance of space, matched equipment, accessories, and beginner-friendly controls. The MARS HYDRO 32×32 and TopoGrow 2×2 packages are easier to place in smaller rooms, while the Spider Farmer 2×4 kit is better for a narrow wall-side setup.
The AC Infinity and VIVOSUN 5×5 systems offer more advanced equipment and growing space, but they require a larger room and budget. Buyers searching for cheap grow tent packages should pay particular attention to actual light power, carbon-filter inclusion, and accessory quality rather than comparing only the number of items in each box.
What Is a Complete Grow Tent Kit?
A complete grow tent kit combines an enclosed grow tent with several pieces of equipment needed for indoor gardening. Most packages include a grow light, exhaust fan, ducting, carbon filter, hanging hardware, and basic monitoring or timing equipment.
The purpose of a kit is to reduce compatibility problems. Instead of purchasing a tent first and then finding a light and fan that fit it, you receive components selected for the same general enclosure size.
This can make an indoor grow tent complete kit especially useful for beginners who are unfamiliar with light coverage, fan sizes, duct diameters, or equipment mounting.
However, the word “complete” does not always mean that the package contains everything required for every room. You may still need growing medium, nutrients, containers, electrical accessories, a humidifier, dehumidifier, heater, or additional circulation fans.
Always inspect the included-components list rather than relying only on product photos. Some listings show plants, fans, filters, and controllers for illustration even when the selected variation excludes one or more of those items.
What Should a Complete Grow Tent Kit Include?
A dependable kit should first include a tent with a stable frame, reflective interior, functional zipper, removable floor tray, and suitable ventilation openings.
The grow light should be appropriate for the selected tent size. A small light may work well inside a 2×2 enclosure but provide weak coverage inside a 4×4 tent.
A complete ventilation package should normally include an inline exhaust fan, ducting, clamps, and a carbon filter when odor control is required. A speed controller is also valuable because it lets you reduce airflow and noise when full power is unnecessary.
Useful control and monitoring equipment may include a timer, thermometer-hygrometer, environmental sensor, or smart controller. These tools help maintain a repeatable light schedule and identify temperature or humidity problems.
A circulation fan is another valuable component. It moves air around the plant canopy instead of only exhausting air from the tent.
Common accessories include:
- Rope hangers
- Grow bags
- Trellis netting
- Pruning shears
- Duct clamps
- Hanging straps
- Timer
- Thermometer-hygrometer
- Protective glasses
- Floor tray
A long accessory list does not automatically make one package better. The tent, light, exhaust fan, and carbon filter are usually more important than inexpensive extras such as labels, small tools, or disposable containers.
Cheap Package vs. Good-Value Package
The lowest-priced kit is not always the most affordable system to own. A package may appear inexpensive because it includes a weak light, small exhaust fan, thin tent material, or low-quality accessories.
If you need to replace the light or ventilation system soon after setup, the total cost may become higher than buying a better-matched package from the beginning.
Good-value cheap complete grow tent kits provide usable core equipment at a reasonable package price. The tent should be stable, the light should cover the intended area, and the fan should be suitable for the enclosure volume.
You should also consider whether replacement parts and compatible upgrades are easy to find. Well-known equipment ecosystems often allow users to replace a fan, add a controller, or upgrade the light without rebuilding the entire system.
Before purchasing, compare the package cost with the approximate cost of buying the tent, light, fan, filter, ducting, and accessories separately. A bundle can save money, but only when you would use most of the included components.
Choosing the Correct Tent Size
Grow tent size affects light requirements, ventilation needs, operating cost, and daily maintenance. A larger tent offers more room, but it is not automatically better for a beginner.
A compact enclosure is generally easier to light and ventilate. It also requires less floor space and may be easier to keep within a stable temperature and humidity range.
| Tent Size | Common Beginner Use |
| 2×2 | Herbs, seedlings, clones, or a compact setup |
| 32×32 | Small indoor setup with extra working room |
| 2×4 | Narrow room or wall-side placement |
| 3×3 or 40×40 | Balanced compact garden |
| 4×4 | Versatile home growing system |
| 5×5 | Larger dedicated indoor setup |
Plant capacity should not be treated as a fixed number. Containers, plant variety, training method, equipment placement, and maintenance access all affect how many plants can fit comfortably.
Measure the floor and ceiling before ordering. You should also leave space around the outside for opening doors, connecting ducting, and reaching electrical equipment.
The largest tent that physically fits the room may still be difficult to operate. Choose a size that you can afford to light, ventilate, and maintain.
Matching the LED Light to the Tent
The grow light is one of the most important components in any grow tent kit with lights. Its coverage should match the dimensions of the selected enclosure.
Do not compare lights using only advertised model names such as “1000W” or “300W.” Some older product names refer to theoretical diode totals rather than actual power consumption.
Check the stated wall draw, recommended coverage area, fixture dimensions, and dimming range. A modern 150W fixture may be appropriate for some compact tents, while a 4×4 enclosure usually requires substantially more light for full-area use.
Bar-style fixtures spread light across a wider ceiling area and may provide more even coverage in large square tents. Compact board-style fixtures can be easier to install in smaller enclosures.
Dimming is valuable for beginners because it allows light output to be reduced during early growth stages or when the tent becomes too warm.
Height must also be considered. The fixture, hangers, containers, and recommended canopy distance all reduce usable vertical space.
A low-priced package with an undersized light may still require an expensive upgrade. Confirm that the included fixture suits your intended use before treating the kit as a bargain.
Evaluating the Grow Tent
Grow tent material is often listed as 600D, 1680D, or 2000D canvas. Higher numbers generally indicate denser and heavier material, but fabric thickness is only one part of overall quality.
A 600D enclosure can work well for a budget or compact setup. Premium kits may use 1680D or 2000D material for increased resistance to tearing, wear, and pinholes.
Check the frame construction as well. Steel poles and metal corner connectors generally provide better support than thin plastic components.
Important tent features include:
- Reflective Mylar interior
- Double-stitched seams
- Light-blocking zipper flaps
- Removable floor tray
- Observation window
- Cable ports
- Multiple duct openings
- Intake screens
- Strong hanging bars
- Tool pocket
Zippers deserve particular attention because they are used frequently. A reinforced backing flap can reduce light leakage around the closure.
The tent should also provide enough height for the included light, fan, filter, and plants. A complete package may contain compatible equipment while still leaving limited vertical room after installation.
Understanding Inline Fans and Carbon Filters
The inline fan removes warm and humid air from the grow tent. Common kit sizes include 4-inch, 6-inch, and 8-inch ventilation systems.
Small enclosures often use 4-inch equipment, while larger 4×4 and 5×5 systems may use 6-inch or 8-inch fans. Fan capacity is usually expressed in cubic feet per minute, or CFM.
The advertised maximum airflow does not represent real operating performance in every setup. Carbon filters, long duct runs, sharp bends, and restrictive vents can reduce airflow.
A carbon filter is used mainly for odor control. Air is pulled through activated carbon before being exhausted from the tent.
Check whether the filter is actually included. Some packages provide an extraction fan and ducting but omit carbon filtration.
Fan noise should also be considered, especially when the tent will be installed in a bedroom, office, or apartment. A speed controller can reduce unnecessary airflow and sound.
For better efficiency, keep ducting as short and straight as practical. Excessive bends increase resistance and may force the fan to operate at a higher speed.
Smart Controller vs. Manual Equipment
Manual kits normally use basic timers, fan-speed dials, and separate temperature-humidity monitors. They cost less and can be easier to troubleshoot because each device operates independently.
A manual system requires more frequent checking. You may need to adjust fan speed, light intensity, or environmental equipment when room conditions change.
Smart kits connect compatible lights, fans, and sensors to a central controller. Depending on the system, the controller may provide schedules, temperature triggers, humidity triggers, app monitoring, alerts, and remote adjustments.
This can make a smart package convenient for beginners, but automation does not eliminate the need to understand the environment. Incorrect settings can still produce poor results.
Smart ecosystems may also limit compatibility. A controller from one manufacturer may not operate every third-party fan or light without adapters.
Choose a smart system when remote monitoring and coordinated control justify the extra cost. A manual kit may offer better value when you prefer simple equipment and are available to inspect the tent regularly.
Accessories That Actually Matter
The most useful accessories are those that support safe installation, reliable environmental control, and routine maintenance.
A timer is essential for maintaining a consistent lighting schedule. A thermometer-hygrometer helps identify temperature and humidity problems before they become severe.
Rope hangers make it easier to adjust the grow light. Strong hanging straps can support fans and filters, while proper clamps prevent ducting from separating.
A clip fan improves internal air circulation. Grow bags and a trellis may also be useful, depending on the growing method.
Pruning shears, protective glasses, labels, and measuring tools can be convenient but should not determine which kit you purchase.
Focus first on the quality of the enclosure, light, fan, filter, and controller. Those components usually affect the total value more than the number of small accessories included.
Additional Costs Beyond the Kit
Even the best grow tent kit may require several extra purchases.
Possible additional expenses include:
- Growing medium
- Nutrients
- pH or conductivity meters
- Additional circulation fans
- Humidifier
- Dehumidifier
- Heater
- Cooling equipment
- Surge protection
- Extension cables
- Replacement carbon filters
- Cleaning supplies
- Containers and drainage trays
Operating cost also matters. Larger lights and ventilation systems consume more electricity than compact equipment.
Room conditions can significantly change the budget. A tent in a hot garage may require additional cooling, while a cold basement may need heating.
Before ordering, create a complete equipment list and identify which items are included. This helps prevent a supposedly inexpensive kit from creating several unexpected purchases.
Common Beginner Buying Mistakes
Assuming Every Kit Includes a Carbon Filter
Some listings include an exhaust fan but no carbon filter. Check the package contents carefully when odor control is important.
Buying Based on Plant-Count Claims
Advertised plant capacity is only an estimate. Container size, plant type, training method, and equipment placement can change the usable capacity.
Ignoring the Selected Amazon Variation
Changing the tent size may also change the light, fan, filter, controller, and accessories. Confirm the exact variation before checkout.
Comparing Lights by Product Name Alone
A model labeled “300W” may consume far less electricity. Compare actual draw and recommended coverage.
Choosing an Oversized Kit
A larger enclosure needs stronger lighting, more ventilation, additional circulation, and more room for maintenance.
Forgetting Ceiling Clearance
You need space to assemble the frame and position ducting or equipment above the tent.
Ignoring Fan Noise
A powerful exhaust fan may be disruptive in a bedroom or apartment. Look for adjustable speed control.
Failing to Plan the Exhaust Route
Decide where warm air will leave the tent before installation. Long or sharply bent ducting can reduce performance.
Expecting Automation to Fix Every Problem
A smart controller can adjust connected equipment, but it cannot compensate for poor equipment placement, incorrect settings, or an unsuitable room.
Valuing Accessory Quantity Over Quality
Twenty inexpensive accessories do not make up for a weak light, unstable tent, or undersized fan.
How to Set Up a Complete Grow Tent Kit
Start by measuring and cleaning the installation area. Confirm that the floor is level and that suitable electrical outlets are nearby.
Assemble the tent frame according to the manufacturer’s instructions. Make sure every pole and connector is fully seated before pulling the fabric over the structure.
Install the removable floor tray and upper hanging bars. Check that the canvas is correctly aligned before closing the main zipper.
It is often easier to hang the carbon filter and inline fan before installing the grow light. These components can be bulky, and the ceiling area becomes crowded after all equipment is mounted.
Connect the fan, filter, and ducting with the shortest practical route. Tighten all clamps and check that the exhaust direction is correct.
Hang the grow light using adjustable rope hangers. Center it over the intended growing area and confirm that there is enough room to raise or lower it later.
Install the circulation fan where it can move air across the enclosure without continuously blasting one small area.
Place the environmental sensor near the plant-canopy level rather than directly beside the light, exhaust opening, or humidifier.
Route electrical cables through the dedicated ports. Keep connections away from water and avoid overloading outlets or extension equipment.
Connect the timer or smart controller and configure the light schedule. Set conservative fan and environmental controls initially.
Before adding plants, run the complete system for a trial period. Check temperature, humidity, airflow, noise, controller operation, and light distribution.
Close the tent in a dark room and inspect the zipper, seams, ports, and windows for visible light leaks. Correct installation problems before beginning regular use.
Read Complete Guide : how to set up a grow tent
Frequently Asked Questions
What comes in a complete grow tent kit?
Most complete kits include a tent, LED grow light, exhaust fan, ducting, carbon filter, and hanging equipment. Some also provide a circulation fan, controller, environmental sensor, timer, grow bags, trellis net, and pruning tools. Package contents vary considerably, so check the selected Amazon variation before purchasing.
Are cheap complete grow tent kits worth buying?
They can provide good value when the tent, light, fan, and filter are properly matched. A low-cost package is less worthwhile when the light is too weak or essential equipment is missing. Compare core-component specifications and likely replacement costs rather than judging the kit only by its checkout price.
What is the best beginner grow tent kit?
The best option depends on available space, budget, and desired automation. A compact 2×2 or 32×32 system may be easier to operate, while a 4×4 kit provides more expansion room. The VIVOSUN 4×4 package offers a useful balance of space, matched equipment, accessories, and WiFi control.
Is a 2×2 or 4×4 grow tent kit better?
A 2×2 kit is easier to place, light, ventilate, and maintain. It also generally costs less to operate. A 4×4 package provides substantially more floor space but requires a stronger light and larger ventilation system. Beginners should choose based on their actual plans rather than future possibilities alone.
How much LED power does a grow tent kit need?
There is no single wattage requirement for every setup. Light efficiency, fixture design, hanging height, and intended coverage all matter. Check the manufacturer’s recommended coverage and actual wall draw. Avoid assuming that a product name containing a high wattage number represents its real electrical consumption.
Does every complete kit include a carbon filter?
No. Some packages include only an extraction fan and ducting. Others provide a fan, carbon filter, prefilter, and clamps. When odor management is important, verify that the selected package includes a filter with the same duct diameter as the fan.
Do grow tent kits with lights save money?
They can save money when the included components are suitable and priced below the cost of buying them separately. Bundles also reduce compatibility research. However, savings disappear when a light, fan, or controller must be replaced because it is undersized or does not meet your needs.
Is a smart grow tent kit worth the extra cost?
A smart kit may be worth the additional cost when you want remote monitoring, schedules, environmental triggers, and coordinated equipment control. It is less valuable when you prefer simple manual equipment or do not plan to use the app. Smart controls support monitoring but do not replace regular inspection.
How much ventilation does a grow tent require?
Ventilation needs depend on tent volume, light heat, room temperature, carbon-filter resistance, and duct design. Calculate the enclosure volume as a starting point, then allow additional capacity for filters and bends. An adjustable fan is useful because airflow can be increased or reduced as conditions change.
Can I upgrade components in a complete kit?
Most kits can be upgraded, but compatibility should be checked. You may replace the light, fan, filter, or controller as long as the new equipment fits the tent and ports. Smart ecosystems may require compatible devices or adapters, while manual systems are often easier to mix with third-party equipment.
Do I need a humidifier or dehumidifier?
That depends on the natural humidity of the room and the conditions inside the operating tent. Some rooms require added moisture, while others need moisture removal. Monitor the enclosure first rather than purchasing both devices automatically. Plant stage and local climate can also change humidity requirements.
Where should I place an indoor grow tent kit?
Choose a dry, level, accessible location near suitable electrical power. Leave enough clearance for doors, ducting, and maintenance. Avoid rooms with extreme temperatures or poor ventilation. The surrounding area should also provide a practical route for exhausting warm air from the tent.
Conclusion
The best cheap complete grow tent kits combine a dependable enclosure with lighting and ventilation equipment that suit the selected size. The lowest-priced package is not always the least expensive option once upgrades, missing components, and operating costs are considered.
For most beginners, the VIVOSUN 4×4 WiFi Grow Tent Kit provides the strongest overall balance. It includes a practical 4×4 tent, 400W light, 6-inch ventilation system, carbon filter, WiFi controller, and useful starter accessories.
The MARS HYDRO 32×32 and TopoGrow 2×2 kits are easier to manage in limited spaces. The Spider Farmer 2×4 package is a better fit for narrow rooms, while the AC Infinity and VIVOSUN 5×5 systems suit buyers who need larger automated setups.
Before purchasing, confirm the selected size, actual light power, ventilation equipment, carbon-filter inclusion, and complete accessory list. A correctly matched package will usually provide better value than the kit with the lowest price or longest feature list.

I’m Maya L. Greenwood, a lifelong plant lover who believes anyone can grow something beautiful with the right guidance. After years of testing soil mixes, pruning methods, irrigation tricks, and pest-safe solutions, I started EasyGardenTips.com to turn hard-won lessons into step-by-step advice. From seed starting and container gardens to composting and seasonal checklists, my goal is to make gardening simple, sustainable, and fun.