How to Plant Seeds in a Raised Bed: Depth, Spacing, and Care
To plant seeds in a raised bed, prepare loose, well-draining soil, make shallow planting holes or rows at the depth recommended on the seed packet, place the seeds at the correct spacing, cover them lightly, and water gently. Keep the upper soil consistently moist until germination, then thin crowded seedlings to give the remaining plants enough room to grow.
Raised garden beds are particularly useful for growing vegetables from seed because they provide a defined planting area, allow easier soil preparation, and often warm earlier in spring than surrounding ground. However, successful germination still depends on soil temperature, moisture, seed quality, and correct planting depth.
Planting too deeply can prevent seedlings from emerging, while excessive watering may cause seeds to rot. Overcrowding can also reduce growth after the seeds sprout.
You can grow many vegetables directly from seed, including carrots, radishes, lettuce, peas, beans, cucumbers, and spinach.
In this article, I explain how to prepare raised-bed soil, choose the right planting time, and sow seeds at suitable depths and spacing. I also cover watering, germination, thinning, crop-specific planting methods, common mistakes, and how to care for young vegetables after they emerge.
How to Plant Seeds in a Raised Bed: Step-by-Step Instructions
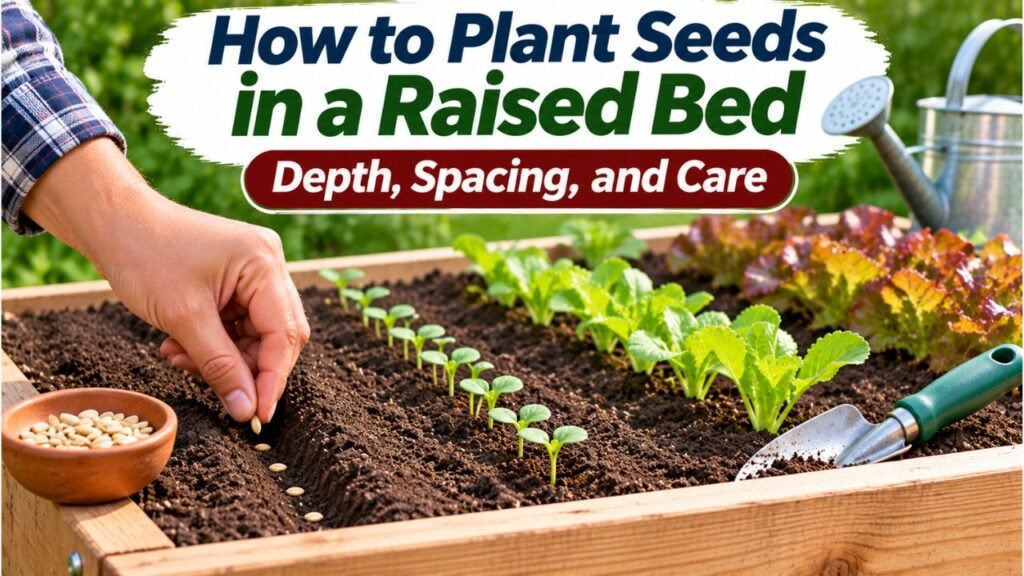
The most reliable method is to prepare a fine seedbed, sow at the recommended depth, gently firm the soil, and maintain moisture until the seedlings emerge.
You do not need expensive gardening equipment to get started.
Materials and Tools Needed
Prepare the following:
- Vegetable, herb, or flower seeds
- A raised garden bed with suitable growing soil
- Finished compost, if needed
- Hand rake or small garden cultivator
- Hand trowel or dibber
- Ruler or measuring tape
- Watering can with a fine rose or adjustable hose nozzle
- Plant labels
- Waterproof marker
- Optional soil thermometer
- Optional lightweight row cover
A garden kneeling pad and gloves may make the work more comfortable.
Step 1: Choose the Right Seeds
Select seeds suitable for direct sowing outdoors.
Good beginner choices include:
- Radishes
- Carrots
- Bush beans
- Peas
- Lettuce
- Spinach
- Arugula
- Beets
- Cucumbers
- Turnips
Some vegetables, such as tomatoes, peppers, and eggplants, are often started indoors in regions with short growing seasons.
Check the seed packet for information about planting dates, depth, spacing, sunlight, and days to maturity.
Step 2: Prepare the Raised-Bed Soil
Remove weeds, large sticks, rocks, and unwanted plant debris.
Loosen the top few inches of soil gently with a hand cultivator or garden fork if necessary.
Break apart large clumps.
The surface should be loose, reasonably level, and fine enough for small seeds to contact the soil.
Avoid working soil when it is excessively wet.
If needed, add a modest amount of finished compost and level the surface.
Step 3: Check the Planting Time
Determine whether your seeds are cool-season or warm-season crops.
Cool-season vegetables such as peas and spinach can often be planted while the weather is still cool.
Warm-season vegetables such as beans and cucumbers need warmer soil.
Use your local frost dates, seed packet, and soil temperature to decide when to plant.
Step 4: Mark the Planting Areas
Decide whether to plant in rows, a grid, or small groups.
Use a ruler or measuring tape to mark spacing.
For a 4 × 8-foot raised bed, you can divide the surface into smaller planting sections rather than planting one long row of every vegetable.
Leave appropriate space for mature plants.
Step 5: Make Holes or Shallow Furrows
Create planting holes or a narrow trench at the recommended depth.
As a general guideline, many seeds are planted approximately two to three times as deep as their diameter.
However, some very small seeds require light to germinate and should be left uncovered or covered only slightly.
The seed packet takes priority over a general rule.
Step 6: Place the Seeds
Drop the seeds into the prepared holes or furrows.
Large seeds are relatively easy to space individually.
Small seeds may be more difficult to handle.
For very small seeds, sow thinly and plan to remove extra seedlings later.
Avoid planting large numbers of seeds into the same small area unless the crop’s planting method specifically recommends it.
Step 7: Cover and Firm the Soil
Use fine soil or an appropriate growing medium to cover the seeds to the required depth.
Press lightly with your hand.
The goal is to create good seed-to-soil contact without compacting the bed.
Do not bury seeds beneath large, hard soil clods.
Step 8: Water Gently
Use a watering can with a fine spray or a gentle hose setting.
Moisten the planted area thoroughly without washing seeds out of position.
Avoid using a strong water jet.
Step 9: Label the Planting Areas
Record:
- Crop name
- Variety
- Planting date
- Optional expected germination period
Labels help distinguish vegetable seedlings from weeds.
They are particularly useful when multiple crops are planted in the same raised bed.
Step 10: Keep the Soil Moist Until Germination
Check the soil regularly.
The upper soil layer should remain consistently moist but not saturated.
Water as needed according to weather, soil type, and seed depth.
Once seedlings emerge, gradually adjust watering to encourage healthy root development.
Key Takeaway: Prepare fine soil, plant at the correct depth and spacing, water gently, and maintain consistent moisture. These steps provide the foundation for successful seed germination.
How to Prepare Raised-Bed Soil Before Planting Seeds
Good soil preparation is especially important for direct seeding.
Small seedlings have limited stored energy and must emerge through the soil surface.
Dense, compacted, or crusted soil can interfere with that process.
What Soil Is Best for Planting Seeds?
A suitable raised-bed soil should be:
- Well-draining
- Loose enough for root growth
- Able to retain useful moisture
- Free of significant contamination
- Suitable for the crops being grown
- Reasonably free of large clumps near the surface
Raised-bed soil may contain mineral soil, compost, and other appropriate organic materials.
There is no universal mixture that works best in every location.
Avoid using pure compost as the entire growing medium unless the product and growing system are specifically designed for that purpose.
Large quantities of compost can sometimes contribute excessive nutrients or salts.
Should You Add Compost Before Seeding?
Add finished compost when the soil would benefit from more organic matter.
A modest surface application may be sufficient for an established raised bed.
Do not automatically add several inches of compost every season.
If the bed already contains fertile soil, additional compost may be unnecessary.
A soil test can help guide fertility decisions.
How Fine Should the Soil Be?
For small seeds such as carrots and lettuce, the upper soil layer should have a relatively fine texture.
Remove large clods that could obstruct emergence.
For larger seeds such as beans and squash, the surface does not need to be quite as fine.
The University of Minnesota Extension’s vegetable planting guide recommends a firm, fine seedbed, especially for small-seeded crops.
However, it also warns against excessive packing, which can encourage surface crusting.
How Do You Know if Soil Is Too Wet?
Pick up a small amount of soil and gently squeeze it.
If the soil forms a sticky, dense mass and does not crumble readily, it may be too wet to work.
If it falls apart into small crumbs when gently disturbed, it is generally easier to prepare.
Working very wet soil can damage its structure.
Wait until the soil becomes workable before planting.
Should You Till a Raised Bed?
Most established raised beds do not need deep tilling every season.
If the soil has good structure, gently prepare the upper layer.
Avoid unnecessary disturbance of deeper soil.
If the bed is compacted, carefully loosen the affected area without turning the entire soil profile more than necessary.
Key Takeaway: Direct-seeded vegetables need a loose, fine, well-draining seedbed. Avoid excessive soil disturbance, compaction, and unnecessary compost applications.
When Should You Plant Seeds in a Raised Bed?
Plant seeds when the soil temperature and expected weather are suitable for the crop, not simply when the calendar reaches a particular month.
Raised beds often warm earlier in spring than surrounding ground.
However, that does not mean warm-season seeds should be planted before the risk of damaging cold weather has passed.
Cool-Season Seeds
Many cool-season vegetables germinate in relatively cool soil.
Examples include:
- Peas
- Spinach
- Lettuce
- Radishes
- Carrots
- Kale
- Beets
Some can be planted several weeks before the average last spring frost.
Actual timing depends on the crop and local conditions.
The University of Minnesota Extension notes that peas, spinach, lettuce, and radishes can be direct-seeded when soil temperatures are approximately 40–50°F.
Warm-Season Seeds
Warm-season vegetables generally require warmer soil.
Examples include:
- Bush beans
- Pole beans
- Cucumbers
- Summer squash
- Pumpkins
- Melons
- Okra
For cucumbers, squash, and melons, soil around 60°F is a commonly cited minimum for germination, although warmer soil generally speeds emergence.
Avoid planting warm-season seeds into cold, saturated soil.
They may rot before germinating.
Planting Temperature Guide
| Crop Group | Example Vegetables | General Planting Condition |
| Cool-season | Peas, spinach, lettuce, radish | Cool, workable soil |
| Cool-to-moderate season | Carrots, beets, chard | Cool to moderately warm soil |
| Warm-season | Beans, cucumbers, squash | Warm soil after frost risk |
| Heat-loving | Okra, melons | Reliably warm conditions |
| Frequently transplanted | Tomatoes, peppers, eggplants | Often started indoors before outdoor planting |
These are broad planting categories rather than exact germination-temperature requirements.
Check the seed packet for your chosen variety.
How to Check Soil Temperature
Use a soil thermometer.
Insert it into the soil at approximately the depth where the seed will be planted or at the depth recommended for the temperature measurement.
Take readings at a consistent time over several days.
A single unusually warm afternoon does not necessarily mean the soil is ready for warm-season crops.
Should You Follow the USDA Hardiness Zone?
The USDA Plant Hardiness Zone Map primarily describes average annual extreme minimum temperatures.
It does not directly tell you the best day to sow every vegetable.
Use local frost dates, crop-specific growing guidance, and actual soil conditions.
Key Takeaway: Raised beds may warm earlier in spring, but proper planting time still depends on the crop’s temperature requirements and local frost risk.
How Deep Should You Plant Seeds in a Raised Bed?
Most vegetable seeds should be planted approximately two to three times as deep as their diameter, unless the seed packet specifies a different depth.
This rule helps balance moisture access with the seedling’s ability to emerge.
However, seed size, soil texture, and light requirements can change the ideal depth.
Seed Planting Depth Chart
| Vegetable | Typical Planting Depth |
| Lettuce | Surface to ⅛–¼ inch, depending on variety |
| Carrots | About ¼ inch |
| Radishes | ¼–½ inch |
| Beets | ½–1 inch |
| Spinach | ½ inch |
| Swiss chard | About ½ inch |
| Peas | 1–1½ inches |
| Bush beans | About 1 inch |
| Pole beans | About 1 inch |
| Cucumbers | ½–1 inch |
| Summer squash | About 1 inch |
| Pumpkins | About 1 inch |
| Turnips | ¼–½ inch |
These are common starting ranges, not universal instructions.
Follow the seed packet for the exact variety.
The University of Maryland Extension’s seed-sowing guide recommends planting seeds at approximately twice their width and adjusting depth for soil texture.
Why Is Planting Depth Important?
A seed needs enough moisture to begin germination.
However, after germination, the emerging seedling must grow through the soil.
If a seed is planted too deeply, it may exhaust its stored energy before reaching sunlight.
If it is too shallow, it may:
- Dry out
- Wash away during watering
- Become exposed
- Be eaten by birds or other animals
Correct depth improves the likelihood of successful emergence.
Should Small Seeds Be Covered?
That depends on the crop.
Carrots are normally covered with a shallow layer of fine soil.
Some lettuce seeds germinate best when exposed to light and may be left on the surface or barely covered.
Follow the variety-specific instructions.
Does Soil Texture Affect Planting Depth?
Yes.
Seeds may be planted slightly deeper in light, sandy soil than in heavy clay soil.
Heavier soils can form crusts that make emergence difficult.
Fine compost or vermiculite may be useful as a thin covering over certain seed rows.
Do not use a thick layer of coarse mulch over freshly planted small seeds.
Key Takeaway: Planting depth is critical. Use the seed packet first and the two-to-three-times-seed-diameter rule as a general guide.
How Far Apart Should Seeds Be Planted in Raised Beds?
Seed spacing depends on the mature size of the vegetable.
Raised beds allow efficient use of space, but overcrowding still creates competition for light, moisture, and nutrients.
Vegetable Seed Spacing Chart
| Vegetable | Typical Final Plant Spacing |
| Carrots | 2–3 inches |
| Radishes | 2–4 inches |
| Beets | 3–4 inches |
| Spinach | 3–6 inches |
| Leaf lettuce | 4–6 inches |
| Head lettuce | 8–12 inches or as specified |
| Peas | 2–3 inches for many varieties |
| Bush beans | 3–6 inches |
| Pole beans | Follow trellis and variety spacing |
| Swiss chard | 6–12 inches, depending on harvest size |
| Trellised cucumbers | Approximately 12–18 inches |
| Zucchini and summer squash | Often 24–48 inches or more |
These measurements describe approximate spacing after thinning.
Seeds may initially be planted closer together.
However, larger seeds can often be placed close to their intended final spacing from the beginning.
Does Raised-Bed Gardening Allow Closer Spacing?
Sometimes.
Wide beds and intensive planting layouts can make efficient use of available growing space.
For example, you can plant vegetables in staggered rows rather than long rows separated by walking paths.
However, closely spaced plants still need adequate light, air circulation, nutrients, and water.
The University of Maryland Extension notes that close spacing can improve production per square foot in some situations, but excessive crowding may reduce yield and increase disease pressure.
Should You Plant One Seed Per Hole?
It depends on the crop and seed quality.
For large, high-quality seeds such as beans, one seed at each intended position can work.
For crops with uncertain germination, you may choose to sow more than one seed and thin later.
For cucumber or squash planting stations, sowing two or three seeds and thinning to the recommended number of plants is another common method.
Always consider the mature size of the crop.
How Do You Space Tiny Seeds?
Tiny seeds such as carrots can be difficult to handle individually.
Options include:
- Gently tapping seeds from the packet
- Using a hand seed dispenser
- Mixing very small seeds with an appropriate dry material to help distribution
- Using commercially prepared seed tape
- Planting thinly and thinning after germination
Do not expect perfect seed spacing when sowing tiny seeds by hand.
Key Takeaway: Use the mature plant’s spacing requirement rather than the number of seeds you can fit into the bed. Thin excess seedlings when necessary.
Three Ways to Plant Seeds in Raised Garden Beds
You can use several planting arrangements.
The best approach depends on the crop, bed dimensions, and preferred gardening style.
Method 1: Row Planting
Row planting involves sowing seeds in narrow furrows.
It works well for:
- Beans
- Peas
- Carrots
- Radishes
- Spinach
- Lettuce
To plant in rows:
- Mark the row using a string or ruler.
- Create a shallow furrow at the recommended depth.
- Place seeds along the row.
- Cover lightly.
- Firm the soil.
- Water gently.
- Label the row.
Rows make it easier to identify seedlings and remove weeds.
They can also simplify drip irrigation or soaker hose placement.
Method 2: Grid or Square-Foot Planting
Grid planting divides the bed into smaller sections.
A common approach is to create 12 × 12-inch squares.
Each square receives a crop at spacing appropriate for its mature size.
For example, a 4 × 4-foot raised bed contains sixteen 1-square-foot sections.
However, not every vegetable belongs in a single square.
Large vegetables such as squash and tomatoes may require multiple square feet or a different layout.
Use the seed packet’s final spacing rather than automatically following a fixed number of plants per square.
Method 3: Hill or Group Planting
Hill planting involves sowing several seeds in a small planting area.
It is commonly used for:
- Cucumbers
- Squash
- Pumpkins
- Melons
A hill does not always need to be a tall mound.
The term may describe a small planting station containing several seeds.
For example:
- Prepare the planting area.
- Make several holes at the appropriate depth.
- Place two to four seeds according to the crop.
- Cover and water.
- Thin the seedlings after emergence.
Leave sufficient room between hills for the mature plants.
Key Takeaway: Rows are simple to maintain, grids help organize limited space, and grouped planting works for many vining vegetables.
How to Plant Seeds in a 4 × 8-Foot Raised Bed
A 4 × 8-foot raised bed provides 32 square feet of planting area.
It is large enough for several types of vegetables, provided they have appropriate spacing.
Step 1: Choose a Seasonal Planting Plan
Start by deciding what you want to grow.
For a cool-season planting, you might select:
- Peas
- Spinach
- Lettuce
- Radishes
For a warm-season planting, you might select:
- Bush beans
- Cucumbers
- Basil
- Other appropriately sized vegetables
Do not assume cool-season and warm-season crops have the same planting window.
Step 2: Put Tall Crops Along One Edge
In many Northern Hemisphere gardens, placing tall crops or trellises along the northern side of the bed can help reduce shading of shorter plants.
For example, peas or cucumbers can grow vertically along a suitable trellis.
However, the best position depends on the bed’s orientation and nearby structures.
Step 3: Divide the Remaining Space
Use rows or a simple grid.
For a spring example:
| Bed Area | Possible Crop |
| North edge with trellis | Climbing peas |
| Middle section | Spinach |
| Southern section | Radishes or leaf lettuce |
Adjust the number of plants to the mature spacing requirements.
This is a layout example, not a fixed planting prescription.
Step 4: Sow at the Correct Depth
Plant each crop separately.
For example:
- Peas: about 1–1½ inches deep
- Spinach: about ½ inch deep
- Radishes: about ¼–½ inch deep
- Lettuce: very shallow or according to the packet
Do not create all planting holes at the same depth.
Step 5: Water and Label
Water gently after planting.
Label each area.
Monitor the soil daily while the seeds are germinating, particularly during warm or windy weather.
Step 6: Plan for Successive Crops
After harvesting quick-growing radishes, you may be able to replant the space with another suitable crop.
For example, radishes can mature within roughly 25–35 days under favorable conditions.
However, later plantings must still fit the seasonal temperature and remaining growing period.
Key Takeaway: A 4 × 8-foot raised bed can support several crops when arranged by mature size, sunlight needs, and planting season.
How to Water Seeds After Planting in a Raised Bed
Newly planted seeds need consistent moisture in the upper soil layer, but they should not remain in saturated conditions.
Watering is one of the most important parts of germination.
Water Immediately After Planting
After covering the seeds, water gently.
Use a fine spray that moistens the soil without displacing seeds.
Avoid strong water pressure.
The goal is to provide moisture throughout the planting depth.
How Often Should You Water Seeds?
There is no universal schedule.
The frequency depends on:
- Temperature
- Wind
- Sun exposure
- Soil texture
- Seed depth
- Rainfall
- Mulch or row cover
- Raised-bed construction
In warm, dry weather, the soil surface may need attention daily or more frequently.
In cool or rainy weather, less irrigation may be necessary.
How Do You Check Moisture?
Gently inspect the soil near a planting row.
The soil at seed depth should feel moist.
It should not be muddy or waterlogged.
If the upper layer is drying, water carefully.
Can You Overwater Seeds?
Yes.
Excess moisture can reduce oxygen availability around seeds.
Wet, poorly drained conditions may also encourage seed rot or seedling disease.
Avoid watering simply because a fixed number of hours has passed.
Check the actual soil conditions.
Should You Use Drip Irrigation for Seeds?
Drip irrigation can work, but the water must reach the planting area.
A widely spaced drip line may not adequately moisten shallow seed rows.
You may need supplemental gentle surface watering during germination.
Once plants establish deeper roots, a suitable drip system becomes more convenient.
When Should You Switch to Deeper Watering?
After seedlings develop roots and begin establishing, gradually reduce the frequency of shallow surface watering while providing enough water to moisten the root zone.
Established vegetables generally benefit from deeper, less frequent watering than newly sown seeds.
The University of Maryland Extension’s beginner vegetable gardening guide distinguishes frequent, shallow watering for newly planted seeds from deeper watering for established plants.
Key Takeaway: Keep seeds consistently moist until they emerge. After seedlings establish, gradually adjust watering to support deeper roots.
How Long Does It Take Seeds to Germinate in a Raised Bed?
Germination time varies by crop and growing conditions.
Some vegetable seeds sprout within a few days.
Others may require two weeks or longer.
Typical Germination Time Chart
| Vegetable | Approximate Days to Emergence |
| Radishes | 3–6 days |
| Lettuce | 6–10 days |
| Bush beans | 5–10 days |
| Peas | 6–10 days |
| Cucumbers | 6–10 days |
| Squash | 4–6 days |
| Beets | 7–10 days |
| Spinach | 7–12 days |
| Carrots | 12–18 days |
| Parsley | 15–21 days |
| Peppers | 9–14 days under suitable conditions |
These are approximate ranges under favorable growing conditions.
Cold soil, poor moisture, old seeds, and other factors can delay emergence.
The ranges are consistent with the Texas A&M AgriLife Extension’s vegetable gardening guide.
Why Do Some Seeds Germinate Faster?
Germination depends on several factors.
Soil temperature: Each crop has a preferred temperature range.
Moisture: Seeds need water to begin germination.
Oxygen: Waterlogged soil can restrict oxygen.
Seed quality: Older or damaged seeds may germinate more slowly or less reliably.
Planting depth: Seeds buried too deeply may fail to reach the surface.
Should You Dig Up Seeds to Check Them?
Generally, avoid disturbing newly planted seed rows unnecessarily.
Digging can damage emerging roots.
If the expected germination period has passed with no visible seedlings, inspect a small test area carefully.
You may also test unused seeds indoors using an appropriate germination method.
Key Takeaway: Some crops emerge within a week, while carrots and parsley often take longer. Check soil temperature and moisture before assuming that seeds have failed.
How to Thin Seedlings in a Raised Bed
Thinning means removing excess seedlings so the remaining plants have enough space to mature.
It is especially important for small-seeded vegetables.
Why Is Thinning Necessary?
When seedlings grow too close together, they compete for:
- Sunlight
- Water
- Soil nutrients
- Root space
- Air circulation
Crowding can produce weak, undersized plants.
For root vegetables, it may also reduce the size and quality of the harvested roots.
When Should You Thin Seedlings?
Thin after the seedlings have emerged and are large enough to identify and handle.
Many gardeners begin when the first true leaves are developing.
However, timing varies by crop.
Do not wait until seedlings become severely crowded and tangled.
How to Thin Seedlings Step by Step
- Check the seed packet for final spacing.
- Identify healthy, vigorous seedlings.
- Decide which plants to keep.
- Use small scissors to cut unwanted seedlings near soil level.
- Avoid disturbing the roots of neighboring plants.
- Water gently if the soil is dry.
Cutting is particularly useful when removing seedlings might disturb nearby roots.
For some crops, carefully pulling seedlings from moist soil is also an option.
Thinning Example: Carrots
Suppose carrot seedlings emerge approximately ½ inch apart.
If the variety needs 2–3 inches of final spacing, remove the extras.
Leave the healthiest seedlings distributed across the planting area.
Thinning Example: Radishes
Radishes typically need more room than their initial seed spacing may provide.
Thin to approximately 2–4 inches, depending on the type.
Crowded radishes may produce poor root development.
Can You Eat Thinned Seedlings?
Some healthy vegetable seedlings are edible.
However, do not assume every crop’s seedlings are safe to eat.
Only consume seedlings from known edible crops at an appropriate stage, and follow suitable washing and food-safety practices.
Do not eat seedlings treated with products that are not approved for edible crops.
Key Takeaway: Thin seedlings to their recommended final spacing. Removing extra plants early supports healthier growth and better harvests.
How to Protect Newly Planted Seeds and Seedlings
Seeds and young seedlings may be vulnerable to birds, insects, strong rain, wind, and temperature extremes.
Simple protective measures can help.
Protect Seeds From Birds
Birds may disturb exposed or shallowly planted seeds.
A lightweight row cover or properly secured protective mesh may help.
Choose material that allows appropriate airflow and watering.
Check the planting area regularly.
Protect Against Heavy Rain
Intense rainfall can wash seeds away or create surface crusting.
If heavy rain is expected, a suitable temporary cover may help.
Avoid placing non-breathable material directly over seedlings for extended periods.
Use Row Covers for Cool Weather
Some lightweight row covers provide modest frost protection.
They can also help reduce exposure to certain insects.
However, different fabric weights provide different levels of protection.
Row covers do not guarantee survival during severe freezing conditions.
Avoid Overheating Seedlings
Plastic covers and low tunnels can trap heat.
On sunny days, temperatures may rise quickly.
Ventilate or remove coverings as necessary.
Protect Against Slugs and Other Pests
Young leaves can be damaged by slugs, snails, and other pests.
Inspect seedlings regularly.
Use appropriate integrated pest management methods.
Avoid applying pesticides without correctly identifying the problem.
Key Takeaway: Protect seeds from physical damage and pests, but keep covers properly ventilated and monitor seedlings regularly.
Should You Use Mulch After Planting Seeds?
Mulch helps conserve moisture, reduce weeds, and protect soil.
However, a thick mulch layer can interfere with seed germination and emergence.
Should You Cover Seeds With Straw?
For very small seeds, avoid placing a thick straw layer directly over the planting row.
Seedlings may struggle to emerge.
Keep the row clear initially.
Once seedlings establish, add suitable mulch around them.
Can You Use Compost as a Seed Cover?
A thin layer of screened, finished compost can help cover certain seeds.
It may also reduce surface crusting.
However, use the planting depth recommended for the crop.
Do not cover small seeds with an excessively thick compost layer.
Can You Use Cedar Mulch?
Cedar chips are generally better suited to established plants than freshly sown vegetable rows.
Coarse chips can create obstacles for emerging seedlings and make the soil harder to prepare for repeated seeding.
Move cedar mulch aside before planting.
Return it around plants after they become established, where appropriate.
When Should You Apply Mulch?
Apply mulch after seedlings have reached a suitable size.
Keep mulch away from tender stem bases.
Use a depth appropriate for the crop and growing conditions.
Key Takeaway: Do not bury newly sown seeds under thick mulch. Keep planting rows clear until seedlings emerge and establish.
Best Vegetables to Grow From Seed in Raised Beds
Many vegetables are particularly well suited to direct sowing.
However, crop choice should match your season, bed depth, and available sunlight.
Radishes
Radishes are useful for beginners because they germinate relatively quickly.
Many varieties mature in about 25–35 days under favorable conditions.
They are suitable for spring and fall planting.
Carrots
Carrots are good raised-bed crops when the soil is loose and deep enough for the selected variety.
They dislike rocky or heavily compacted soil.
Keep the surface consistently moist during germination.
Lettuce
Leaf lettuce can be grown from seed in small raised-bed sections.
Some varieties are better suited to cool weather.
Follow the seed packet’s light requirements and recommended covering depth.
Spinach
Spinach prefers cool conditions.
It is commonly planted in spring or fall.
High temperatures can reduce germination and encourage bolting.
Bush Beans
Bush beans are relatively straightforward to direct-seed once the soil becomes warm.
They do not usually require a tall trellis.
However, proper spacing and sunlight are important.
Peas
Peas are well suited to cool-season planting.
Many varieties benefit from a trellis.
Install supports at planting time or soon afterward to avoid disturbing the roots later.
Cucumbers
Cucumbers can be direct-sown in warm soil.
Vining types can grow on a suitable trellis.
Bush varieties may be better for compact beds when vertical growing is not desired.
Beets
Beets grow well in suitable raised-bed soil.
Their seed structures may produce more than one seedling, depending on the variety.
Thinning can be particularly important.
Quick Beginner Crop Comparison
| Crop | Difficulty | Main Consideration |
| Radish | Easy | Cool weather and spacing |
| Leaf lettuce | Easy | Shallow planting and temperature |
| Bush beans | Easy | Warm soil |
| Peas | Easy | Cool weather and support |
| Carrots | Moderate | Consistent moisture and loose soil |
| Spinach | Easy to moderate | Avoid excessive heat |
| Beets | Easy to moderate | Thinning |
| Cucumbers | Easy to moderate | Warm soil, space, and support |
Key Takeaway: Radishes, lettuce, peas, and bush beans are practical beginner crops. Carrots also work well but need careful moisture management during germination.
Can You Plant Flower and Herb Seeds in Raised Beds?
Yes.
Raised beds can support many herbs and flowering plants.
However, their planting requirements vary by species.
Herbs Suitable for Direct Sowing
Examples include:
- Cilantro
- Dill
- Basil
- Chives
- Parsley
Some herbs germinate slowly.
Others require warmer soil.
For example, basil is sensitive to cold conditions, while cilantro generally performs better in cooler weather.
Flowers Suitable for Raised Beds
Examples include:
- Calendula
- Nasturtiums
- Zinnias
- Cosmos
- Marigolds
- Sunflowers, where space permits
These plants can add color and may provide resources for pollinators.
However, flower size and growth habit matter.
Tall sunflowers may shade nearby vegetables or require additional support.
Are Flower Seeds Planted at the Same Depth as Vegetables?
No.
Follow the seed packet for the exact species.
Some flower seeds need light for germination and should not be covered deeply.
Others need a thin layer of soil.
Can You Mix Flowers and Vegetables?
Yes, when their light, moisture, and spacing requirements are compatible.
For example, compact flowering plants may fit along the edge of a vegetable bed.
However, avoid overcrowding the vegetables or allowing aggressive flowers to dominate the planting space.
Key Takeaway: Herbs and flowers can be direct-sown in raised beds, but their individual seed depths, temperatures, and mature sizes must be considered.
Direct Sowing vs. Starting Seeds Indoors: Which Is Better?
Direct sowing means planting seeds where the vegetables will grow to maturity.
Starting seeds indoors means germinating them in containers and transplanting them later.
Each approach has advantages.
Direct Sowing Advantages
Direct sowing can:
- Reduce the need for indoor growing equipment
- Avoid transplant disturbance
- Save time on seedling care
- Work well for root crops
- Be practical for beans, peas, and many cucurbits
However, outdoor seeds are more exposed to weather and pests.
Starting Seeds Indoors Advantages
Indoor seed starting can:
- Extend the effective growing season
- Allow early growth before outdoor conditions are suitable
- Help gardeners in short-season climates
- Provide more control over germination conditions
However, seedlings need sufficient light, suitable temperatures, and gradual acclimation before transplanting.
Which Vegetables Are Better Direct-Sown?
Common examples include:
- Carrots
- Radishes
- Peas
- Beans
- Turnips
- Many beets
- Parsnips
Which Are Often Started Indoors?
In regions with short growing seasons:
- Tomatoes
- Peppers
- Eggplants
- Broccoli
- Cauliflower
- Certain cabbage varieties
Some cucumbers, melons, and squash can also be started indoors for a short period, but they require careful handling because they can be sensitive to root disturbance.
Comparison Table
| Factor | Direct Sowing | Indoor Seed Starting |
| Equipment | Minimal | Trays, growing mix, light |
| Root disturbance | Low | Possible during transplanting |
| Weather exposure | Higher | Lower during early growth |
| Growing-season extension | Limited | Useful |
| Best for root vegetables | Often preferred | Less convenient for some crops |
| Best for tomatoes and peppers in cold climates | Often less practical | Generally preferred |
Key Takeaway: Direct sowing is ideal for many roots, beans, and peas. Indoor starting is useful for slow-growing warm-season crops in shorter growing seasons.
Why Are My Seeds Not Germinating in a Raised Bed?
When seeds fail to emerge, the cause is usually related to temperature, moisture, seed quality, or planting technique.
Common Germination Problems
| Problem | Possible Cause | Practical Solution |
| No seedlings after expected time | Soil too cold | Wait for suitable temperature |
| Seeds dry out | Inconsistent surface moisture | Water gently as needed |
| Seeds rot | Excessive moisture or cold soil | Improve drainage and timing |
| Uneven emergence | Different planting depths | Make uniform planting holes |
| Seedlings struggle to emerge | Soil crusting | Use a fine seedbed and gentle watering |
| Seedlings are crowded | Too many seeds | Thin after germination |
| Seeds disappear | Birds or animals | Use suitable protective covering |
| Weak seedlings | Poor light or unsuitable conditions | Improve growing conditions |
| Seeds fail despite good conditions | Old or damaged seed | Test germination and replace if necessary |
Problem 1: Seeds Were Planted Too Deeply
Small seedlings may not have enough stored energy to reach the surface.
Use the recommended planting depth.
Do not bury tiny seeds beneath thick soil or mulch layers.
Problem 2: Soil Temperature Is Too Low
Warm-season crops may germinate very slowly in cold soil.
Some seeds may rot before sprouting.
Check the soil temperature rather than relying only on air temperature.
Problem 3: Soil Dried Out
Seeds need moisture to begin germination.
If the soil dries severely after the seed absorbs water, germination may fail.
Check the planting area regularly.
Problem 4: Soil Stayed Too Wet
Waterlogged soil can restrict oxygen.
It may also create conditions favorable for decay.
Reduce unnecessary watering and check drainage.
Problem 5: The Seeds Are Old
Seed viability declines over time.
The rate depends on crop type and storage conditions.
Older seeds may still germinate but at a lower percentage.
A small germination test can help determine whether the seed remains viable.
Problem 6: Soil Developed a Hard Crust
Heavy rain or excessive watering can compact the surface.
Small seedlings may struggle to break through.
Prepare a fine seedbed and water gently.
For some crops, a thin layer of fine compost or vermiculite over the planted row may help.
Problem 7: Pests Ate the Seeds
Birds, rodents, and certain soil-dwelling organisms may disturb or consume seeds.
Use an appropriate protective cover and inspect the bed.
When Should You Replant?
Wait until the crop’s normal germination period has passed.
Consider whether cold soil may be delaying emergence.
If no seedlings appear and the conditions are suitable, inspect a small area and replant as necessary.
Do not repeatedly reseed without correcting the underlying problem.
Key Takeaway: Check moisture, soil temperature, seed depth, and seed quality before replanting. Correcting the cause improves the next attempt.
Common Mistakes When Planting Seeds in Raised Beds
Several avoidable mistakes can reduce germination and crop performance.
1. Planting Seeds Too Deep
Small seeds may fail to emerge.
Follow the packet’s planting depth.
2. Planting Too Early
Warm-season seeds may rot in cold soil.
Wait for suitable temperatures.
3. Overwatering
Waterlogged soil can restrict oxygen and damage seeds.
Keep the soil moist, not saturated.
4. Letting the Seedbed Dry Out
Germinating seeds need consistent moisture.
Check shallow seed rows frequently.
5. Using Poor-Quality Soil
Large clods, compaction, or poor drainage can interfere with emergence.
Prepare a suitable seedbed first.
6. Planting Seeds Too Close Together
Crowded plants compete for resources.
Use appropriate spacing and thin when necessary.
7. Covering Tiny Seeds Too Heavily
Some small seeds need light for germination.
Follow the species-specific instructions.
8. Forgetting Plant Labels
Unlabeled seedlings can be difficult to distinguish from weeds.
Mark each crop and planting date.
9. Using Thick Mulch Before Emergence
Coarse mulch can obstruct young seedlings.
Keep planting rows clear.
10. Fertilizing Too Heavily
Excess soluble salts can damage seeds and young roots.
Use amendments based on actual soil needs.
11. Ignoring Sunlight Requirements
Many fruiting vegetables need at least 6–8 hours of direct sunlight daily.
Choose crops suited to the raised bed’s exposure.
12. Skipping Thinning
Crowded seedlings may remain weak and undersized.
Thin at the appropriate stage.
Key Takeaway: Correct planting depth, moisture, soil temperature, and spacing matter more than using complicated gardening techniques.
How to Care for Raised-Bed Seedlings After Germination
Once the seeds sprout, their needs begin changing.
The goal shifts from maintaining moisture for germination to supporting root development and healthy plant growth.
Provide Enough Sunlight
Most vegetables need substantial sunlight.
For tomatoes, peppers, beans, and cucumbers, approximately 6–8 hours of direct sunlight is a common target.
Some leafy vegetables tolerate less sunlight.
Watch for seedlings stretching excessively toward the light.
Adjust Watering Gradually
Newly emerged seedlings still have small root systems.
Continue checking soil moisture.
As the plants establish, water more deeply to support root growth.
Avoid keeping the surface permanently wet.
Thin Crowded Plants
Follow final spacing recommendations.
Remove extra seedlings before overcrowding becomes severe.
Begin Weeding Early
Small weeds are easier to remove.
Work carefully to avoid disturbing vegetable roots.
Add Mulch When Appropriate
Once plants are established, use suitable organic mulch to conserve moisture and suppress weeds.
Keep mulch away from tender stems.
Monitor Fertility
Young plants do not always need immediate fertilizer.
If the raised-bed soil is fertile, they may grow well without additional feeding.
Follow soil test recommendations and the crop’s nutrient requirements.
Avoid applying concentrated fertilizer directly to tender seedlings.
Install Supports Early
Peas, pole beans, and cucumbers may need trellises.
Install supports before roots and vines become extensive.
This reduces the risk of damaging plants later.
Monitor for Pest Problems
Inspect leaves and stems regularly.
Look for:
- Chewing damage
- Unusual spotting
- Wilting
- Damaged stems
- Insect activity
- Poor growth
Identify the problem before choosing a treatment.
Key Takeaway: After germination, provide adequate sunlight, appropriate watering, final plant spacing, and early support for climbing crops.
Simple Raised-Bed Seed Planting Schedule for Beginners
A planting routine helps organize the first few weeks.
However, the actual number of days to emergence varies by crop.
Before Planting
Check:
- Planting season
- Soil temperature
- Seed packet instructions
- Soil condition
- Sunlight exposure
- Available growing space
Planting Day
Complete these tasks:
- Remove weeds.
- Prepare the soil surface.
- Mark rows or grid sections.
- Sow at the proper depth.
- Cover and firm gently.
- Water.
- Label the crops.
First Week
Check the soil moisture regularly.
Watch for emergence.
Protect the planting area from heavy rain or animals if necessary.
Do not disturb the seed rows unnecessarily.
Second Week
Some crops may have emerged.
Others, particularly slow-germinating vegetables, may still be developing.
Continue appropriate watering.
Identify weeds carefully.
Following Weeks
As seedlings develop:
- Thin crowded plants.
- Adjust watering.
- Remove weeds.
- Install supports.
- Begin suitable mulching.
- Monitor plant health.
When Should You Plant More Seeds?
Successive sowing can provide a longer harvest.
For example, radishes and leaf lettuce may be planted in small batches at intervals during suitable weather.
Some gardeners sow a new batch approximately every 1–2 weeks, depending on the crop.
However, planting intervals should be adjusted for expected harvest timing, temperature, and available space.
Key Takeaway: A simple schedule makes direct seeding easier, but plant care should follow actual soil moisture, crop growth, and weather rather than a rigid calendar.
Conclusion
Learning how to plant seeds in a raised bed starts with preparing suitable soil, selecting seeds for the season, and following the correct planting depth and spacing.
A raised bed provides a convenient growing area, but seeds still need suitable temperature, moisture, oxygen, and contact with the soil to germinate.
Start with loose, well-draining soil and make planting holes or shallow furrows according to the seed packet. Cover the seeds lightly, press the soil gently, and water without washing them out of position.
Keep the upper soil consistently moist until seedlings emerge. After germination, thin crowded plants and gradually adjust watering to support healthy root growth.
For beginners, radishes, lettuce, peas, bush beans, and carrots are useful crops to try. Choose varieties suitable for your local planting season and the available growing space.
Avoid planting too deeply, overcrowding, or applying thick mulch before seedlings emerge.
If you are starting with a small raised bed, I recommend planting only a few compatible crops at first. This makes it easier to learn their germination times, watering needs, and spacing requirements before expanding the garden.
FAQs About How to Plant Seeds in a Raised Bed
Can you plant seeds directly into a raised garden bed?
Yes. Many vegetables grow well when their seeds are planted directly in a raised bed. Common examples include carrots, radishes, peas, beans, lettuce, spinach, and cucumbers. Choose a suitable planting time and follow the seed packet’s depth and spacing instructions.
How deep should seeds be planted in a raised bed?
Most vegetable seeds are planted approximately two to three times as deep as their diameter. Small seeds such as carrots are often planted about ¼ inch deep, while larger seeds such as beans may be planted approximately 1 inch deep. Some seeds need light and should remain uncovered or barely covered.
How often should you water newly planted seeds in a raised bed?
Water whenever necessary to keep the soil at seed depth consistently moist without becoming waterlogged. The required frequency depends on temperature, wind, rainfall, soil texture, and planting depth. Newly sown seeds often need more frequent, gentle watering than established plants.
How many seeds should you put in each hole?
It depends on the crop and seed quality. Large seeds such as beans may be planted individually, while cucumber or squash planting stations sometimes contain two or more seeds that are thinned later. Follow the seed packet and allow enough space for the mature plants.
Should you soak seeds before planting them in a raised bed?
Most vegetable seeds do not require soaking. Some slow-germinating or hard-coated seeds may benefit from appropriate presowing treatments. However, soaking can damage seeds if done incorrectly. Follow the recommendations for the specific crop rather than soaking every seed automatically.
Can you plant seeds in a raised bed filled with compost?
Seeds can germinate in some compost-based materials, but pure compost is not always a suitable complete growing medium. Excess nutrients, salts, or poor physical structure may create problems. A balanced raised-bed soil mixture with appropriate organic matter is generally more reliable.
What is the easiest vegetable to grow from seed in a raised bed?
Radishes are among the easiest choices because they germinate quickly and often mature within approximately 25–35 days under favorable conditions. Leaf lettuce, peas, and bush beans are also practical beginner crops when planted during the correct season.

I’m Maya L. Greenwood, a lifelong plant lover who believes anyone can grow something beautiful with the right guidance. After years of testing soil mixes, pruning methods, irrigation tricks, and pest-safe solutions, I started EasyGardenTips.com to turn hard-won lessons into step-by-step advice. From seed starting and container gardens to composting and seasonal checklists, my goal is to make gardening simple, sustainable, and fun.