How to Cover a Raised Garden Bed: DIY Hoops, Fabric, and Netting
To cover a raised garden bed, install a row-cover fabric, insect netting, shade cloth, or clear plastic over a simple hoop frame, then secure the edges so wind and pests cannot get underneath. Choose the material for the problem: breathable frost fabric for chilly nights, fine mesh for insects, sturdy netting for birds, and ventilated plastic for seasonal warmth.
A cover can protect seedlings, reduce pest damage, and extend your harvest, but the wrong material can create new problems. Clear plastic can overheat plants in sunshine, fine insect mesh can keep pollinators out, and loose fabric can rub against delicate leaves. A cover also needs enough room for plants to grow and convenient access for watering and harvesting.
You do not need a permanent greenhouse to get started. A small bed can often be protected with flexible hoops and removable fabric, while larger beds or winter growing may benefit from a framed cold cover.
In this article, I explain which raised-bed covers work for frost, insects, birds, heat, and winter weather. You’ll learn to measure a bed, build a basic hoop tunnel, secure and ventilate the cover, and avoid common mistakes.
How to Cover a Raised Garden Bed Step by Step
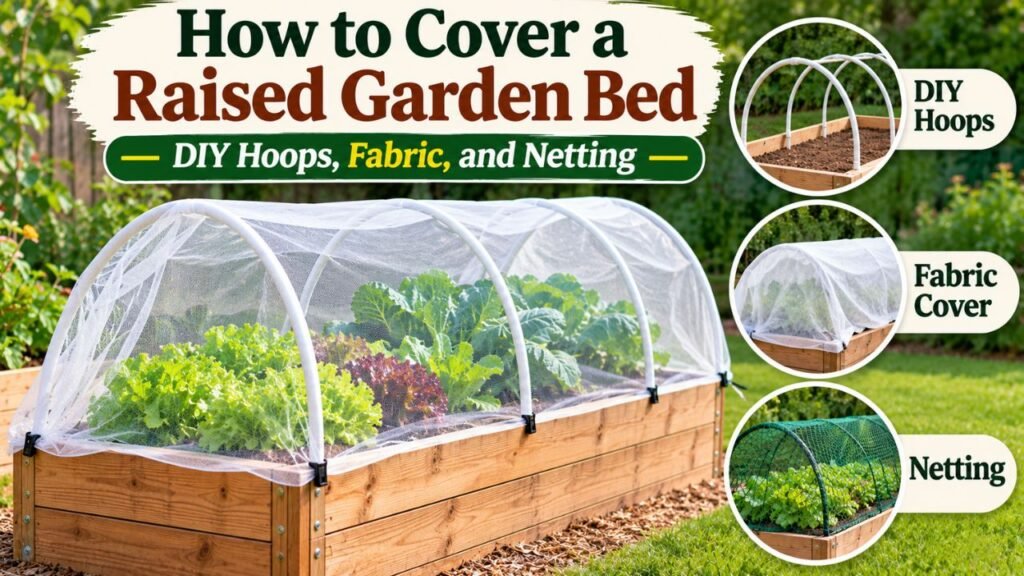
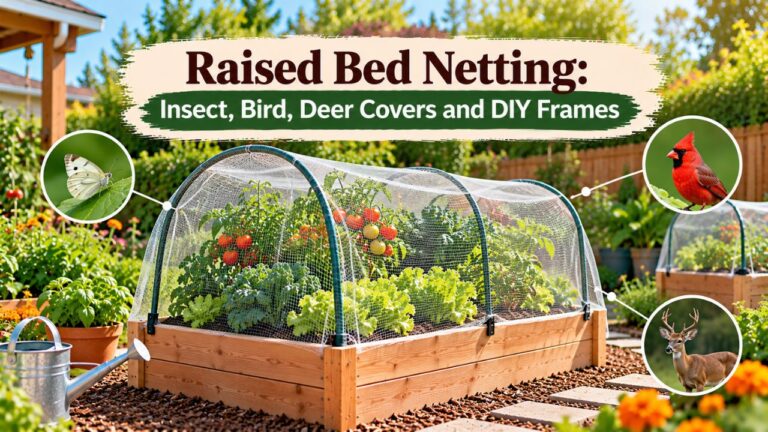
A simple hoop tunnel is one of the most versatile ways to cover a raised garden bed.
The frame supports the covering above the plants, preventing fabric from resting heavily on leaves while creating space for growth.
You can change the material throughout the growing season without rebuilding the entire structure.
Step 1: Decide Why You Need a Cover
Before purchasing materials, determine what you want to protect the garden from.
Different covers serve different purposes.
| Purpose | Recommended cover | Main benefit |
| Light frost | Frost cloth or medium-weight row cover | Retains some warmth |
| Cold-weather growing | Heavier row cover or ventilated low tunnel | Extends the growing season |
| Insect pests | Fine insect netting | Blocks insects from reaching plants |
| Birds | Suitable bird netting or mesh enclosure | Prevents access to crops |
| Rabbits and larger animals | Rigid wire cage or fencing | Creates a stronger physical barrier |
| Excessive sunlight | Garden shade cloth | Reduces direct solar exposure |
| Heavy rain | Supported, properly ventilated rain shelter | Limits direct rainfall on plants |
| Empty bed during winter | Organic mulch or appropriate seasonal cover | Protects exposed soil |
The material should match the problem.
For example, insect netting is useful for keeping cabbage moths away from vegetables, but it provides little protection against freezing temperatures.
Similarly, frost cloth can help during chilly weather but may trap excessive heat when used unnecessarily during summer.
Step 2: Measure Your Raised Garden Bed
Measure the bed’s:
- Length.
- Width.
- Height above the surrounding ground.
- Height of the tallest plants.
Common raised-bed dimensions include:
- 3 × 6 feet.
- 4 × 4 feet.
- 4 × 8 feet.
- 4 × 10 feet.
The frame should provide enough clearance for the plants beneath it.
For example, low-growing lettuce may need a relatively short tunnel.
Tomatoes, peppers, and other taller plants require more vertical room or a different covering structure as they mature.
Important: Measure the curved distance over the planned hoops, not just the flat width of the bed.
You also need extra material along the edges and ends for anchoring.
Step 3: Choose a Frame Material
Several materials can support a raised-bed cover.
Common options include:
- Flexible PVC pipe.
- Heavy-gauge wire.
- Metal garden hoops.
- Fiberglass garden rods designed for hoop supports.
- Wood framing.
- Appropriate metal tubing.
Flexible PVC and manufactured garden hoops are convenient for small DIY tunnels.
Metal hoops may provide greater rigidity, depending on their construction.
Wood frames are useful for permanent hinged covers or animal-protection cages.
Choose a material suitable for the bed size and expected wind or snow conditions.
Step 4: Install the Hoop Supports
For a simple low tunnel, position hoops across the width of the bed.
Space them evenly along its length.
For example, a 4 × 8-foot raised bed might use five hoops spaced approximately 2 feet apart.
This is a practical DIY arrangement, not a universal structural specification.
The appropriate spacing depends on the strength of the hoops, the cover material, and local weather.
Install the hoops using suitable stakes, sleeves, or brackets.
For wooden beds, properly installed pipe straps or similar fittings can hold the supports.
For metal raised beds, use compatible mounting hardware that does not damage the panels or leave sharp edges.
Make sure the hoops are stable before adding the cover.
Step 5: Cut the Cover to the Correct Size
Choose a cover large enough to extend over the hoops and reach the anchoring points.
Measure the distance across the curved hoop using a flexible measuring tape.
Then add material for securing both sides.
For example, if the curved distance over the hoop is 8 feet and you need 1 foot of extra fabric on each side:
8 + 1 + 1 = 10 feet of cover width
For an 8-foot-long bed, you might also allow approximately 2 feet at each end for gathering and securing the fabric.
8 + 2 + 2 = 12 feet of cover length
In that hypothetical arrangement, a cover approximately 10 × 12 feet would provide the planned allowance.
Actual dimensions depend on hoop height, cover shape, and anchoring method.
Step 6: Drape the Cover Over the Frame
Spread the material evenly across the hoops.
Avoid stretching it so tightly that it pulls the hoops inward.
At the same time, prevent excess loose fabric from flapping in the wind.
For insect protection, ensure the covering reaches the bed edges without leaving openings.
For frost protection, secure the edges to reduce cold air movement beneath the fabric.
For plastic tunnels, plan how the sides or ends will open for ventilation.
Step 7: Secure the Cover
Common anchoring methods include:
- Garden fabric clips.
- Ground staples.
- Sandbags.
- Soil along the fabric edges.
- Appropriate spring clamps.
- Bungee cords with suitable attachment points.
- Purpose-built greenhouse clips.
Choose the method according to the cover and frame.
For example, lightweight frost fabric can be secured with garden staples or sandbags.
A plastic tunnel may require additional clips and stronger anchors.
Do not rely on a few loose stones in an exposed, windy location.
Step 8: Allow Access for Watering and Harvesting
A useful cover should be easy to open.
You may need access for:
- Watering.
- Harvesting.
- Weeding.
- Plant inspection.
- Pollination.
- Temperature control.
Consider securing one side permanently and using removable clips on the opposite side.
This allows the cover to be lifted without dismantling the entire tunnel.
For a permanent enclosure, a hinged lid or removable panel may be more convenient.
Step 9: Inspect the Covered Bed Regularly
Once the cover is installed, check the plants and structure frequently.
Look for:
- Excessive heat.
- Condensation.
- Fabric damage.
- Loose anchors.
- Insects trapped inside.
- Leaves pressing against the cover.
- Soil that has become too dry or wet.
Adjust the cover as the plants grow and weather changes.
Key Takeaway: A simple hoop tunnel with interchangeable coverings offers flexible protection. The most important details are stable supports, proper material selection, secure edges, and easy access.
Best Materials for Covering a Raised Garden Bed
Covering materials differ in weight, airflow, light transmission, and durability.
Understanding these differences helps prevent damage to plants.
Floating Row Cover Fabric
Floating row covers are lightweight woven, knitted, or spunbonded materials designed for garden use.
Many allow sunlight, rain, and air to pass through.
They are useful for:
- Frost protection.
- Early spring planting.
- Fall season extension.
- Excluding certain insect pests.
- Protecting tender seedlings from wind.
Row covers come in different weights.
Lightweight covers generally allow more sunlight through.
Heavier covers typically provide more cold protection but reduce light transmission.
According to the University of Minnesota Extension’s growing-season guide, lightweight row covers may transmit more than 90% of available sunlight, while medium-weight options commonly transmit 75–85%.
The extension also explains that the heaviest covers provide greater cold protection but can block 40–50% of sunlight.
Therefore, the thickest cover is not always the best choice for long-term use.
Insect Netting
Fine insect netting is designed to prevent insects from reaching crops.
It is especially useful for protecting:
- Cabbage.
- Broccoli.
- Kale.
- Radishes.
- Carrots.
- Other vegetables vulnerable to specific insect pests.
Choose mesh fine enough to exclude the target insect.
Mesh intended for large insects may not stop very small pests.
Insect netting usually allows reasonable airflow and light transmission.
However, it does not provide the same insulation as dedicated frost cloth.
Best for: Keeping insects away during the growing season.
Bird Netting
Bird netting can protect crops from birds.
It may be useful around strawberries, blueberries, peas, and other attractive crops.
However, loose bird netting can entangle birds and other wildlife.
Choose a wildlife-conscious design, install the netting tightly over a supporting frame, and secure all loose edges.
Inspect it frequently.
For small raised beds, a rigid mesh cage may be easier to manage than loose bird netting.
Clear Greenhouse Plastic
Clear plastic creates a more enclosed growing environment.
It can trap warmth and protect plants from direct rainfall.
However, it does not provide the same natural airflow as breathable garden fabric.
A sealed plastic tunnel can heat rapidly in sunlight.
Use appropriate ventilation openings or removable sides.
Choose greenhouse-grade plastic intended for outdoor use if the cover will remain installed for extended periods.
Ordinary thin plastic sheeting may deteriorate more quickly.
Shade Cloth
Shade cloth reduces the amount of direct sunlight reaching plants.
It can be useful during hot weather, particularly for crops susceptible to heat stress.
Shade cloth is available in different shade percentages.
For example, 30% shade cloth blocks approximately 30% of incoming light under its rated test conditions.
The appropriate shade level depends on the crop and climate.
Leafy greens in very hot conditions may benefit from more shading than sun-loving tomatoes and peppers.
Avoid excessive shading that reduces plant growth.
Polycarbonate Panels
Rigid polycarbonate panels can be used for permanent or semi-permanent cold frames.
They provide a clear protective surface and can offer better structural durability than thin plastic film when properly selected and installed.
However, they are more expensive and require suitable framing.
Some panels provide insulation through a multiwall design.
A cold frame with a polycarbonate lid should include ventilation because heat can build up quickly.
Cover Material Comparison
| Material | Frost protection | Insect protection | Airflow | Best use |
| Lightweight row cover | Limited | Good for suitable pests | Good | Spring protection and insect exclusion |
| Medium/heavy frost cloth | Moderate, varies by weight | Can exclude insects | Moderate | Cold nights |
| Fine insect mesh | Minimal | Very good when properly sealed | Good | Pest exclusion |
| Bird netting | Minimal | Limited against small insects | Excellent | Bird protection |
| Clear plastic film | Can retain substantial heat | Barrier when closed | Poor without ventilation | Low tunnels and rain shelters |
| Shade cloth | Minimal | Limited, depends on mesh | Good | Summer heat management |
| Polycarbonate | Useful in suitable cold frames | Barrier when enclosed | Requires ventilation | Permanent cold frames |
Key Takeaway: Breathable row cover is a practical general-purpose option. Use fine mesh for insects, shade cloth for excessive sun, and ventilated plastic for cold-season protection.
How to Build a DIY Hoop Cover for a 4 × 8 Raised Bed
A 4 × 8-foot raised bed is large enough to grow several vegetables while remaining manageable for a basic hoop tunnel.
A removable cover can be built without constructing a full greenhouse.
Materials Needed
For a simple DIY arrangement, gather:
- Five suitable flexible hoops.
- Ten appropriate hoop supports or mounting brackets.
- Garden row-cover fabric or insect netting.
- Compatible clips or clamps.
- Ground stakes or other anchors.
- Tape measure.
- Scissors suitable for the cover material.
- Drill or screwdriver if the mounting system requires it.
The exact material lengths depend on the desired tunnel height.
Select hoops designed to span the bed without cracking or becoming unstable.
Step 1: Mark Hoop Positions
Measure the 8-foot length.
Mark five positions at approximately:
- 0 feet.
- 2 feet.
- 4 feet.
- 6 feet.
- 8 feet.
Position the hoops approximately opposite each other across the bed.
If the structure is exposed to high winds or supports a heavier cover, use spacing and reinforcement appropriate for those conditions.
Step 2: Install the Supports
Attach or insert the hoop supports according to their design.
Ensure they are secure.
If using sleeves or brackets on wooden bed walls, use suitable exterior fasteners.
If using a metal raised bed, avoid drilling unless the manufacturer permits it and the installation will not weaken or damage the panels.
Step 3: Form the Hoops
Bend the flexible hoop material into arches.
Insert the ends into the supports.
All hoops should have a similar shape and height.
Check that the frame provides clearance above the plants.
For a low-growing lettuce bed, a shorter tunnel may be sufficient.
For taller crops, increase the height or use a different enclosure.
Step 4: Add a Ridge Support if Needed
A lightweight tunnel may not need a ridge support.
However, connecting the tops of the hoops can help keep them aligned.
Use a suitable lightweight support designed for the frame.
Do not attach heavy materials to flexible hoops that cannot safely support them.
A stronger frame may be needed in windy locations.
Step 5: Place the Cover
Drape the fabric or netting over the structure.
Center it so both sides have enough material for anchoring.
Allow additional fabric at each end.
Avoid sharp corners that could tear the material.
Step 6: Secure the Sides and Ends
Use clips and anchors suitable for the covering material.
For insect netting, seal the edges closely enough to prevent pests from entering.
For frost cloth, reduce gaps that allow cold air to move underneath.
If using plastic, install a practical ventilation system.
Step 7: Test the Cover
Lift one side to check access.
Make sure you can water, inspect, and harvest without dismantling the whole structure.
Check that the cover remains secure when gently pulled.
If the fabric sags onto the plants, adjust the hoops or add support.
Key Takeaway: A 4 × 8-foot raised bed can often be covered with a removable five-hoop tunnel, but the final design should reflect crop height, cover weight, wind exposure, and available anchoring points.
How to Cover a Raised Garden Bed for Frost Protection
Frost protection is one of the main reasons gardeners cover raised beds.
Lightweight and medium-weight frost fabrics are often suitable for protecting vegetables during chilly nights.
When Should You Cover Plants for Frost?
Cover frost-sensitive plants when local forecasts indicate temperatures may approach freezing.
However, the exact temperature at which damage occurs depends on the crop and weather conditions.
For example:
- Tomatoes are sensitive to frost.
- Peppers can suffer cold injury.
- Basil is particularly sensitive to low temperatures.
- Kale and spinach tolerate colder conditions.
- Established cold-hardy crops may survive temperatures that damage warm-season vegetables.
Do not assume every plant requires the same protection.
How Much Frost Protection Does Row Cover Provide?
Frost protection depends on fabric weight, installation, wind, soil warmth, and weather conditions.
The University of Maine Cooperative Extension explains that lightweight floating row covers can provide approximately 2–4°F of frost protection under suitable conditions.
Heavier materials may provide greater protection, but their performance varies.
A row cover cannot guarantee survival during prolonged hard freezes.
How to Install Frost Cloth
Follow these steps:
- Check the overnight temperature forecast.
- Water the soil appropriately if it is dry.
- Install hoops if the plants are delicate or tall.
- Drape frost cloth over the plants or frame.
- Secure all edges.
- Keep the fabric from flapping against leaves.
- Check conditions the next morning.
- Vent or remove the cover when necessary.
A cover that reaches the ground or bed edges can help retain warmth rising from the soil.
Simply hanging fabric high above the plants with open sides provides less insulation.
Can Frost Cloth Touch Plants?
Some floating row covers are designed to rest loosely on low-growing plants.
However, contact can cause abrasion when the fabric moves in the wind.
Wet material may also freeze against foliage.
Hoops are especially useful for protecting delicate seedlings and larger plants.
Should You Remove Frost Covers During the Day?
That depends on the weather and material.
Lightweight, breathable fabric may remain over suitable crops for extended periods.
Heavier covers can restrict light and retain excessive heat.
If sunny weather makes the covered area too warm, vent or remove the cover.
Important: Do not leave sealed plastic over a raised bed in direct sunlight without monitoring temperature.
How to Cover a Raised Garden Bed to Keep Bugs Out
Fine insect netting is one of the most effective nonchemical ways to protect vegetable crops from certain flying pests.
It works by preventing insects from reaching the plants.
However, correct installation is essential.
Choose the Right Mesh Size
Different pests require different mesh openings.
For example:
- Larger mesh may block moths and butterflies.
- Finer mesh may exclude flea beetles.
- Very fine mesh may be needed for smaller insects.
Choose a product specifically rated for the pest you want to exclude.
A mesh that stops cabbage moths may not stop tiny thrips.
Install Netting Before Pests Arrive
Insect netting is most effective when installed before pests lay eggs on the plants.
If caterpillars or other pests are already present, covering the bed may trap them inside.
Inspect the plants before installation.
Remove visible pests and check the undersides of leaves.
Seal Every Edge
Insects can enter through small gaps.
Secure the netting around the entire perimeter.
Pay particular attention to:
- Corners.
- Hoop attachment points.
- Openings around irrigation lines.
- Areas where the fabric overlaps.
Make the cover easy to open for inspection and maintenance.
Remove Covers When Pollination Is Needed
Some vegetable crops depend on insects for pollination.
Examples include:
- Cucumbers.
- Squash.
- Pumpkins.
- Melons.
If these crops flower beneath insect-proof netting, pollinators may be unable to reach them.
Remove or open the cover when pollination is needed, or provide a suitable alternative such as hand pollination.
The appropriate approach depends on the crop.
Can You Leave Insect Netting on All Summer?
Sometimes.
Fine netting may remain in place over crops that do not require insect pollination during the covered period.
However, continue checking for pests, heat buildup, growth clearance, and airflow.
Do not leave a cover in place without inspecting the plants.
How to Cover a Raised Garden Bed to Keep Birds and Animals Out
Animals can damage seeds, seedlings, leaves, and mature crops.
A physical barrier may help, but different animals require different designs.
Protecting Raised Beds From Birds
Birds may dig up seeds or eat developing fruits.
A lightweight mesh enclosure can reduce access.
For a small raised bed, consider a hoop-supported net or a framed cover.
Keep the mesh taut to reduce wildlife entanglement.
Inspect the cover regularly.
Avoid loose netting that hangs down around plants.
Protecting Raised Beds From Rabbits
Rabbits can reach low-growing plants easily.
A rigid wire enclosure is generally more reliable than lightweight bird netting.
Use a mesh with openings small enough to exclude rabbits, including young ones.
Secure the bottom edges.
If rabbits can push underneath the barrier, the cover will be less effective.
Protecting Raised Beds From Squirrels
Squirrels may dig in the soil or disturb newly planted seeds.
A rigid framed cover with suitable wire mesh can help.
Lightweight floating fabric is not intended to resist determined animals.
For long-term protection, use a stable enclosure with secure attachment points.
Protecting Raised Beds From Deer
A low hoop tunnel is generally not sufficient to exclude deer.
Deer may step over or damage lightweight structures.
A suitable perimeter fence or properly designed animal-resistant enclosure is usually more effective.
The required height and construction depend on local conditions.
Best Covers for Different Animals
| Animal | Suitable protection |
| Small birds | Taut mesh or framed netting |
| Rabbits | Secure wire enclosure |
| Squirrels | Rigid mesh lid or cage |
| Cats | Sturdy mesh cover or fencing |
| Deer | Appropriate tall fencing or substantial enclosure |
| Insect pests | Fine insect netting |
Key Takeaway: Lightweight row covers are useful for insects and weather, but animals often require stronger physical barriers.
How to Cover a Raised Garden Bed With Plastic
Plastic is useful when you want to create a warmer growing environment.
However, it requires more careful temperature management than breathable fabric.
Choose Greenhouse-Grade Plastic
Use plastic designed for outdoor growing structures when possible.
UV-stabilized greenhouse film is generally more durable than ordinary indoor plastic sheeting.
The appropriate thickness depends on the frame and intended use.
For a durable framed cloche, 6-mil greenhouse polyethylene is a commonly used option.
Keep Plastic Above the Plants
Use hoops or a suitable frame to support the film.
Do not lay ordinary clear plastic tightly over growing foliage.
Plastic contact can create condensation and temperature problems.
It also restricts airflow.
Provide Ventilation
Clear plastic can trap significant heat.
According to Oregon State University Extension’s raised-bed cloche construction guide, covered cloches can become extremely hot on sunny days, and the publication recommends ventilation openings.
For example, you can create:
- Roll-up sides.
- Removable end panels.
- Adjustable vents.
- A hinged opening.
Check the temperature inside the tunnel.
Avoid Sealing Plastic All Day
A closed plastic tunnel may overheat even when outdoor temperatures feel relatively cool.
The amount of heat buildup depends on sunlight, ventilation, enclosure size, and outside temperature.
Open or remove the cover when necessary.
Does Plastic Protect Plants From Heavy Rain?
A properly supported plastic shelter can prevent rain from falling directly on plants.
However, runoff must have somewhere to go.
Do not direct large amounts of water against the raised-bed walls or toward vulnerable foundations.
Also remember that rain cannot naturally water the covered soil.
Use irrigation or water the bed manually.
How to Cover a Raised Garden Bed for Summer Heat
In hot climates, the main concern may be excessive sunlight rather than cold weather.
Shade cloth can help reduce solar exposure.
Use Shade Cloth Instead of Plastic
Clear plastic is generally unsuitable for providing shade.
It can trap heat and make conditions worse.
Shade cloth reduces the amount of incoming sunlight.
Choose a shade percentage appropriate for your crop.
For example:
- Heat-sensitive lettuce may benefit from moderate shade during very hot periods.
- Tomatoes generally need substantial sunlight.
- Peppers also require adequate light for healthy growth and fruit production.
Avoid shading every crop equally.
Install Shade Cloth Above the Plants
Attach the cloth to hoops or a taller frame.
Leave adequate clearance for air circulation.
A cover that hangs loosely over leaves may rub against them in windy conditions.
Secure the material without blocking ventilation.
Provide Afternoon Shade
In hot summer conditions, reducing intense afternoon sunlight may be more useful than blocking morning light.
The best orientation depends on the garden’s location and surrounding structures.
Monitor plant performance and adjust the cover as needed.
Continue Watering
Shade cloth can reduce moisture loss, but it does not eliminate the need to water.
Check soil moisture beneath the cover.
Raised beds can dry quickly during hot weather.
How to Cover a Raised Garden Bed for Winter
Winter protection depends on whether the bed contains living plants or will remain empty until spring.
These situations require different approaches.
Covering Raised Beds With Winter Crops
Cold-hardy vegetables may benefit from a low tunnel or heavier row cover.
Examples include:
- Kale.
- Spinach.
- Some lettuce varieties.
- Collard greens.
- Mâche.
- Certain overwintering onions.
However, winter survival depends on plant variety, local climate, maturity, and the severity of cold weather.
A cover may extend the harvest, but it does not provide the same protection as a heated greenhouse.
Using a Double-Layer Cover
In some cold-season systems, gardeners use two layers of protection.
For example:
- A breathable row cover close to the crops.
- A larger supported tunnel above it.
This can provide additional insulation.
However, the outer tunnel still requires ventilation during warm periods.
Do not assume a double cover guarantees protection during extreme winter temperatures.
Protecting Empty Raised Beds in Winter
If the bed will remain empty, protecting the soil surface is often more important than installing a greenhouse-style tunnel.
You can use:
- Shredded leaves.
- Clean straw.
- Suitable organic mulch.
- A cover crop adapted to your region.
- Another appropriate soil-protection method.
These options can reduce bare-soil exposure and help manage erosion.
A breathable organic mulch is often preferable to keeping empty soil sealed beneath plastic all winter.
Should You Cover Raised Beds With a Tarp for Winter?
A tarp can be used temporarily for certain soil-management purposes.
However, an impermeable tarp blocks rainfall and airflow at the soil surface.
It may also collect water or create unwanted conditions if installed poorly.
For routine winter soil protection, organic mulch or a cover crop is often more suitable.
What About Snow?
Snow can provide some insulation to the soil, but heavy accumulation can damage weak hoop structures.
Do not assume a lightweight PVC tunnel can safely support heavy snow or ice.
If your area experiences substantial snow loads, use a structure specifically designed for those conditions.
Remove or secure temporary covers before severe weather when appropriate.
Key Takeaway: Use frost fabric or an appropriate low tunnel for living winter crops. For empty beds, protect the soil with mulch or a suitable cover crop.
Should You Cover a Raised Garden Bed When It Rains?
Not always.
Vegetable plants generally need water, and normal rainfall can be beneficial.
However, temporary rain protection may be useful during prolonged wet weather.
When Rain Protection Makes Sense
Consider a rain shelter when:
- Extended heavy rainfall is expected.
- Delicate plants may suffer physical damage.
- You need to reduce direct rainfall on certain crops.
- The bed is already excessively wet.
- A crop-management plan requires more precise moisture control.
However, covering the plants does not solve poor drainage.
If the soil stays waterlogged, investigate the underlying drainage conditions.
Best Cover for Rain
A supported clear plastic roof can prevent direct rainfall.
Leave the sides open or provide suitable ventilation.
Avoid trapping excessive humidity around foliage.
A fully enclosed plastic tunnel may create a warm, damp environment favorable to some plant diseases.
Do You Need to Water Under a Rain Cover?
Yes.
An impermeable plastic cover prevents most rainfall from reaching the soil directly.
Check soil moisture regularly.
Use a watering can or drip irrigation system as needed.
How to Build a Hinged Raised Garden Bed Cover
A hinged cover is useful when you want a more permanent enclosure.
It can make everyday gardening easier than repeatedly removing loose fabric.
Materials for a Hinged Cover
Depending on the design, you may need:
- Exterior-grade wood or suitable framing material.
- Corrosion-resistant hinges.
- Compatible screws.
- Insect mesh or suitable wire hardware cloth.
- Latches.
- Support braces.
- A suitable cover panel.
- Measuring and cutting tools.
Choose materials that can withstand outdoor conditions.
Basic Construction Steps
- Measure the raised bed.
- Build a rectangular frame to fit the top.
- Add cross supports if needed.
- Attach the selected mesh or covering.
- Install hinges on one side.
- Secure the hinges to suitable framing.
- Add a latch.
- Install a lid support or stay.
- Test opening and closing.
The lid should not be so heavy that it strains the raised-bed walls.
When a Hinged Cover Works Best
A hinged mesh lid is particularly useful for:
- Bird protection.
- Squirrel protection.
- Small animal exclusion.
- Seedling protection.
- Small raised beds requiring frequent access.
For a large raised bed, several smaller hinged panels may be easier to operate than one oversized lid.
Make sure the cover can be secured in the open position so it cannot fall unexpectedly.
How to Water Plants Under a Raised Bed Cover
Watering depends on whether the covering material allows rain through.
Watering Under Row Cover Fabric
Most breathable garden row covers permit some water to pass through.
You may be able to water through them.
However, check that the water actually reaches the soil.
Very dense fabric or poor installation can affect distribution.
Watering Under Insect Netting
Insect netting usually allows rain and irrigation water through.
Water can often be applied without removing the cover.
However, use a gentle spray around delicate seedlings.
Watering Under Plastic
Clear plastic is not permeable to rain.
You will need to:
- Open the cover for watering.
- Use drip irrigation beneath it.
- Install another suitable irrigation system.
Avoid allowing water to collect on top of unsupported plastic.
Using Drip Irrigation
Drip irrigation works well beneath many raised-bed covers.
It delivers water directly to the soil without requiring the entire cover to be removed.
A basic system may include:
- Supply tubing.
- Drip line.
- Appropriate connectors.
- A suitable filter.
- Pressure regulation when required.
- A timer, if desired.
Check soil moisture rather than relying solely on a timer.
How Much Does It Cost to Cover a Raised Garden Bed?
The cost depends on the covering material, bed size, frame construction, and whether you want a temporary or permanent system.
A simple fabric cover is generally less expensive than a rigid framed structure.
Cost Comparison by Cover Type
| Cover type | General cost level | Installation effort |
| Floating row cover without hoops | Low | Easy |
| Wire hoops with frost fabric | Low to moderate | Easy |
| PVC hoop tunnel | Low to moderate | Easy to moderate |
| Insect netting tunnel | Low to moderate | Easy |
| Shade cloth with supports | Moderate | Easy to moderate |
| Plastic low tunnel | Moderate | Moderate |
| Hinged mesh cover | Moderate to high | Moderate |
| Framed cold cover with polycarbonate | Higher | Moderate to advanced |
Actual prices vary by material quality, dimensions, and local availability.
When comparing products, also consider durability and replacement costs.
A reusable cover may provide better long-term value than a thin material that tears after one season.
Common Mistakes When Covering Raised Garden Beds
Avoid these problems to keep plants healthy and the structure functional.
Using Plastic Without Ventilation
A sealed plastic cover can become very hot in sunshine.
Provide vents and monitor internal temperature.
Using Frost Cloth for Summer Shade
Frost cloth is primarily designed for cold protection and sometimes insect exclusion.
It does not necessarily provide the same light and heat management as proper shade cloth.
Choose material based on the season.
Leaving Gaps Under Insect Netting
Small openings may allow pests to enter.
Secure all edges, corners, and attachment points.
Forgetting About Pollination
Insect-proof covers also exclude beneficial pollinators.
Remove or open covers when insect-pollinated crops require access to their flowers.
Letting Fabric Rub Against Plants
Wind can cause loose material to damage tender foliage.
Use hoops for plants that need additional clearance.
Making the Frame Too Weak
Lightweight hoops are not automatically suitable for severe wind, heavy rain, or snow.
Use appropriate supports and anchors.
Covering Plants That Already Have Pests
A cover may trap existing insects inside the bed.
Inspect and manage pests before installation.
Using the Wrong Mesh for the Target Pest
A large-mesh cover may stop moths but allow smaller insects through.
Choose an opening size suitable for the pest.
Failing to Check Soil Moisture
Covers change watering conditions.
Plastic blocks rainfall, while fabric may allow water through.
Monitor soil moisture beneath the material.
Leaving Covers on After Plants Outgrow Them
A tunnel that fits seedlings may become too small for mature plants.
Adjust or remove the cover as plants develop.
When Should You Remove a Raised Garden Bed Cover?
The right time depends on why the cover was installed.
Remove Frost Protection When Cold Risk Passes
Once the weather is consistently suitable for the crop, heavy frost protection may no longer be necessary.
Remove or vent the cover to prevent overheating.
Open Insect Covers When Pollination Is Needed
For insect-pollinated vegetables, access to flowers is important.
Cucumbers, squash, and pumpkins are common examples.
Remove or open the cover at the appropriate stage.
Remove Shade Cloth When Temperatures Cool
A shade cloth that helps during summer heat may reduce useful sunlight during cooler weather.
Adjust it when conditions change.
Replace Damaged Netting
Torn fabric may no longer exclude insects or animals effectively.
Repair small damage when appropriate or replace the material.
Remove Temporary Covers During Severe Weather
If strong winds or heavy snow are expected, assess whether the structure can safely remain installed.
Remove temporary materials when they cannot withstand the forecast conditions.
Key Takeaway: Raised-bed covers are management tools, not permanent set-and-forget installations. Adjust them according to crop growth, weather, pollination, and pest pressure.
Conclusion
Learning how to cover a raised garden bed starts with identifying what the plants need protection from.
For frost, use a suitable row-cover fabric. For insects, install fine mesh with securely closed edges. For birds and small animals, consider a sturdy framed enclosure. For summer heat, use appropriate shade cloth.
A simple hoop tunnel is a practical choice for many home gardeners because the covering material can be changed throughout the year.
Measure the bed, install stable hoops, leave enough room for plant growth, and secure the fabric properly.
Remember that plastic requires ventilation, insect covers can interfere with pollination, and winter covers may need stronger support.
My recommendation is to start with a removable hoop frame and keep separate covers for frost protection and insect control.
This gives you a flexible system that can protect vegetables through different growing conditions without requiring a full greenhouse.
FAQs About How to Cover a Raised Garden Bed
What Is the Best Material to Cover a Raised Garden Bed?
The best material depends on the purpose. Use frost cloth for cold protection, fine insect mesh for pest exclusion, shade cloth for excessive sunlight, and properly ventilated greenhouse plastic for a low tunnel. No single material is ideal for every condition.
How Do You Cover a Raised Garden Bed for Winter?
For living winter crops, install a suitable frost cover or cold-weather tunnel. For an empty bed, use organic mulch or an appropriate cover crop to protect the soil. In snowy climates, make sure any overhead structure can handle expected weather loads.
Can You Cover a Raised Garden Bed With Plastic?
Yes. Clear plastic can create a warmer growing environment and protect plants from direct rainfall. However, it should be supported by hoops or framing and provided with ventilation. A sealed plastic cover can overheat quickly in sunlight.
How Do You Cover a Raised Garden Bed to Keep Animals Out?
Use a sturdy mesh enclosure or appropriately designed fencing. A hinged wire-mesh cover can help deter squirrels, rabbits, and birds from small beds. Lightweight insect fabric is not usually strong enough for larger animals.
Can You Water Through a Raised Bed Cover?
You can often water through breathable row-cover fabric and insect netting. Clear plastic blocks most rain and irrigation water, so it generally requires opening the cover or using irrigation underneath. Always check the soil moisture after watering.
Do You Need Hoops to Cover a Raised Garden Bed?
Not always. Lightweight floating row covers can sometimes rest loosely on low-growing plants. However, hoops reduce fabric contact, improve plant clearance, and provide a useful frame for interchangeable materials. Plastic film should generally be supported above the crops.
Should I Leave My Raised Garden Bed Covered All the Time?
Not necessarily. Covers should be adjusted for weather, crop growth, and pollination. Remove heavy frost cloth when temperatures become consistently warm, open insect netting when pollinators need access, and ventilate plastic tunnels to prevent overheating.

I’m Maya L. Greenwood, a lifelong plant lover who believes anyone can grow something beautiful with the right guidance. After years of testing soil mixes, pruning methods, irrigation tricks, and pest-safe solutions, I started EasyGardenTips.com to turn hard-won lessons into step-by-step advice. From seed starting and container gardens to composting and seasonal checklists, my goal is to make gardening simple, sustainable, and fun.