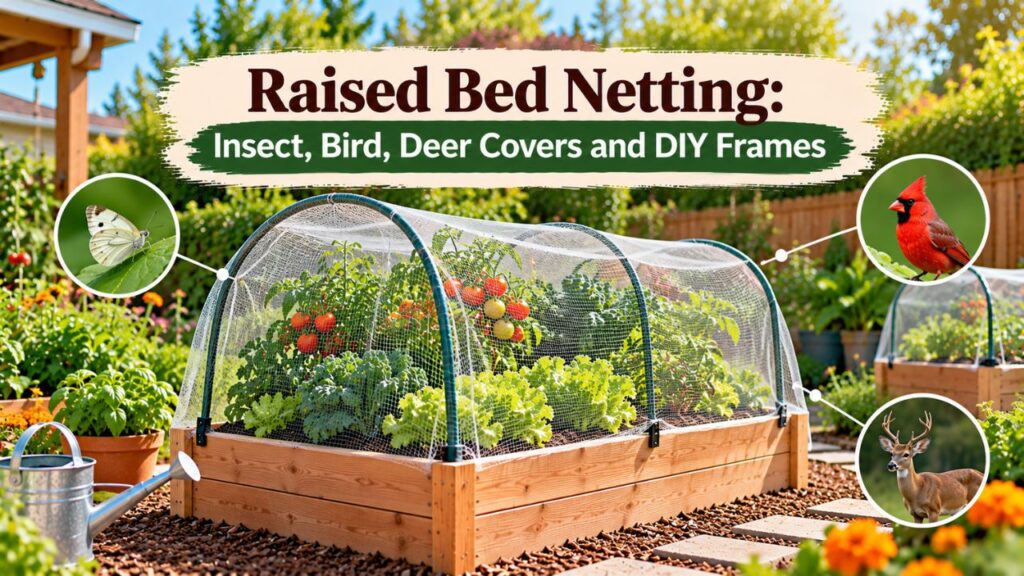
Raised Bed Netting: Insect, Bird, Deer Covers and DIY Frames
Raised bed netting is a protective mesh installed over or around raised garden beds to keep insects, birds, and larger animals away from plants without blocking essential sunlight and airflow. The best netting depends on the pest: fine insect mesh blocks small insects, bird netting protects ripening crops, and stronger fencing or reinforced enclosures help prevent deer damage.
A simple netting system usually consists of flexible hoops or a rigid frame covered with mesh. The covering must be secured along the edges so pests cannot enter underneath, while remaining easy to open for watering, harvesting, and plant care.
However, not every type of garden netting serves the same purpose. Ordinary bird netting has openings that are too large to exclude many insects, and lightweight insect mesh is not strong enough to resist a determined deer.
Poor installation can also create problems. Loose netting may trap wildlife, unsupported mesh can damage plants, and tightly sealed insect covers can prevent pollinators from reaching flowers.
This guide explains the different types of raised bed netting, how to choose suitable mesh, build a DIY frame, install protective covers, and maintain them safely throughout the growing season.
How to Choose Raised Bed Netting for Different Pests
The first step is identifying which animals or insects are damaging your plants.
Different pests require different mesh openings, materials, and supporting structures.
A fine mesh designed to exclude cabbage moths works differently from a larger-opening net intended to keep birds away from strawberries.
| Netting Type | Main Protection | Recommended Structure |
| Fine insect mesh | Aphids, flea beetles, cabbage moths, and other insects, depending on mesh size | PVC hoops or a lightweight frame |
| Bird netting | Birds feeding on seedlings and ripening fruit | Raised hoops or a supported cage |
| Deer netting | Deer browsing and entering garden areas | Tall, sturdy perimeter fence |
| Hardware cloth | Rabbits, rodents, and certain digging animals, depending on gauge and opening size | Rigid frame or secured barrier |
| Floating row cover | Insects, wind, and limited cold-weather protection | Directly over suitable plants or supported by hoops |
| Shade cloth | Excessive sunlight and heat | Raised support frame |
Fine Mesh for Small Insects
Fine insect netting has small openings designed to prevent targeted insects from reaching the plants.
It is useful for protecting leafy vegetables, brassicas, and young seedlings.
Mesh opening size matters because very small pests can pass through coverings designed for larger insects.
Choose a product that specifically identifies the pests it is intended to exclude.
Larger Mesh for Birds
Bird netting typically has larger openings than insect mesh.
This allows air and light to reach the plants while creating a physical barrier against birds.
However, loosely installed netting can entangle birds and other wildlife.
A well-supported, securely fastened covering is safer and more effective than draping loose netting directly over plants.
Stronger Netting for Deer
Deer require a different approach because they can jump over short barriers or push into lightweight structures.
Ordinary insect mesh and bird netting should not be relied on for serious deer exclusion.
A tall perimeter fence or sufficiently sturdy, fully enclosed cage is generally more appropriate.
Insect Netting for Raised Beds: Types and Mesh Selection
Insect netting for raised beds works by physically preventing pests from reaching plant leaves, stems, and growing points.
Unlike insecticides, the barrier does not need to kill the insects. It prevents access when correctly installed before pests enter the protected area.
Insect mesh can be particularly useful for vegetables that regularly experience damage from leaf-feeding insects.
Which Insects Can Raised Bed Netting Stop?
Depending on the mesh size, insect netting can help exclude:
- Cabbage white butterflies and other moths
- Flea beetles
- Cucumber beetles
- Leafminers that lay eggs on exposed leaves
- Aphids
- Whiteflies
- Thrips when sufficiently fine mesh is used
- Other flying pests larger than the mesh openings
Not every mesh excludes every insect.
For example, a net that blocks cabbage butterflies may still allow much smaller insects through its openings.
Also, netting does not eliminate pests already living inside the protected area.
Choosing the Right Insect Mesh Size
The smaller the insect, the finer the mesh generally needs to be.
However, extremely fine mesh may reduce airflow more than a coarser material.
| Target Pest | Suitable Mesh Selection |
| Cabbage butterflies and larger moths | Fine garden insect barrier |
| Cucumber beetles | Mesh specifically rated to exclude beetles |
| Flea beetles | Fine insect-exclusion mesh |
| Aphids and whiteflies | Finer mesh appropriate to the species |
| Thrips | Very fine insect mesh designed for thrips exclusion |
Check the manufacturer’s stated mesh opening dimensions and pest-exclusion claims.
A material sold as bird netting is usually not an adequate substitute for insect-proof mesh.
Is Insect Netting Better Than Floating Row Cover?
Both materials can protect raised bed vegetables, but they have different characteristics.
Insect mesh is usually a woven or knitted material with visible openings. It is particularly useful during warm weather when airflow is important.
Floating row cover is commonly a lightweight, nonwoven fabric that permits light and water to pass through while offering insect exclusion and some weather protection.
According to the University of Maryland Extension’s vegetable garden weather and pest protection guidance, insect mesh can be preferable during summer when conventional row covers may create excessive heat. The guidance also recommends supporting heavier insect mesh above plants with a frame.
For warm-season raised beds, properly selected insect mesh is often the more practical long-term barrier.
Bird Netting for Raised Beds: Protecting Seeds and Fruit
Bird netting is useful when birds disturb newly planted beds or feed on ripening vegetables and berries.
Strawberries, blueberries, and other soft fruits can attract birds as the fruit begins to ripen.
Birds may also disturb young seedlings or freshly planted seeds.
Best Bird Netting for Raised Garden Beds
Choose a durable, weather-resistant covering that can be supported securely above the plants.
The most important features include:
- A mesh suitable for excluding the target birds
- Sufficient strength to remain intact outdoors
- A design that can be held taut
- Limited loose material near the ground
- Easy access for harvesting
- Enough clearance to keep birds from reaching fruit through the openings
Fine, taut mesh or a rigid mesh cage can reduce the risk of wildlife becoming entangled compared with loose, wide-opening netting.
Avoid flimsy products that easily stretch into loops around animals.
How to Install Bird Netting Over Strawberries
Strawberries are a common example of a crop that benefits from a supported protective cover.
Follow these steps:
- Install short hoops or a rectangular frame over the strawberry bed.
- Make the frame tall enough to remain above mature foliage and fruit.
- Select a bird-exclusion covering that fits the entire frame.
- Drape the material over the supports without leaving sagging sections.
- Secure the covering along all four sides.
- Add an opening that allows fruit to be harvested without dismantling the structure.
- Inspect the netting regularly for damage or trapped wildlife.
The cover should not rest directly against ripening strawberries.
Birds may be able to reach fruit through the mesh if the material is in contact with the plants.
Can Birds Get Trapped in Garden Netting?
Yes. Poorly installed bird netting can entangle birds, small mammals, snakes, and other animals.
The risk increases when the netting hangs loosely, forms loops, or lies unsecured on the ground.
To reduce the hazard:
- Keep the covering supported and taut.
- Secure all loose edges.
- Avoid leaving excess material gathered near the ground.
- Inspect the enclosure at least daily.
- Repair holes and damaged sections promptly.
- Remove unnecessary netting after the protection period ends.
If an animal becomes entangled, contact a local wildlife rehabilitator or animal rescue service. Trying to free a distressed wild animal without proper handling knowledge can injure both the animal and the rescuer.
Deer Netting for Raised Garden Beds
Deer can damage vegetable plants by feeding on leaves, tender stems, and developing crops.
Unlike smaller pests, deer may reach over a low raised bed or enter the surrounding garden.
A protective covering must account for their size, strength, and jumping ability.
Is Ordinary Raised Bed Netting Strong Enough for Deer?
Usually not.
Thin insect mesh and lightweight bird netting are designed for smaller animals.
They may tear or collapse if a deer pushes against them.
For reliable deer protection, use a purpose-built deer fence or a sturdy enclosure designed to withstand contact from large animals.
How Tall Should Deer Netting Be?
For gardens experiencing substantial deer pressure, a tall perimeter fence is often more dependable than individual low covers.
The University of Maryland Extension’s 2026 deer damage management guidance identifies 8–10-foot woven or welded wire fencing as a highly reliable long-term exclusion method. It also discusses plastic mesh fencing as a less durable but potentially effective alternative.
A lower fence may discourage some deer, particularly around compact areas, but it does not provide the same level of protection.
How to Install Deer Netting Around Raised Beds
For a garden containing several raised beds, a perimeter enclosure is often more practical than constructing tall fencing around every individual bed.
A basic installation involves:
- Measure the garden perimeter.
- Mark the locations of fence posts and the entrance.
- Choose posts strong enough to support the required fence height.
- Install the posts according to the selected fencing system.
- Attach the deer netting or fence material securely.
- Keep the bottom edge closed so animals cannot enter underneath.
- Install a gate that closes securely.
- Check the fence regularly for damage or loose sections.
The posts, supports, and fasteners should match the intended fence material and local wind conditions.
Check local rules before building a tall perimeter fence, particularly near property boundaries.
Can You Use a Small Deer-Proof Cage Over One Raised Bed?
Yes, a fully enclosed rigid cage can protect an individual raised bed when it is properly designed.
A sturdy enclosure may be more practical than an 8-foot perimeter fence when only one small bed needs protection.
However, the structure must be strong enough to resist contact and prevent deer from reaching plants through the sides.
A simple low PVC hoop tunnel covered with lightweight bird netting is not an equivalent substitute.
Raised Bed Netting Frame: DIY Design Options
A frame keeps the netting above plants and provides attachment points for securing the covering.
There are three common frame designs suitable for raised garden beds.
1. PVC Hoop Frame
PVC hoops are flexible supports that curve over the bed.
They are a practical choice for insect mesh, lightweight row cover, and certain bird netting installations.
Advantages include easy assembly, low weight, and the ability to remove the hoops when they are no longer needed.
However, lightweight PVC frames are not intended to withstand heavy snow or substantial pressure from large animals.
2. Wooden Rectangular Frame
A wooden frame creates a box-shaped structure above the planting area.
It can support fine mesh, bird netting, or suitable rigid screening.
A rectangular frame is particularly helpful when plants need more vertical clearance.
It also allows the installation of hinged lids or removable panels.
However, a large wooden frame becomes heavier than a PVC hoop structure and requires stronger corner connections.
3. Metal Hoop or Wire Frame
Metal hoops can provide a compact support system.
Heavy-gauge wire is suitable for some small low tunnels, while properly shaped metal conduit can be used for more substantial structures.
Metal frames are often useful when repeated seasonal installation and removal are expected.
Choose materials with adequate strength and corrosion resistance.
For taller or wider structures, additional bracing may be necessary.
How to Build a PVC Raised Bed Netting Frame
A simple PVC hoop frame is an accessible DIY project for a standard 4-by-8-foot raised garden bed.
The frame supports insect mesh or bird netting above the plants without requiring a permanent wooden structure.
Materials for a 4-by-8-Foot Raised Bed
Prepare the following materials:
- Flexible ½-inch PVC pipe for the hoops
- Short ¾-inch PVC sections for mounting sleeves, provided the pipes fit together
- Suitable conduit straps or pipe clamps
- Exterior-rated screws
- Drill and screwdriver
- Measuring tape
- PVC cutting tool
- Insect mesh or bird netting
- Snap clamps or suitable fastening clips
- Optional lightweight ridge support
For a typical low tunnel, four or five hoops may provide a useful starting arrangement along an 8-foot bed.
Final spacing should depend on the covering material and expected weather.
Step 1: Measure the Raised Garden Bed
Measure the outside width and length of the bed.
Determine how high the frame needs to stand above the soil.
For low-growing vegetables, a tunnel around 15–30 inches high may be appropriate.
Taller plants require more clearance.
Check the mature plant height rather than designing the frame only around the size of new seedlings.
Step 2: Mark the Hoop Positions
Mark corresponding positions along both long sides of the frame.
Each hoop should connect two points directly opposite one another.
Spacing of approximately 2–4 feet is a practical starting range for a lightweight low tunnel.
For a standard 8-foot bed, four or five hoops offer several support points without requiring an excessive amount of material.
Closer spacing may be necessary where the covering needs additional support.
Step 3: Attach the PVC Mounting Sleeves
Cut the ¾-inch PVC into short sections suitable for holding the hoop ends.
Secure each sleeve to the wooden raised bed wall using appropriate conduit straps.
Keep the sleeves aligned vertically.
Make sure the screws and attachments are suitable for outdoor use.
For metal raised beds, use compatible brackets or freestanding supports rather than drilling into coated metal panels unnecessarily.
Step 4: Bend and Install the Hoops
Cut flexible PVC pipe into lengths that create the intended arch.
The necessary length depends on the bed width and desired height.
Insert one end into a mounting sleeve.
Carefully bend the pipe across the bed and insert the opposite end into its matching sleeve.
Repeat until all hoops are installed.
Avoid forcing brittle or unsuitable pipe into an excessively tight curve.
Step 5: Stabilize the Frame
Check whether the hoops remain upright and evenly spaced.
A lightweight ridge support along the top can help maintain alignment.
For example, a suitable line or lightweight connector can link the upper sections of the arches.
However, the frame still needs adequate attachment to resist wind.
Do not rely on a thin line to turn a lightweight hoop frame into a snow-rated structure.
Step 6: Install the Netting
Place the selected mesh over the completed frame.
Keep it centered so sufficient material extends along both sides and ends.
Secure the netting with compatible clips.
Close the edges using appropriate fasteners, boards, weights, or other anchors.
Make sure the covering can be opened for maintenance.
The finished frame should hold the netting above the plants without leaving accessible gaps or loose material that could trap wildlife.
How to Put Netting Over Raised Beds Correctly
Installing the netting properly is just as important as choosing the material.
An uncovered gap along the bed edge can allow insects or animals to enter even when the mesh itself is suitable.
Step 1: Inspect the Plants Before Covering
Examine both sides of the leaves.
Look for visible insects, eggs, caterpillars, and other pest activity.
Remove pests already present when appropriate.
Installing a protective cover over an existing infestation may trap the pests with the plants.
Some insects also emerge from the soil after overwintering, so netting alone may not prevent problems when pests are already beneath the covering.
Step 2: Install the Support Frame
Choose a hoop or rectangular frame that suits the crop height.
Make sure the structure is securely attached and does not lean.
Leave enough space between the mesh and plants to prevent rubbing and allow growth.
Step 3: Measure and Cut the Netting
Measure the actual frame rather than relying only on the garden bed’s width and length.
For a hoop tunnel, measure from one lower attachment point, over the arch, to the opposite attachment point.
Add enough material for secure fastening.
Also measure the full length of the bed and include enough material to close both ends.
The shape of the arch determines the required netting width.
Step 4: Drape the Mesh Over the Frame
Place the netting over the top of the structure.
Center it and distribute the extra material evenly.
Avoid twisting the mesh or pulling it so tightly that the frame bends.
For bird netting, remove folds and loops that could catch wildlife.
For fine insect mesh, make sure the covering extends far enough to close every side.
Step 5: Secure All Four Sides
Use appropriate clips, landscape staples, fasteners, or weighted boards.
For raised beds with wooden sides, clamps or removable battens can provide convenient attachment points.
The edges should remain closed against the intended pest.
An insect barrier is much less useful if moths or beetles can enter underneath it.
Step 6: Create a Convenient Opening
Plan how the cover will be opened before fastening every edge.
Possible designs include:
- A roll-up side panel
- A removable end section
- A hinged wooden lid
- A detachable mesh cover
- Clips that can be released for harvesting
A convenient opening encourages regular plant inspection.
It also makes watering, pruning, and removing weeds easier.
Step 7: Inspect the Finished Installation
Check the entire enclosure for:
- Loose edges
- Tears or holes
- Sagging sections
- Unsecured fasteners
- Netting touching fruit
- Areas where animals could become trapped
- Insufficient room for growing plants
Make adjustments before leaving the cover in place.
How Much Netting Do You Need for a Raised Bed?
The correct quantity depends on the bed dimensions and the height and shape of the support frame.
A flat covering needs a different amount of material from a tall hoop tunnel.
Measuring Netting for a Rectangular Frame
For a box-shaped frame with netting over the top and four sides, calculate the required coverage from the frame’s actual dimensions.
For example, a frame measuring:
- 4 feet wide
- 8 feet long
- 2 feet high
has a top area of:
4 × 8 = 32 square feet
The two long sides require:
2 × (8 × 2) = 32 square feet
The two short sides require:
2 × (4 × 2) = 16 square feet
The total geometric covering area is:
32 + 32 + 16 = 80 square feet
This does not include fastening overlaps, trimming waste, doors, or additional material needed for secure edges.
Actual purchase quantity also depends on the width of the available netting roll.
Measuring Netting for a Hoop Tunnel
For a curved tunnel, use a flexible measuring tape to follow the arch.
Measure the distance from one lower edge, over the hoop, and down to the opposite lower edge.
Add sufficient allowance for securing the sides.
Then measure the tunnel length and add enough material to close the two ends.
This method is more reliable than assuming every 4-foot-wide bed uses the same netting width.
A taller arch requires more material than a low arch over the same bed.
Should You Buy Extra Netting?
A modest amount of extra material can be useful for fastening and repairs.
However, avoid leaving the extra mesh hanging loosely around the bed.
Trim unnecessary material or fasten it securely so it cannot form loops or traps for wildlife.
Raised Bed Netting and Pollination: When to Remove the Cover
One of the most important limitations of insect netting is its effect on pollination.
Fine mesh excludes beneficial insects along with pests.
This can interfere with crops that depend on bees or other insects to transfer pollen.
Crops That Can Remain Under Insect Netting
Some vegetables do not require insect visits for the harvested portion to develop.
Examples include:
- Lettuce
- Spinach
- Kale
- Cabbage
- Broccoli
- Many other leafy vegetables
These crops can often remain protected under suitable insect mesh throughout much of their growing period.
However, if the gardener intends to produce seeds from these plants, their flowering and pollination requirements may be different.
Crops That Need Pollinator Access
Many fruiting crops benefit from or require insect pollination.
Examples include:
- Squash
- Zucchini
- Pumpkins
- Many cucumber varieties
- Melons
- Strawberries
For these plants, remove or open fine insect netting when flowers need pollination.
Some specialized varieties produce fruit without fertilization, but this should not be assumed for ordinary garden varieties.
Hand pollination may be possible for certain crops, although it adds maintenance work.
Does Bird Netting Block Pollinators?
Bird netting with relatively large openings may allow many pollinating insects to enter.
However, the actual effect depends on mesh size and installation.
Fine bird-exclusion mesh may also limit insect access.
When growing flowering crops, choose a system that balances bird protection with pollination needs.
For example, strawberries may benefit from bird protection as the fruit ripens, but access during flowering should also be considered.
How to Water and Maintain Plants Under Raised Bed Netting
A protective cover should not prevent routine garden care.
The plants still need water, sunlight, airflow, and monitoring.
Watering Through Insect Mesh
Most open insect mesh allows rain and irrigation water to pass through.
However, water distribution may change depending on the material and how the cover is positioned.
Check the soil moisture beneath the cover rather than assuming every rainfall reaches the root zone adequately.
A drip irrigation system or soaker hose beneath the covering can simplify watering.
Preventing Excessive Heat
Fine mesh usually provides better ventilation than clear plastic or certain dense row covers.
However, airflow can still be reduced, especially under very fine screening.
Inspect plants during hot weather.
If the enclosed area becomes excessively warm, consider a more breathable material, additional ventilation, or a different pest-management approach.
Do not use clear plastic as a substitute for insect mesh during hot weather without managing ventilation.
Checking for Insects Inside the Cover
Inspect plants regularly even after installing the barrier.
Look for:
- New feeding damage
- Insect eggs
- Caterpillars
- Aphid colonies
- Damaged leaves
- Signs of disease
Remove pests when appropriate and close the covering again.
Cleaning and Storing Netting
At the end of the growing season, remove the netting if it is no longer needed.
Shake off loose debris and clean it according to the manufacturer’s instructions.
Allow it to dry before storage.
Fold or roll the material neatly and place it in a protected container away from rodents and sharp objects.
Inspect older mesh before reusing it.
Sunlight, weather, and repeated handling can weaken synthetic materials over time.
Common Raised Bed Netting Problems and Solutions
Several installation mistakes can make a protective covering ineffective or unsafe.
Using Bird Netting to Stop Tiny Insects
Ordinary bird netting often has openings large enough for small insects to pass through.
Choose fine insect mesh when the goal is to exclude aphids, flea beetles, or similar pests.
Leaving Gaps Along the Bottom
Insects and animals may enter through loose edges.
Fasten the covering around the full perimeter and check after windy weather.
Installing Netting After an Infestation Starts
Netting prevents entry but does not automatically eliminate insects already present.
Inspect plants before covering them and address existing pests.
Allowing Netting to Touch Ripening Fruit
Birds may reach fruit through the mesh when it rests directly on the plant.
Raise the covering above the crop using hoops or a cage.
Leaving Loose Netting Near the Ground
Loose material can trap wildlife.
Keep the mesh supported, tensioned, and secured along its edges.
Remove damaged sections immediately.
Forgetting About Pollination
Fine insect netting may exclude bees from flowering crops.
Open or remove it when insect pollination is necessary.
Using Weak Hoops for Deer Protection
Lightweight PVC hoops are intended for suitable garden covers, not for resisting large animals.
Use reinforced cages or deer fencing where deer damage is a serious problem.
Building a Frame Too Low for Mature Plants
A cover that fits new seedlings may become restrictive as plants grow.
Allow enough space for mature foliage and normal growth.
Adjust or remove the covering when plants outgrow the structure.
Which Raised Bed Netting Setup Is Best for Your Garden?
The most appropriate setup depends on the primary pest, bed dimensions, and expected maintenance.
| Gardening Situation | Recommended Setup |
| Cabbage and kale attacked by caterpillars | Fine insect mesh over PVC hoops |
| Lettuce damaged by flea beetles | Fine insect barrier with sealed edges |
| Strawberries eaten by birds | Taut, supported bird netting or a rigid mesh cage |
| Young seedlings disturbed by birds | Lightweight supported bird-exclusion cover |
| Several raised beds visited by deer | Tall, purpose-built perimeter deer fence |
| One small bed exposed to deer | Strong, fully enclosed protective cage |
| Raised bed needing frequent access | Hinged or removable framed cover |
| Hot-weather insect protection | Breathable insect mesh with appropriate ventilation |
For most small vegetable beds experiencing insect damage, a removable PVC hoop frame with properly fitted insect mesh is a practical starting choice.
For fruiting crops exposed to birds, a supported cage with safe, taut netting may be more useful.
For deer, invest in an appropriately strong structure rather than relying on lightweight garden mesh.
Conclusion
Raised bed netting provides a practical way to protect vegetables, herbs, and fruits from pests without relying entirely on chemical treatments.
Fine insect mesh is useful for excluding small insects, while properly supported bird netting can help protect seedlings and ripening fruit. Deer require stronger protection, usually through tall fencing or a reinforced enclosure.
A DIY frame made from PVC hoops, wood, or suitable metal supports can keep the covering above plants and make maintenance easier.
For reliable protection, install the mesh before pests enter, close the edges, provide enough space for plant growth, and maintain access for watering and harvesting.
Pay attention to pollination and wildlife safety. A protective net that restricts beneficial insects or entangles animals creates problems of its own.
The best system is one that matches the pest, protects the crop, and remains practical to inspect and maintain throughout the growing season.
FAQs About Raised Bed Netting
What is the best netting for raised garden beds?
Fine insect mesh is a good choice for beds affected by flying insect pests. Bird netting or a rigid mesh enclosure is more suitable for protecting fruit from birds, while deer usually require stronger fencing. The best material depends on the pest being excluded.
Can I put netting directly over raised bed plants?
Lightweight floating row covers can sometimes rest directly on suitable crops with enough slack for growth. However, insect mesh and bird netting generally work better over a support frame. Bird netting should be kept away from fruit to prevent birds from reaching through it.
How tall should a raised bed netting frame be?
A low tunnel approximately 15–30 inches tall can work for many young or compact vegetables. Taller crops need more clearance. Measure the expected mature plant height before building the frame.
Will insect netting keep birds out of raised beds?
Fine insect mesh can also act as a barrier against birds when it is properly supported and securely fastened. However, the frame and material must be strong enough for the expected contact, and any loose sections should be corrected to reduce wildlife entanglement risks.
Can bees get through raised bed insect netting?
Most fine insect-exclusion netting also blocks bees and other pollinators. Remove or open the covering when crops require insect pollination, or use an appropriate alternative pollination method when practical.
Can deer jump over raised bed netting?
Yes. Deer may jump over short barriers or push through weak netting. Tall perimeter fencing or strong, fully enclosed cages provide more dependable protection than ordinary low garden covers.
Can I leave netting on my raised beds all season?
Yes, for some crops, provided the covering allows suitable airflow, water, and plant growth and does not interfere with required pollination. Inspect the netting regularly for pests, damage, loose edges, and trapped wildlife. Remove it when protection is no longer necessary.

I’m Maya L. Greenwood, a lifelong plant lover who believes anyone can grow something beautiful with the right guidance. After years of testing soil mixes, pruning methods, irrigation tricks, and pest-safe solutions, I started EasyGardenTips.com to turn hard-won lessons into step-by-step advice. From seed starting and container gardens to composting and seasonal checklists, my goal is to make gardening simple, sustainable, and fun.