Plans for Raised Flower Beds: Layouts, Hoops, and Winter Care
The best plans for raised flower beds combine a manageable bed width, enough soil for flower roots, reliable drainage, and a layout that makes planting and maintenance easy. A rectangular bed measuring 3–4 feet wide and 6–8 feet long is a practical starting point, while a U-shaped design provides access to several planting areas from one central walkway.
Raised flower beds can be built from wood, galvanized steel, stone, or concrete blocks. The right material and dimensions depend on the available space, the flowers being grown, and whether the bed will remain planted through winter.
A good plan should also consider seasonal protection. Simple hoops made from PVC pipe or metal can support frost cloth, insect netting, or temporary plastic covers. However, covering a raised bed with plastic throughout winter is not always necessary or beneficial.
Whether you’re building a compact flower border or a larger U-shaped garden, careful planning helps prevent wasted soil, awkward access, poor drainage, and unnecessary construction costs.
This guide covers practical raised flower bed designs, building steps, soil requirements, DIY hoop supports, and winter protection choices for different growing conditions.
Plans for Raised Flower Beds That Fit Different Garden Spaces
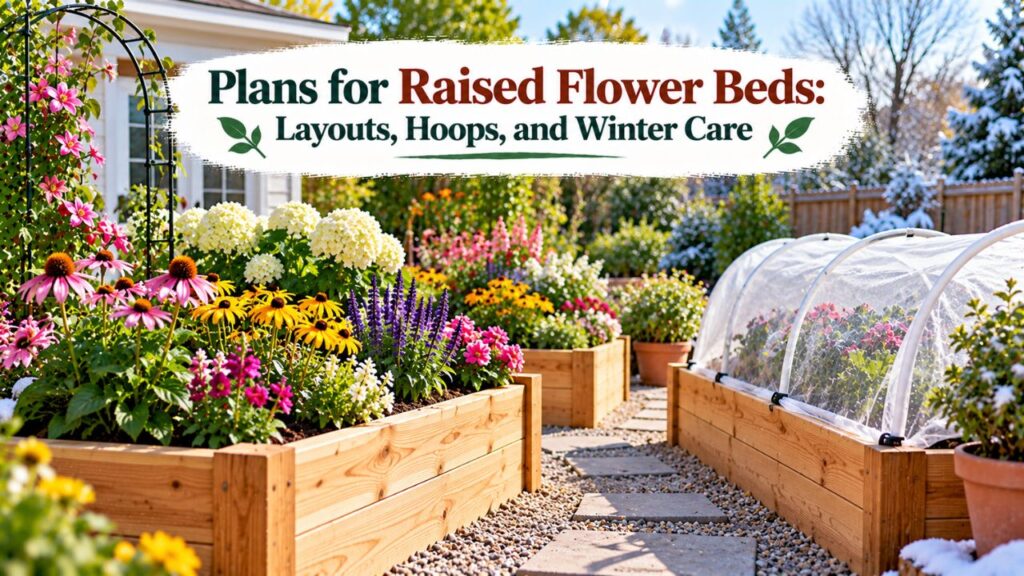
Raised flower beds can be designed in several shapes and sizes. The best layout depends on the available sunlight, mature plant sizes, access requirements, and the overall appearance you want.
Most home gardeners benefit from starting with a simple rectangular bed before attempting a more complicated shape.
| Raised Flower Bed Plan | Suggested Dimensions | Best Application |
| Small rectangular bed | 2 × 4 feet | Patios and compact flower displays |
| Medium rectangular bed | 3 × 6 feet | Mixed annual flowers |
| Large rectangular bed | 4 × 8 feet | Backyard cutting gardens |
| Square flower bed | 4 × 4 feet | Small ornamental gardens |
| Narrow border bed | 2 × 8 feet | Fences and walkways |
| U-shaped raised bed | 8 × 8 feet overall | Larger gardens with central access |
These dimensions are practical examples rather than mandatory construction sizes.
Small Rectangular Raised Flower Bed Plan
A 2-by-4-foot raised flower bed provides 8 square feet of planting space.
This compact design is suitable for colorful annual flowers, smaller ornamental plants, and gardens with limited room.
A frame approximately 10–12 inches tall is a reasonable starting point when the bed sits over suitable natural soil.
Possible planting combinations include:
- Compact marigolds
- Dwarf zinnias
- Sweet alyssum
- Short-growing salvias
- Selected seasonal bedding flowers
Choose plants according to their mature height and spacing needs.
A small bed becomes crowded quickly if it contains several vigorous, spreading flowers.
Medium Raised Flower Bed Plan
A 3-by-6-foot raised bed provides 18 square feet of growing area.
It offers more planting flexibility while remaining easy to reach from both long sides.
This size works well for mixed flower displays, especially when combining plants with different mature heights.
For example, taller upright flowers can occupy the center or back of the bed, while shorter flowers fill the edges.
The arrangement should depend on the directions from which people will view and maintain the garden.
Large Raised Flower Bed Plan
A 4-by-8-foot flower bed provides 32 square feet of growing area.
It is suitable for larger flower combinations and small cutting gardens.
The 4-foot width works best when both long sides are accessible.
The longer planting area can accommodate flowers with different blooming periods, helping maintain color through more of the growing season.
However, avoid treating the entire bed as one dense planting area.
Allow enough spacing for mature stems, airflow, and routine maintenance.
Narrow Raised Flower Border Plan
A narrow bed approximately 2 feet wide can work well beside a fence, patio, or walkway.
This is particularly useful when plants can only be reached from one side.
Low-growing flowers may be placed near the accessible edge, with taller plants positioned toward the back.
Avoid choosing plants that will spread far beyond the bed and block the surrounding path.
What to Consider Before Building a Raised Flower Bed
A successful raised flower bed starts with the site rather than the building materials.
Sunlight, soil conditions, drainage, and plant size influence how the bed should be constructed.
Choose a Location With Suitable Sunlight
Most popular sun-loving flowers need a location receiving substantial direct sunlight.
Zinnias, marigolds, cosmos, and many salvias generally perform well with around six or more hours of direct sunlight daily.
Other flowers tolerate or prefer partial shade.
Before building the frame, observe the intended location throughout the day.
Check for shade from:
- Buildings and fences
- Mature trees
- Nearby shrubs
- Garden structures
- Other tall plants
Select flowers based on the actual light conditions rather than trying to force sun-loving varieties into a shaded location.
Select the Right Raised Flower Bed Width
The bed should be narrow enough to reach without stepping onto the planting soil.
A width of 3–4 feet is suitable for many gardeners when both sides are accessible.
For beds against fences or walls, approximately 2 feet is usually more manageable.
The University of Maryland Extension’s raised-bed gardening guide describes common raised beds as approximately 2–4 feet wide and emphasizes keeping the planting area accessible from permanent surrounding paths.
Although its guidance focuses on vegetables, the same access and soil-management principles apply to raised flower beds.
Decide How Tall the Flower Bed Should Be
Raised flower bed height affects comfort, construction cost, and soil requirements.
| Frame Height | Practical Use |
| 6–8 inches | Low flower borders over suitable ground |
| 10–12 inches | Standard raised flower beds |
| 18–24 inches | Taller flower beds with additional contained soil |
| 30–36 inches | Standing-height gardening, depending on the gardener |
A 10–12-inch frame is a useful starting point for many flowers planted in an open-bottom bed.
However, roots can grow into the soil underneath when the ground is suitable.
An elevated planter with an enclosed bottom needs enough contained soil for the selected plants.
Larger perennials and shrubs may require more rooting space than compact annual flowers.
Leave Enough Space Around the Bed
Walking paths should allow comfortable movement while watering, pruning, and removing spent blooms.
A path approximately 2 feet wide may be workable for routine access.
Wider paths are helpful when using wheelbarrows or gardening equipment.
For accessible gardening, walkway width and turning space should be planned around the individual user’s needs.
How to Build a Simple 4-by-8-Foot Raised Flower Bed
A wooden rectangular bed is one of the easiest raised flower bed plans to construct.
The following example creates an open-bottom frame with nominal outside dimensions of 4 by 8 feet.
It is intended for placement on suitable natural ground.
Materials for a 4-by-8-Foot Flower Bed
For a frame approximately 11¼ inches high, you can use:
- Three 2×12×8-foot boards suitable for outdoor use
- Four short wooden corner supports
- Exterior-rated corrosion-resistant screws
- Measuring tape
- Carpenter’s square
- Level
- Saw
- Drill and appropriate bits
- Work gloves and safety glasses
- Suitable topsoil and finished compost
A nominal 2×12 board is typically about 11¼ inches wide and 1½ inches thick.
Cedar and other naturally durable woods are common choices for outdoor garden beds.
Pressure-treated lumber suitable for residential ground contact is another option, but confirm the actual preservative type and intended application.
Step 1: Measure and Cut the Boards
Use two full 8-foot boards for the long sides.
Cut two 45-inch pieces from the third board.
When those shorter pieces fit between the two long boards, the frame will have an outside width of approximately 48 inches.
Measure the actual lumber thickness before cutting because dimensions can vary.
Cut the corner supports to fit inside the frame without extending above the top edge.
Step 2: Assemble the Rectangular Frame
Arrange the boards on a level working surface.
Position the shorter end boards between the long side boards.
Attach the boards to the corner supports using suitable exterior-rated screws.
Predrill when necessary to reduce splitting.
Check that the corners are square and that the frame sits evenly.
A taller or longer design may need additional bracing to prevent the sides from bowing after filling.
Step 3: Prepare the Ground
Move the assembled frame to the selected location.
Remove unwanted vegetation or manage it using a suitable smothering method.
Check whether the native soil is compacted.
If the soil is safe for gardening but difficult for roots to penetrate, carefully loosen the surface with a garden fork.
Avoid working saturated soil because doing so may damage its structure.
Step 4: Fill the Raised Flower Bed
Use a suitable growing mixture.
For many open-bottom beds, a practical starting blend is:
- Two parts quality loamy topsoil
- One part mature plant-based compost
Adjust the mixture according to the existing soil condition and the ingredients already present.
Avoid filling the bed entirely with unfinished compost or fresh organic waste.
Step 5: Water and Check the Frame
Water the soil gently so the material settles naturally.
Check that the frame remains level and that its sides do not bow outward.
Leave a little space beneath the top edge for mulch and watering.
Avoid compacting the soil by standing inside the bed.
Step 6: Arrange and Plant the Flowers
Place the potted flowers on the soil surface before planting.
This allows you to assess the arrangement and spacing.
Consider:
- Mature plant height
- Flower color
- Blooming period
- Sunlight requirements
- Spreading growth habits
- Access for deadheading and watering
After checking the layout, install the plants at their recommended spacing and planting depth.
U-Shaped Raised Garden Bed Plans for Larger Flower Gardens
A U-shaped raised garden bed offers an attractive alternative to separate rectangular beds.
Its main advantage is the central opening, which allows a gardener to reach multiple planting areas without walking through the soil.
This layout can work particularly well for flowers because the planting areas remain visible from several directions.
Example 8-by-8-Foot U-Shaped Raised Garden Bed Plan
Consider a U-shaped flower bed with the following dimensions:
| Measurement | Planned Dimension |
| Overall outside width | 8 feet |
| Overall outside depth | 8 feet |
| Width of each planting arm | 2 feet |
| Depth of the connecting rear section | 2 feet |
| Central opening width | 4 feet |
| Central opening depth | 6 feet |
| Nominal bed height | 12 inches |
| Approximate planting area | 40 square feet |
The central opening remains accessible from the front.
The two side arms extend forward from the rear connecting section, creating the U shape.
With these nominal dimensions, each planting strip is approximately 2 feet wide.
This keeps the growing areas within a comfortable reach from the internal walkway.
How Much Soil Does a U-Shaped Bed Need?
To estimate soil volume, calculate the outer rectangular area and subtract the central opening.
Outer area:
8 × 8 = 64 square feet
Central opening:
4 × 6 = 24 square feet
Planting area:
64 − 24 = 40 square feet
For a 12-inch-deep soil layer:
40 × 1 = 40 cubic feet
That equals approximately 1.48 cubic yards.
This calculation uses nominal plan dimensions. Actual soil volume will be slightly lower after allowing for the thickness of the frame walls and space below the rim.
How to Build a U-Shaped Raised Flower Bed
The simplest construction method is to create connected planting sections around a central opening.
- Mark the outside dimensions using stakes and string.
- Mark the center opening and confirm that it is wide enough for comfortable access.
- Prepare the ground beneath the planting sections.
- Cut the boards to create the outer perimeter and inner-facing walls.
- Secure the corners and junctions with appropriate supports.
- Install additional bracing where longer walls need reinforcement.
- Check the frame alignment and level.
- Fill the planting sections with a suitable growing mixture.
- Finish the central walkway with an appropriate path material.
For an integrated U-shaped frame, plan every inside and outside wall before cutting the lumber.
The total board length will depend on the actual board thickness, corner connections, and whether the sections share walls.
A simpler alternative is to arrange three separate rectangular raised beds in a U-shaped layout.
This avoids complicated internal corners and allows the beds to be moved or replaced individually.
Flower Arrangement for a U-Shaped Bed
A U-shaped garden can display flowers effectively from the central path and surrounding lawn.
For example:
Rear section: Upright flowering plants can create a focal point at the back of the U.
Side arms: Medium-height flowers can provide color along both sides of the walkway.
Inner edges: Compact flowers can soften the appearance of the path without obstructing access.
Outer corners: Selected ornamental plants can provide visual contrast, provided their mature spread fits the available space.
Avoid placing tall, spreading flowers along the inner walkway if they will interfere with movement.
Is a U-Shaped Raised Flower Bed Better Than Rectangular Beds?
A U-shaped design is useful when you want a connected garden layout with a central working area.
However, it requires more planning and can use more framing material than a simple rectangle of similar growing area.
Rectangular beds are usually easier to construct, replace, and rearrange.
Choose a U-shaped layout when its access and appearance justify the additional construction effort.
How to Make Hoops for Raised Beds
Hoops are curved supports installed over garden beds to hold protective coverings above plants.
They can support lightweight frost cloth, insect netting, shade cloth, or clear plastic.
For a raised flower bed, hoops are particularly useful when protecting young annuals from occasional cold weather or extending the growing season.
Materials Needed for DIY Raised Bed Hoops
A basic hoop system can be made using:
- Flexible ½-inch PVC pipe
- Short sections of larger PVC pipe for mounting sleeves
- Conduit straps or suitable mounting brackets
- Exterior-rated screws
- Plastic clips or snap clamps
- Measuring tape
- Saw suitable for cutting PVC
- Optional garden twine or a ridge support
- Frost cloth, row cover, or suitable greenhouse plastic
Galvanized wire or metal conduit can also be used instead of PVC.
For stronger tunnels exposed to substantial wind or snow, an engineered metal hoop system may be more appropriate.
Step 1: Measure the Raised Bed
Measure the width and length of the bed.
Determine how high the hoops need to rise above the flowers.
A low-growing flower bed needs less clearance than one containing tall, mature plants.
For many low-tunnel applications, the University of Maryland Extension’s weather and pest protection guidance describes hoops approximately 15–30 inches high, spaced 2–4 feet apart.
These dimensions provide a useful starting point for simple garden covers.
Step 2: Install Mounting Sleeves
For a wooden raised bed, attach short PVC sleeves to the inside walls using suitable conduit straps.
Position matching sleeves directly opposite one another.
For example, ¾-inch PVC sleeves can receive smaller ½-inch PVC hoops when the actual pipe sizes fit appropriately.
Check the fit before attaching all the sleeves.
For a ground-anchored system, another option is to bend PVC over properly installed rebar supports.
Keep exposed metal ends protected during assembly, and check for buried utilities before driving any stakes into the ground.
Step 3: Cut and Bend the PVC Hoops
Cut flexible PVC pipe into lengths that create the intended arch.
The required length depends on the bed width and the desired tunnel height.
For a 4-foot-wide bed, you can begin by assessing a flexible pipe length of approximately 7–8 feet, then adjust the design to achieve the required clearance.
Insert one end into a mounting sleeve.
Carefully bend the pipe across the bed and place the other end into the opposite sleeve.
Do not force unsuitable or brittle pipe into an excessively tight bend.
Step 4: Space the Hoops Evenly
For an 8-foot-long raised bed, four or five hoops can provide useful support for lightweight coverings.
Place the hoops at consistent intervals.
Closer spacing can reduce sagging, but the required spacing depends on the hoop material, cover weight, wind exposure, and expected weather.
The hoops should stand upright and remain securely anchored.
Step 5: Add a Covering Material
Choose the cover according to its purpose.
| Cover Material | Main Use |
| Lightweight row cover | Mild frost and insect protection |
| Medium-weight frost cloth | Cold-weather protection |
| Clear greenhouse plastic | Temporary low-tunnel warming |
| Insect netting | Pest exclusion without sealing the bed |
| Shade cloth | Protection from excessive sun and heat |
Drape the selected material over the hoops.
Leave sufficient material to secure the edges.
Use clips, clamps, or another suitable fastening method to prevent the cover from blowing away.
Keep clear plastic from resting directly against tender flowers during freezing weather.
Step 6: Provide Access and Ventilation
Design the cover so that one side can be opened easily.
This is particularly important when using clear plastic.
Sunlight can increase temperatures inside a closed tunnel even during cool outdoor weather.
Open or remove the plastic when necessary to prevent overheating and excessive condensation.
For flowers requiring insect pollination, provide access once blooms open.
Should I Cover My Raised Beds With Plastic in Winter?
You do not normally need to cover an empty raised flower bed or a dormant perennial bed with clear plastic throughout winter. Organic mulch is often a more suitable way to protect exposed soil, while plastic coverings are useful mainly when creating a managed low tunnel around actively growing plants.
The correct approach depends on whether the bed contains annuals, dormant perennials, tender plants, or no plants at all.
Covering an Empty Raised Flower Bed in Winter
An empty raised bed generally does not need to be sealed beneath a plastic sheet.
Bare soil benefits from protection against erosion, heavy rainfall, and repeated temperature changes.
A suitable organic mulch can provide that protection while allowing normal water movement.
Possible materials include:
- Shredded leaves
- Clean straw
- Suitable compost
- Other appropriate organic garden mulch
A temporary tarp may be used for a specific purpose, such as suppressing weeds or protecting stored soil, but it should not be confused with a breathable winter mulch.
Protecting Perennial Flowers in Winter
Perennial flowers often enter dormancy as temperatures fall.
Their winter survival depends on the species, local climate, drainage, and growing conditions.
Raised beds can expose roots to more temperature fluctuation than surrounding ground, especially when the entire growing container is above ground.
For suitable hardy perennials:
- Maintain appropriate drainage.
- Avoid excessive watering before freezing conditions.
- Apply suitable winter mulch when needed.
- Keep heavy mulch from accumulating directly against sensitive crowns.
- Select plants appropriate for the local USDA plant hardiness zone.
Fully elevated planters can be more challenging for overwintering perennial roots than open-bottom beds connected to natural ground.
A plastic tunnel may provide temporary weather protection, but it does not guarantee that the root zone will remain warm enough for every perennial.
Using Plastic Hoops for Winter Flower Protection
Clear plastic can help create a warmer protected environment around certain actively growing plants.
However, it requires careful management.
Use plastic over a hoop frame rather than sealing it directly against the flowers.
Secure the edges against wind, but provide a way to ventilate the tunnel.
During mild sunny weather, temperatures inside the tunnel can rise significantly.
Condensation and prolonged humidity may also create unfavorable conditions for some flowers.
Plastic covers should be inspected regularly, especially during abrupt weather changes.
Can You Leave Plastic on Raised Beds All Winter?
It depends on the purpose and the local climate.
A managed low tunnel may remain in use through winter for suitable crops, but it must be monitored.
A tightly sealed plastic cover left unattended can create problems such as:
- Excessive daytime heat
- Condensation buildup
- Restricted airflow
- Wind damage
- Accumulated rain or snow loads
- Insufficient water reaching the soil
Lightweight DIY hoops may not support heavy snow.
If snow accumulation is expected, use a structure designed for those loads or remove the covering before severe weather.
Plastic vs. Frost Cloth for Raised Beds
Clear plastic and frost cloth serve different purposes.
Clear plastic traps heat and restricts direct rainfall, making it useful for temporary greenhouse-style protection. It needs active ventilation.
Frost cloth is a breathable, water-permeable material that provides varying levels of cold protection depending on its weight.
For occasional frost protection of suitable flowers, frost cloth may be easier to manage.
For a season-extending low tunnel, plastic may provide more warming but requires greater attention.
Neither material can make an unsuitable plant reliably winter-hardy in every climate.
Which Flowers Work Best in Raised Flower Bed Plans?
Plant selection should be considered before construction because different flowers require different amounts of space, sunlight, and winter protection.
Annual Flowers for Sunny Raised Beds
Annual flowers are often well suited to raised beds because their seasonal growth makes it easy to change planting designs.
Popular choices include:
- Zinnias
- Marigolds
- Cosmos
- Annual salvias
- Celosia
- Sweet alyssum
Select varieties based on mature size rather than assuming every cultivar remains compact.
Some cosmos and zinnias can become tall and may need support.
Flowers for Partially Shaded Beds
Partially shaded raised beds can support different seasonal flowers.
Possible choices include:
- Impatiens
- Wax begonias
- Torenia
- Selected shade-tolerant annuals
Check the plant label for its specific light requirements.
Partial shade varies considerably depending on whether sunlight is received in the morning or during the hottest part of the afternoon.
Perennial Flowers for Raised Beds
Perennials can provide recurring blooms without annual replanting.
Possible choices include:
- Coneflowers
- Coreopsis
- Black-eyed Susans
- Yarrow
- Perennial salvias
However, suitability depends on the local climate, drainage, and winter exposure.
Open-bottom raised beds are often easier for maintaining established perennials than shallow, fully elevated planters.
Choose species appropriate to the USDA hardiness zone and provide enough space for their mature root systems.
Arrange Flowers by Mature Height
For a rectangular bed viewed from one side, place taller plants toward the back.
Use medium-height flowers in the middle and shorter plants near the front.
For a bed accessible and visible from all sides, taller flowers may work better near the center.
In a U-shaped bed, avoid tall plants directly along the inside walkway.
The planting design should preserve access as the flowers reach full size.
How Much Soil Do Raised Flower Bed Plans Require?
Calculating soil before purchasing materials prevents unnecessary expenses.
For a rectangular bed, use:
Soil Volume (Cubic Feet) = Length × Width × Soil Depth
All measurements must be in feet.
If the depth is measured in inches, divide it by 12 first.
Soil Volume for Common Flower Bed Plans
| Bed Dimensions | Soil Depth | Approximate Volume |
| 2 × 4 feet | 12 inches | 8 cubic feet |
| 3 × 6 feet | 12 inches | 18 cubic feet |
| 4 × 4 feet | 12 inches | 16 cubic feet |
| 4 × 8 feet | 12 inches | 32 cubic feet |
| U-shaped 8 × 8 feet overall, with a 4 × 6 ft opening | 12 inches | 40 cubic feet |
These estimates use nominal dimensions and assume the planting areas are filled to the stated soil depth.
Actual material requirements depend on frame thickness, settling, and the amount of existing soil.
What Soil Is Best for Raised Flower Beds?
A soil-based mixture of quality loamy topsoil and finished compost is a practical starting choice for many open-bottom raised flower beds.
For example:
- Two parts loamy topsoil
- One part mature plant-based compost
However, the appropriate composition depends on the ingredients and existing ground conditions.
A shallow elevated planter with a solid bottom may require a suitable container growing medium instead.
Avoid filling an entire bed with immature compost or materials that could create excessive settling.
Should You Add Gravel Under Raised Flower Beds?
A gravel layer is generally unnecessary in ordinary open-bottom raised beds.
Proper drainage depends on the soil structure and the ability of excess water to move into the ground beneath the bed.
In enclosed planters, gravel does not replace drainage holes and reduces the available root volume.
Choose suitable growing material and provide effective drainage rather than assuming that a coarse bottom layer will solve waterlogging.
How to Maintain a Raised Flower Bed Through the Seasons
A well-designed flower bed should remain easy to maintain after the initial planting.
Seasonal care is especially important because flowers have different growth patterns and weather requirements.
Spring: Prepare Soil and Protect Young Flowers
Remove winter protection when conditions allow.
Check the frame for damage and repair loose connections.
Inspect the growing medium for compaction, drainage issues, or excessive settling.
Add suitable compost when needed, based on the soil condition.
For tender flowers, watch local frost forecasts and use temporary covers when appropriate.
Summer: Water, Mulch, and Support Growth
Raised beds can dry faster than surrounding ground-level soil.
Check moisture beneath the surface before watering.
Use organic mulch where appropriate to reduce evaporation.
Tall flowering plants may require stakes or other supports.
Remove spent flowers when deadheading is beneficial for the species and desired flowering pattern.
Avoid leaving plastic low-tunnel covers closed during hot weather.
Fall: Prepare Annual and Perennial Beds
Remove annual plants that have completed their growing season, particularly when they show signs of disease.
Healthy plant residues may be composted when appropriate.
For perennials, follow species-specific pruning and winter care requirements.
Some seed heads and stems can be left standing for wildlife and winter garden interest.
Check whether winter mulch or temporary frost protection is needed.
Winter: Protect Soil Without Trapping Excess Moisture
Maintain suitable mulch over exposed growing soil.
Inspect drainage and prevent water from remaining trapped in enclosed planters.
For perennial flowers, avoid unnecessary disturbance of dormant crowns.
If a hoop cover is used, check its anchors and ventilation after changing weather conditions.
Do not assume a covered bed is maintenance-free.
Common Raised Flower Bed Planning Problems
Several design mistakes can make a new flower garden harder to maintain.
Building the Bed Before Choosing the Flowers
A bed designed without considering mature plant sizes may become crowded.
Choose the main plants first, then confirm that the bed provides enough growing space.
Making a U-Shaped Bed Too Narrow Inside
The central opening needs enough space for comfortable movement.
A narrow walkway may become unusable when mature flowers spread inward.
Check access dimensions before assembling the frame.
Choosing a Tall Bed Without Calculating Soil Costs
A taller frame requires more material when filled completely.
Calculate the intended growing depth and total soil volume before purchasing lumber or metal panels.
Building Hoops That Are Too Weak for Winter Conditions
Lightweight PVC hoops can work well for frost cloth and certain temporary covers.
However, they may bend or fail under heavy snow or high wind.
Use an appropriately reinforced design where winter weather is severe.
Leaving Clear Plastic Sealed Over Flowers
Clear plastic can warm the air under a tunnel, but it can also cause overheating during sunny weather.
Provide ventilation and monitor the plants rather than leaving the cover permanently sealed.
Ignoring Winter Conditions for Perennials
A perennial suitable for an in-ground garden may experience greater root exposure in an elevated planter.
Choose plants for the local climate and account for the bed’s construction.
Conclusion
The most useful plans for raised flower beds combine practical dimensions, suitable growing soil, and easy access for seasonal care.
A simple rectangular bed measuring 3–4 feet wide and 6–8 feet long is a good starting point for many home gardens. A U-shaped design offers a larger connected planting area with convenient central access, but it requires additional planning and framing.
DIY PVC hoops can provide an inexpensive way to support frost cloth, netting, or temporary plastic covers. However, clear plastic should be used according to the plants and weather conditions, not automatically left over every raised bed throughout winter.
Choose the bed shape according to your available space, select flowers that fit the light and climate, and calculate soil requirements before construction.
For most beginners, a simple open-bottom rectangular bed is the easiest option. A U-shaped bed becomes worthwhile when its layout provides a clear advantage in accessibility and garden appearance.
FAQs About Plans for Raised Flower Beds
How deep should a raised flower bed be?
A raised flower bed approximately 10–12 inches high can work well for many annual flowers when it has an open bottom over suitable natural soil. Elevated planters with enclosed bottoms need enough contained growing depth for the selected plants. Large perennials and shrubs may require more root space.
What is the best wood for a raised flower bed?
Cedar, redwood, and other naturally decay-resistant woods are common choices. Suitable exterior-rated or residential ground-contact-treated lumber may also be used. The best option depends on cost, availability, expected service life, and maintenance preferences.
How wide should the center of a U-shaped raised bed be?
A central opening approximately 3–4 feet wide can provide comfortable access for many gardeners. The ideal width depends on the gardener’s reach, mobility needs, and whether equipment must be moved through the space.
Can I make raised bed hoops without PVC pipe?
Yes. Flexible galvanized wire, suitable metal conduit, and other garden hoop materials can be used. Metal conduit may require a specialized bending tool, while flexible wire can be shaped by hand when it is the correct size and stiffness.
Should I cover an empty raised flower bed with plastic in winter?
Usually not. An empty bed often benefits more from an appropriate organic mulch that protects the soil surface. Plastic may be useful for specific weed-management or seasonal growing purposes, but it is not routinely required.
Can perennial flowers survive winter in raised beds?
Yes, many hardy perennials can survive in raised beds when their cold tolerance, drainage, and root conditions are suitable. Fully elevated planters can expose roots to greater temperature fluctuations, so plant selection and winter protection require additional attention.
Do raised flower beds need a bottom?
Not when installed directly over suitable natural ground. Open-bottom raised beds allow drainage and provide access to additional rooting space. Beds on patios, decks, or elevated supports need a suitable base or containment system with effective drainage.

I’m Maya L. Greenwood, a lifelong plant lover who believes anyone can grow something beautiful with the right guidance. After years of testing soil mixes, pruning methods, irrigation tricks, and pest-safe solutions, I started EasyGardenTips.com to turn hard-won lessons into step-by-step advice. From seed starting and container gardens to composting and seasonal checklists, my goal is to make gardening simple, sustainable, and fun.