How to Use Raised Bed Soil to Fill, Plant, and Grow Vegetables
To use raised bed soil, fill a prepared garden bed with a loose, well-draining soil mix, moisten it evenly, and plant seeds or transplants without compacting the surface. If you’re using a commercial product labeled “raised bed soil” or “raised bed mix,” check its ingredients before adding anything else.
The process seems straightforward, but several details affect how well plants grow. Soil depth, drainage, moisture retention, and organic matter all influence root development. Filling a bed with unsuitable material can leave vegetables struggling even when they receive adequate sunlight and regular watering.
A raised bed placed directly on the ground also behaves differently from one sitting on concrete. In an open-bottom garden bed, roots may extend into the native soil. In a bed with a solid base, plants depend entirely on the growing medium inside.
Using the correct soil preparation method helps prevent excessive settling, poor drainage, and uneven moisture.
This guide covers preparing the growing area, filling a raised bed, using packaged soil, calculating the amount needed, planting vegetables, and maintaining soil quality throughout the growing season.
How to Use Raised Bed Soil in a New Garden Bed
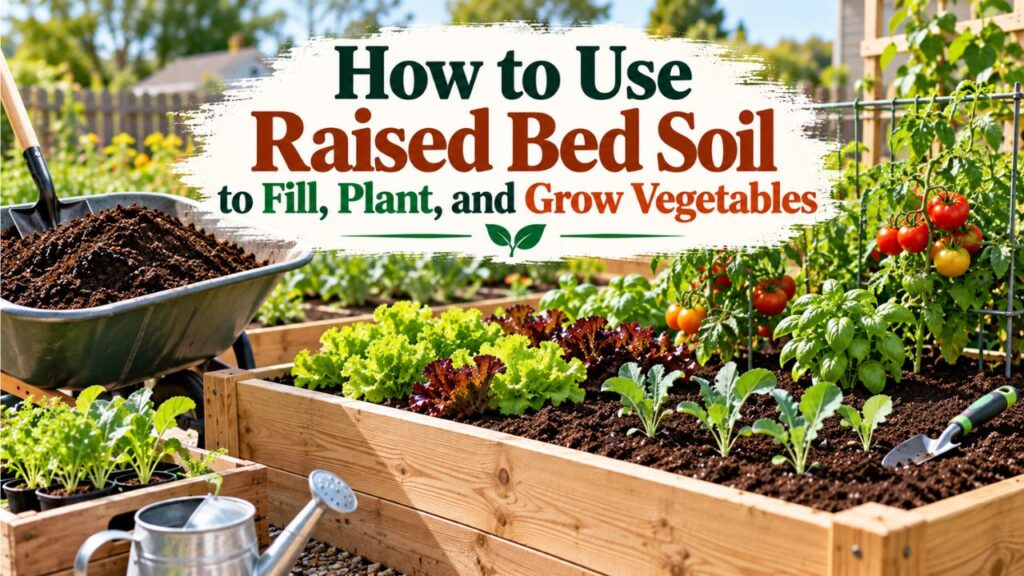
Using raised bed soil correctly involves more than emptying bags into a wooden or metal frame. The underlying ground, soil composition, and planting depth all need attention.
Follow these steps to prepare a new raised garden bed for growing vegetables, herbs, or flowers.
Step 1: Prepare the Area Beneath the Raised Bed
Choose a location that receives enough sunlight for the plants you intend to grow. Most fruiting vegetables, including tomatoes and peppers, perform best in a location receiving at least six to eight hours of direct sunlight daily.
Before adding soil:
- Remove large weeds, stones, construction debris, and other unwanted materials.
- Clear existing grass or suppress it before filling the bed.
- Check whether the underlying soil drains properly.
- Gently loosen compacted native soil with a garden fork if necessary.
- Level the raised bed frame so the soil can be distributed evenly.
If the bed sits directly on healthy garden soil, leaving the bottom open allows roots to grow deeper and water to move into the ground.
Avoid placing an impermeable plastic sheet across the bottom of an open-ground raised bed. Such a barrier can restrict drainage and root growth.
Important: If the underlying soil may contain lead or other contaminants, arrange appropriate soil testing before growing vegetables. A raised bed does not automatically eliminate contamination risks.
Step 2: Check the Raised Bed’s Soil Depth and Drainage
Soil depth determines how much room plant roots have to develop and how much moisture the growing medium can store.
The appropriate depth depends partly on whether roots can extend into the ground below.
For an open-bottom bed on suitable native soil, plants can access additional rooting space beneath the frame.
A raised bed on concrete or another hard surface requires more careful planning because roots cannot penetrate the surface underneath.
According to the University of Maryland Extension’s raised-bed gardening guidance, beds on impermeable surfaces should provide at least 8 inches of growing depth for leafy greens, beans, and cucumbers, while peppers, tomatoes, and squash generally need 12–24 inches.
Make sure beds on hard surfaces have a reliable drainage outlet. Water should never remain trapped at the bottom of the growing medium.
Step 3: Check the Raised Bed Soil Before Filling
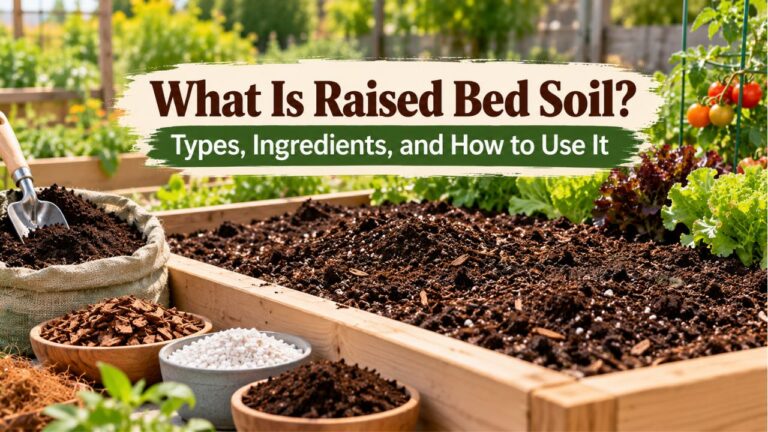
Not every product labeled “raised bed soil” contains the same materials.
Some bagged blends contain mineral soil mixed with compost. Others consist mainly of composted bark, wood fibers, peat-based ingredients, or other organic materials.
Before opening the bags, check the product label for:
- Soil ingredients: Whether the blend contains topsoil, compost, or primarily soilless materials.
- Fertilizer content: Whether plant nutrients have already been added.
- Intended use: Whether the product is recommended for raised garden beds.
- Organic matter: Whether compost and other organic ingredients are already included.
- Application instructions: Whether the manufacturer recommends mixing the product with existing soil.
A complete raised bed mix may be ready for planting without additional amendments.
If you’re using ordinary topsoil instead, its texture and fertility may need improvement before planting.
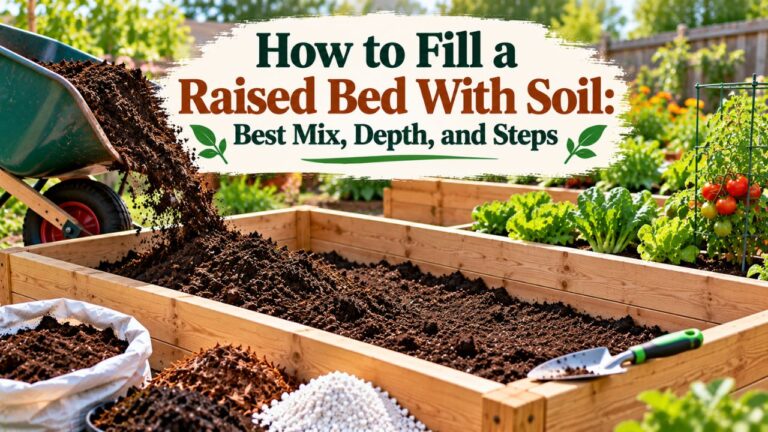
Step 4: Fill the Raised Garden Bed With Soil
Once the growing area is ready, begin adding the raised bed soil.
Use a shovel, wheelbarrow, or garden scoop to distribute the material evenly across the frame.
Follow this process:
- Pour or shovel the soil into the bed.
- Break apart large clumps with a hand cultivator or garden rake.
- Spread the material evenly into the corners.
- Blend any necessary soil amendments throughout the growing layer.
- Gently level the surface without pressing it firmly.
- Leave approximately 1–2 inches of space below the upper edge of the frame.
Leaving room near the top helps contain water and mulch.
Avoid walking on the soil or pressing it down with your feet. Heavy compaction reduces pore spaces that roots need for air and water movement.
If you’re combining different growing materials, blend them where practical instead of creating sharply separated layers of topsoil and compost.
Step 5: Moisten the Raised Bed Soil Before Planting
Freshly added soil may be dry, particularly when the mixture contains peat, composted bark, or other lightweight organic materials.
Water the entire growing surface slowly using a watering can, hose with a gentle spray attachment, or drip irrigation system.
Allow the water to soak into the soil rather than running across the surface.
After watering, check the moisture several inches below the top layer.
The soil should feel evenly moist but not waterlogged.
If water initially runs off a very dry organic mix, apply smaller amounts repeatedly, allowing each application to soak in before adding more.
Moistening the soil before planting makes it easier to create planting holes and helps new roots establish contact with the growing medium.
Step 6: Plant Seeds or Transplants in the Prepared Soil
After the raised bed soil has been filled, leveled, and moistened, planting can begin.
For seeds, follow the sowing depth and spacing instructions on the seed packet.
For transplants:
- Dig a planting hole wide enough to accommodate the root ball.
- Remove the plant carefully from its nursery container.
- Gently loosen circling roots if necessary.
- Place the plant at the appropriate planting depth.
- Return soil around the roots.
- Firm the soil lightly to eliminate large air pockets.
- Water around the plant’s base.
Most transplants should remain at approximately their original growing depth, although certain crops, such as tomatoes, can tolerate deeper stem planting.
Avoid burying the crowns of plants that need their growing points near the soil surface.
Step 7: Apply Mulch Around the Plants
Once plants are established, apply an appropriate organic mulch around the growing area.
Shredded leaves, clean straw, or finely shredded plant material can help reduce moisture loss and discourage weeds.
Keep mulch away from direct contact with plant stems to avoid creating persistently damp conditions around their bases.
For newly seeded areas, wait until seedlings emerge or use only a very light covering suitable for the crop.
As the mulch decomposes, it can contribute additional organic material to the garden bed.
How Much Raised Bed Soil Do You Need?
Calculate the amount of soil before purchasing bags or arranging a bulk delivery.
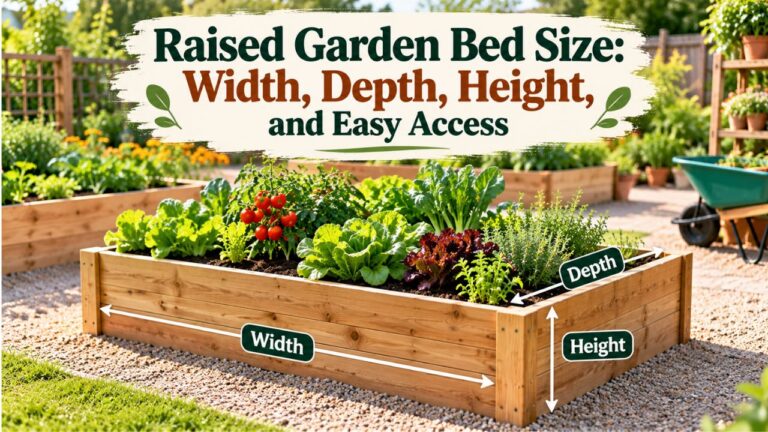
The required quantity depends on the bed’s length, width, and intended filling depth.
For a rectangular raised bed, use this formula:
Length × Width × Soil Depth = Soil Volume
All measurements must use the same unit.
When working in feet, the result will be in cubic feet.
Example: Filling a 4 × 8-Foot Raised Garden Bed
Suppose a raised bed measures:
- Length: 8 feet
- Width: 4 feet
- Frame height: 12 inches
- Desired soil depth: 10 inches
Convert the soil depth to feet:
10 ÷ 12 = 0.833 feet
Calculate the volume:
8 × 4 × 0.833 = approximately 26.7 cubic feet
If each bag contains 2 cubic feet, the bed requires approximately 14 bags to reach the intended fill level.
You may need a small additional amount later as the soil settles.
For large raised beds, bulk soil purchased by the cubic yard can be more practical than individual bags.
One cubic yard contains 27 cubic feet.
Account for Soil Settling
Freshly filled raised beds often settle after repeated watering and natural decomposition of organic materials.
This is normal, particularly with lightweight mixes containing substantial amounts of compost or wood-based ingredients.
Check the soil level after watering and during the first growing season.
If the soil drops noticeably, add more appropriate growing mix where needed.
Avoid adding a thick layer directly over established seedlings or burying plant crowns.
Should You Mix Raised Bed Soil With Compost or Topsoil?
Whether raised bed soil needs additional ingredients depends on its existing composition.
A complete commercial raised bed mix is different from plain topsoil or unfinished compost.
Adding more organic material is not automatically beneficial.
Using Premixed Bagged Raised Bed Soil
Most packaged mixes specifically formulated for raised garden beds are intended to provide a usable growing medium.
If the bag already contains sufficient compost or organic matter, additional compost may be unnecessary.
Adding too much compost can create moisture-management problems and may result in excessive nutrient levels.
Check whether fertilizer is already included before applying more.
A ready-to-use raised bed mix generally does not need extra compost simply because it is being used for the first time.
The product label and soil condition should guide any adjustments.
Using Topsoil and Compost to Prepare Raised Bed Soil
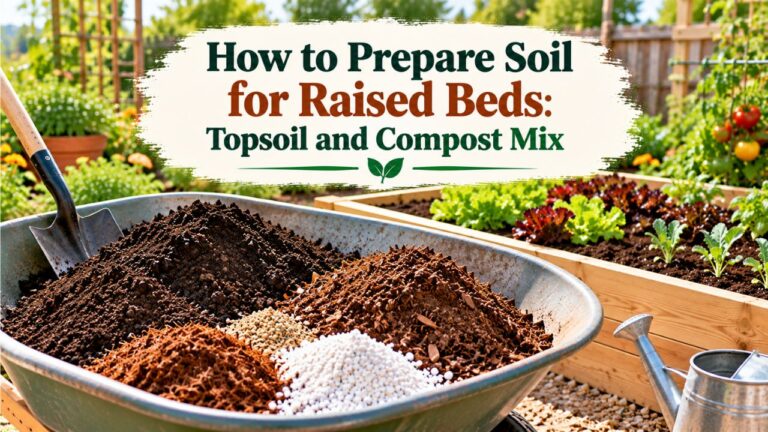
If you’re creating your own growing mixture, combining suitable topsoil with finished compost can provide a productive soil structure.
Topsoil supplies mineral particles that contribute to the soil’s structure and water-holding characteristics.
Finished compost adds organic matter and can improve moisture management, soil structure, and nutrient availability.
The University of Minnesota Extension’s raised-bed gardening recommendations describe a mixture containing approximately one-half to two-thirds topsoil and one-third to one-half plant-based compost.
This is a general starting point rather than a formula that every garden must follow.
The appropriate proportions depend on the existing soil texture and nutrient content.
For example, a soil already rich in organic matter may require little additional compost.
A mixture containing excessive compost may dry unevenly, accumulate nutrients, or gradually lose volume as organic materials decompose.
Mixing New Raised Bed Soil With Existing Garden Soil
If an existing raised bed already contains healthy, well-draining soil, there’s usually no reason to remove everything before adding fresh material.
Instead:
- Remove weeds and unwanted plant remains.
- Loosen the upper surface if it has become compacted.
- Add the appropriate amount of fresh soil or finished compost.
- Blend the material into the existing upper growing layer where practical.
- Level the bed and water it before planting.
Mixing compatible materials helps avoid abrupt differences in soil texture that can interfere with water movement.
If the original soil contains excessive salts, contaminants, or serious drainage problems, simply adding fresh soil on top may not solve the underlying issue.
How to Plant Vegetables in Raised Bed Soil
Raised bed soil can support many vegetables, but planting methods should match each crop’s root development, spacing, and moisture requirements.
Growing Leafy Vegetables in Raised Bed Soil
Lettuce, spinach, kale, and other leafy vegetables generally have relatively shallow rooting systems compared with large fruiting crops.
They benefit from soil that remains consistently moist without becoming saturated.
When planting leafy vegetables:
- Prepare a fine, level seedbed.
- Sow seeds at the depth recommended for the crop.
- Avoid burying small seeds too deeply.
- Keep the germination zone consistently moist.
- Thin seedlings to their recommended spacing.
Overcrowding can reduce airflow and leave plants competing for water and nutrients.
Growing Tomatoes and Peppers in Raised Bed Soil
Tomatoes and peppers need more extensive rooting space and consistent access to water.
A deeper raised bed is particularly useful when the garden is built over concrete or another surface that prevents roots from growing downward.
Keep the soil loose enough for root development and provide sufficient room between mature plants.
Install supports for tomatoes early to avoid damaging established roots later.
Tomatoes may develop additional roots along buried sections of their stems, but peppers should generally be transplanted close to their original nursery growing depth.
Both crops benefit from consistent watering, particularly during flowering and fruit development.
Growing Carrots and Other Root Vegetables
Carrots, radishes, beets, and similar crops grow best when the soil allows roots to develop without encountering hard clods or excessive compaction.
Remove large stones and break apart dense clumps before sowing.
Carrots are particularly sensitive to physical obstructions that can cause roots to become forked or misshapen.
For longer carrot varieties, choose a bed with sufficient unobstructed growing depth.
Avoid adding large amounts of fresh manure or unfinished organic material before planting root crops.
How to Water Raised Bed Soil After Planting
Raised bed soil often loses moisture faster than soil in a traditional in-ground garden.
The elevated growing area has more exposed surfaces, and some raised bed blends contain lightweight materials that dry relatively quickly.
Watering should respond to actual soil conditions rather than following an inflexible daily schedule.
Check Moisture Below the Surface
The soil surface may look dry while deeper layers still contain sufficient moisture.
Before watering, insert a finger approximately 1–2 inches into the soil.
If the soil feels dry at that depth, additional watering may be appropriate, although the needs of deeper-rooted plants also depend on moisture farther down.
If the soil feels moist, check again later rather than automatically adding water.
For established plants, occasional deeper checks help determine whether water is reaching the root zone.
Seedlings require closer attention because their roots occupy a much shallower layer.
Water Slowly and Evenly
Apply water near the base of the plants.
Drip irrigation, soaker hoses, and gentle watering attachments can deliver water without disturbing the soil surface.
Water deeply enough to moisten the active root zone, then allow excess water to drain away.
Avoid repeated light watering that only moistens the uppermost layer while leaving deeper roots dry.
During hot or windy weather, raised beds may require more frequent watering.
Soil composition, bed depth, plant size, and local climate all influence how quickly moisture is lost.
Prevent Excessive Moisture Loss
Several practices can help keep raised bed soil from drying too quickly:
- Use organic mulch around established plants.
- Maintain adequate soil depth.
- Check moisture regularly during hot weather.
- Water early enough for plants to absorb moisture before severe daytime heat.
- Avoid disturbing the soil unnecessarily.
- Consider drip irrigation for more consistent moisture delivery.
A soil blend containing suitable mineral soil and organic matter generally provides more balanced moisture management than one composed almost entirely of lightweight organic ingredients.
How to Maintain Raised Bed Soil Throughout the Growing Season
Healthy raised bed soil requires ongoing care, but it does not usually need complete replacement each year.
The goal is to maintain soil structure, replace nutrients when necessary, and preserve enough growing depth for future crops.
Add Fertilizer Based on Soil Needs
Raised bed soil does not always contain enough nutrients to support an entire growing season.
However, adding fertilizer without checking the soil or the product label can create its own problems.
If possible, obtain a soil test that reports pH and nutrient levels.
Use the results to determine whether additional fertilizer or soil amendments are needed.
If you’re using a packaged raised bed mix, check whether the product already contains fertilizer and how long its nutrient supply is intended to last.
Avoid assuming that more fertilizer will automatically produce healthier plants.
Excess nutrients can damage roots, create nutrient imbalances, and contribute to unnecessary runoff.
Refresh Raised Bed Soil Between Growing Seasons
At the end of a growing season, remove unwanted weeds and diseased plant debris.
Healthy plant remains can be composted separately when appropriate.
Before the next planting season:
- Inspect the soil level.
- Check for compaction or poor drainage.
- Add fresh soil if significant settling has occurred.
- Apply finished compost when soil conditions and nutrient needs justify it.
- Incorporate recommended amendments without excessive digging.
- Level the growing surface before planting.
A well-maintained raised bed can remain productive for multiple growing seasons without replacing all its soil.
Avoid Unnecessary Deep Tilling
Established raised bed soil benefits from limited disturbance.
Frequent deep digging can disrupt soil structure and bring buried weed seeds closer to the surface.
Where possible, use hand tools to loosen only the areas that need attention.
Keep permanent walking paths outside the raised bed so the growing area is not repeatedly compressed.
Common Problems When Using Raised Bed Soil
Even correctly installed raised bed soil can develop issues as weather conditions change and plants grow.
Identifying the cause helps determine whether the soil needs more water, improved drainage, additional nutrients, or a different growing medium.
Raised Bed Soil Dries Out Too Quickly
Rapid drying is common in shallow beds, elevated planters, and mixes containing large amounts of lightweight organic material.
Possible solutions include:
- Applying mulch around established plants.
- Watering thoroughly instead of repeatedly wetting only the surface.
- Checking whether water actually penetrates dry soil.
- Maintaining sufficient growing depth.
- Reassessing the soil composition if the problem persists.
If the soil becomes extremely dry and starts repelling water, moisten it gradually rather than applying a large amount all at once.
Raised Bed Soil Stays Wet for Too Long
Persistently saturated soil limits the oxygen available to plant roots.
Possible causes include blocked drainage, overly compacted material, excessive watering, or an unsuitable soil blend.
First, check whether water can leave the bed.
If the raised bed has a bottom, verify that drainage openings are functioning correctly.
Reduce unnecessary watering and avoid walking on wet soil.
Adding gravel to the bottom is not a reliable solution for poor soil drainage. Correcting the drainage outlet and growing medium is more effective.
Raised Bed Soil Settles Too Much
A noticeable decline in soil height can occur when a new mix contains substantial amounts of decomposable organic material.
Some settling is expected.
However, excessive volume loss may indicate that the bed was filled with too much unfinished compost, wood-based material, or other ingredients that gradually break down.
Replenish the growing layer with suitable soil as needed.
Avoid burying established plant stems or adding large amounts of undecomposed material around roots.
Vegetable Plants Show Signs of Nutrient Deficiency
Yellowing leaves, slow growth, and poor plant development can indicate nutrient problems, but they can also result from overwatering, drought, root damage, temperature stress, or disease.
Do not immediately apply fertilizer based on leaf color alone.
Check the soil moisture, drainage, root conditions, and plant-specific symptoms.
A soil test can help identify nutrient shortages, excessive nutrient levels, or unsuitable pH.
Applying amendments based on the actual problem is more reliable than repeatedly adding fertilizer.
Conclusion
Understanding how to use raised bed soil starts with choosing a suitable growing medium and preparing the bed for proper drainage and root development.
Fill the frame with loose soil, leave a little room below the rim, moisten the growing layer, and plant according to each crop’s requirements.
If you’re using a complete commercial raised bed mix, additional compost or fertilizer may not be necessary. If you’re preparing your own soil, combining suitable topsoil with finished compost is a practical starting point.
The most important long-term practices are maintaining consistent moisture, avoiding compaction, checking soil fertility, and replenishing material as the bed settles.
With appropriate preparation and routine care, raised bed soil can support healthy vegetables and remain useful for many growing seasons.
FAQs About How to Use Raised Bed Soil
Can You Use Raised Bed Soil Straight From the Bag?
Yes, many commercial raised bed soil products are designed for direct use in raised garden beds. Check the label to confirm that the mixture is ready for planting and whether it already contains fertilizer or compost.
Can You Plant Immediately After Adding Raised Bed Soil?
Yes, you can generally plant immediately after filling and moistening the bed with a suitable ready-to-use growing mix. Make sure the material does not contain unfinished compost or fresh manure that could harm plants.
Can You Use Raised Bed Soil in Regular Flower Pots?
Not every raised bed soil mix is suitable for flower pots. Products containing substantial amounts of mineral topsoil may become too dense in smaller containers. A potting mix specifically formulated for containers is usually a better choice.
Should You Put Rocks at the Bottom of a Raised Bed Before Adding Soil?
No, a layer of rocks is not necessary for proper raised bed drainage. In open-bottom beds, allow water to move into the ground. For beds with a solid base, provide effective drainage openings and use an appropriate growing medium.
How Often Should You Replace Raised Bed Soil?
Raised bed soil usually does not need complete replacement every year. Maintain it by replenishing settled material, managing moisture, and adding compost or fertilizer when needed. Full replacement may be necessary if the soil becomes contaminated or develops a serious problem that cannot be corrected.
Can You Add New Raised Bed Soil on Top of Old Soil?
Yes, fresh raised bed soil can be added to an existing bed when the original soil is healthy and drains properly. Blend the new material into the upper growing layer where practical, and avoid burying the crowns or stems of established plants.

I’m Maya L. Greenwood, a lifelong plant lover who believes anyone can grow something beautiful with the right guidance. After years of testing soil mixes, pruning methods, irrigation tricks, and pest-safe solutions, I started EasyGardenTips.com to turn hard-won lessons into step-by-step advice. From seed starting and container gardens to composting and seasonal checklists, my goal is to make gardening simple, sustainable, and fun.