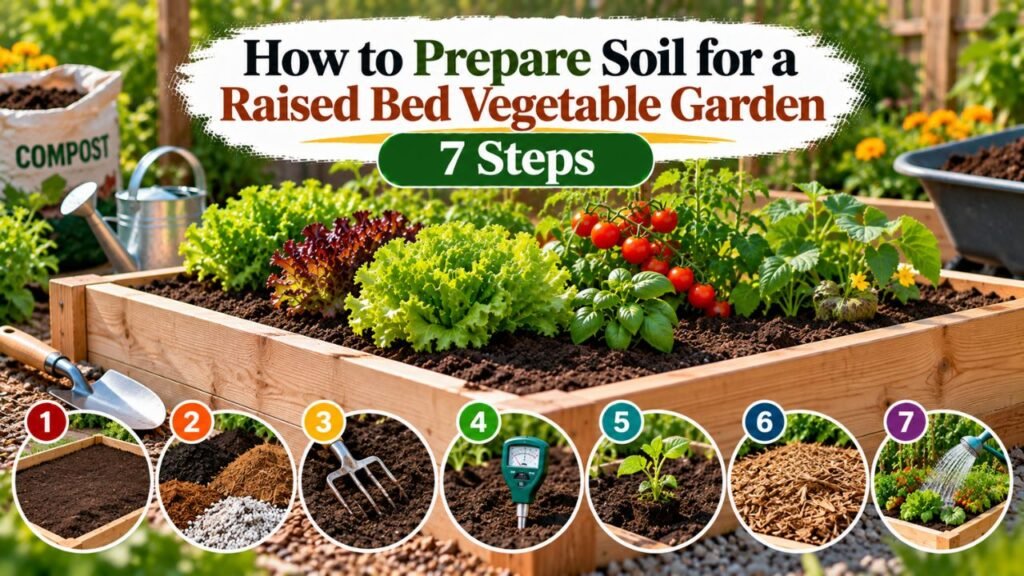
How to Prepare Soil for a Raised Bed Vegetable Garden: 7 Steps
To prepare soil for a raised bed vegetable garden, start with well-draining topsoil, mix in fully finished compost, and loosen the ground beneath the bed before planting. For most open-bottom raised beds, a mixture of approximately two parts quality topsoil to one part compost provides a practical starting point.
Vegetables need soil that holds enough moisture for roots without becoming waterlogged. Heavy clay can restrict drainage, while an overly sandy or compost-rich mixture may dry out quickly. The right balance helps plants develop healthy roots and access essential nutrients.
Preparing the underlying ground is equally important. Compacted soil, persistent weeds, and unsuitable drainage conditions can cause problems even when the raised bed contains good-quality growing medium.
Soil testing also helps identify nutrient deficiencies and pH problems before you add unnecessary fertilizers or amendments.
In this article, I cover how to prepare the ground, choose the best soil ingredients, calculate the correct quantities, and fill a raised vegetable bed step by step. You’ll also learn how to improve clay or sandy soil, adjust pH, maintain drainage, and prepare the soil for vegetables such as tomatoes, peppers, carrots, and leafy greens.
What Is the Best Soil for a Raised Bed Vegetable Garden?
The best soil for an open-bottom raised vegetable bed is generally a loose, fertile mixture containing mineral topsoil and mature compost.
It should provide three essential conditions:
- Good drainage: Excess water moves away from the root zone without keeping the soil saturated.
- Adequate moisture retention: Soil holds enough water between irrigation events.
- Suitable nutrients and aeration: Roots can access nutrients and oxygen while spreading through the growing medium.
A productive raised bed does not need expensive specialty ingredients if the basic soil components are already suitable.
Best Topsoil and Compost Ratio for Raised Beds
A practical starting mixture is:
- 67% quality topsoil: Provides mineral particles, structure, and water-holding capacity.
- 33% finished compost: Adds organic matter and helps support healthy soil structure.
This is equivalent to two parts topsoil and one part compost by volume.
For example, a raised bed requiring 18 cubic feet of soil would need approximately 12 cubic feet of topsoil and 6 cubic feet of compost.
The University of Minnesota Extension’s raised-bed soil recommendations describe a suitable mixture containing approximately one-half to two-thirds topsoil and one-third to one-half plant-based compost.
The ratio is a starting point, not a fixed requirement. Existing soil texture, organic matter, and nutrient levels can affect the most suitable mixture.
Why Quality Topsoil Matters
Topsoil contains mineral particles, including sand, silt, and clay.
These particles influence how soil drains, holds water, and supports plant roots.
For raised vegetable beds, loamy topsoil is generally preferable because it contains a balanced combination of particle sizes.
Good topsoil should:
- Have a crumbly texture.
- Break apart without excessive force.
- Absorb water reasonably well.
- Contain limited stones and unwanted debris.
- Have an earthy smell.
- Be free from known contamination.
Avoid purchasing soil that becomes extremely sticky when wet or forms hard, dense clumps after drying.
Likewise, extremely sandy topsoil may not hold enough moisture for vegetables during hot weather.
Why Finished Compost Is Important
Compost is decomposed organic material that can improve the physical condition of garden soil.
In clay-rich soil, it helps support soil aggregation and the formation of spaces for air and water movement.
In sandy soil, compost can improve moisture retention and nutrient-holding capacity.
Choose fully finished compost with a dark, crumbly appearance and an earthy smell.
Avoid using unfinished compost containing large amounts of undecomposed food scraps or fresh organic waste.
Also, do not fill an entire raised bed with compost alone. An excessively compost-rich mixture can create moisture-management problems and contribute to nutrient imbalances.
Key Takeaway: A balanced topsoil-and-compost mixture is generally more dependable for a permanent open-bottom raised bed than pure compost or lightweight potting soil alone.
How to Prepare Soil for a Raised Bed Vegetable Garden Step by Step
Preparing a raised bed involves more than placing soil inside a frame.
The following seven steps explain how to assess the site, prepare the soil underneath, mix the growing materials, and establish suitable conditions before planting.
Step 1: Choose a Sunny Location With Good Drainage
Start by selecting a suitable location for the raised bed.
Most fruiting vegetables, including tomatoes, peppers, and squash, perform best with approximately 6–8 hours of direct sunlight daily.
Leafy greens may tolerate less direct sunlight, particularly during hot weather.
Choose an area that:
- Receives sufficient sunlight for the intended crops.
- Has relatively level ground.
- Does not remain flooded after rainfall.
- Provides convenient access to water.
- Has enough space around the bed for gardening.
- Is away from significant contamination sources.
Avoid placing raised beds where water regularly flows from roofs, driveways, or surrounding slopes.
Even a well-draining growing mixture can become saturated when the underlying ground cannot absorb or release excess water.
For a new vegetable garden, a bed approximately 3–4 feet wide is convenient because you can usually reach the center from both sides without walking on the soil.
Step 2: Test the Existing Soil Before Adding Amendments
Before adding compost, fertilizer, or lime, test the soil underneath the planned raised bed.
A laboratory soil test can identify nutrient levels and soil pH, helping you determine which amendments are actually needed.
For an open-bottom bed, the existing ground matters because vegetable roots may eventually grow below the raised-bed frame.
The University of Maryland Extension’s guide to growing vegetables in raised beds recommends testing native soil before making changes. It identifies a pH range of approximately 6.2–6.8 as suitable for most garden vegetables and notes that productive beds with high organic matter may also perform well at somewhat higher pH levels.
A basic soil test may report:
- Soil pH.
- Phosphorus and potassium levels.
- Organic matter, depending on the laboratory.
- Nutrient and amendment recommendations.
If the property’s history suggests possible lead contamination, request a separate lead test. Basic fertility testing does not automatically include heavy metals or other contaminants.
Use the test results before applying lime, sulfur, or fertilizers.
Important: Do not automatically add lime to every raised garden bed. Soil that already has an appropriate pH may not need it.
Step 3: Remove Weeds and Prepare the Ground
Once the location has been selected and tested, prepare the ground beneath the raised bed.
Remove trash, large stones, unwanted vegetation, and other materials that could interfere with root growth.
The best method depends on the existing ground conditions.
If the bed is going over grass:
- Cut the grass short.
- Remove persistent perennial weeds where possible.
- Consider smothering the remaining vegetation with plain cardboard or another suitable temporary covering.
- Remove plastic tape and coatings from any cardboard.
- Prepare the soil surface before adding the growing mixture.
Cardboard can temporarily suppress vegetation, but it may slow water infiltration until it becomes wet and decomposes.
For a bed installed over already clear garden soil, an additional barrier is usually unnecessary.
If the ground is compacted:
Use a garden fork to gently loosen the upper soil.
Insert the fork and rock it backward and forward rather than completely turning the soil over.
This creates openings for water and roots to move downward.
Avoid working the ground when it is saturated. Digging extremely wet soil can damage its structure and create dense clumps.
Step 4: Prepare the Topsoil and Compost Mixture
After preparing the ground, select the growing materials.
For a new open-bottom vegetable bed, use suitable loamy topsoil and finished compost.
A two-to-one topsoil-to-compost mixture is a practical starting point.
To prepare it:
- Measure two equal portions of topsoil.
- Add one equal portion of finished compost.
- Spread the materials on a clean tarp or suitable mixing surface.
- Break apart large clumps.
- Blend the components with a shovel or garden fork.
- Remove stones, plastic, and unwanted debris.
Continue mixing until the compost is reasonably evenly distributed.
If you purchase a commercial raised-bed blend, check its ingredients before adding more compost.
Some prepared products already contain enough organic material for planting.
Do not automatically add sand, perlite, peat moss, or fertilizer to a suitable commercial mixture.
Each additional amendment should solve an identified soil problem.
Step 5: Calculate How Much Soil the Raised Bed Needs
Measure the bed’s inside length, width, and planned filling depth.
For rectangular raised beds, calculate the required soil volume using:
Soil volume (cubic feet) = Length (feet) × Width (feet) × Soil depth (feet)
Convert inches into feet before multiplying.
For example, a raised bed measuring 4 feet wide, 8 feet long, and 12 inches deep requires:
4 × 8 × 1 = 32 cubic feet
To convert cubic feet into cubic yards:
32 ÷ 27 = approximately 1.19 cubic yards
If the soil is sold in 2-cubic-foot bags, the theoretical requirement is 16 bags.
Soil Volume for Common Raised Bed Sizes
| Raised-bed size | Soil depth | Cubic feet | Cubic yards |
| 3 × 3 feet | 12 inches | 9 | 0.33 |
| 3 × 6 feet | 12 inches | 18 | 0.67 |
| 4 × 4 feet | 12 inches | 16 | 0.59 |
| 4 × 6 feet | 12 inches | 24 | 0.89 |
| 4 × 8 feet | 12 inches | 32 | 1.19 |
These calculations assume the specified internal dimensions and a complete 12-inch fill.
For a 12-inch-tall frame, leaving 2 inches below the rim means the actual filling depth is 10 inches.
Calculate according to that intended soil level rather than the full frame height.
Pro Tip: If purchasing bagged soil, round up to complete bags. Keeping a small amount of extra growing mix is useful if the bed settles after watering.
Step 6: Fill the Bed Without Compacting the Soil
Once the mixture is prepared, begin transferring it into the raised bed.
Add the soil gradually, spreading it evenly across the planting area.
Use a rake or shovel to distribute the material.
Avoid creating thick, separate layers of topsoil and compost. Mixing them produces a more consistent growing zone.
When filling a deeper bed, work in manageable portions.
Do not walk inside the raised bed or press the mixture firmly with your feet.
Compaction reduces the larger spaces between soil particles that normally contain air and allow water movement.
Stop filling approximately 1–2 inches below the upper rim.
This provides room for watering and a light layer of mulch.
Step 7: Water the Soil and Check Its Condition Before Planting
After filling, water the bed slowly and evenly.
The growing medium should become moist without turning into dense mud.
Watering helps settle loose particles and reveals areas where the surface may sink.
Check for:
- Uneven soil levels.
- Water pooling on the surface.
- Areas that remain unexpectedly dry.
- Excessively dense sections.
- Soil escaping through gaps in the frame.
Add a little more growing mix if settling reduces the intended depth.
If the soil drains properly and has a suitable texture, the raised bed can generally be planted once weather and crop requirements are appropriate.
Fully finished compost and suitable prepared soil do not normally require a long waiting period before planting.
How to Improve Different Soil Types for Raised Bed Vegetables
Not every garden starts with suitable loamy soil.
The underlying ground may contain heavy clay, excessive sand, or a mixture that lacks adequate organic matter.
The best preparation method depends on the existing conditions.
How to Prepare Clay Soil for a Raised Vegetable Bed
Clay-rich soil can hold considerable moisture, but compacted clay may drain slowly and restrict root growth.
If the bed is installed over heavy clay:
- Remove unwanted vegetation.
- Wait until the soil is moist but not saturated.
- Gently loosen compacted ground with a garden fork.
- Add suitable loamy topsoil and finished compost above it.
- Blend compatible materials where appropriate to avoid an abrupt boundary.
- Check drainage after watering.
Avoid trying to correct dense clay by adding a small quantity of sand.
Sand must be present in suitable proportions and particle sizes to change the soil’s texture effectively. Small additions may offer little improvement.
For severe drainage problems, improving the site or relocating the bed may be more effective than adding amendments.
How to Prepare Sandy Soil for Raised Beds
Sandy soil drains quickly because its relatively large particles leave spaces through which water moves easily.
However, it may dry too fast for vegetables during hot weather.
To improve sandy soil:
- Add suitable finished compost.
- Maintain organic matter through appropriate additions.
- Use mulch to reduce surface evaporation.
- Water according to root-zone moisture.
- Test fertility before adding unnecessary fertilizer.
A loamy topsoil mixture can also improve water retention in a raised bed built over very sandy ground.
Avoid relying on compost alone to create the entire growing layer.
How to Prepare Existing Garden Soil for a New Raised Bed
If the existing garden soil is already fertile, loose, and well-drained, you may not need to replace it.
A raised bed can be built over that soil and filled with additional suitable material.
Inspect the original soil before adding amendments.
If it has adequate organic matter and nutrient levels, adding large quantities of compost may be unnecessary.
The goal is to improve the growing environment, not replace healthy soil simply because a raised frame is being installed.
How Deep Should Soil Be for a Raised Bed Vegetable Garden?
The correct growing depth depends on the crops and whether the raised bed is connected to the ground underneath.
For a conventional open-bottom bed, approximately 8–12 inches of suitable growing medium is a practical starting depth for many vegetables.
Roots can continue growing into the native soil if it is sufficiently loose and well-drained.
For a bed with an enclosed bottom or one installed on concrete, the entire rooting area must be provided inside the structure.
Recommended Growing Depths for Vegetables
| Vegetable | Practical growing-depth consideration |
| Lettuce | Relatively shallow roots; suitable for modest depths |
| Spinach | Moderate rooting space with consistent moisture |
| Radishes | Loose soil deep enough for developing roots |
| Carrots | Rooting depth depends on the mature carrot variety |
| Bush beans | Benefit from loose, well-draining soil |
| Peppers | Need adequate depth for established roots |
| Tomatoes | Benefit from a deeper, extensive rooting zone |
| Squash | Requires generous rooting space and moisture |
For beds on hard surfaces, university extension guidance recommends at least 8 inches for crops such as leafy greens and beans, and approximately 12–24 inches for larger crops such as tomatoes, peppers, and squash.
These are general growing-depth guidelines, not guarantees for every vegetable variety.
Do You Need to Fill a Deep Raised Bed Completely With Soil?
Not necessarily, especially if the raised bed is open to suitable garden ground underneath.
The important requirement is adequate rooting depth.
However, avoid filling a shallow bed with large logs, rocks, or other materials that substantially reduce usable growing space.
Very tall raised beds sometimes incorporate woody organic material in their lower sections to reduce the amount of purchased soil needed.
That approach can create considerable settling as the wood decomposes.
For a typical 8–12-inch-tall vegetable bed, using a suitable soil mixture throughout is usually the more predictable choice.
How to Prepare Raised Bed Soil on Concrete or Other Hard Surfaces
A raised vegetable bed on concrete needs different soil preparation from one placed directly on natural ground.
Roots cannot move into the soil below, and water cannot drain downward through the pavement.
The growing mixture must provide the entire rooting environment.
Use a Suitable Container-Style Growing Medium
For beds installed on hard surfaces, a mixture of approximately equal parts finished compost and suitable soilless growing medium can be appropriate.
This differs from the topsoil-heavy mixture generally used for open-bottom raised beds.
Soilless growing media may contain peat moss, coconut coir, aged bark, perlite, and other ingredients.
The mixture needs to retain moisture while providing enough air for root growth.
Avoid filling a shallow enclosed planter entirely with dense garden topsoil.
Provide a Clear Drainage Path
Water must be able to leave the bottom of the structure.
Suitable designs may include:
- A supported base with drainage openings.
- A water-permeable liner over a properly draining structure.
- A slightly raised frame with safe runoff clearance.
- A manufactured raised planter with built-in drainage.
Do not install impermeable plastic across the entire bottom without an effective drainage system.
Also consider the combined weight of the frame, wet growing medium, water, and mature plants.
For decks, balconies, and other elevated structures, confirm that the surface can safely support the load.
How to Adjust Raised Bed Soil pH Before Planting
Soil pH affects nutrient availability and how well plants can use the nutrients already present.
Most common garden vegetables prefer slightly acidic to near-neutral soil.
However, the correct treatment depends on the actual pH and the crops being grown.
What Is a Good Soil pH for Raised Bed Vegetables?
A pH around 6.2–6.8 is a useful target for many vegetables.
Some vegetables tolerate a wider range, and an established bed can remain productive outside these exact numbers.
A soil test is the best starting point.
Do not adjust pH simply because a generic gardening recommendation calls for a particular number.
How to Raise Low Soil pH
Agricultural lime is commonly used when soil is too acidic.
However, the required amount depends on more than the current pH.
Soil texture and buffering capacity influence how much lime is needed.
Use laboratory recommendations rather than applying an arbitrary quantity.
Excessive lime can raise pH beyond the suitable range and interfere with nutrient availability.
How to Lower High Soil pH
Elemental sulfur may be recommended for certain alkaline soils.
Its effectiveness depends on soil chemistry, temperature, moisture, and microbial activity.
Do not assume sulfur will correct every high-pH soil.
Soils containing substantial free calcium carbonate can be particularly difficult to acidify.
Use test results and local extension guidance before applying acidifying amendments.
Important: Do not mix lime and sulfur into a raised bed simply as a routine preparation step. They serve different purposes and should only be used when appropriate.
Should You Add Fertilizer When Preparing Raised Bed Soil?
Fertilizer may be necessary, but adding it automatically is not always beneficial.
Topsoil and finished compost can already contain meaningful nutrient concentrations.
A soil test helps determine whether additional nitrogen, phosphorus, potassium, or other nutrients are required.
Understanding NPK Fertilizer
Most fertilizer labels show three numbers representing:
- Nitrogen (N): Supports leafy growth and other plant functions.
- Phosphorus (P): Supports energy transfer, root development, and other processes.
- Potassium (K): Supports water regulation and various plant functions.
For example, a fertilizer labeled 5-10-10 contains 5% nitrogen, 10% available phosphate, and 10% soluble potash by weight.
These numbers describe the product’s nutrient analysis, not necessarily what a raised bed requires.
Choose fertilizer according to soil test results and crop needs.
Why Too Much Compost or Fertilizer Can Cause Problems
Repeated heavy compost applications can increase certain nutrient levels, especially phosphorus.
Manure-based compost may contain substantial phosphorus and soluble salts.
Excessive nutrient concentrations can interfere with plant growth and contribute to environmental runoff problems.
More fertilizer does not automatically produce larger vegetables.
If the growing medium already contains adequate phosphorus and potassium, additional fertilizer containing those nutrients may be unnecessary.
Nitrogen requirements may still need attention because nitrogen availability changes during the growing season.
What Should You Avoid Adding to Raised Bed Vegetable Soil?
Some materials are inexpensive or easy to obtain but are unsuitable for a productive vegetable root zone.
Fresh Manure
Fresh manure can contain harmful pathogens, weed seeds, and high concentrations of certain nutrients or salts.
Use suitable, fully composted manure only when appropriate, and follow food-gardening safety guidance.
Avoid putting fresh manure directly around vegetable roots immediately before planting.
Unfinished Compost
Compost that is still actively decomposing may temporarily immobilize nutrients or create unsuitable growing conditions.
Use mature material with a stable, earthy character.
Large amounts of uncomposted food scraps do not belong directly in the active vegetable root zone.
Unknown Fill Dirt
Fill dirt may contain dense subsoil, stones, construction debris, or other unwanted materials.
It is not necessarily equivalent to quality topsoil.
If buying in bulk, inspect the material and ask about its origin.
Contaminated Soil
Avoid soil from locations with known or suspected contamination.
Potential concerns include old industrial areas, chemical storage sites, or ground affected by deteriorating lead-based paint.
Use appropriate laboratory testing when contamination is a possibility.
Thick Gravel Layers
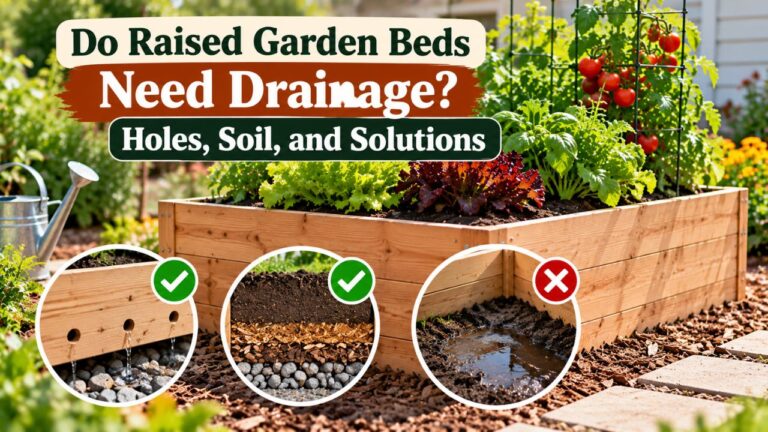
Adding gravel to the bottom of a raised bed is not a dependable solution for drainage problems.
Gravel occupies valuable growing space and does not fix compacted soil or an inadequate outlet.
For an open-bottom bed, improve the underlying soil and drainage conditions instead.
Excessive Peat or Lightweight Potting Mix
Peat-based potting mixes can be useful for container gardens, but filling a large permanent open-bottom bed entirely with lightweight growing medium may create moisture-management problems.
For a conventional raised bed, a suitable mineral topsoil-and-compost mixture generally provides a more stable long-term foundation.
How to Check Whether Raised Bed Soil Is Ready for Planting
Before sowing seeds or transplanting vegetables, inspect the growing medium.
You don’t need laboratory equipment for every physical check.
Check Soil Texture
Take a small handful of slightly moist soil.
A suitable loamy mixture should generally hold together loosely when squeezed and break apart with gentle pressure.
If the material forms a dense, sticky mass, it may be too wet or contain substantial clay.
If it falls apart immediately and dries excessively quickly, moisture retention may need attention.
This hand test provides a practical texture assessment, not a substitute for laboratory analysis.
Check Drainage
Water the bed slowly.
The water should enter the soil without prolonged surface pooling.
After irrigation, inspect whether the root zone remains excessively saturated.
For enclosed planters, confirm that drainage outlets allow excess water to escape.
Do not expect every raised bed to drain at exactly the same speed.
Check Moisture Before Planting
Seeds need suitable moisture near the surface for germination.
Transplants need moisture around their root balls.
Before planting, water dry soil thoroughly enough to moisten the intended root zone.
Avoid planting into extremely muddy soil.
The surface should be workable without becoming a compacted mass.
Check Soil Temperature
Vegetables have different temperature requirements for germination and growth.
Cool-season vegetables such as lettuce, spinach, and peas can tolerate cooler conditions than warm-season crops like peppers and tomatoes.
A soil thermometer can help determine when the bed is suitable for direct seeding.
Follow crop-specific planting temperatures rather than assuming every vegetable should be planted as soon as the bed is prepared.
How to Maintain Prepared Raised Bed Soil Throughout the Growing Season
Preparing the soil correctly is the first step. Maintaining its structure and fertility helps keep the bed productive.
Avoid Walking Inside the Bed
Walking on the soil compresses its pore spaces.
This reduces aeration and can restrict drainage and root growth.
Work from the surrounding paths.
For large beds, provide enough access from the sides to avoid stepping onto the planting surface.
Use Mulch to Protect Soil Moisture
Organic mulch helps reduce evaporation and surface crusting.
Suitable materials include clean straw, shredded leaves, and other plant-based mulches.
Keep mulch away from the stems of young plants where moisture accumulation could cause problems.
Do not cover newly sown seeds with a thick mulch layer that prevents emergence.
Water According to Root-Zone Moisture
Raised beds may dry faster than nearby ground-level gardens, especially in hot, windy weather.
Check the soil below the surface before watering.
Water slowly enough for moisture to reach the active root zone.
Avoid keeping the growing medium constantly saturated.
Drip irrigation and soaker hoses can be useful for delivering water near plant roots.
Refresh the Soil Between Growing Seasons
After harvesting, remove unwanted weeds and diseased plant debris.
Check whether the soil has settled and whether the surface needs leveling.
Add an appropriate growing mixture when the soil level has dropped substantially.
Compost and fertilizer applications should depend on soil condition and nutrient requirements.
Established raised beds generally do not need complete soil replacement every year.
Soil testing every two to three years is a useful maintenance practice for monitoring fertility.
Protect the Soil Between Plantings
If the raised bed will remain unused for several months, protect the surface from erosion and excessive weed growth.
A suitable mulch layer or cover crop can help.
Avoid leaving the growing medium exposed to heavy rainfall and wind unnecessarily.
For a permanent bed, minimal soil disturbance can help preserve its structure over time.
Common Raised Bed Soil Problems and Practical Solutions
Even properly prepared beds may develop problems as plants grow.
The most effective correction depends on the actual cause.
| Problem | Possible cause | Practical solution |
| Water stays on the surface | Compaction, dense soil, or poor drainage | Assess drainage and loosen affected soil |
| Soil dries too quickly | Sandy or overly coarse mixture | Improve moisture management and use mulch |
| Plants have pale leaves | Possible nutrient deficiency, poor roots, or excess moisture | Check growing conditions and soil nutrients |
| Soil level keeps dropping | Settling and organic matter decomposition | Top up with compatible growing mix |
| Soil becomes hard | Compaction or surface crusting | Avoid foot traffic and protect soil surface |
| Excessive weed growth | Existing weed roots or seeds | Remove weeds and maintain suitable mulch |
| Weak growth despite fertilizer | pH imbalance, drainage problems, or other stress | Test soil and investigate root conditions |
Don’t assume every symptom is caused by poor fertility.
Vegetable growth also depends on sunlight, temperature, irrigation, crop variety, and pest or disease pressure.
A soil amendment should address an identified problem rather than be added simply because plant growth is disappointing.
Conclusion
Understanding how to prepare soil for a raised bed vegetable garden begins with assessing the existing ground and creating a balanced growing mixture.
For most open-bottom raised beds, approximately two parts quality topsoil and one part fully finished compost provide a practical starting point. Loosen compacted ground, test the soil before making major amendments, and fill the bed to an appropriate depth for the intended vegetables.
Good drainage, adequate rooting space, and suitable nutrient levels are more important than adding numerous specialty ingredients.
Avoid filling the bed entirely with compost, using unknown fill dirt, or applying fertilizer without considering existing soil conditions.
For a new vegetable raised bed, I recommend starting with tested, well-draining soil, mixing in mature compost, and protecting the finished growing surface with appropriate moisture management. This creates a dependable foundation that can be maintained and improved over many growing seasons.
FAQs About How to Prepare Soil for a Raised Bed Vegetable Garden
Can You Use Regular Garden Soil in a Raised Vegetable Bed?
Yes, regular garden soil can be used if it has suitable texture, drainage, fertility, and no significant contamination concerns.
Mixing quality garden soil with finished compost can improve its organic matter content and structure.
Avoid relying entirely on dense clay soil or unknown construction fill.
What Is the Best Soil Mix for Raised Bed Vegetables?
For most open-bottom raised vegetable beds, approximately two parts suitable topsoil to one part finished compost is a practical starting mixture.
The ideal proportions depend on the existing soil’s texture, fertility, and organic matter.
For enclosed planters or beds on concrete, an appropriate soilless growing medium may be more suitable.
Do You Need to Remove Grass Before Filling a Raised Bed?
Not always.
Existing grass can be removed or suppressed before filling the bed.
Plain cardboard may provide temporary suppression, although it can initially slow water movement.
Persistent perennial weeds may require more thorough removal because some can regrow through the new soil.
Should You Add Fertilizer Before Planting Vegetables?
Add fertilizer when a soil test or crop-specific recommendation indicates that nutrients are needed.
Freshly prepared raised-bed mixtures may already contain adequate amounts of certain nutrients, especially when substantial compost is included.
Avoid applying large quantities of fertilizer without considering existing nutrient levels.
How Long Should Raised Bed Soil Settle Before Planting?
You can generally plant shortly after filling the bed with suitable topsoil and fully finished compost.
Water the mixture to help it settle and check the surface level.
A long waiting period is usually unnecessary unless the materials require further composting or the soil is too wet to work.
Is 8 Inches of Soil Deep Enough for Raised Bed Vegetables?
Eight inches can be sufficient for certain vegetables, especially when the raised bed has an open bottom and roots can grow into suitable soil underneath.
For beds on concrete or with enclosed bottoms, larger crops such as tomatoes and peppers generally benefit from deeper growing medium.
Choose the depth according to the crop’s root requirements and the condition of the underlying ground.
Should You Replace Raised Bed Soil Every Year?
No. Healthy raised-bed soil can remain productive for many years with suitable maintenance.
Check nutrient levels, drainage, soil structure, and settling before each growing season.
Add compatible growing material or amendments when needed rather than replacing the entire bed.
Complete replacement is generally reserved for serious problems such as confirmed contamination or conditions that cannot be corrected safely.

I’m Maya L. Greenwood, a lifelong plant lover who believes anyone can grow something beautiful with the right guidance. After years of testing soil mixes, pruning methods, irrigation tricks, and pest-safe solutions, I started EasyGardenTips.com to turn hard-won lessons into step-by-step advice. From seed starting and container gardens to composting and seasonal checklists, my goal is to make gardening simple, sustainable, and fun.