How to Install Drip Irrigation in Raised Beds: Easy DIY Guide
To install drip irrigation in raised beds, connect a water source to a backflow preventer, filter, and pressure regulator, run supply tubing to the garden beds, and attach drip lines with emitters near the plants. After connecting everything, flush the tubing, test for leaks, and adjust the watering schedule based on soil moisture.
Drip irrigation is particularly useful for raised vegetable gardens because it delivers water slowly near plant roots instead of spraying the entire growing area. It can reduce unnecessary evaporation, limit water splashing onto leaves, and make everyday watering more convenient.
A basic system doesn’t require complicated plumbing. Most home gardeners can install one using flexible tubing, barbed connectors, a few simple tools, and an outdoor faucet. A battery-powered timer can also automate watering.
However, choosing the correct tubing, pressure, emitter spacing, and watering duration determines how effectively the system works.
In this article, I explain how to install drip irrigation in raised beds from planning the layout to connecting and testing the equipment. You’ll learn which supplies to buy, how to space drip lines in a 4×8-foot bed, how to calculate water delivery, and how to adjust and maintain the system for healthy vegetables.
How to Install Drip Irrigation in Raised Beds: System Overview
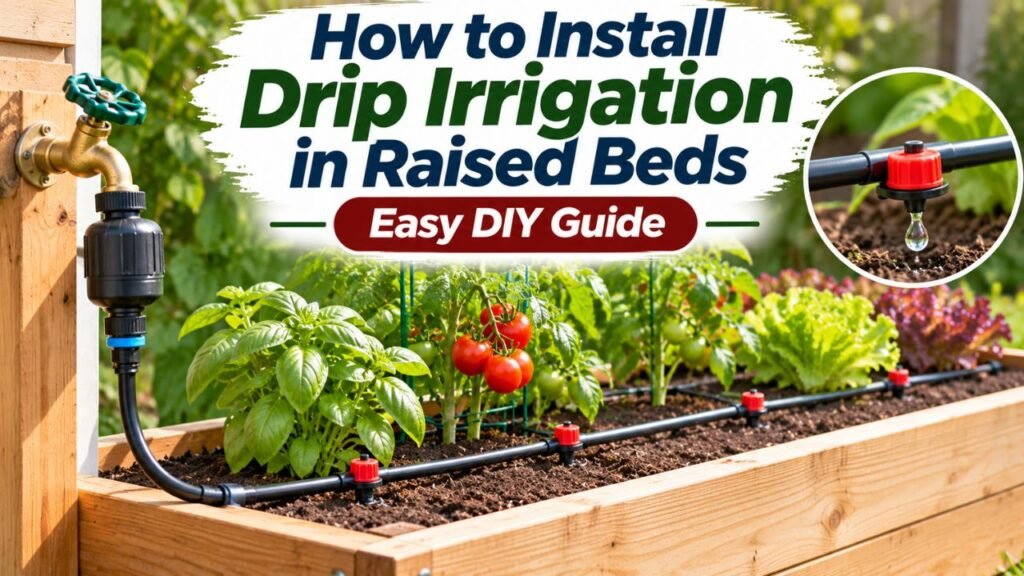
A basic raised-bed drip irrigation system uses a low-pressure water supply and a network of tubing with small outlets called emitters.
Water moves through the tubing and drips slowly into the soil.
Unlike overhead sprinklers, the system concentrates water near the plants rather than spraying leaves and surrounding pathways.
How a Raised-Bed Drip Irrigation System Works
A typical setup includes the following components arranged along the water supply:
Outdoor faucet → Timer (optional) → Backflow preventer → Filter → Pressure regulator → Tubing adapter → Main supply tubing → Drip lines → End closures
The precise order of the head assembly may vary with the equipment and local plumbing requirements. Follow the component manufacturers’ instructions and applicable backflow-prevention rules.
Each component has a specific purpose.
| Component | Function |
| Outdoor faucet or hose connection | Supplies water |
| Water timer | Controls watering automatically |
| Backflow preventer | Helps prevent irrigation water from entering the potable supply |
| Filter | Captures debris that could clog emitters |
| Pressure regulator | Reduces pressure to the level required by the drip system |
| Main supply tubing | Carries water from the source to the beds |
| Drip tubing | Distributes water along planting areas |
| Emitters | Release water slowly |
| Barbed connectors | Join different tubing sections |
| End caps or figure-eight closures | Seal tubing ends |
| Landscape staples | Hold tubing in position |
According to the University of Arizona Cooperative Extension’s drip irrigation guide, a properly designed system requires compatible low-pressure components, appropriate filtration, and emitters selected for the plants being watered.
Why Drip Irrigation Works Well in Raised Beds
Raised beds often contain loose, well-draining soil mixtures.
These mixtures can dry more quickly than surrounding in-ground garden soil, especially during hot or windy weather.
Drip irrigation helps by delivering water directly into the growing area.
Potential advantages include:
- More controlled water application.
- Less water spraying outside the bed.
- Reduced wetting of plant foliage.
- Convenient automated watering.
- Easier watering of multiple beds.
- Less time spent moving hoses.
- More consistent moisture when properly scheduled.
However, drip irrigation isn’t automatically water-efficient in every installation.
Incorrect emitter spacing, excessive watering duration, clogged tubing, or leaks can waste water.
Proper setup and regular inspection are important.
What Do You Need to Install Drip Irrigation in Raised Beds?
Most small raised-bed installations can be assembled with inexpensive irrigation components.
The exact quantities depend on the number and dimensions of the beds.
Required Drip Irrigation Supplies
| Material | Typical Choice for a Home Garden |
| Main supply tubing | ½-inch nominal polyethylene irrigation tubing |
| Drip tubing | ¼-inch dripline or compatible larger inline drip tubing |
| Emitter spacing | Commonly 6 or 12 inches |
| Emitter flow rate | Often 0.5 or 1 gallon per hour |
| Pressure regulator | Rated for the selected drip product, often around 20–30 psi |
| Irrigation filter | Commonly 120–200 mesh, depending on emitter requirements |
| Backflow preventer | Appropriate for the water supply and local regulations |
| Barbed fittings | Matching tees, elbows, and connectors |
| End closures | Compatible end caps or figure-eight clamps |
| Ground staples | Suitable for securing tubing |
| Faucet timer | Optional but convenient |
| Hole punch | For installing takeoffs and emitters in compatible tubing |
These are common component options, not universal specifications.
Always verify the product’s operating pressure, flow capacity, and fitting dimensions before purchasing.
Tools Needed for Installation
You may need:
- Measuring tape.
- Irrigation tubing cutter or sharp utility knife.
- Drip tubing hole punch.
- Marker.
- Bucket.
- Stopwatch.
- Small garden trowel.
- Gardening gloves.
Use a tubing cutter designed for flexible irrigation pipe whenever possible.
It generally produces cleaner cuts than a dull knife.
Should You Buy a Drip Irrigation Kit?
A complete kit can be convenient for beginners.
Many kits include tubing, connectors, emitters, stakes, and end closures.
However, check whether the kit includes a filter, pressure regulator, and backflow preventer.
Not every kit contains all three.
Also confirm the tubing length and emitter capacity.
A kit designed for a few potted plants may not be suitable for several large raised beds.
Key Takeaway: Choose compatible components as a system. The tubing, pressure regulator, filter, fittings, and emitters must work together.
Which Drip Irrigation Tubing Is Best for Raised Beds?
Several watering products can be used in raised gardens.
The best option depends on the planting layout and whether you want to water the entire bed or individual plants.
¼-Inch Dripline With Built-In Emitters
Quarter-inch dripline is useful for small raised beds.
It is flexible and can be arranged in short parallel runs.
The built-in emitters release water at regular intervals.
For example, a dripline with emitters every 12 inches can provide reasonably uniform watering along a vegetable row.
This type of tubing is convenient for:
- Lettuce.
- Spinach.
- Carrots.
- Radishes.
- Herbs.
- Closely planted vegetables.
However, small-diameter dripline has manufacturer-specific limits on length and flow.
Use short runs connected to an adequately sized supply line rather than assuming a single long ¼-inch line can serve an entire garden.
½-Inch Inline Drip Tubing
Larger inline drip tubing can also be used inside raised beds.
It may be appropriate for larger beds or systems covering several planting areas.
Some products contain pressure-compensating emitters that help maintain more consistent output within their specified operating range.
The tubing can be arranged in parallel lines or another suitable layout.
It is less flexible than some smaller tubing, so allow room for bends and connectors.
Drip Tape
Drip tape is commonly used in vegetable production.
It is relatively lightweight and contains regularly spaced outlets.
Drip tape may be an economical choice for long planting rows.
However, thin-walled tape can be more vulnerable to punctures and handling damage.
It also often requires lower operating pressure than thicker drip tubing.
Do not connect drip tape to a regulator intended for a higher-pressure dripline without verifying compatibility.
Point-Source Drip Emitters
Point-source emitters deliver water to individual locations.
They are useful for larger, widely spaced vegetables such as tomatoes and peppers.
For example, a gardener may position one or more emitters within each plant’s root zone.
As plants grow, the wetted area may need to be expanded.
Point-source irrigation is less convenient for densely seeded crops that need moisture distributed across a larger part of the bed.
Soaker Hose vs. Drip Irrigation
A soaker hose releases water through its porous material.
It is simple to install and can work in raised beds.
However, drip tubing with specified emitters provides more predictable flow-rate information for planning and adjusting irrigation.
| Feature | Inline Drip Tubing | Soaker Hose |
| Water outlets | Built-in emitters | Porous hose wall |
| Flow information | Often specified per emitter | Varies by product |
| Watering pattern | Defined emitter locations | Water seeps along hose |
| Layout flexibility | Good | Good |
| Pressure requirements | Product-specific | Product-specific |
| Maintenance | Check and flush emitters | Inspect for uneven seepage |
| Best use | Planned vegetable-bed irrigation | Simple raised-bed watering |
For a new system serving multiple raised vegetable beds, inline drip tubing is generally a practical starting choice.
How to Plan a Drip Irrigation Layout for Raised Beds
Planning the layout before cutting tubing helps prevent wasted material and uneven watering.
The design should account for the bed dimensions, plants, soil texture, and available water supply.
Measure the Raised Beds
Start by recording:
- Number of raised beds.
- Length of each bed.
- Width of each bed.
- Distance between beds.
- Distance from the water source.
- Location of major plants.
- Available pathways.
Draw a simple overhead sketch.
Mark the position of the outdoor faucet and the route of the main supply tubing.
This makes it easier to estimate material quantities.
How Far Apart Should Drip Lines Be?
For many densely planted raised beds, approximately 12 inches between parallel drip lines is a useful starting layout.
However, this is not a universal requirement.
Spacing depends on how water moves through the soil and how closely the vegetables are planted.
| Planting Situation | Possible Layout |
| Dense salad greens | Parallel drip lines approximately 8–12 inches apart |
| General mixed vegetable bed | Parallel lines approximately 12 inches apart |
| Coarse, sandy raised-bed mix | Test closer line or emitter spacing |
| Widely spaced tomatoes | Targeted emitters near root zones |
| Peppers in separate rows | Drip lines aligned with planting rows |
| Seedlings before roots spread | Drip plus temporary supplemental watering if needed |
These are preliminary design choices.
After installation, test the actual wetted soil pattern before deciding whether the spacing is sufficient.
How Far Apart Should Emitters Be?
Common inline emitter spacing includes 6 and 12 inches.
Six-inch spacing provides more discharge points along the same length of tubing.
Twelve-inch spacing provides fewer discharge points.
Closer emitter spacing does not always mean the system should run for the same amount of time.
For identical emitter flow rates, more emitters increase total water delivery.
Soil texture also matters.
Sandy soil often allows water to move downward more rapidly, creating a narrower wetted area.
Loamy soil may distribute moisture farther sideways.
According to Utah State University Extension’s backyard drip irrigation guide, emitter spacing and discharge rates should be selected according to soil texture, the plant root zone, and the intended wetted area.
Should Drip Lines Run Lengthwise or Across the Bed?
For rectangular raised beds, parallel lines running along the bed’s length are often convenient.
They are easy to install, secure, and adjust.
For example, an 8-foot-long bed can contain several 8-foot drip lines supplied by a header at one end.
This layout keeps the tubing organized and simplifies maintenance.
However, an alternative grid or looping pattern may work for different planting arrangements.
The important point is maintaining appropriate water distribution across the growing area.
Example: Drip Irrigation Layout for a 4×8 Raised Bed
A 4-foot-wide by 8-foot-long raised bed provides 32 square feet of growing space.
For densely planted vegetables, a simple layout uses four parallel drip lines.
Recommended Starting Layout
<box border radius=”lg” padding={3} gap={2}>
<text weight=”medium” textAlign=”center”>Example 4×8-Foot Raised Bed</text>
<svg viewBox=”0 0 340 224″ width=”100%” xmlns=”http://www.w3.org/2000/svg”>
<rect x=”42″ y=”18″ width=”266″ height=”185″ rx=”8″ fill=”#b99469″ fillOpacity=”0.16″ stroke=”#b99469″ strokeWidth=”3″/>
{#each [60,120,180,240,300] as x}
<line x1={x} y1=”24″ x2={x} y2=”201″ stroke=”currentColor” strokeOpacity=”0.055″ strokeDasharray=”4 5″/>
{/each}
<path d=”M61 40 H288″ fill=”none” stroke=”#517d9e” strokeWidth=”7″ strokeLinecap=”round”/>
<path d=”M61 40 V197″ fill=”none” stroke=”#517d9e” strokeWidth=”2″ strokeDasharray=”4 4″/>
{#each [79,127,175,223] as y, i}
<path d={`M63 ${y} H287`} fill=”none” stroke=”#5e9570″ strokeWidth=”5″ strokeLinecap=”round”/>
{#each [80,111,142,173,204,235,266,287] as x}
<circle cx={x} cy={y} r=”3.2″ fill=”#c57d3a”/>
{/each}
<circle cx=”63″ cy={y} r=”5″ fill=”#517d9e”/>
{/each}
<line x1=”61″ y1=”18″ x2=”61″ y2=”40″ stroke=”#517d9e” strokeWidth=”4″/>
<path d=”M27 19 L61 19″ stroke=”#517d9e” strokeWidth=”4″ fill=”none”/>
<text x=”15″ y=”11″ fontSize=”10″ fill=”currentColor”>Supply</text>
<text x=”176″ y=”216″ fontSize=”11″ textAnchor=”middle” fill=”currentColor”>8 ft length</text>
<text x=”329″ y=”112″ fontSize=”11″ textAnchor=”middle” fill=”currentColor” transform=”rotate(90 329 112)”>4 ft width</text>
</svg>
<row align=”center” justify=”center” wrap=”wrap” gap={3}>
<row align=”center” gap={1}><box background=”#517d9e” width=”14px” height=”5px” radius=”full”/><caption>Main supply/header</caption></row>
<row align=”center” gap={1}><box background=”#5e9570″ width=”14px” height=”5px” radius=”full”/><caption>Drip lines</caption></row>
<row align=”center” gap={1}><box background=”#c57d3a” size=”7px” radius=”full”/><caption>Emitters</caption></row>
</row>
<caption textAlign=”center”>Illustrative layout, not to scale. Each emitter line needs an appropriate end closure; actual emitter count and spacing depend on the product.</caption>
</box>
Position the four lines approximately 6, 18, 30, and 42 inches from one side of the bed.
That gives approximately 12 inches between adjacent lines and 6 inches between the outer lines and the bed edges.
How Much Tubing Is Needed?
For four lines that are each 8 feet long:
4 × 8 = 32 feet of drip tubing
Allow additional tubing for connections, routing, and adjustments.
You also need a header or suitable manifold to distribute water to the four lines.
The header can be made from compatible ½-inch blank supply tubing.
What Emitter Spacing Should You Choose?
For this example, consider inline drip tubing with emitters spaced 12 inches apart.
Each 8-foot line would contain approximately eight emitters, depending on the manufacturer’s emitter positions and where you cut the tubing.
Four lines would contain approximately 32 emitters.
This is a useful starting arrangement for mixed vegetables.
For sandy soil or very densely planted crops, closer spacing may be necessary.
How Much Water Will This Bed Receive?
Suppose each emitter delivers 0.5 gallons per hour.
The total system flow would be:
32 emitters × 0.5 gallons per hour = 16 gallons per hour
For a 30-minute watering cycle:
16 × 0.5 = 8 gallons
The 4×8 bed covers 32 square feet.
One inch of water over that entire area equals approximately:
32 × 0.623 = 19.9 gallons
Therefore, 8 gallons represents approximately 0.4 inch of water averaged across the bed area.
This is a theoretical depth equivalent, not proof that every section of soil receives an identical amount.
Actual wetting patterns depend on soil texture, emitter placement, pressure, and drainage.
Use this calculation to understand water delivery, then test the soil before deciding how long to irrigate.
Key Takeaway: Four parallel 8-foot emitter lines provide a straightforward starting layout for a 4×8 raised bed. Adjust spacing after observing the actual soil-wetting pattern.
Step-by-Step: Installing Drip Irrigation in Raised Beds
After selecting the components and planning the layout, the physical installation is relatively simple.
The following procedure assumes a garden-faucet-fed system using flexible supply tubing and inline drip emitters.
Step 1: Connect the System to the Water Source
Locate an outdoor faucet with a suitable threaded hose connection.
Check that the faucet works properly and that the water supply is adequate.
If using an automatic timer, attach a faucet-compatible timer according to its instructions.
Install an appropriate backflow-prevention device as required by the water supplier and local regulations.
Backflow prevention helps protect the potable water supply against reverse flow from the irrigation system.
Do not omit required backflow protection simply because the system operates at low pressure.
Step 2: Install the Filter and Pressure Regulator
Connect the filter and pressure regulator in the arrangement specified by their manufacturers.
A common system places the filter before the pressure regulator.
The filter removes particles that could clog emitters.
The regulator reduces water pressure to the level required by the drip tubing.
Many drip systems operate within approximately 10–30 psi, but the exact requirement varies.
For example, some inline tubing is designed for approximately 20–30 psi, while thin drip tape may require lower pressure.
Choose a regulator based on the drip product’s specifications.
Also verify that the regulator’s rated flow range includes the expected system flow.
A regulator designed for a much larger irrigation zone may not operate as intended on a very small, low-flow setup.
Step 3: Attach the Main Supply Tubing
Install the appropriate adapter between the faucet assembly and the main supply tubing.
Use compatible polyethylene irrigation tubing.
For many small garden systems, nominal ½-inch supply tubing is convenient.
However, tubing manufacturers use different outside diameters, so nominal size alone does not guarantee fitting compatibility.
Match the tubing and connectors carefully.
Run the supply tubing from the faucet toward the raised beds.
Follow the planned route and avoid placing tubing across walking paths where it could create a trip hazard.
Step 4: Run the Supply Line Along the Raised Beds
Position the main supply line near the end or side of each raised bed.
For multiple beds, the mainline can continue along the garden and feed separate branches.
Use tees and elbows where necessary.
Avoid sharp bends that could restrict water movement.
Keep the tubing accessible enough for future inspection.
If the supply line must cross a pathway, protect it appropriately rather than leaving it exposed where people or garden equipment may damage it.
Step 5: Install the Dripline Connections
If using ¼-inch dripline, make the required takeoff holes in the compatible mainline using a proper irrigation punch.
Insert the appropriate barbed connectors.
Attach the smaller drip tubing to the connectors.
For a 4×8 bed with four parallel drip lines, install four connections along the header.
The lines should extend lengthwise through the bed.
Check that the fittings are seated securely.
Avoid enlarging the punched holes unnecessarily because this can cause leaks.
Step 6: Lay Out the Drip Lines
Place the tubing across the surface of the raised-bed soil according to your planned layout.
For a densely planted 4×8 bed, the four-line arrangement described earlier is a practical starting point.
Position the emitter outlets where they can wet the intended root zones.
Avoid placing every emitter directly against a plant stem.
Instead, allow water to spread into the surrounding soil.
For large vegetables, adjust the dripline or use targeted emitters as the root systems expand.
Step 7: Secure the Tubing
Use garden staples or irrigation stakes to keep the tubing in position.
Place them at intervals sufficient to prevent the tubing from shifting or lifting.
A spacing of roughly 2–3 feet can be a useful starting point for surface tubing, with additional stakes at bends.
Do not drive staples through the tubing.
Make sure staples do not pinch the lines.
Leave enough flexibility to reposition the tubing when planting layouts change.
Step 8: Flush the System Before Closing the Ends
Before permanently sealing the tubing ends, briefly run water through the system.
This helps remove dirt or plastic debris introduced during installation.
Keep the open tubing ends clear of soil.
Allow water to run until it appears clean, following the manufacturer’s flushing instructions.
Then turn off the water.
Fit the correct end caps or closures.
Step 9: Turn On the Water and Check for Leaks
Slowly activate the water supply.
Inspect:
- Faucet connections.
- Timer connections.
- Filter housing.
- Pressure regulator.
- Tubing adapters.
- Barbed connectors.
- Dripline branches.
- End closures.
Look for spraying, dripping at fittings, disconnected lines, or unusually weak emitter flow.
Repair problems before leaving the system unattended.
Water should emerge slowly and consistently from the emitters.
A properly functioning drip system generally does not spray water like a sprinkler.
Step 10: Test the Soil-Wetting Pattern
Run the system for a short trial period.
For example, start with approximately 20–30 minutes, then evaluate the soil.
This is a testing interval, not a universal irrigation recommendation.
After allowing time for water to move through the soil, use a small trowel to check moisture several inches below the surface.
Inspect locations:
- Near an emitter.
- Between two emitters.
- Between adjacent drip lines.
- Near the bed edges.
- Near plants with different root depths.
If the soil remains dry between lines, consider adjusting their spacing or emitter arrangement.
If the soil becomes excessively wet or water runs off, reduce the application duration or use shorter cycles.
Step 11: Program the Watering Timer
Once you understand how the system wets the soil, set the timer.
Choose a watering frequency and duration appropriate for the plants, soil mix, weather, and season.
Start conservatively and adjust after monitoring moisture.
Do not assume a fixed daily schedule will remain suitable throughout the growing season.
Rainfall and changing temperatures affect water demand.
Key Takeaway: Assemble the low-pressure supply components, connect the mainline, install and secure the drip tubing, flush the system, and verify that water reaches the intended root zones before automating irrigation.
How to Connect Drip Irrigation to Multiple Raised Beds
A single water source can supply several raised beds if the system has adequate flow and compatible pressure regulation.
The key is distributing water without creating excessive pressure losses.
Use a Main Supply Line
Run the main supply tubing past each bed.
At each raised bed, install a tee or another compatible branch connection.
The branch feeds the drip lines inside the bed.
For example, three raised beds can be supplied from one faucet using a continuous mainline with a connection at each bed.
Consider Separate Watering Zones
Different plants may require different watering schedules.
For example, a bed of young lettuce may need more frequent shallow-root-zone moisture than a bed of established drought-tolerant herbs.
If plants have substantially different requirements, separate valves or independently controlled zones may be useful.
This prevents watering every bed according to the needs of the thirstiest plants.
Calculate Total Water Demand
To estimate the total flow, add the flow rates of all emitters operating at the same time.
For example, if three beds each have 32 emitters rated at 0.5 gallons per hour:
3 × 32 × 0.5 = 48 gallons per hour
That equals:
48 ÷ 60 = 0.8 gallons per minute
The available water supply, regulator, tubing, and fittings must support that flow.
Very long tubing runs, elevation changes, and undersized components can affect performance.
For larger gardens, divide the system into zones if necessary.
How Long Should You Run Drip Irrigation in Raised Beds?
There is no single watering duration that works for every raised bed.
The correct time depends on the emitter flow rate, number of emitters, soil texture, plant size, and weather.
How to Calculate Water Delivery
Use the following formula:
Total Water (gallons) = Number of Emitters × Emitter Flow (gph) × Run Time (hours)
For example:
- 32 emitters.
- 0.5 gallons per hour per emitter.
- 30-minute irrigation cycle.
Calculation:
32 × 0.5 × 0.5 = 8 gallons
This tells you how much water the system is designed to deliver under its rated conditions.
It does not tell you exactly how deep the moisture reaches.
How Much Water Do Raised Beds Need?
A commonly used starting benchmark for established vegetable gardens is around 1 inch of total water per week, including rainfall.
However, raised-bed needs can differ substantially.
Hot weather, high winds, sandy soil, and rapidly growing vegetables can increase water demand.
Cooler weather, rainfall, and moisture-retentive soil mixes can reduce it.
Young seedlings may also require a different watering pattern from established plants.
Use the benchmark as a planning reference rather than a fixed rule.
Should You Water Raised Beds Every Day?
Not necessarily.
Some raised beds may need frequent irrigation during hot weather.
Others may remain adequately moist for several days.
Frequent watering isn’t automatically better.
Constantly wet soil can reduce root-zone aeration and contribute to poor root health.
Check soil moisture before deciding whether another irrigation cycle is needed.
How Deep Should Drip Irrigation Water the Soil?
For established vegetables, the goal is to supply moisture throughout the active root zone rather than wetting only the surface.
As a practical check, examine soil moisture around 4–6 inches deep, then consider the root depth of the specific crop.
Larger established plants may need moisture deeper than that.
Seedlings with shallow roots need moisture closer to the surface until their roots develop.
If the top inch is wet but the soil below remains dry, the watering cycle may be too short for an established crop.
How to Adjust Watering for Different Soil Types
| Soil Condition | Watering Consideration |
| Sandy soil | Water may move downward quickly; closer emitter spacing or more frequent shorter cycles may help |
| Loamy soil | Often provides a balance of drainage and moisture retention |
| Clay-rich soil | Water may spread sideways but infiltrate slowly |
| Compost-rich raised-bed mix | Moisture behavior depends on ingredients and decomposition |
| Very dry potting-style mix | May need gradual rewetting to avoid uneven absorption |
Use observed moisture patterns to adjust emitter placement and watering duration.
Key Takeaway: Calculate the system’s flow, then verify the soil’s actual moisture. The best watering schedule changes with crop growth, rainfall, temperature, and soil texture.
Should Drip Irrigation Go Above or Below the Soil?
For most beginner raised-bed installations, placing drip tubing on the soil surface is convenient.
It is easy to inspect, move, clean, and repair.
Surface Drip Irrigation
Surface tubing can be placed directly on the soil and secured with stakes.
Advantages include easy inspection and seasonal adjustment.
The tubing can also be moved when you change crops.
This makes it suitable for raised beds that are replanted several times a year.
Drip Irrigation Under Mulch
Once the system has been tested, you can cover suitable surface tubing with a light layer of organic mulch.
Mulch can reduce evaporation from the soil surface and help moderate soil temperature.
However, keep the tubing accessible for maintenance.
Avoid burying components so deeply that leaks and clogs become difficult to detect.
Follow the tubing manufacturer’s installation recommendations.
Buried Drip Irrigation
Subsurface drip systems are designed to deliver water below the soil surface.
They may reduce surface evaporation further, but they also require more careful planning.
Buried lines can be harder to inspect or repair.
Certain systems may need protection against root intrusion or additional maintenance procedures.
For most small home raised beds, surface dripline or dripline beneath mulch is simpler to manage.
Common Drip Irrigation Problems in Raised Beds
Drip systems are straightforward, but they still require occasional troubleshooting.
Drip Emitters Are Not Releasing Water
Possible causes include:
- Closed faucet or valve.
- Clogged filter.
- Blocked emitter.
- Kinked tubing.
- Incorrect regulator.
- Inadequate water supply.
- Incorrectly connected tubing.
Check the system from the water source toward the affected line.
Flush the tubing and clean filters according to their instructions.
Replace clogged emitters when cleaning is ineffective.
Water Only Reaches One Side of the Bed
The emitter or line spacing may be too wide for the soil’s wetting pattern.
Water movement can be especially narrow in coarse soil.
Try repositioning drip lines or adding suitable emitters.
Retest the moisture pattern after making changes.
Water Pressure Is Too High
Excessive pressure can cause fittings to leak or disconnect.
Use a pressure regulator rated for the drip tubing.
Do not assume that partly closing the faucet provides stable, accurate pressure regulation.
Water Flow Is Too Weak
Weak flow may result from an undersized supply line, clogged filter, insufficient source pressure, or too many emitters operating at once.
Check the available water flow and compare it with the total system demand.
Consider dividing a large garden into separate watering zones.
Water Pools Around Emitters
Pooling can indicate that water is being applied faster than the soil can absorb it.
Possible adjustments include:
- Shorter watering cycles.
- More time between cycles.
- Lower-flow emitters.
- Better emitter distribution.
- Improving drainage problems where appropriate.
Do not automatically increase watering duration when the soil surface remains wet.
Plants Are Still Wilting
Wilting doesn’t always mean the plants need more water.
Heat stress, root damage, disease, and waterlogged soil can also cause wilting.
Check soil moisture at root depth before changing the irrigation schedule.
If the soil is already wet, investigate other possible causes.
How to Maintain Drip Irrigation in Raised Beds
Regular maintenance helps prevent clogged emitters and uneven watering.
A simple inspection routine is usually sufficient for small garden installations.
Check the System During Watering
Periodically observe the drip lines while the timer is running.
Confirm that all expected emitters release water.
Check for disconnected fittings, leaks, or damaged tubing.
Pay particular attention to areas where gardening tools or animals may disturb the lines.
Clean the Filter
Inspect and clean the filter according to the manufacturer’s instructions.
Monthly inspection during the growing season can be a useful starting point.
If the water contains substantial sediment, more frequent cleaning may be necessary.
Turn off the water and release pressure appropriately before opening a filter housing.
Flush the Drip Lines
Sediment can accumulate near tubing ends.
Periodically open the approved flush points or end closures and run clean water through the lines.
Avoid allowing soil to enter the open tubing.
Turn off the water before resealing the ends.
Adjust the Layout as Plants Grow
Young plants have smaller root systems than mature vegetables.
As tomatoes, peppers, and other crops grow, they may benefit from additional wetted root-zone coverage.
Reposition or add emitters where necessary.
Avoid concentrating all water immediately against the stem.
Prepare the System for Winter
In freezing climates, disconnect and protect components that could be damaged by trapped water.
This may include:
- Battery-operated timers.
- Filters.
- Pressure regulators.
- Backflow devices.
- Exposed tubing.
Drain and store equipment according to its manufacturer’s instructions.
Some irrigation systems require specific winterization procedures.
Do not assume every system can safely remain full of water throughout winter.
Common Mistakes When Installing Drip Irrigation in Raised Beds
Avoiding several common mistakes can make the installation more reliable.
Skipping the Pressure Regulator
Ordinary household water pressure may exceed the operating limits of drip tubing and emitters.
Using an appropriate regulator helps maintain the required pressure.
Forgetting the Filter
Small emitter openings can become clogged with sediment.
Install a compatible filter and clean it regularly.
Using the Wrong Tubing Connectors
Nominal tubing sizes do not always identify the exact outside diameter.
Choose fittings specifically compatible with the tubing.
Incorrect connectors can cause leaks or disconnected lines.
Placing Drip Lines Too Far Apart
Water may not spread far enough sideways to reach every plant.
Test the soil-wetting pattern and adjust line spacing when needed.
Installing Too Many Emitters on One Line
Every emitter adds to the total flow requirement.
Too many emitters or overly long runs can reduce uniformity.
Follow the tubing manufacturer’s maximum run-length and flow specifications.
Setting the Timer Without Testing the Soil
A timer cannot determine the correct watering duration unless you have evaluated water delivery and soil moisture.
Start with a trial cycle and adjust based on actual conditions.
Burying Tubing Before Checking for Leaks
Hidden leaks and clogged emitters are harder to find.
Test the complete system while the tubing is visible.
Cover it with mulch only after confirming correct operation.
Leaving Irrigation Unchanged All Season
Water requirements change as plants grow and weather conditions shift.
Review the schedule regularly.
A setting suitable for spring may not work during midsummer heat.
Ignoring Young Seedlings
Newly planted seeds and shallow-rooted seedlings may not reach moisture delivered by widely spaced emitters.
Supplement with gentle surface watering when necessary until roots develop.
Neglecting Maintenance
Filters, emitters, and fittings require occasional attention.
A small clog can leave one plant dry even when the timer runs normally.
Inspect the system regularly.
Conclusion
Learning how to install drip irrigation in raised beds is a practical way to make watering more consistent and convenient.
Begin by measuring the garden and planning the tubing layout.
Connect the faucet to the appropriate backflow prevention, filter, and pressure-regulating components. Then run a main supply line to each bed and attach drip tubing or emitters positioned near the plants.
For a 4×8-foot raised bed, four parallel drip lines spaced approximately 12 inches apart can provide a useful starting layout for densely planted vegetables.
After installation, flush the system, check for leaks, and test how water spreads through the soil.
Use the emitter flow rates to estimate how much water is delivered, but adjust the timer using actual root-zone moisture rather than relying on a fixed schedule.
With appropriate spacing, pressure control, and regular maintenance, a simple drip system can provide reliable irrigation for raised-bed vegetables throughout the growing season.
FAQs About How to Install Drip Irrigation in Raised Beds
What Is the Best Drip Irrigation System for Raised Beds?
For many small raised vegetable gardens, inline drip tubing with regularly spaced emitters is a practical choice.
It is easy to arrange across the bed and connect to a faucet-fed supply line.
For large, widely spaced vegetables, point-source emitters may be more suitable.
The best option depends on planting density, soil texture, and available water pressure.
How Many Drip Lines Do I Need for a 4×8 Raised Bed?
Four parallel lines running the 8-foot length are a useful starting arrangement.
Position them approximately 12 inches apart, with the outer lines about 6 inches from the bed edges.
However, sandy soil, dense planting, or specific dripline products may require different spacing.
Test the actual wetted soil pattern.
Can I Connect Drip Irrigation Directly to a Garden Hose?
Yes, a properly designed system can be supplied through a compatible garden hose or outdoor faucet.
However, the connection still needs suitable backflow protection, filtration, and pressure regulation.
Do not connect low-pressure drip tubing directly to an unrestricted high-pressure water supply unless the manufacturer explicitly provides an appropriate integrated assembly.
How Deep Should I Bury Drip Irrigation in Raised Beds?
For ordinary home raised-bed systems, surface installation is often easiest.
You can leave the drip tubing exposed or cover it lightly with mulch after testing.
Subsurface installation requires tubing and maintenance procedures suitable for burial.
Avoid burying ordinary surface dripline deeply without confirming that the product is designed for that use.
How Often Should I Run Drip Irrigation in Raised Beds?
Watering frequency depends on soil texture, plant growth, rainfall, and temperature.
A raised bed may need more frequent watering during hot weather than during cool conditions.
Check soil moisture at root depth and adjust the schedule accordingly.
Do not assume that every raised bed requires daily irrigation.
Do I Need a Pressure Regulator for Raised-Bed Drip Irrigation?
Most conventional faucet-fed drip systems need pressure regulation unless the supply assembly already includes suitable pressure control.
Drip products commonly operate at lower pressures than household water supplies.
Choose the regulator specified for your tubing and emitters.
Is 6-Inch or 12-Inch Emitter Spacing Better?
Both can work.
Six-inch emitter spacing provides more watering points and may be useful for closely planted crops or soil with limited sideways moisture movement.
Twelve-inch spacing is often suitable for general vegetable-bed layouts.
Because closer spacing increases total emitter count, the watering duration may need adjustment.
Can I Use One Drip Irrigation System for Multiple Raised Beds?
Yes. A properly sized main supply line can serve multiple beds through branch connections.
Add the flow rates of all emitters operating together to confirm that the water source, regulator, and tubing can support the demand.
If the beds have different watering needs, separate valves or zones may improve control.

I’m Maya L. Greenwood, a lifelong plant lover who believes anyone can grow something beautiful with the right guidance. After years of testing soil mixes, pruning methods, irrigation tricks, and pest-safe solutions, I started EasyGardenTips.com to turn hard-won lessons into step-by-step advice. From seed starting and container gardens to composting and seasonal checklists, my goal is to make gardening simple, sustainable, and fun.