
5 Best Potting Soil for Bromeliads: Airy Mixes for Vibrant Plants
Buying the wrong potting soil can leave a bromeliad sitting in a soggy pot, or drying out before you remember to water again. A dense mix can also make repotting messy and leave little room for air around the roots. The frustrating part is that a bag labeled for houseplants may not suit your plant’s roots or watering routine.
For many bromeliads, a loose mix matters because the roots need support without staying packed in wet soil. The right balance also depends on your pot: a container with drainage holes gives extra water somewhere to go, while a pot without them leaves less room for watering mistakes. Match the bag size to the number of plants you have, too, so a partly used mix doesn’t sit around longer than necessary.
Here’s what this guide will help you sort out:
- How to judge drainage and moisture balance for your plant and pot.
- What each mix contains, and where the product details leave questions.
- How to repot carefully without burying the plant too deeply.
- What to check on the bag before you buy.
Quick Picks
-
Best For Bromeliad-Specific Blend

Gardenera Bromeliad Planting Soil – Nurture Your
Bark, peat moss, charcoal, and sand balance moisture and drainage for growers who want a mix made for bromeliads.
-
Best For Small Potting Jobs

rePotme Bromeliad and Jewel Classic Potting Soil
A resealable junior bag with drainage and moisture retention suits a small houseplant collection or a single repotting.
Top 5 Potting Soils for Bromeliads at a Glance
Start with Gardenera if you want a mix specifically described for bromeliads and need a larger bag. rePotme is a smaller-bag option, while the other picks are broader indoor or container mixes, so check the ingredient and use details against your plant’s needs.
| Product image | Product name | Check product |
|---|---|---|
| 1 |
Gardenera Bromeliad Planting Soil – Nurture Your | Check Price |
| 2 |
rePotme Bromeliad and Jewel Classic Potting Soil | Check Price |
3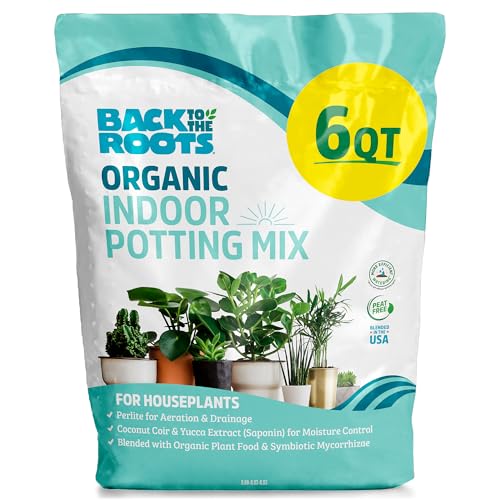 |
Back to the Roots Organic Indoor Potting | Check Price |
4 |
Burpee Premium Organic Potting Mix Garden Soil | Check Price |
5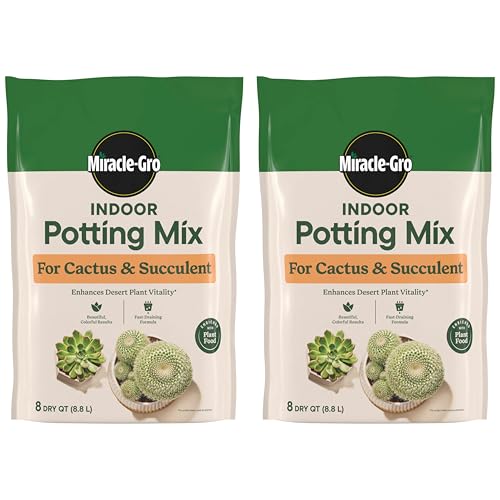 |
Miracle-Gro Indoor Potting Mix for Cactus & | Check Price |
5 Best Potting Soils for Bromeliads: Detailed Reviews
When I chose the best potting soil for bromeliads, I focused on ingredients that affect airflow and water movement, plus whether the mix is described for bromeliads or for general containers. Those details can help you avoid dense, slow-drying soil and make it easier to match a bag to your watering habits.
The choices range from bromeliad-specific blends to general indoor and succulent mixes, with different bag sizes and ingredient descriptions. Comparing them side by side helps you see when a specialized blend is useful and when a general mix calls for closer checking before potting.
1. Gardenera Bromeliad Planting Soil – Nurture Your
Bark, peat moss, charcoal, and sand balance moisture and drainage for growers who want a mix made for bromeliads.
- Size10 Quart Bag
- WeightNot listed; check details
- DimensionsNot listed; check details
- MaterialNot listed; check details
Gardenera Bromeliad Soil is a bromeliad-specific mix for growers who want a bag with several listed ingredients rather than a general-purpose houseplant blend.
The ingredients include bark, Canadian peat moss, sphagnum moss, charcoal, fern, worm castings, and sand. Bark is a chunky plant-based ingredient that can leave larger spaces in the mix, helping water and air move around the roots instead of leaving the soil packed tight. The peat moss and sphagnum moss retain moisture, which may be useful if your room dries out quickly, while sand and charcoal are included for aeration and drainage.
The 10-quart bag gives you more mix for several plants or a larger container, but it may be more than you need for one small bromeliad. The product details don’t give a ratio for the ingredients, so don’t assume how chunky or fast-drying the finished mix will be. Check how the mix feels after watering and make sure your pot has drainage holes.
Pros:
- Bromeliad-specific mix, so the intended plant type is clear.
- Bark adds chunky structure that can leave room for airflow.
- Peat and sphagnum moss help hold moisture.
- Sand and charcoal are included for drainage and aeration.
- Worm castings add a stated nutrient source.
- 10-quart bag can cover more than one small pot.
Cons:
- Larger bag may be unnecessary for a single small plant.
- Ingredient proportions and finished texture aren’t specified.
- Moisture-retaining ingredients still require careful watering.
Buy it if: you want a bromeliad-focused blend, because the listed bark, moss, sand, and charcoal offer a mix of moisture retention and air space.
Skip it if: you only need enough soil for a tiny pot, because the 10-quart bag may leave you storing a lot of leftover mix, and a smaller bag would suit you better. For another fit, consider Repotme or Back.
I’d consider Gardenera Bromeliad Soil first when you want ingredients chosen with bromeliads in mind and need enough for more than one pot. The mix’s variety gives you a clearer sense of what’s in the bag than a vague “indoor soil” label. My hesitation is that the ingredient ratios aren’t stated, so check the texture and the bag size before ordering.
This is the pick for a grower who values a named bromeliad blend and can use a 10-quart amount.
2. rePotme Bromeliad and Jewel Classic Potting Soil
A resealable junior bag with drainage and moisture retention suits a small houseplant collection or a single repotting.
- ColorBromeliad Soil
- SizeJunior Bag (4 Qts)
- WeightNot listed; check details
- DimensionsNot listed; check details
rePotme Bromeliad and Jewel Mix is a small-bag option for someone repotting one plant or trying a bromeliad-focused mix without storing a large amount.
The mix is described as having good drainage while absorbing an appropriate amount of water. That balance matters because a mix that dries too quickly can make watering feel constant, while soil that stays wet can cause trouble in a container. The details don’t list the ingredients, though, so you can’t judge the chunk size or material blend from the description alone.
The product information describes a resealable bag measuring 7 by 11.5 inches and gives the size as a junior bag. The structured size field says 4 quarts, while another feature description mentions 2 quarts, so the amount is unclear. Check the current package size before buying, especially if you’re planning a specific number of pots.
Pros:
- Bromeliad and jewel plant use is named directly.
- Drainage is a stated feature of the mix.
- Water absorption is also part of the stated balance.
- Resealable bag can help contain unused soil.
- Compact format may suit a small repotting task.
Cons:
- Product details give conflicting bag volumes.
- Ingredient list and mix texture aren’t stated.
- A small bag may not cover several large containers.
Buy it if: you’re repotting a small number of plants, because the resealable junior bag is easier to store than a large sack.
Skip it if: you need a known quantity for several pots, because the volume details conflict, and a clearly sized bag would suit you better. Gardenera and Back are worth a closer look instead.
What I like about rePotme Bromeliad and Jewel Mix is the plant-specific description paired with a resealable package. That’s a sensible format if you have a small collection and don’t want a large bag taking up closet space. I’d double-check the volume because the stated amounts don’t match, and the ingredients aren’t listed.
Choose rePotme if the package size checks out and you prefer buying a smaller quantity.
3. Back to the Roots Organic Indoor Potting
The catalog lists Includes 6qt of Back to the Roots Indoor Potting Mix. Our Potting Mix contains organic yucca extract that aids. Compare fit and care needs before choosing.
- Size6 Quart
- ColorIndoor Potting Mix
- Release Date2023-01-01T00:00:01Z
- Number Of Items1
Back to the Roots Indoor Potting Soil is a general indoor mix for plant owners who want a peat-free option and are willing to check whether its texture suits a bromeliad.
The product description names organic yucca extract as a moisture-retaining ingredient. That may help a potting mix hold water between checks, but a moisture aid isn’t a substitute for drainage holes or a careful watering routine. The mix also includes mycorrhizae, a type of beneficial fungus described as supporting root development and nutrient uptake; that’s a soil component, not a reason to expect a specific result from every plant.
The listing describes the mix as peat-free and says it contains no bark or compost. Those details may matter if you’re choosing ingredients deliberately, but they also mean you can’t assume the mix has the chunkiness of a bark-based bromeliad blend. Its 6-quart size is more manageable than a large sack, though the product is marketed broadly for indoor plants rather than specifically for bromeliads.
Pros:
- Peat-free formula is clearly described.
- Yucca extract is included for moisture retention.
- Mycorrhizae are included as a root-supporting component.
- No bark or compost, according to the product details.
- 6-quart bag offers a modest amount for indoor use.
Cons:
- General indoor mix rather than a bromeliad-specific formula.
- No bark or compost means the texture may not be chunky.
- Drainage performance isn’t described in as much detail.
Buy it if: you prefer a peat-free indoor mix, because the product description names yucca extract and mycorrhizae among its ingredients.
Skip it if: you want a chunky blend with bark listed, because Back to the Roots has no bark, and a bark-based potting mix would suit you better. If those trade-offs rule it out, Gardenera or Repotme may suit you better.
I’d keep Back to the Roots Indoor Potting Soil in mind for a buyer who has a clear reason to choose a peat-free mix. Its ingredient details are more informative than a label that only says “indoor soil,” but the broad houseplant focus leaves the bromeliad-specific fit uncertain. Check the texture and confirm that water drains freely from your pot before using it.
This choice makes the most sense when peat-free is a priority and you’re comfortable judging the mix in your own container.
4. Burpee Premium Organic Potting Mix Garden Soil
The catalog lists SUPPORTS VIBRANT GROWTH: Transform your garden with our premium indoor/outdoor potting soil! This nutrient-ric. Compare fit and care needs before choosing.
- Size9 Quart
- ColorPotting Mix
- Number Of Items1
- WeightNot listed; check details
Burpee Premium Organic Potting Mix is a general container mix for growers who want a product described for indoor and outdoor pots, rather than a blend made specifically for bromeliads.
The listed coco coir is a fiber made from coconut husks, and the product description says it helps improve aeration while retaining moisture. That can be useful when you want soil that doesn’t dry instantly, but moisture retention still needs to suit your watering habits and pot. The mix is also described as feeding plants immediately and providing slow-release nutrition for up to three months; that feeding period is a product claim, so follow the package directions for use rather than adding fertilizer on guesswork.
The 9-quart bag is a middle-sized amount for a few containers, and the description says the mix works in pots and raised beds. The product is presented for vegetables, flowers, and herbs, so a bromeliad grower should pay attention to texture and drainage instead of relying on the broad container label. The bag has small air holes, which the description says are intended to promote circulation before use.
Pros:
- Coco coir is described as supporting aeration and moisture balance.
- Intended for containers as well as raised beds.
- Product details state immediate feeding and up to three months of slow-release nutrition.
- 9-quart bag can suit several container projects.
- Indoor and outdoor use is stated.
Cons:
- General-purpose mix, not specifically formulated for bromeliads.
- Nutrient content may be more than a buyer wants in a simple mix.
- Detailed ingredient proportions aren’t provided.
Buy it if: you need soil for several container plants, because Burpee’s 9-quart bag is described for indoor and outdoor pots.
Skip it if: you want a bromeliad-only blend with a clearly stated ingredient ratio, because Burpee is a broad container mix, and a more specialized potting mix would suit you better.
I’d see Burpee Premium Organic Potting Mix as a practical general container choice, not an automatic match for every bromeliad. Coco coir and the stated feeding period give you useful details to weigh, while the broad plant focus makes drainage worth checking. Read the package directions carefully if you’re managing fertilizer, and don’t add extra feed without considering what’s already in the mix.
This bag suits someone who can use the extra volume across several container plants.
5. Miracle-Gro Indoor Potting Mix for Cactus &
The catalog lists Miracle-Gro Indoor Potting Mix for Cactus and Succulent is enriched with Miracle-Gro Plant Food and enhances d. Compare fit and care needs before choosing.
- ColorBrown
- Size8 Qt. (Pack of 2)
- Number Of Items2
- WeightNot listed; check details
Miracle-Gro Cactus and Succulent Mix is a fast-draining indoor mix aimed at desert plants, so it may interest bromeliad owners who prioritize drainage and are prepared to check the fit.
The listed ingredients include forest products, sphagnum peat moss, sand, and perlite. Perlite is a lightweight, porous material that helps create air spaces in potting soil; in a container mix, that can help water drain rather than leaving the roots surrounded by dense soil. This formula is made for cacti and succulents, which have different growing needs from many bromeliads, so the fast-draining design may dry more quickly than you want.
The product is enriched with plant food, and the bundle includes two 8-quart bags. The package information says each bag fills five 6-inch containers, with the amount varying by root ball size. That’s a lot of mix for a small bromeliad collection, and the added plant food is worth factoring into any other feeding plan.
Pros:
- Sand and perlite are listed for fast drainage.
- Product is ready to use without mixing.
- Plant food is included in the mix.
- Two bags provide more soil for multiple containers.
- Package gives an estimate for 6-inch pots.
Cons:
- Formulated for cacti and succulents rather than bromeliads.
- Fast drainage may mean more frequent watering for some setups.
- Two-bag bundle may be excessive for one plant.
- Included plant food affects your fertilizing decisions.
Buy it if: you need a fast-draining mix for several small pots, because the two-bag bundle is ready to use and includes sand and perlite.
Skip it if: you prefer a moisture-retaining bromeliad blend, because this mix is aimed at desert plants, and a mix made for bromeliads would suit you better.
I’d choose Miracle-Gro Cactus and Succulent Mix only when fast drainage is the main goal and you’re comfortable monitoring how quickly the pot dries. Its ingredient list gives a beginner a useful idea of why it drains quickly, but the target plant group is a real limitation. Check whether the bag quantity and included plant food fit your collection before buying.
This is best for someone who wants extra mix for multiple containers and doesn’t mind adjusting watering to the pot’s behavior.
How to Choose the Best Potting Soil for Bromeliads
The best potting soil for bromeliads should hold some moisture without staying dense and wet around the roots. Start with your plant’s care needs, then check the mix texture, container drainage, and bag size before choosing.
Check the texture, not just the label
A loose, airy texture lets water move through the pot and leaves spaces for air. Bark, coarse fibers, sand, and perlite can change the feel of a mix, though ingredients alone don’t prove how quickly a particular blend will dry. If the package lists a broad “indoor” use but no texture details, look for a clear ingredient description and check the mix after watering.
Many bromeliads grow in ways that make a dense, fine potting medium a poor default, but care needs vary by type. Don’t assume every plant sold as a bromeliad wants exactly the same blend. If you know the plant’s name, use its specific care guidance to decide how much moisture retention makes sense.
Balance moisture with your watering habits
A moisture-retaining mix can help if your home is dry or you tend to miss a watering, but too much water held in a container can also cause problems. A fast-draining blend may suit a grower who waters carefully, yet it can dry out sooner in a warm, bright room. Choose for your actual conditions, not an abstract idea of the “ideal” soil.
If you water often, prioritize a pot and mix that let excess water escape. If you often forget, a little moisture retention can be helpful, but don’t try to solve missed watering by keeping the pot constantly wet. The right fit is the one that dries at a manageable pace while still letting extra water drain away.
Look for a pot with drainage holes
Drainage holes are openings at the bottom of a container that let extra water leave. For beginners, a pot with holes is the simpler choice because it gives you more room for small watering mistakes. A decorative outer pot can hold a nursery pot with holes, but pour out water that collects in the outer container.
A larger pot holds more wet soil and can take longer to dry, especially if the root ball is small. Pick a container only modestly larger than the roots rather than moving a small plant into a huge pot. That helps you avoid a large volume of unused, slow-drying soil around the plant.
Match the mix to the plant’s care needs
A bromeliad-specific label is useful, but it isn’t the only factor. Read the ingredient list and look for clues about moisture retention and air space. If you’re comparing general-purpose mixes, remember that a formula intended for jungle plants or other tropical houseplants may differ from one made for dry-loving succulents.
Different tropical plants can have different preferences, so don’t automatically transfer a bromeliad recipe to another species. If you’re also caring for foliage plants with different water needs, the potting soil for tropical plants guide can help you think through those differences rather than treating every leafy plant alike. Use the label as a starting point and the plant’s specific care needs as the deciding factor.
Buy a bag size you can use
Bag volume matters because unopened-looking soil still needs sensible storage after you open it. A small bag is easier to use up for one or two pots, while a larger bag may make sense if you’re repotting a collection. Check the stated volume and don’t rely on a “junior” or “small” label if the actual quantity matters to your project.
One package description here gives conflicting volumes, which is a good reminder to confirm the current bag size before purchase. Think about how many pots you’ll fill and their diameters, then leave room for settling and root balls. There’s no benefit in paying for more soil than you can store well.
Decide whether added nutrients suit your plan
Some mixes include worm castings or plant food, while others emphasize soil ingredients without making the same feeding claims. Added nutrients can simplify early care, but they also mean you should read the package directions before using a separate fertilizer. Don’t assume every plant needs extra feeding right after repotting.
If you want a simple growing medium, choose a mix whose stated ingredients and feeding details suit that preference. If you’re considering other tropical foliage plants, the soil choices for calathea comparison is a reminder that moisture and feeding needs can vary even among indoor plants. Follow the care directions for your own plant rather than applying one feeding schedule to all of them.
How to Use Potting Soil for Bromeliads for the Best Results
Use a pot with drainage, add enough loose mix to support the roots, and water in a way that lets excess moisture escape. Handle the plant gently and avoid packing the soil down like you’re filling a brick mold.
- Read the bag first. Check whether the mix is ready to use, whether it includes fertilizer, and whether the manufacturer gives a watering or feeding direction.
- Choose a suitable container. Use a clean pot with drainage holes and a size close to the plant’s root ball. A pot that is much too large holds more wet soil than a small root system needs.
- Prepare the work area. Lay down paper or a tray and keep the pot, mix, and plant nearby. Dry potting ingredients can scatter, so avoid working over a carpet if you can help it.
- Loosen the plant carefully. Support the plant at its base and ease it from the old pot. Don’t yank leaves to pull it free, and avoid breaking healthy roots just to remove every bit of old mix.
- Add a base layer. Put enough fresh mix in the pot so the plant sits at a similar depth to before. If the base is too high or too low, adjust the soil before filling around the roots.
- Fill around the roots. Add mix in small handfuls and gently settle it with your fingers. Keep the soil loose enough for air and water movement; firm pressure can compress it.
- Water carefully. Water the pot according to the plant’s care needs, then let excess drain away. Don’t leave the container sitting in runoff.
- Watch how the pot dries. Check the soil and pot weight over the next several days rather than following a rigid calendar. The room, container, and season all affect drying time.
Plant needs differ across tropical foliage plants. A croton, for instance, may call for a different balance of moisture and drainage than your bromeliad, so use the croton potting mix guide when you’re choosing soil for that plant instead of sharing one mix by default. Keep plant labels with the pots if you’re repotting several species at once.
How to Make Your Bromeliad Potting Soil Last Longer
Store leftover potting soil in a dry, covered place where the bag won’t be soaked by rain or exposed to standing water. Close a resealable bag fully, or transfer the mix to a clean container with a lid, and keep the original label so you know what ingredients and feeding claims apply.
Before reusing stored soil, check whether it smells sour, feels unusually wet, or has visible pests or mold. Those signs call for caution rather than mixing the old soil into a fresh pot automatically. Don’t store a bag on a damp floor, where moisture can creep into the mix and turn storage into a science project you didn’t ask for.
For a planted bromeliad, check soil moisture regularly and adjust to the room and season. A fixed schedule can mislead because a small pot near a warm window dries differently from a larger pot in a cooler spot. Pour away water that collects in a cachepot, and don’t compress the surface when adding a little fresh mix.
When you repot, use a clean container and remove old soil that is loose or clearly unsuitable, while handling roots gently. Avoid adding a layer of gravel as a substitute for drainage holes; the container still needs a way for water to leave. If the mix has added plant food, follow its label before applying more fertilizer.
Common Mistakes to Avoid When Buying and Using Bromeliad Soil
A few small checks can prevent the usual potting problems. Most mistakes come from treating every houseplant mix as interchangeable or watering by the calendar instead of looking at the pot.
- Choosing soil by the word “indoor” alone. General indoor mixes vary widely; read the ingredients and look for clues about drainage and texture.
- Ignoring drainage holes. A good mix can’t let water escape through a sealed pot; use a container with holes or carefully manage an inner nursery pot.
- Buying a pot that is far too large. Extra soil stays wet around a small root ball; choose a container only somewhat larger than the roots.
- Packing soil down firmly. Compression removes air spaces; settle the mix gently with your fingers instead.
- Watering on the same weekday every time. Drying changes with light, temperature, and pot size; check the soil before watering.
- Using a succulent mix without considering its target plants. A fast-draining formula may dry quickly; monitor the pot and decide whether that suits your bromeliad.
- Adding fertilizer without checking the bag. Some mixes already include plant food; read the package directions before feeding again.
- Assuming one mix suits every tropical plant. Root and moisture preferences vary; match soil to each plant rather than filling every pot from one bag.
Elephant ears are another example of why a plant’s name and growing needs matter when choosing soil. If you grow them too, the elephant ear soil guide can help you compare their potting needs without assuming they’re identical to a bromeliad’s.
How to Set Up Potting Soil for Bromeliads
Repotting is manageable when you prepare the pot and work area before opening the bag. Take your time with the root ball, and let the plant sit at about its previous soil depth.
- Confirm the plant and container. Identify the bromeliad if possible, then check that the pot has drainage holes. A container without an exit for water calls for a different setup.
- Check the new mix. Read the bag for ingredients, feeding details, and directions. If the texture looks much denser or finer than expected, pause and reconsider before filling the pot.
- Clean the pot and tools. Remove old soil and debris from the container, then let it dry. A clean work surface also keeps stray soil away from other plants.
- Moisten dry mix only if needed. If the mix is dusty and the care directions allow it, lightly dampen it so it settles more evenly. Don’t soak the bag or turn the soil into a wet clump.
- Remove the plant gently. Hold near the base and ease the root ball from its old pot. If it sticks, loosen the potting mix around the edge instead of pulling hard on the leaves.
- Set the plant at the right height. Add a shallow base layer and place the root ball so the plant sits near its old depth. Avoid burying the central leaves or packing soil against the plant’s base.
- Fill and settle the mix. Add soil around the roots, then tap the pot lightly to settle it. Use your fingers to guide mix into open spaces without pressing it tight.
- Water and drain. Follow the plant’s care needs, then allow excess water to run out. Empty any water left in a decorative outer pot.
After setup, keep the plant in a location that suits its light and temperature needs, and check moisture before watering again. Repotting can disturb roots, so avoid stacking extra changes, such as a new feeding routine, on top of the move unless the package or plant-care directions call for them.
Common Questions About Potting Soil for Bromeliads
What potting soil should I use for a bromeliad?
Choose a loose mix that can retain some moisture while still draining, and match it to your plant’s care needs. A bromeliad-specific blend can be a straightforward starting point, but check the ingredients and texture instead of relying on the label alone. Use a pot with drainage holes and observe how quickly the soil dries in your home.
Can I use regular indoor potting soil for a bromeliad?
You can consider a general indoor mix if its texture and drainage suit your plant, but the words “indoor potting soil” don’t tell you everything. Check the ingredients and whether the mix is designed to retain a lot of moisture or drain quickly. If the soil stays wet, reassess the pot, watering, and mix rather than adding more water.
Does bromeliad soil need bark?
Bark can add larger pieces and air spaces to a mix, but the product details here don’t establish that every bromeliad needs bark. Plant type, pot size, watering habits, and room conditions all affect the right blend. Treat bark as one possible ingredient, then judge the finished mix by how it supports the plant and drains after watering.
How often should I water a bromeliad in potting soil?
There isn’t one reliable watering schedule for every bromeliad and home. Check the potting mix and take the container size, light, temperature, and season into account before watering. Let excess water drain away instead of leaving the pot in runoff, and follow care instructions for the specific bromeliad you have.
Can I use cactus and succulent soil for bromeliads?
You can consider it if drainage is your priority, but a cactus mix may dry faster than a bromeliad needs. Check the ingredients, added plant food, and the way the soil behaves in your pot before deciding. If you also keep succulents, the guide to making succulent potting soil covers why a gritty mix is useful for that different plant group.
How much potting soil do I need to repot a bromeliad?
The amount depends on the root ball and the new container, so bag volume alone won’t tell you how many plants you can fill. Measure the pot and choose one only modestly larger than the roots, then check the bag’s stated quart amount. Leave space near the rim for watering, and don’t buy a much larger pot just to use up leftover soil.
Make the Pot and Watering Routine Your Final Check
Before you buy, confirm the bag size, read the ingredient and feeding details, and make sure your container has drainage. Choose a mix that fits your bromeliad and your watering habits, then check how the soil dries after the first watering rather than relying on a fixed schedule.

I’m Maya L. Greenwood, a lifelong plant lover who believes anyone can grow something beautiful with the right guidance. After years of testing soil mixes, pruning methods, irrigation tricks, and pest-safe solutions, I started EasyGardenTips.com to turn hard-won lessons into step-by-step advice. From seed starting and container gardens to composting and seasonal checklists, my goal is to make gardening simple, sustainable, and fun.
One Comment