How to Refresh Raised Bed Soil Before the Next Growing Season
To refresh raised bed soil, remove old plant debris, add a thin layer of finished compost, replenish settled soil, and correct nutrient or drainage problems as needed. Most established raised beds can be reused for many growing seasons without completely replacing their soil.
Over time, organic matter breaks down, plants use available nutrients, and the soil level gradually drops. Repeated watering, heavy rainfall, and gardening activities can also affect soil structure. These changes may leave the growing medium less suitable for healthy root development.
However, refreshing a raised bed doesn’t mean adding large amounts of fertilizer or completely rebuilding its original soil mixture. The right approach depends on whether the bed needs additional organic matter, improved aeration, more soil volume, or specific nutrients.
A few targeted improvements can restore favorable growing conditions while preserving the existing soil. This guide explains how to evaluate old raised bed soil, choose suitable amendments, replenish soil levels, and prepare the bed for another productive planting season.
How to Refresh Raised Bed Soil Step by Step
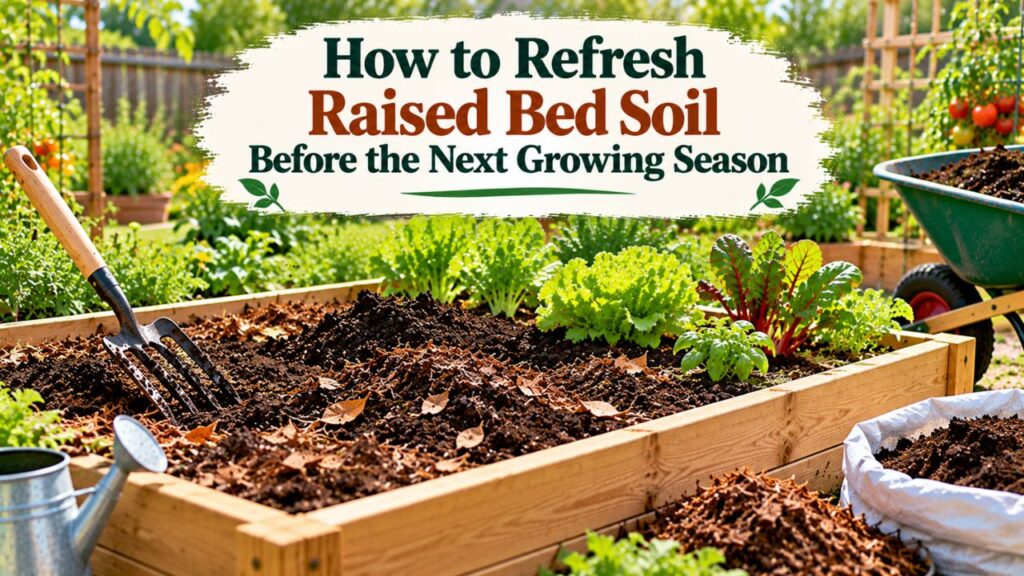
Refreshing an established raised bed is usually a straightforward process. The objective is to improve the existing growing medium rather than remove soil that remains healthy and usable.
Follow these steps before planting your next vegetable or flower crop.
Step 1: Remove Old Plants, Weeds, and Garden Debris
Begin by clearing the raised bed after harvesting the previous crop.
Remove dead stems, large root crowns, weeds, and unwanted plant material. Healthy plant debris can go into an appropriate composting system, while severely diseased material should be handled according to local garden disease guidance.
Small, healthy roots can often remain underground and decompose naturally.
Pay particular attention to:
- Weeds with extensive or spreading root systems
- Dead vegetable stems and large root masses
- Plants showing signs of serious disease
- Fallen fruit that may attract pests
- Undecomposed debris interfering with planting
Avoid turning the entire soil bed upside down while removing old plants.
If a large root system is difficult to remove, cut the stem near the soil surface and leave healthy roots to break down when appropriate.
Once the bed is clear, its surface condition becomes easier to assess.
Step 2: Check the Existing Soil’s Condition and Depth
Before adding amendments, inspect the soil’s texture, moisture, and overall depth.
Healthy raised bed soil should generally feel loose enough for roots to penetrate while still holding some moisture.
Take a handful of slightly moist soil and squeeze it gently.
A healthy, crumbly mixture will usually form a loose clump that breaks apart with light pressure. Very hard clods may indicate compaction, while a mixture that falls apart immediately and dries rapidly may have limited water-holding capacity.
Check for these conditions:
- Low soil level: The growing medium has settled below its original height.
- Compaction: The surface feels hard and resists gentle digging.
- Poor drainage: Water remains in the bed unusually long after watering or rainfall.
- Rapid drying: The soil becomes dry soon after irrigation.
- Surface crusting: A hard layer develops over the planting area.
These symptoms don’t necessarily have the same cause.
For example, adding compost may help improve some soil properties, but it cannot correct a blocked drainage outlet beneath an elevated planter.
Identify the actual problem before choosing an amendment.
Step 3: Test the Raised Bed Soil Before Adding Fertilizer
Plants remove nutrients from soil as they grow, but this does not mean every raised bed needs the same fertilizer each year.
A laboratory soil test helps determine whether nutrients are deficient, sufficient, or already excessive.
It can also reveal soil pH conditions that affect nutrient availability.
The University of Minnesota Extension’s raised bed gardening guidance recommends testing established raised bed soil every two to three years and applying compost, fertilizer, or other amendments according to the results.
For a reliable sample, collect several small portions from different locations within the bed and combine them according to the testing laboratory’s directions.
Request a test appropriate for vegetable garden soil if you plan to grow edible crops.
Pay attention to:
- Soil pH
- Available phosphorus
- Potassium levels
- Organic matter, when included
- Other nutrients covered by the test
Nitrogen recommendations may be based partly on the crop and growing conditions because soil nitrogen availability changes throughout the season.
Important: Don’t automatically add lime, sulfur, or high-phosphorus fertilizer without evidence that the soil needs it.
Step 4: Add a Thin Layer of Finished Compost
Finished compost is one of the most useful materials for refreshing an established raised bed.
It supplies organic matter, supports soil organisms, and helps maintain favorable soil structure.
According to Oregon State University Extension’s compost application guidance, established vegetable garden beds can receive approximately ¼ to 1 inch of finished compost annually, depending on soil conditions and needs.
Spread the compost evenly across the surface.
Choose material that:
- Has a dark, crumbly appearance
- Smells earthy rather than sour or strongly ammonia-like
- Contains no obvious uncomposted food scraps
- Is free of visible trash and unwanted contaminants
- Comes from a reliable source
A thin compost layer can remain as a surface topdressing in a low-dig system. If incorporation is necessary, mix gently into the upper soil without repeatedly disturbing the entire bed.
Avoid adding several inches of compost every season. Excessive applications can gradually increase phosphorus and soluble salts, potentially harming sensitive plants.
Compost improves soil organic matter, but it shouldn’t completely replace the mineral soil component in a typical raised bed.
Step 5: Top Up the Raised Bed With Suitable Soil Mix
Raised bed soil often sinks as organic matter decomposes and the growing medium settles.
If the soil level has dropped significantly, compost alone may not be the most appropriate material for restoring its depth.
Add a suitable raised bed soil mix containing mineral soil and an appropriate amount of organic matter.
Look for a mixture with:
- Quality loamy topsoil
- Mature compost
- A loose but stable structure
- Good moisture retention
- Adequate drainage
Try to match the properties of the existing growing medium.
For example, adding a very coarse, fast-draining mix over a moisture-retentive soil may create inconsistent conditions across the root zone.
Spread the new material evenly and gently blend the contact area if necessary.
Leave some space below the top edge of the raised bed to accommodate watering and mulch.
Don’t fill the entire bed with pure compost merely because the original soil has settled.
Step 6: Loosen Compacted Soil Without Excessive Tilling
If the soil has become dense, loosen affected areas with a garden fork or hand cultivator.
Work only when the soil is moist enough to crumble but not wet and sticky.
Insert a garden fork gently and rock it backward to create small openings.
Avoid repeatedly flipping the soil or breaking up every clump.
Established raised beds generally benefit from minimal soil disturbance. Extensive tilling can damage existing soil structure and disturb beneficial soil organisms.
A bed that is already loose and well-drained may require only light surface preparation.
If the soil remains severely compacted despite careful loosening, investigate possible causes such as foot traffic, repeated working while wet, or unsuitable soil composition.
Step 7: Apply Fertilizer Only Where Needed
Compost contributes some nutrients, but its nutrient release may not match the requirements of every crop.
Vegetables such as tomatoes, peppers, squash, and corn can have substantial nutrient needs during active growth.
Use soil test recommendations and the requirements of your planned crops to select an appropriate fertilizer.
Possible options include:
- Balanced vegetable fertilizers when multiple nutrients are needed
- Nitrogen-focused fertilizers when additional nitrogen is recommended
- Specific nutrient amendments based on verified deficiencies
- Slow-release fertilizer products labeled for vegetable gardens
Follow the product’s application instructions and account for nutrients already supplied through compost.
Avoid assuming that every raised bed requires a balanced fertilizer each spring.
If phosphorus or potassium levels are already high, adding more may create problems without improving plant growth.
Step 8: Water the Soil and Add Protective Mulch
After refreshing the soil, water gently to settle loose material and bring moisture into the planting zone.
The soil should become evenly moist without remaining saturated.
If water pools or drains unusually slowly, inspect the drainage situation before planting.
Once seeds or transplants are established, add a suitable organic mulch around the plants.
Useful materials include:
- Clean, seed-free straw
- Shredded dry leaves
- Appropriate untreated organic mulch
- Other plant-safe mulching materials suitable for the crop
Mulch helps reduce moisture loss, limits surface crusting, and protects the soil from direct rainfall.
Keep mulch away from plant stems to reduce excessive moisture around the crowns.
At this stage, the bed is generally ready for planting if the amendments are suitable, soil moisture is appropriate, and any necessary soil adjustments have been completed.
What Should You Add to Old Raised Bed Soil?
Different soil amendments serve different purposes.
Choosing materials based on the soil’s actual condition prevents unnecessary expense and overapplication.
| Material | Main Purpose | When to Use |
| Finished compost | Replenishes organic matter and improves soil structure | During seasonal maintenance as needed |
| Raised bed soil mix | Restores lost soil volume | When the bed has settled significantly |
| Organic mulch | Protects soil and conserves moisture | After planting or during seasonal protection |
| Fertilizer | Supplies specific plant nutrients | When crop needs or soil tests justify it |
| Lime | Raises acidic soil pH | Only when testing recommends it |
| Elemental sulfur | Lowers soil pH over time | Only when suitable for the soil and crop |
Is Compost Enough to Refresh Raised Bed Soil?
Compost may be enough when the existing soil has good structure, adequate depth, and no major nutrient imbalance.
A thin application can replenish organic matter without changing the composition of the entire bed.
However, compost cannot solve every soil problem.
If the bed has lost several inches of soil, it may need additional mineral soil or a balanced raised bed mix.
If a laboratory test indicates a specific nutrient deficiency, targeted fertilization may also be necessary.
If the soil is constantly waterlogged, drainage conditions need attention rather than simply adding more organic matter.
Should You Add Worm Castings to Old Raised Bed Soil?
Worm castings can be used as a supplemental organic amendment, but they are not required for routine soil refreshing.
They provide organic matter and some nutrients, although their composition varies.
Use modest amounts according to product directions.
Worm castings are not a substitute for replacing lost soil volume or correcting a verified nutrient deficiency.
For a large raised bed, quality finished compost is often a more economical foundation for regular organic matter maintenance.
Can You Use Manure to Refresh Raised Bed Soil?
Properly composted manure can contribute organic matter and nutrients, but it should be used carefully.
Manure-based composts may contain relatively high amounts of phosphorus and soluble salts.
Repeated applications can lead to nutrient accumulation in raised beds.
For food gardens, use appropriately processed materials and follow food safety guidance. Avoid adding fresh manure immediately before harvesting edible crops.
Plant-based finished compost is often a more straightforward option for routine seasonal maintenance.
How Much Compost Do You Need to Refresh a Raised Bed?
The amount depends on the surface area of the bed and the thickness of the intended compost layer.
For established vegetable beds, a thin annual application is generally more appropriate than repeatedly adding large volumes.
The following examples show the approximate amount needed to cover common rectangular raised beds.
| Raised Bed Size | ½-Inch Compost Layer | 1-Inch Compost Layer |
| 2 × 4 feet | 0.33 cubic feet | 0.67 cubic feet |
| 3 × 6 feet | 0.75 cubic feet | 1.50 cubic feet |
| 4 × 4 feet | 0.67 cubic feet | 1.33 cubic feet |
| 4 × 8 feet | 1.33 cubic feet | 2.67 cubic feet |
These values represent geometric volume, not a mandatory application rate.
The basic formula is:
Compost volume (cubic feet) = Bed length (feet) × Bed width (feet) × Compost depth (inches) ÷ 12
For example, a 4-by-8-foot raised bed has a surface area of 32 square feet.
Adding a 1-inch compost layer requires approximately 2.67 cubic feet of material.
If the soil already has high organic matter, phosphorus, or soluble salt levels, use the soil test to decide whether compost should be reduced or skipped.
When Is the Best Time to Refresh Raised Bed Soil?
Spring and fall are both suitable times to refresh an established raised bed.
The preferred season depends on your local climate, planting schedule, and the soil problems you’re trying to correct.
Refreshing Raised Bed Soil in Spring
Spring is a convenient time to prepare soil immediately before planting vegetables, herbs, and flowers.
Once the soil is workable:
- Remove remaining winter debris and weeds.
- Inspect the soil for compaction and settling.
- Add finished compost if needed.
- Restore lost soil depth with an appropriate mix.
- Apply any recommended amendments.
- Rake the planting surface gently.
Avoid working the soil while it is waterlogged.
If a handful of soil sticks together in a wet, dense mass, allow it to dry further before disturbing it.
For early spring vegetables, check that soil temperature and moisture conditions are suitable for the particular crop.
Refreshing Raised Bed Soil in Fall
Fall provides an opportunity to improve soil after the main harvest.
Removing spent crops and adding appropriate organic matter can prepare the bed for winter.
Fall is also a useful time for laboratory soil testing because it allows time to plan amendments before spring planting.
After maintenance, protect exposed soil with a suitable mulch or cover crop.
Avoid leaving large areas of bare soil exposed to heavy rainfall and erosion.
For beds in cold regions, winter mulch can help protect the soil surface. In warmer regions, cover crops may provide another way to keep the soil occupied between vegetable plantings.
Refreshing Soil Between Vegetable Crops
Raised bed soil can also be refreshed between successive crops during the growing season.
For example, after harvesting spring lettuce or radishes, you may want to prepare the same bed for beans or another summer vegetable.
Remove old crop debris, check the soil’s condition, and add a small amount of finished compost if appropriate.
Additional fertilizer should depend on the next crop and the existing nutrient supply.
There is usually no reason to remove and replace all the soil between healthy crop cycles.
How to Fix Specific Problems in Old Raised Bed Soil
Sometimes a raised bed needs more than routine compost and surface preparation.
The correct treatment depends on the symptoms.
Refreshing Raised Bed Soil That Has Become Hard and Compacted
Hard soil can restrict root development and reduce water infiltration.
If the bed has become compacted, first identify what caused it.
Possible contributors include:
- Walking or standing inside the bed
- Repeatedly digging while the soil is wet
- Heavy pressure from equipment
- Excessively dense soil materials
- Poor soil structure
For moderate compaction, gently loosen the soil with a garden fork and add an appropriate amount of finished compost if needed.
Avoid using the raised bed as a walkway.
If the original soil contains large amounts of dense clay, deeper soil improvement may be necessary. Adding large quantities of coarse sand without assessing the overall soil mixture is not a reliable solution.
Refreshing Raised Bed Soil That Dries Out Too Quickly
Raised beds can dry out faster than surrounding garden soil, especially when they are tall, exposed to wind, or located in full sun.
If the soil becomes dry soon after watering, investigate whether the growing medium contains enough water-retentive material.
A suitable amount of compost may help improve moisture management.
Organic mulch can also reduce direct evaporation from the soil surface.
Check irrigation practices as well. Shallow watering may leave the deeper root zone dry even when the surface appears damp.
Water slowly enough for moisture to penetrate the growing depth, then adjust watering frequency to crop requirements and weather.
Refreshing Raised Bed Soil With Poor Drainage
Slow drainage needs a different approach.
If water remains near the soil surface for an unusually long period, check whether the underlying soil is compacted or the raised bed has restricted drainage.
This is particularly important for elevated planters with enclosed bottoms.
Possible causes include:
- Blocked drainage holes
- Compacted soil beneath an open-bottom bed
- A poorly draining soil mixture
- Impermeable barriers beneath the bed
- Excessive irrigation
Don’t assume that adding more compost or perlite will automatically solve the problem.
Correct drainage restrictions first, then evaluate whether the growing medium needs adjustment.
Refreshing Raised Bed Soil With Nutrient Problems
Yellow leaves, slow growth, and poor harvests sometimes suggest nutrient deficiencies, but these symptoms are not conclusive.
Overwatering, root damage, temperature stress, and soil pH problems can produce similar effects.
A soil test is more useful than choosing fertilizer solely from leaf appearance.
If a nutrient deficiency is confirmed, use an amendment suited to that problem.
Avoid applying large amounts of fertilizer in an attempt to force faster growth.
Excess fertilizer can increase soluble salts and potentially damage roots.
How to Refresh Raised Bed Soil Without Replacing It
In most established beds, replacing all the soil is unnecessary.
A low-disturbance approach preserves the existing mineral soil and focuses on restoring what has been lost.
The basic method involves removing spent crops, checking soil conditions, spreading an appropriate amount of finished compost, and maintaining mulch.
If the soil level has fallen, top it up with a suitable growing mix.
This approach works especially well when:
- Plants previously grew reasonably well.
- The bed drains properly.
- The soil has no known contamination.
- The growing medium remains reasonably loose.
- Laboratory testing does not reveal serious imbalances.
However, there are situations where the soil needs further investigation.
When Should Raised Bed Soil Be Replaced?
Complete replacement should be considered only when a significant problem cannot reasonably be corrected through normal soil management.
Examples include:
- Confirmed contamination that makes the soil unsuitable for edible crops
- Persistent severe drainage problems caused by an unsuitable growing medium
- Serious chemical damage or salt accumulation that cannot be corrected effectively
- Major soil quality problems resulting from inappropriate fill materials
Plant disease does not automatically require complete soil replacement.
Some soilborne pathogens can persist, but management depends on the particular disease, host plants, and growing conditions.
For repeated disease problems, seek a reliable diagnosis before removing large quantities of soil.
Replacing soil without correcting the underlying cause may allow the problem to return.
How to Keep Raised Bed Soil Healthy After Refreshing
Good maintenance reduces the amount of corrective work needed between growing seasons.
A few consistent practices help protect the soil’s structure, organic matter, and productivity.
Keep the Raised Bed Covered With Mulch
Mulch protects exposed soil from direct rainfall and excessive drying.
It also reduces weed emergence and limits crust formation.
Organic mulch gradually breaks down and may contribute additional organic matter.
Select materials appropriate for vegetable beds and avoid placing thick mulch against plant stems.
Rotate Vegetable Crops When Practical
Growing the same plant family repeatedly in a small raised bed can increase the risk of certain soilborne diseases.
Crop rotation helps reduce some of this pressure.
For example, tomatoes, peppers, and eggplants belong to the same plant family, so switching among them does not provide a true family-level rotation.
Where enough garden space is available, rotate plant families between beds.
In a single small raised bed, crop rotation options are limited. Good sanitation, healthy transplants, and appropriate disease management become especially important.
Grow Cover Crops Between Planting Seasons
Cover crops can help protect soil when the bed is not being used for vegetables.
Depending on the species, they may reduce erosion, support soil structure, or contribute organic matter.
Examples include oats, field peas, and certain clovers, although the suitable choice depends on your climate and planting schedule.
Some cover crops die during winter, while others need to be cut down or otherwise terminated before the next crop is planted.
Select a cover crop that can be managed without delaying your next vegetable planting.
Avoid Walking on the Raised Bed Soil
One major advantage of raised bed gardening is that plants can grow in areas separated from foot traffic.
Keep your feet in the surrounding pathways.
If the bed is wide, use appropriate hand tools to reach the middle instead of stepping onto the soil.
Reducing unnecessary pressure helps maintain a loose growing environment.
Monitor Soil Moisture and Fertility
Check moisture at root depth rather than relying only on the appearance of the surface.
Water when the crop and soil conditions require it, allowing excess water to drain.
Review soil test results periodically and record significant amendments.
This prevents the repeated addition of nutrients that may already be present in adequate amounts.
Mistakes That Can Make Raised Bed Soil Worse
Even well-intended soil improvements can create problems when applied excessively.
Avoid these practices:
- Adding too much compost: Repeated heavy applications may cause nutrient and salt accumulation.
- Using unfinished compost: Material that hasn’t decomposed adequately can create inconsistent growing conditions.
- Applying fertilizer without testing: Unnecessary nutrients can contribute to soil imbalances.
- Tilling wet soil: Disturbing saturated soil can increase compaction and damage structure.
- Replacing soil unnecessarily: Healthy existing soil can remain productive with proper maintenance.
- Using pure compost to refill deep soil losses: A balanced growing medium is more appropriate for restoring the full root zone.
- Ignoring drainage problems: Soil amendments cannot compensate for a permanently blocked drainage system.
The most effective refresh is not necessarily the one that adds the most material.
Instead, make the smallest appropriate changes needed to improve the bed’s actual condition.
Conclusion
Understanding how to refresh raised bed soil can help keep an established garden productive without the expense and effort of replacing its entire growing medium.
Start by removing old crops, inspecting soil structure, and checking whether the bed has settled. Add a modest amount of finished compost when appropriate, replenish missing soil with a suitable raised bed mix, and correct nutrient problems according to soil test results.
Avoid excessive tilling and unnecessary fertilizer applications. Protect the refreshed soil with mulch, maintain proper watering, and keep foot traffic out of the planting area.
For most healthy raised beds, regular organic matter management, occasional soil testing, and basic seasonal maintenance are enough to support continued vegetable and flower production.
FAQs About How to Refresh Raised Bed Soil
Can I Reuse Raised Bed Soil Every Year?
Yes. Raised bed soil can generally be reused for many years when it remains uncontaminated, drains properly, and receives suitable maintenance.
Add finished compost as needed, replenish soil that has settled, and use soil testing to identify nutrient adjustments.
Complete soil replacement is usually unnecessary.
Should I Remove Old Roots Before Refreshing Raised Bed Soil?
Remove large root crowns and roots associated with diseased plants.
Small, healthy roots can often remain in the soil and decompose naturally.
Avoid aggressive digging when removing roots because it can disturb the existing soil structure.
Can I Add Compost to Raised Bed Soil Right Before Planting?
Yes. Fully finished compost can generally be added shortly before planting.
Spread an appropriate amount over the soil and prepare the planting surface.
Avoid using unfinished compost or fresh manure as an immediate substitute, especially when growing edible vegetables.
Do I Need to Fertilize Raised Bed Soil Every Spring?
Not necessarily. The need for fertilizer depends on existing nutrient levels, previous amendments, and the crops you plan to grow.
A laboratory soil test can help determine whether additional nutrients are required.
Adding fertilizer automatically each spring may lead to excessive nutrient accumulation.
Can I Refresh Raised Bed Soil While Plants Are Growing?
Yes. You can apply a thin layer of finished compost around established plants without removing them.
Keep the material away from stems and avoid disturbing the roots.
Additional fertilizer should be applied according to the plants’ needs and product instructions.
How Long Should I Wait Before Planting in Refreshed Soil?
If you use finished compost, suitable raised bed soil, and appropriately applied fertilizer, you can generally plant immediately once the soil is prepared.
However, some amendments, including those intended to adjust pH, may require additional time to react.
Follow soil test recommendations and the instructions for the particular amendment.
How Often Should I Completely Replace Raised Bed Soil?
There is no fixed replacement schedule for properly maintained raised bed soil.
A healthy growing medium can remain useful for many seasons.
Consider significant replacement only when testing or a reliable diagnosis identifies contamination, severe soil degradation, or another problem that cannot be reasonably corrected through normal maintenance.

I’m Maya L. Greenwood, a lifelong plant lover who believes anyone can grow something beautiful with the right guidance. After years of testing soil mixes, pruning methods, irrigation tricks, and pest-safe solutions, I started EasyGardenTips.com to turn hard-won lessons into step-by-step advice. From seed starting and container gardens to composting and seasonal checklists, my goal is to make gardening simple, sustainable, and fun.