
Finding the best grow tents can be difficult, especially when dozens of products appear to offer similar features.
Important differences in canvas thickness, zipper quality, frame strength, ventilation ports, height, and interior space may not become obvious until you start using the tent.
Choosing the wrong grow tent can cause light leaks, poor airflow, limited growing space, and weak support for your equipment.
You may also spend more money replacing the tent or upgrading parts that do not work well with your setup.
To make your decision easier, I researched and compared 12 popular grow tents available for indoor gardeners in the USA.
This guide mainly focuses on standalone grow tents, helping you choose the right option based on your available space, budget, equipment, and future growing plans.
I have also included a few complete grow tent kits. These options may be useful when you want the tent, grow light, ventilation system, and essential accessories in one package.
You will not need to purchase every component separately.
Don’t have time to read every review? The VIVOSUN S448 4×4 Grow Tent is my top overall choice for most beginners.
Its 4-by-4-foot footprint provides 16 square feet of growing space, while its 80-inch height leaves room for plants, lighting, and ventilation equipment.
It also includes a reflective interior, observation window, removable floor tray, and multiple duct openings.
These features make it a practical starting point for a flexible indoor growing setup.
12 Best Affordable Grow Tents for Indoor at a Glance
| Image | Product Name | Check Price |
|---|---|---|
Best Choice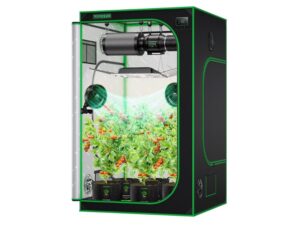 | VIVOSUN S448 4×4 Grow Tent – Best Overall for Beginners | Check Price |
Second Best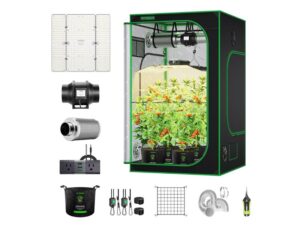 | VIVOSUN 4×4 Complete Grow Tent Kit – Best All-in-One Option | Check Price |
Third Choice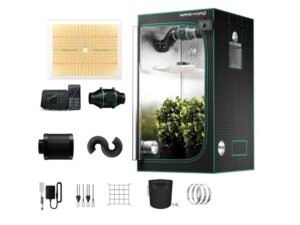 | MARS HYDRO 4×4 Smart Grow Tent Kit – Best Smart All-in-One Option | Check Price |
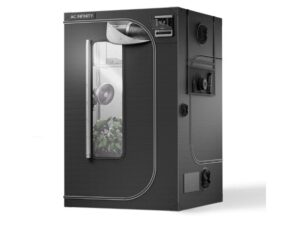 | AC Infinity CLOUDLAB 5×5 Grow Tent – Best Heavy-Duty 5×5 Option | Check Price |
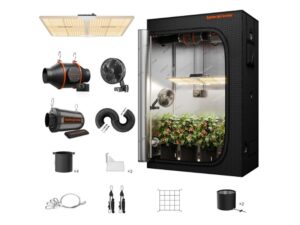 | Spider Farmer SF2000 2×4 Grow Tent Kit – Best Complete Kit for Narrow Spaces | Check Price |
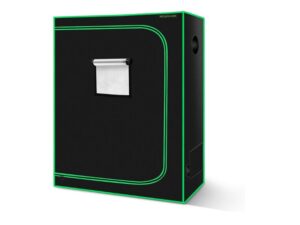 | MELONFARM 4×2 Grow Tent – Best Affordable 2×4 Tent | Check Price |
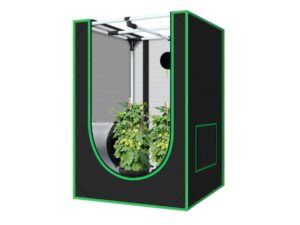 | Green Hut 2×2 Short Grow Tent – Best Compact Starter Tent | Check Price |
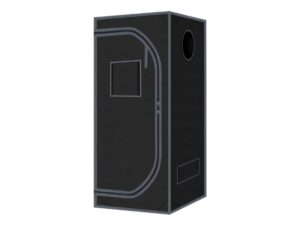 | zazzy 32x32x63 Grow Tent – Best Budget Mid-Size Option | Check Price |
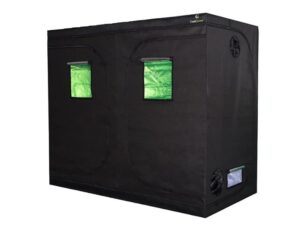 | CoolGrows 8×4 Grow Tent – Best Budget Large Grow Tent | Check Price |
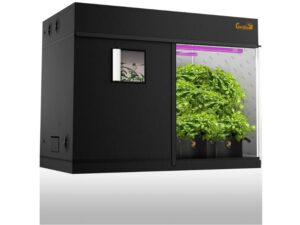 | Gorilla Grow Tent Pro 4×8 – Best Premium Tall Grow Tent | Check Price |
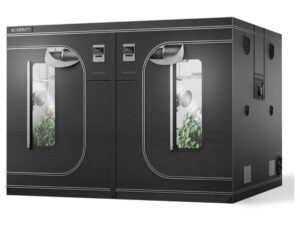 | AC Infinity 8×8 Grow Tent – Best Heavy-Duty Extra-Large Option | Check Price |
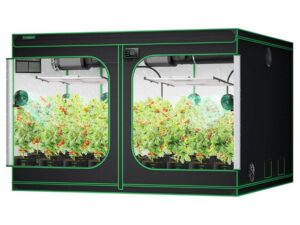 | VIVOSUN S108 10×10 Grow Tent – Best Maximum-Capacity Option | Check Price |
1. VIVOSUN S448 4×4 Grow Tent – Best Overall for Beginners
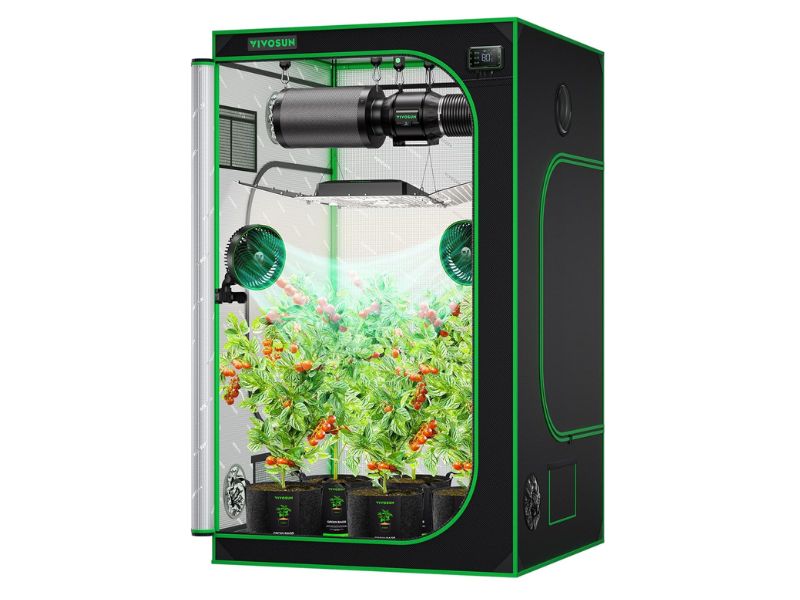
The VIVOSUN S448 is a practical choice for beginners who want enough growing space without moving immediately to an oversized tent.
Its 48-by-48-inch floor provides 16 square feet of usable area, while the 80-inch height leaves room for plants, an LED grow light, and ventilation equipment.
VIVOSUN uses high-density Oxford fabric with a reinforced PE layer and a reflective Mylar interior.
The manufacturer also adds double stitching and a black inner lining behind the zipper to reduce light leakage. A robust metal frame supports the enclosure, and the top bar is rated to hold up to 100 pounds of equipment.
Daily access is straightforward. Multiple doors provide convenient entry, while the observation window lets you check your plants without opening the main zipper.
The removable floor tray helps contain soil, water, and other small spills, making routine cleaning easier.
The tent also includes several openings for duct fans, electrical cords, and lighting equipment. An internal organizer provides a convenient place for small tools.
Tool-free corner connectors and detailed instructions should make assembly manageable for a first-time indoor gardener.
However, this is a standalone grow tent rather than a complete kit.
You will still need to purchase a suitable grow light, inline fan, carbon filter, ducting, and environmental controls separately. The 4×4 footprint may also be too large for a narrow closet or small apartment.
Pros: Spacious 4×4 interior, 80-inch height, reflective lining, sturdy metal frame, observation window, removable tray, and flexible ventilation openings.
Cons: Lighting and ventilation equipment are not included, and it requires a reasonably large floor area.
My Verdict: The VIVOSUN S448 offers a strong balance of size, practical features, and beginner-friendly assembly. It is a sensible standalone option for shoppers comparing the best grow tents for a flexible indoor setup.
2. VIVOSUN 4×4 Complete Grow Tent Kit – Best All-in-One Option
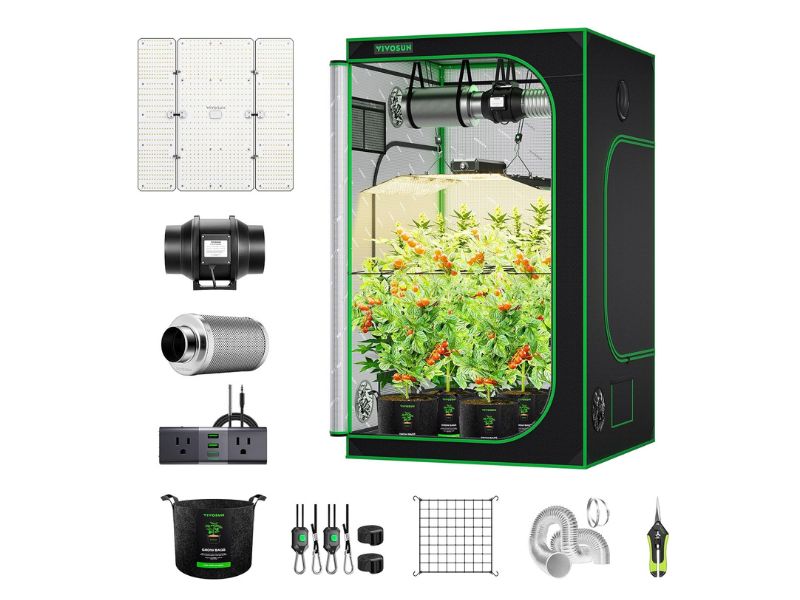
If you want to receive almost everything needed for an indoor growing setup in one package, the VIVOSUN 4×4 Complete Grow Tent Kit is a convenient alternative to buying each component separately. However, because this article focuses on standalone grow tents, the tent itself remains the main point of this review.
The included grow tent measures 48 x 48 x 80 inches, giving you the same practical 4×4 footprint as many popular home setups. It uses a metal frame, a reflective Mylar interior, and 600D Oxford fabric with a PE outer layer. This combination creates an enclosed growing space with enough height for plants, lighting, and overhead ventilation equipment.
What makes this option different is the bundled equipment. Along with the tent, the package includes a 400W full-spectrum LED grow light, a 6-inch inline fan, carbon filter, ducting, GrowHub A22 controller, grow bags, trellis net, and several setup accessories. The Wi-Fi-enabled controller can help you schedule connected equipment and monitor temperature and humidity through the VIVOSUN app.
This package may suit a beginner who wants a complete setup without spending time matching a tent, light, fan, filter, and controller from different brands. The main drawback is that it costs considerably more than purchasing a standalone tent, and experienced growers may prefer choosing each component according to their own specifications.
Pros: Spacious 4×4 tent, 80-inch height, reflective Mylar lining, metal frame, complete ventilation system, grow light, controller, and useful accessories included.
Cons: Higher upfront cost, more equipment than some beginners need, and less flexibility when selecting individual components.
My Verdict: Choose this VIVOSUN kit when convenience matters more than customization. It provides a capable 4×4 grow tent and saves you from purchasing the main growing components separately.
3. MARS HYDRO 4×4 Smart Grow Tent Kit – Best Smart All-in-One Option
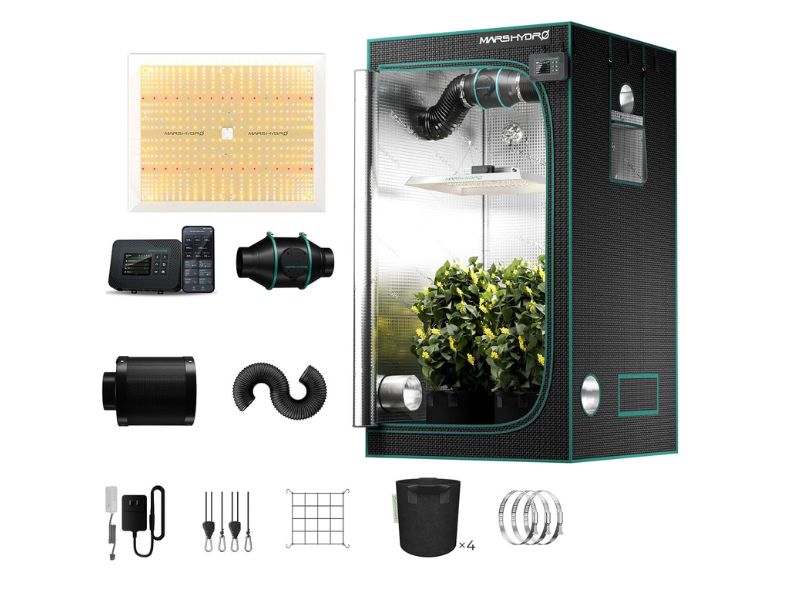
The MARS HYDRO Smart Grow Tent Kit is designed for beginners who prefer receiving a matched indoor setup instead of selecting every component separately. Although it is sold as a complete system, the main attraction for this article is its 48″x48″x80″-inch grow tent, which provides more floor space than a basic 2×2 model while remaining easier to place.
The enclosure uses 1680D reflective Mylar canvas, double stitching, a light-blocking layer behind the zipper, and a metal frame. MARS HYDRO states that the frame can support up to 110 pounds, giving you room to suspend the included light and ventilation equipment while keeping the floor available for containers. Multiple openings also help route ducting, power cords, and environmental accessories.
Choose this option when you want the tent, 300W dimmable LED light, 6-inch inline fan, carbon filter, ducting, controller, sensor, grow bags, and hanging accessories together. You will not need to purchase the main parts separately or check whether they fit the enclosure. The Wi-Fi controller can also monitor and adjust connected equipment according to environmental settings.
The main limitation is that a complete package costs more upfront than a standalone tent. It also gives experienced growers less freedom to choose a different light, fan, or controller. The 70-inch height is usable, but taller plants and overhead equipment will require careful planning.
Pros: Thick 1680D tent material, practical mid-size footprint, strong frame, matched equipment, smart controller, and fewer compatibility decisions.
Cons: Higher initial cost, limited component customization, and less vertical space than an 80-inch tent.
My Verdict: This is a useful convenience option for beginners who want everything in one package. Buyers mainly seeking an empty grow tent can save money with a standalone model.
4. AC Infinity CLOUDLAB 5×5 Grow Tent – Best Heavy-Duty 5×5 Option
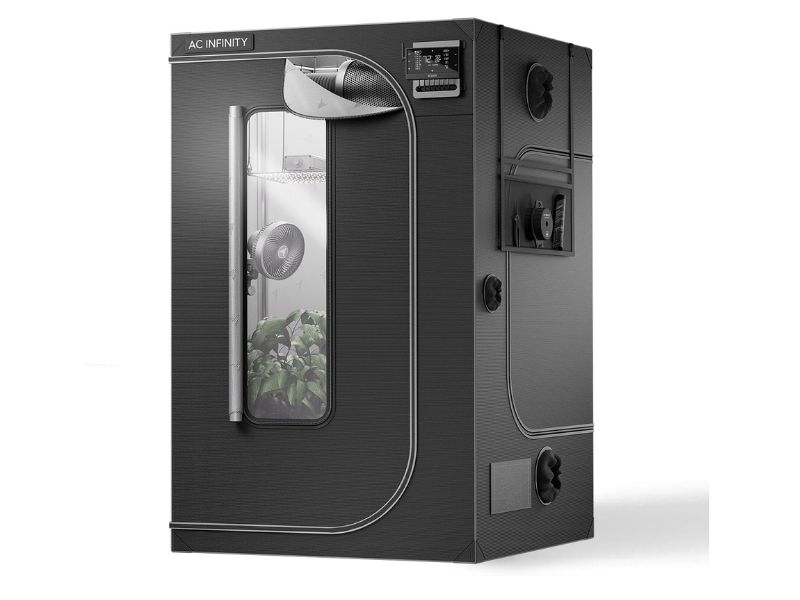
The AC Infinity CLOUDLAB 866 is a spacious standalone tent for growers who want stronger materials and more room than a standard 4×4 enclosure. Its 60 x 60 x 80-inch dimensions provide 25 square feet of floor area, making it suitable for a dedicated indoor growing space rather than a small corner.
Construction is the main reason to consider this model. The tent uses 2000D canvas, reflective Mylar, reinforced corners, and 1-inch steel poles. AC Infinity also includes additional hanging bars, which can help distribute lights, fans, filters, and other overhead equipment. Front zipper flaps add another barrier against light leaks, while the heavy-duty catch tray protects the floor from minor spills.
The tall viewing window allows you to inspect plants without repeatedly opening the main door and disturbing the controlled environment. A controller mounting plate with a light-resistant cable passage is especially useful when you plan to add compatible environmental controls. Several duct ports provide routing options for exhaust fans, humidifiers, heaters, or air-conditioning equipment.
This tent does not include a grow light, fan, carbon filter, or controller. Those separate purchases increase the total setup cost, but they also let you choose equipment according to your room conditions and growing goals. Beginners should measure the available floor area and confirm that there is enough clearance to assemble and access a 5×5 structure.
Pros: Heavy 2000D canvas, 1-inch steel poles, generous interior space, multiple ports, controller plate, viewing window, extra hanging bars, and catch tray.
Cons: Requires substantial room, all growing equipment is sold separately, and the larger volume needs stronger environmental control.
My Verdict: The AC CLOUDLAB 866 is a strong choice for buyers who value durable construction and expansion space. It is better suited to a dedicated setup than a compact beginner corner.
5. Spider Farmer SF2000 2×4 Grow Tent Kit – Best Complete Kit for Narrow Spaces
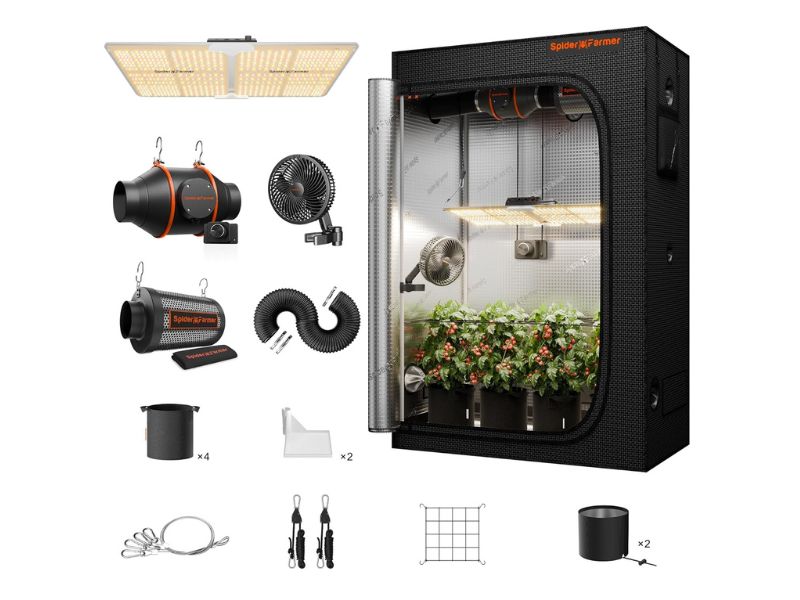
The Spider Farmer SF2000 Complete Kit is a convenient option when you want a narrow grow tent and the essential equipment in one package. Its tent measures 24 x 47 x 71 inches, so it can fit along a wall or inside a rectangular room where a wider 3×3 or 4×4 enclosure would take up too much space.
The tent uses a 1680D Oxford exterior, reflective Mylar interior, reinforced double stitching, and SBS zippers. A steel frame supports the structure, and the manufacturer rates it for up to 120 pounds. Multiple access ports allow you to route ventilation equipment and electrical cords, while the removable viewing window helps you check the interior without fully opening the tent. A leak-resistant floor tray is included for easier cleaning.
If you want everything together, this package may be easier than building a setup component by component. It includes the tent, a 200W dimmable LED grow light, 4-inch inline fan, carbon filter, ducting, clip fan, and related accessories. Because the included parts are matched, you will not need to purchase the main components separately.
However, the complete package has a higher upfront cost than a standalone 2×4 tent. The 71-inch height also requires thoughtful placement of the filter, fan, and light so enough vertical room remains for plants. Growers who already own equipment may find the bundle unnecessary.
Pros: Space-efficient 2×4 footprint, 1680D fabric, steel frame, useful access ports, viewing window, floor tray, and essential equipment included.
Cons: More expensive than a tent alone, less freedom to select individual components, and moderate vertical clearance.
My Verdict: This kit is well suited to a beginner who wants a complete narrow-room setup without shopping for every major component separately. Choose a standalone 2×4 tent when customization matters more.
6. MELONFARM 4×2 Grow Tent – Best Affordable 2×4 Tent
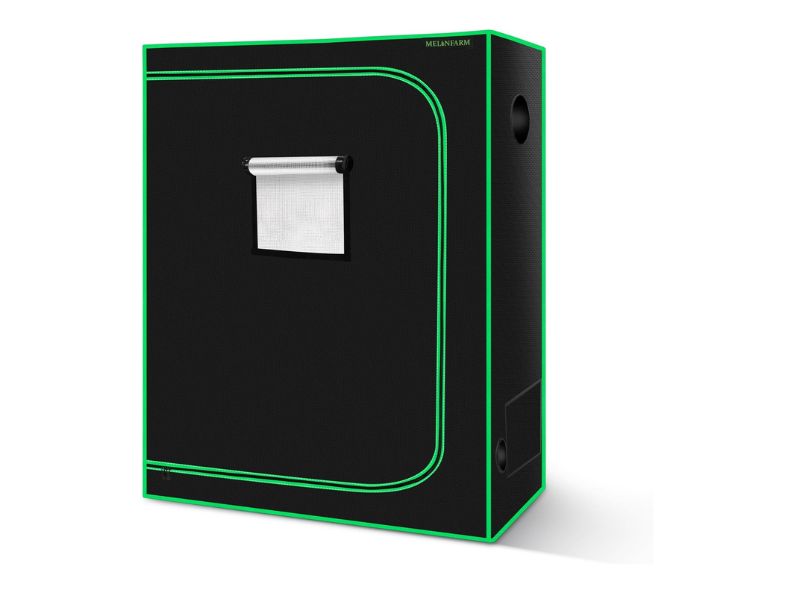
The MELONFARM 4×2 Grow Tent is aimed at beginners who need a long, narrow enclosure without paying for a complete kit. Its 48 x 24-inch floor fits neatly against many walls, while the 60-inch height keeps the overall structure compact. This shape can be more practical than a square tent in an apartment, closet area, basement, or spare room.
The enclosure is made with 600D double-stitched canvas and a highly reflective waterproof interior film. A metal frame supports the tent, and the large zippered door provides access for moving containers and equipment. Two transparent observation windows let you check the plants without opening the main door, helping you avoid unnecessary changes to the internal environment.
A storage pocket provides a place for small tools, meters, or pruning accessories. The listing also states that the tent can be assembled without tools, which is useful for a first-time buyer. Because this is a standalone tent, you can choose your own light, exhaust fan, filter, and circulation fan based on your budget rather than accepting the components included in a bundle.
The greatest limitation is its 60-inch height. Once you account for plant containers, light-hanging distance, and overhead ventilation equipment, the remaining vertical space may be restrictive for tall plants. The 600D fabric is also lighter than the 1680D or 2000D material found on premium models, so buyers should set realistic expectations for long-term heavy use.
Pros: Affordable 2×4 format, reflective interior, metal frame, dual observation windows, storage pocket, and tool-free assembly.
Cons: Limited height, lighter canvas than premium tents, and no light or ventilation equipment included.
My Verdict: This MELONFARM model is a sensible affordable grow tent for a narrow indoor area. It works best for shorter plants and budget-conscious beginners who prefer selecting their equipment separately.
7. Green Hut 2×2 Short Grow Tent – Best Compact Starter Tent
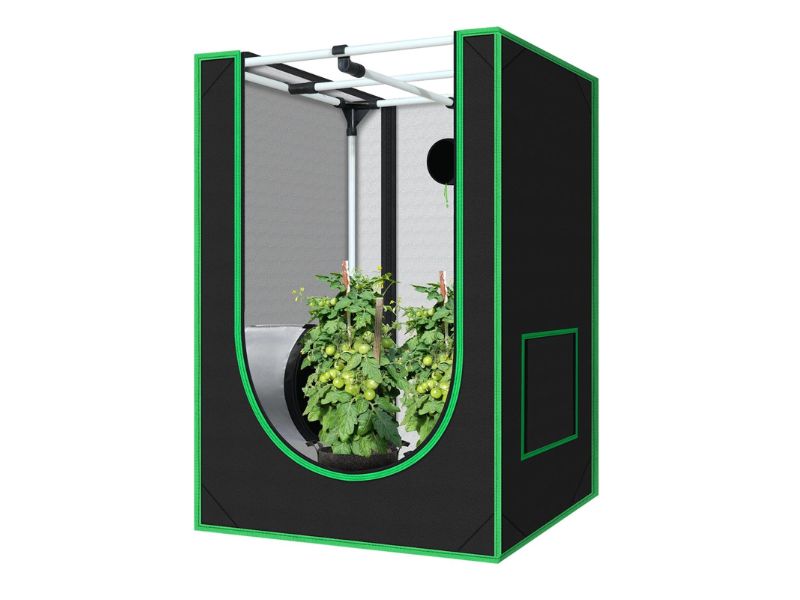
The Green Hut 2×2 is one of the most compact standalone options in this selection. It measures 24 x 24 x 36 inches, making it easier to place in an apartment, small room, low storage area, or dedicated seed-starting corner. The short profile is better suited to seedlings, clones, herbs, or naturally compact plants than a full-height indoor garden.
Its interior uses reflective Mylar, while the outer enclosure is made from double-stitched 600D material. Heavy-duty steel poles form the frame, and Green Hut claims a support capacity of at least 110 pounds. The listing also describes a wide zipper-covering ribbon designed to reduce light leakage around the door.
A removable Mylar floor tray helps contain water, soil, and plant debris. The reinforced pole connectors can be tightened around the frame, and the manufacturer provides assembly instructions for users setting up a grow tent for the first time. Since the enclosure has only four square feet of floor space, it may also require less lighting and ventilation equipment than a large tent.
The low height is both its main advantage and its biggest drawback. After installing a light and allowing a safe distance between the fixture and plant canopy, vertical growing room becomes limited. It is not a practical choice for tall mature plants or bulky overhead filters. Buyers should plan the entire setup before choosing this size.
Pros: Very small footprint, reflective lining, steel frame, removable tray, reinforced zipper area, and beginner-friendly assembly.
Cons: Only 36 inches tall, limited plant and equipment capacity, and 600D material is less substantial than premium canvas.
My Verdict: The Green Hut 2×2 is a useful cheap grow tent for seedlings, herbs, and compact indoor projects. It should be selected for its space-saving design, not for large plants or future expansion.
8. zazzy 32x32x63 Grow Tent – Best Budget Mid-Size Option
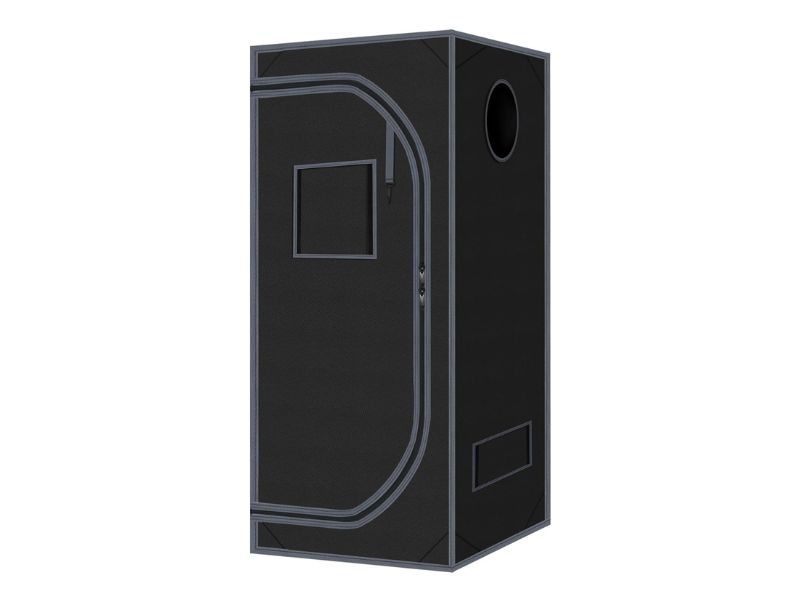
The zazzy 32 x 32 x 63-inch Grow Tent fills the gap between very small 2×2 models and larger 3×3 enclosures. Its roughly 2.7-foot-square floor provides more working room than a compact starter tent, while the 63-inch height remains manageable in rooms with limited ceiling clearance.
The tent uses tear-resistant 600D canvas, double stitching, and a reflective Mylar interior. According to the listing, the interior lining reflects up to 98 percent of light. Strong metal poles and adjustable PA corner connectors hold the structure together, while the heavy-duty zipper is intended to reduce light escaping around the main opening.
Multiple ventilation openings can accommodate a fan, filter, and ducting. A screened rectangular opening supports passive airflow while helping keep larger dust particles and insects outside. The removable Mylar floor tray simplifies cleanup after watering, and the frame can be assembled without tools. These features make the tent approachable for a beginner building a customized setup with separately selected equipment.
The unusual 32-inch footprint may require more careful light selection than a standard 2×2 or 3×3 tent. Its 63-inch height is also moderate rather than generous, so overhead equipment and light-hanging distance can reduce usable plant space. The brand has less visibility than several premium manufacturers, which may matter to buyers prioritizing a broad accessory ecosystem.
Pros: Useful middle-size footprint, reflective Mylar, metal poles, adjustable connectors, multiple vents, screened intake, removable tray, and tool-free installation.
Cons: Nonstandard dimensions can complicate equipment matching, vertical room is limited, and the 600D canvas is relatively light.
My Verdict: This zazzy tent is an affordable middle-ground option for shoppers who find a 2×2 too small but cannot accommodate a full 3×3. Measure your light and ventilation equipment before ordering.
9. CoolGrows 8×4 Grow Tent – Best Budget Large Grow Tent
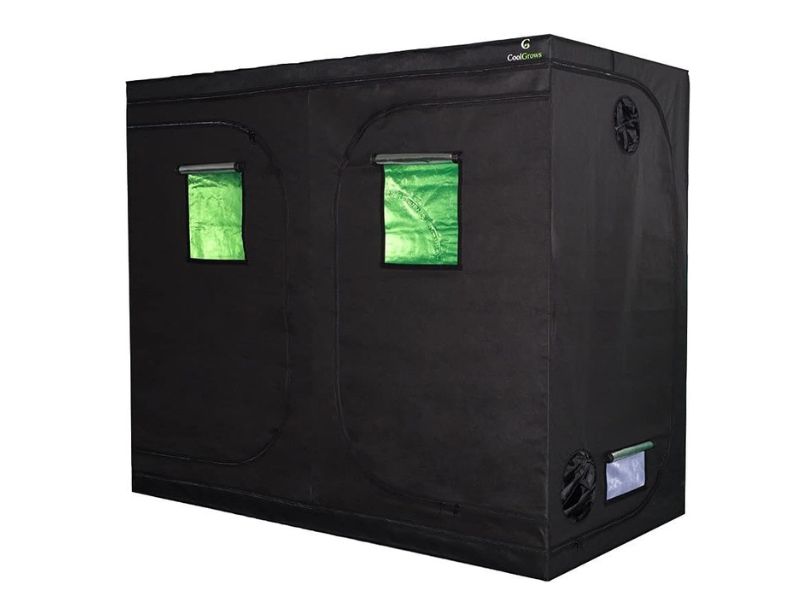
The CoolGrows 8×4 Grow Tent offers a large rectangular growing area for buyers who need more room but do not want to move directly into an 8×8 enclosure. It measures 96 x 48 x 80 inches, providing 32 square feet of floor space and enough height for common overhead lighting and ventilation arrangements.
The tent uses 600D stitched material, a reflective Mylar interior, metal poles, and metal connectors. CoolGrows states that the enclosure is designed to block light when fully closed. A front observation window allows you to inspect the interior without opening the main door, while the removable water-resistant spill tray helps protect the room floor and makes cleanup more manageable.
An 8×4 footprint can support a more extensive indoor garden or a layout using multiple lights. The rectangular shape supports row organization and may fit a long wall better than a square 8×8 tent. Assembly instructions are included, although a structure of this size is generally easier to build with additional space and another person available.
This tent includes no light, fan, carbon filter, or environmental controller. Filling and managing a 32-square-foot enclosure can require several pieces of equipment, increasing the total cost beyond the tent price. The 600D fabric is also lighter than premium large tents, and beginners should not choose this size unless they have measured the room and planned airflow carefully.
Pros: Large 8×4 floor area, practical 80-inch height, metal frame and connectors, reflective interior, viewing window, and removable tray.
Cons: Significant space and ventilation requirements, equipment sold separately, and lighter canvas than high-end large tents.
My Verdict: The CoolGrows 8×4 is a value-focused large tent for a dedicated room. It is most suitable when you already understand the lighting, airflow, and access requirements of a larger enclosure.
10. Gorilla Grow Tent Pro 4×8 – Best Premium Tall Grow Tent
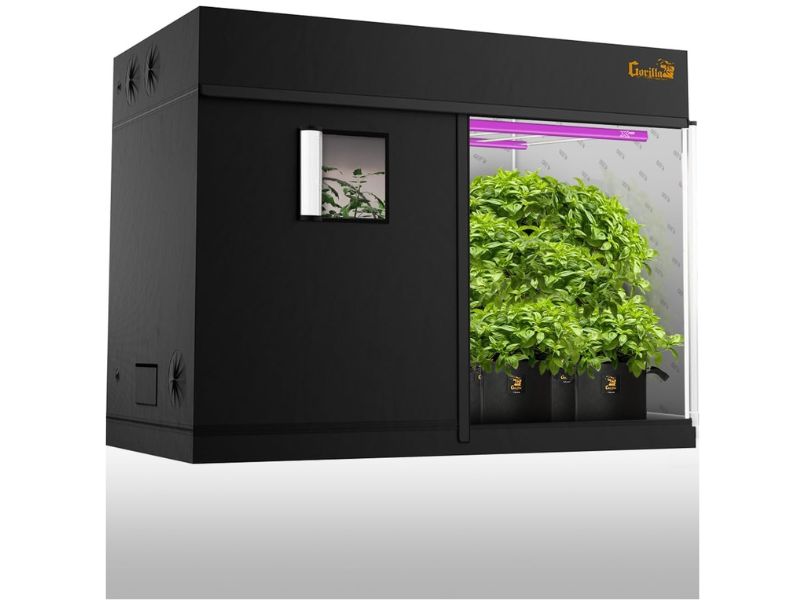
The Gorilla Grow Tent Pro 4×8 is designed for buyers who place greater importance on height, frame strength, and heavy-duty construction than on a low purchase price. Its 48 x 96-inch floor offers 32 square feet of growing space, while the standard height starts at 6 feet 11 inches and can reach 7 feet 11 inches with the included extension.
The tent uses 1680D reflective fabric, reinforced stitching, industrial-strength zippers, and an all-steel interlocking frame. Gorilla rates the frame for up to 300 pounds of suspended equipment, which may benefit setups using several lights, filters, fans, or other overhead devices. These are manufacturer claims, so equipment should still be distributed carefully across the support bars.
Wrap-around zippers provide broad access to the interior, which is helpful in a deep 4×8 layout where plants at the back may otherwise be difficult to reach. Viewing windows allow routine inspection without opening the tent, and integrated storage keeps small tools nearby. The adjustable height also creates more flexibility for tall plants and recommended light-to-canopy distances.
The major drawback is that this premium tent may be excessive for a first small indoor setup. It requires a dedicated room, compatible ceiling height, and separately purchased lights and ventilation equipment. Its heavier construction can also make assembly and repositioning less convenient than with a compact tent.
Pros: Adjustable height, thick 1680D canvas, strong steel frame, high claimed hanging capacity, broad access, viewing windows, and reinforced zippers.
Cons: Premium cost, large room requirement, heavier assembly, and no growing equipment included.
My Verdict: The Gorilla 4×8 is a premium choice for growers who need extra height and substantial overhead support. Beginners with limited space or a modest setup will receive better value from a smaller tent.
11. AC Infinity 8×8 Grow Tent – Best Heavy-Duty Extra-Large Option
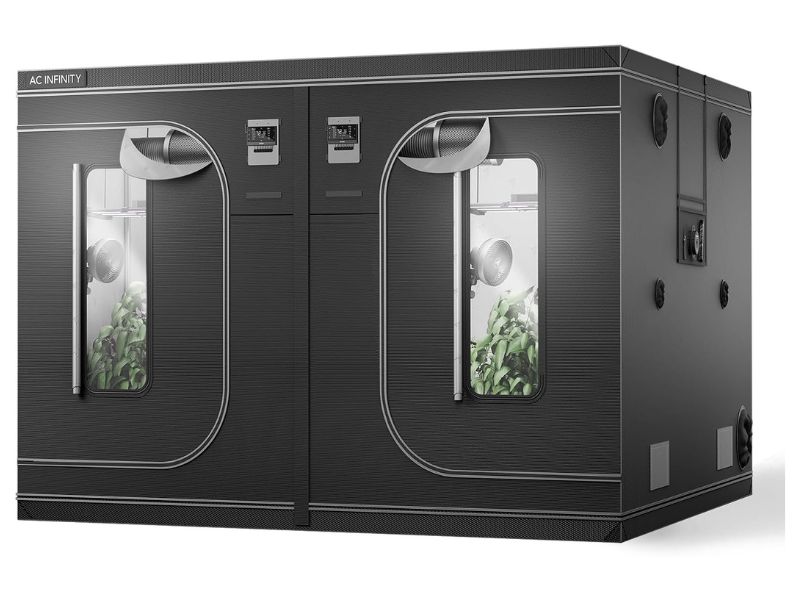
The AC Infinity CLOUDLAB 899 is an extra-large standalone tent intended for a dedicated growing room. Its 96 x 96 x 80-inch dimensions create 64 square feet of floor area, so it provides substantially more capacity than the 4×4, 5×5, and 4×8 models reviewed above.
AC Infinity builds this enclosure with 2000D canvas, reflective Mylar, reinforced corners, and 1-inch alloy-steel poles. The listing also specifies genuine SBS zippers, front zipper flaps, a stain-resistant catch tray, and multiple hanging bars. These features are useful when the tent must support several lights and ventilation components across a wide ceiling area.
Tall viewing windows allow you to monitor sections of the garden without repeatedly opening the main doors. A controller mounting plate includes a light-resistant cable passage, while the additional duct ports can route exhaust equipment, humidifiers, heaters, or cooling devices. The large number of hanging bars gives users more options for distributing equipment instead of concentrating weight in one area.
This is not a practical first tent for most beginners. An 8×8 enclosure demands considerable room, multiple lighting fixtures, strong ventilation, and careful electrical planning. It also takes more time to assemble, clean, and manage than a smaller enclosure. The tent itself does not include environmental equipment, so total setup expenses can rise quickly.
Pros: Extra-large floor area, heavy 2000D canvas, 1-inch steel poles, multiple hanging bars, SBS zippers, controller plate, viewing windows, and catch tray.
Cons: Requires a dedicated room and substantial equipment, has a high total setup cost, and may overwhelm a first-time grower.
My Verdict: The CLOUDLAB 899 is best for users who already know they need an 8×8 footprint and want durable materials. Most beginners should start with a smaller tent that is easier to light, ventilate, and maintain.
12. VIVOSUN S108 10×10 Grow Tent – Best Maximum-Capacity Option
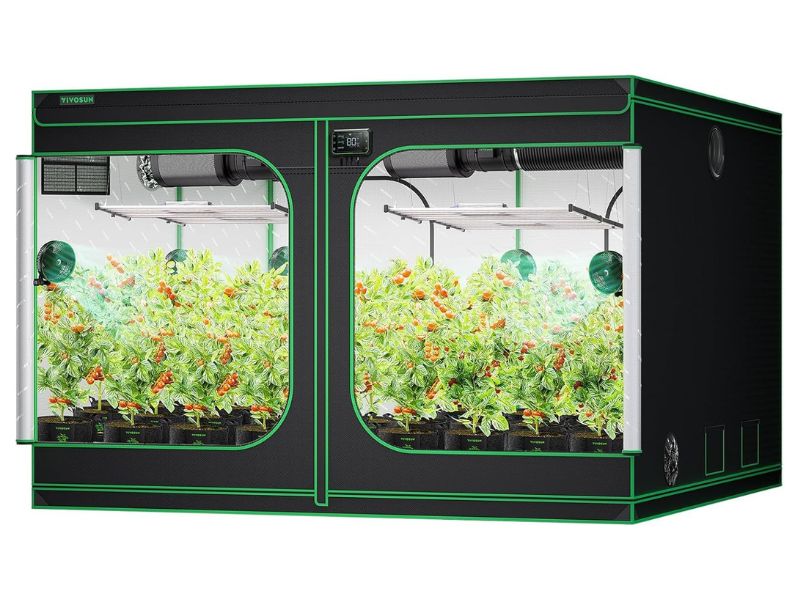
The VIVOSUN S108 is the largest grow tent in this roundup. It measures 120 x 120 x 80 inches, creating a 100-square-foot enclosed area. This size is intended for a dedicated indoor room and offers more capacity than most beginners need.
The enclosure uses 600D Oxford canvas with a reinforced PE layer and reflective Mylar walls. A black inner lining behind the zipper is designed to improve light blocking, while the metal frame supports the large structure. VIVOSUN includes hanging straps, removable floor trays, a tool organizer, and multiple openings for fans, lamps, ducting, and electrical cords.
An unusual feature is the multi-chamber layout. The listing describes two smaller interior sections alongside one large growing area, allowing users to separate different stages or plant types without purchasing several independent tents. Tool-free corner connectors and a detailed manual are intended to simplify assembly, although a tent this large is still more manageable with ample floor space and assistance.
The S108 is a standalone enclosure, so all lighting, exhaust fans, filters, circulation fans, controls, and extension cables must be purchased separately. Managing heat and humidity across 100 square feet can require substantial equipment and electricity. Buyers also need enough clearance around the exterior to reach doors, ports, and maintenance areas.
Pros: Maximum floor area, multi-chamber design, reflective lining, metal frame, multiple equipment openings, tool storage, hanging straps, and removable trays.
Cons: Excessive for most beginners, demanding ventilation and lighting requirements, large room footprint, and 600D canvas rather than premium heavier material.
My Verdict: The VIVOSUN S108 is suitable for users planning a large, divided indoor garden in a dedicated room. It should not be selected simply because it offers more space; smaller tents are easier and less expensive for most beginners to manage.
How to Choose the Best Grow Tent for Your Indoor Setup
A grow tent may look like a simple fabric enclosure, but several details determine how easy it will be to use. Size, height, frame strength, canvas quality, access points, and ventilation openings can affect the entire indoor growing setup.
Beginners should avoid choosing a tent based only on price or advertised plant capacity. The right option should fit the available room, support the planned equipment, and leave enough space for maintenance.
Before ordering, measure the floor area, ceiling height, doorways, and any nearby furniture. You should also decide where the grow light, exhaust fan, filter, ducting, and electrical cords will be placed.
What Is a Grow Tent?
A grow tent is an enclosed structure designed to create a more controlled environment for indoor plants. It normally has an outer fabric shell, a reflective interior, a metal or plastic frame, zippered doors, duct openings, and cable ports.
The reflective lining helps redirect light toward the growing area instead of allowing it to escape into the room. The enclosure also makes it easier to manage airflow, temperature, humidity, and light schedules.
Grow tents can be used for herbs, vegetables, flowers, seedlings, and other legal indoor plants. They are especially useful when you do not have a dedicated growing room or need to separate plants from the surrounding environment.
However, the tent does not control the environment by itself. You still need suitable lighting, ventilation, circulation, and monitoring equipment.
Standalone Grow Tent vs. Complete Grow Tent Kit
Most of the products in this article are standalone grow tents. These models include the enclosure and frame, but the grow light, fan, filter, and controller must be purchased separately.
A standalone tent gives you more control over the setup. You can choose each component based on your budget, room temperature, plant type, noise preference, and future plans.
This approach is often better for buyers who already own equipment or want to upgrade individual parts later. It may also help you avoid paying for bundled accessories that you do not need.
A complete grow tent kit includes the tent and several essential components in one package. Depending on the kit, it may include a grow light, inline fan, carbon filter, ducting, controller, circulation fan, grow bags, and hanging accessories.
If you want everything together, a complete kit can save time because you will not need to purchase every major component separately. The included parts are generally selected to work with the tent size.
The disadvantage is reduced flexibility. You may prefer a different light, quieter fan, larger filter, or more advanced controller than the items included in the package.
For this reason, complete kits are useful convenience options, but the main focus of this guide remains standalone grow tents.
Choose the Right Grow Tent Size
Grow tent size is one of the most important buying decisions. A tent that is too small may limit plant growth and make equipment difficult to arrange. A tent that is too large may cost more to light, ventilate, and maintain.
The advertised dimensions describe the outside of the tent. The actual usable area becomes smaller after you add containers, fans, humidifiers, heaters, and other equipment.
You should also leave some space around the exterior. This makes it easier to open doors, connect ducting, inspect vents, and clean behind the tent.
Grow Tent Size Guide
| Tent Size | Suitable Use |
| 2×2 | Seedlings, herbs, clones, or a compact indoor setup |
| 2×4 | Narrow rooms, closets, or wall-side placement |
| 3×3 | Small but flexible home growing area |
| 4×4 | Balanced size for many beginner and intermediate setups |
| 5×5 | Larger growing area with more equipment space |
| 4×8 | Long rooms, multiple lights, or divided plant rows |
| 8×8 | Dedicated growing room with substantial equipment |
| 10×10 | Large indoor garden or multi-section setup |
Plant capacity should not be treated as a fixed number. It can change based on container size, plant variety, training method, growing stage, and how much room the equipment occupies.
A 4×4 tent may be manageable for one grower but too large for another. Choose based on your actual available space rather than trying to purchase the biggest model within your budget.
Measure the Available Room Before Buying
Measure the length, width, and ceiling height of the intended location. Do not forget to check the space needed for external ducting, fan placement, electrical connections, and door movement.
A tent listed as 80 inches tall may not fit comfortably in a room with an 82-inch ceiling. You need enough clearance to lift the frame during assembly and position equipment above or around the enclosure.
Doorway width also matters. Large tents are normally assembled inside the room, but the box, frame pieces, and accessories still need to pass through the entrance.
Consider the surrounding temperature as well. A tent placed in a hot attic, cold garage, or poorly ventilated closet may be difficult to manage even when the enclosure itself is high quality.
Consider Tent Height and Vertical Space
Height affects more than the maximum size of your plants. The upper section of the tent must also hold the grow light, hanging system, inline fan, carbon filter, and ducting.
Containers take up space from the bottom, while lighting equipment reduces space from the top. You must also maintain an appropriate distance between the light and the plant canopy.
A 36-inch tent may work well for seedlings, clones, herbs, or compact plants. It will be restrictive for tall plants or a large overhead ventilation system.
Tents measuring around 70 to 80 inches provide more flexibility for most home setups. Extra-tall tents can be valuable when you plan to use larger containers, tall plants, or several suspended components.
Before choosing a short tent, sketch the approximate height of every major item that will be placed inside.
Understand Canvas Density
Grow tent fabric is often described with a denier rating such as 600D, 1680D, or 2000D. A higher number generally indicates a heavier and denser fabric, but it should not be the only quality measurement.
A well-made 600D tent may be sufficient for a small or occasional indoor setup. It can also be lighter, easier to assemble, and more affordable.
Heavier 1680D or 2000D canvas may provide better resistance to tearing, pinholes, and long-term wear. It is commonly found on premium or heavy-duty grow tents.
However, canvas thickness cannot compensate for weak stitching, poor zipper construction, unstable poles, or badly fitted seams. Overall build quality is more important than one specification.
Look for double stitching, reinforced corners, zipper-covering flaps, and a durable outer layer. These details can improve light control and reduce damage from repeated use.
Check the Reflective Interior
Most grow tents use a reflective Mylar-style interior. Its purpose is to redirect unused light back toward the plants and reduce dark areas around the sides of the enclosure.
A bright, evenly installed reflective surface can help make better use of the available grow light. Wrinkled or damaged lining may still function, but large gaps and exposed fabric can reduce effectiveness.
The interior should be easy to wipe clean and should not separate quickly from the outer canvas. Check whether the floor tray uses a similar reflective or water-resistant material.
Avoid assuming that a very high advertised reflection percentage automatically makes one tent superior. Light placement, fixture quality, wall condition, and plant arrangement also affect how evenly the growing area is illuminated.
Examine the Frame and Poles
The frame supports the entire enclosure and any equipment hanging from the upper bars. Steel or alloy-steel poles are generally preferable to lightweight plastic structures for a permanent setup.
Check the pole diameter, connector material, and number of upper support bars. Larger tents may require several bars to distribute the weight of lights, filters, fans, and cables.
Metal corner connectors can provide a more stable structure than thin plastic connectors. Some models also use locking mechanisms or tightening screws to prevent the frame from separating.
Manufacturers often advertise a maximum hanging capacity. Treat this as an upper limit rather than a target.
Distribute equipment across the bars and avoid placing all the weight in one central area. A grow light, carbon filter, fan, ducting, and hanging hardware can become heavier than expected when combined.
Inspect Zippers and Seams
The zipper is one of the most frequently used parts of a grow tent. A weak zipper can snag, separate, or allow light to escape after repeated opening and closing.
Look for heavy-duty zippers with a fabric flap behind or around the closure. This backing helps cover small gaps and improves light control.
Double-stitched seams can reduce the risk of tearing around doors, windows, ports, and corners. Reinforced stitching is especially important on large tents because the canvas places more pressure on the frame.
Small pinholes may be visible when a bright light is operating inside a dark room. Minor leaks can sometimes be covered, but widespread leakage may indicate poor construction or damage.
Do not force a zipper around a tight corner. Support the canvas with one hand and move the zipper slowly to reduce stress.
Check Door Placement and Interior Access
A large tent is not useful when you cannot comfortably reach the plants at the back. Door position and opening size should match the intended layout.
Small tents may need only one front door. Wider 4×8, 8×8, and 10×10 tents benefit from multiple access points because reaching across the entire interior can be difficult.
Consider how containers will be moved in and out. A narrow opening may become frustrating when the plants, trays, or equipment are large.
Observation windows can be convenient for checking the interior without opening the main door. This may reduce unnecessary changes in temperature, humidity, and light exposure.
However, a viewing window should have an effective cover. Otherwise, it can become another source of light leakage.
Look for Suitable Ventilation Ports
Ventilation ports allow ducting to pass through the tent. Their size and position affect where you can install an exhaust fan, carbon filter, intake duct, or external environmental equipment.
A useful tent normally has upper ports for warm-air exhaust, lower openings for intake, and smaller cable ports for lights, sensors, and controllers.
Drawstring sleeves around the ports help close the fabric around the ducting. Dual sleeves can provide better light blocking than a single loose opening.
Check the diameter of the ports before buying a fan or filter. A 4-inch ventilation system may not fit a port intended for larger ducting without an adapter.
More ports offer flexibility, but unused openings should close securely. Poorly sealed ports may allow light, dust, pests, or uncontrolled air to enter the enclosure.
Read Complete Guide: How to Set Up a Grow Tent: A Complete Step-by-Step Guide
Plan the Ventilation System
Plants and grow lights can increase heat and humidity inside an enclosed space. Without sufficient air exchange, the environment may become difficult to manage.
An exhaust system normally includes an inline fan and ducting. A carbon filter may also be added when odor control is necessary.
To estimate the internal volume, multiply the tent’s length, width, and height. Fan specifications are normally provided in cubic feet per minute, commonly called CFM.
The basic tent volume is only a starting point. Carbon filters, long ducting, sharp bends, high room temperature, and powerful lights can reduce effective airflow or increase ventilation demand.
Larger tents generally need stronger ventilation than smaller models. However, an oversized fan running at full power may create unnecessary noise and excessive negative pressure.
A speed controller or automated environmental controller can make airflow easier to adjust.
Do Not Forget Internal Air Circulation
Exhaust ventilation replaces warm or humid air, but plants also benefit from gentle air movement inside the tent.
A small oscillating or clip-on fan can help reduce stagnant areas around leaves and containers. Air circulation may also help create more even temperature and humidity throughout the enclosure.
The fan should move the air without continuously blasting one section of the plant at high speed. Strong direct airflow can damage leaves or dry one area faster than the rest.
Larger tents may require more than one circulation fan. Position them so that air moves above and below the plant canopy without creating unsafe contact with water, loose fabric, or electrical cords.
Fans also occupy space. Include them in your layout before deciding how many containers the tent can hold.
Match the Grow Light to the Tent
Grow lights are designed for specific coverage areas. A light intended for a 2×2 tent may not distribute sufficient intensity across a 4×4 space.
Similarly, installing an overly powerful light in a short tent can create heat problems and make it difficult to maintain a safe distance from the plant canopy.
Check the manufacturer’s recommended flowering and vegetative coverage rather than relying only on the product name or wattage.
Dimmable lights provide more flexibility because the output can be reduced during early growth stages or when environmental temperatures rise.
The fixture dimensions also matter. Confirm that the light fits between the frame poles and leaves room for ventilation equipment.
When comparing the best indoor grow tent options, consider the planned light at the same time. The tent and lighting system must work together.
Consider the Floor Tray
A removable floor tray is a simple but useful feature. It can contain small amounts of water, soil, plant material, and other debris.
The tray should cover most of the floor and have raised edges. This makes routine cleanup easier and provides another layer between the containers and the tent floor.
A tray is not a substitute for careful watering. Large spills may escape over the edges or enter openings around the corners.
Remove and clean the tray periodically. Standing water and organic material should not be allowed to remain inside the tent.
For large models with several chambers, check whether each section includes a separate tray.
Useful Beginner-Friendly Features
Some features do not directly improve plant growth, but they can make the tent easier to manage.
A tool pocket keeps meters, scissors, ties, and small accessories off the floor. A controller mounting plate allows sensors and control equipment to be installed without making unnecessary holes in the canvas.
Observation windows reduce the need to open the doors for quick checks. Multiple cable ports help separate electrical wires from ventilation ducting.
Removable intake screens may help reduce the entry of larger dust particles and insects. Extra hanging bars provide more options for positioning equipment.
Clear assembly instructions and labeled poles are especially valuable for first-time users. Replacement-part availability and responsive customer support may also matter over the life of the tent.
Cheap Grow Tent vs. Affordable Grow Tent
A cheap grow tent has a low purchase price, but it may not provide the best long-term value. Thin material, weak zippers, unstable connectors, or poor access can lead to replacement costs and daily frustration.
An affordable tent balances price with usable construction. It may use lighter canvas than a premium model but still provide a stable metal frame, reflective lining, functional ports, and acceptable stitching.
When comparing cheap grow tents, calculate the cost of the complete setup. A low-priced enclosure still requires a light, exhaust fan, ducting, circulation fan, monitoring equipment, and possibly a carbon filter.
The largest affordable tent is not always the best value. A bigger enclosure usually requires more lighting, stronger ventilation, and higher electricity use.
For many beginners, a well-built 2×4, 3×3, or 4×4 model can offer better value than a low-priced oversized tent.
Consider the Total Setup Cost
The tent is only one part of an indoor growing system. Before buying, create a budget for all essential components.
Common expenses include:
- Grow light
- Inline exhaust fan
- Ducting
- Carbon filter
- Circulation fan
- Timer or controller
- Temperature and humidity monitor
- Containers and trays
- Hanging equipment
- Electrical accessories
Larger tents may require multiple lights, fans, or circulation devices. They can also use more electricity throughout the growing cycle.
A complete kit may appear expensive compared with an empty tent, but it can be cost-effective when you need every included component.
On the other hand, a standalone tent may provide better value when you already own equipment or want to build the system gradually.
Common Grow Tent Buying Mistakes
Buying Before Measuring the Room
A tent may fit the floor but still be too tall for the ceiling or too close to surrounding walls. Measure the entire installation area, including space for doors and ducting.
Choosing the Largest Tent Available
More space also means more equipment, higher operating costs, and additional maintenance. Beginners should choose a manageable size rather than the maximum size their room can hold.
Ignoring Vertical Clearance
The advertised height is not fully available for plants. Containers, lighting, filters, fans, and safe hanging distances all reduce usable vertical space.
Selecting the Tent Before the Light
The light coverage should match the enclosure. Choosing both components together can help prevent dark corners, excessive heat, or insufficient intensity.
Assuming Every Listing Is a Complete Kit
A product photo may show lights, plants, and ventilation equipment even when only the tent is included. Read the package contents carefully before ordering.
Focusing Only on Canvas Density
A higher denier number can indicate heavier fabric, but zipper quality, stitching, frame strength, and access design are also important.
Overloading the Hanging Bars
Do not assume the frame can safely support unlimited equipment. Add the weight of every suspended component and distribute it across several bars.
Forgetting Maintenance Access
You should be able to reach plants, clean trays, adjust equipment, and inspect ducting without removing the entire setup.
How to Set Up a Grow Tent
Start by clearing and cleaning the installation area. The floor should be level, dry, and close enough to suitable electrical outlets.
Assemble the frame according to the manufacturer’s instructions. Confirm that every pole and connector is fully seated before pulling the fabric over the structure.
Install the floor tray, hanging bars, and any internal dividers. It is usually easier to position the main light and ventilation equipment before filling the tent with plants.
Place the exhaust port near the upper section because warm air rises. Lower openings can be used for passive or active intake.
Route electrical cords through the dedicated cable ports rather than the larger ventilation openings when possible.
After assembly, close the doors and operate the light inside a dark room. Inspect the seams, zipper, windows, and ports for visible leaks.
Run the equipment without plants for a trial period. Monitor the temperature, humidity, airflow, and noise so adjustments can be made before the growing area is occupied.
How to Maintain a Grow Tent
Keep the interior free from standing water, dead leaves, spilled growing material, and unused equipment. Regular cleaning makes the environment easier to inspect and manage.
Wipe the reflective walls carefully with a soft cloth. Avoid abrasive tools or strong chemicals that may damage the lining.
Remove and clean the floor tray when necessary. Check underneath it for moisture or debris.
Inspect the zippers for trapped fabric and accumulated dirt. Move them slowly around corners and avoid pulling the door closed with excessive force.
Check the frame and hanging bars periodically. Loose connectors should be corrected before they affect the structure.
Ventilation screens, fans, filters, and ducting also require maintenance. Dust buildup can reduce airflow and increase equipment noise.
Frequently Asked Questions
What size grow tent is best for a beginner?
A 2×4, 3×3, or 4×4 tent is often manageable for a beginner, depending on the available room and planned equipment. A 2×4 model works well in a narrow area, while a 4×4 provides more expansion space. Measure the room and calculate the cost of lighting and ventilating the entire enclosure before deciding.
Is a 2×2 or 3×3 grow tent better?
A 2×2 tent is easier to fit, light, and ventilate. It may be suitable for herbs, seedlings, or a compact setup. A 3×3 provides more floor area and flexibility but requires a larger light and more environmental control. The better size depends on your space, plant type, and future plans.
Is a cheap grow tent worth buying?
A low-cost tent can be worthwhile when it has a stable frame, functional zippers, reflective lining, suitable ports, and acceptable stitching. Avoid choosing based only on the lowest price. A slightly more expensive model may provide better long-term value if it reduces light leaks, equipment instability, and early replacement.
Is 600D canvas thick enough for a grow tent?
A 600D tent can be sufficient for many small and budget-friendly indoor setups. It is usually lighter and easier to handle than heavier fabric. However, 1680D or 2000D material may provide better resistance to tears and pinholes. Stitching, zippers, seams, and frame quality remain equally important.
What is the best material for a grow tent?
A strong grow tent normally combines durable Oxford-style fabric, reflective Mylar lining, reinforced stitching, and a metal frame. There is no single ideal canvas density for every user. Premium tents often use heavier material, while affordable models may use 600D fabric to reduce weight and cost.
How tall should a grow tent be?
A height of approximately 70 to 80 inches offers useful flexibility for many indoor setups. It leaves room for containers, plants, lighting, and overhead ventilation equipment. Shorter tents are better for seedlings and compact plants. Taller models may be necessary for large containers, tall plants, or complex equipment arrangements.
Does a grow tent need ventilation?
Yes. An enclosed tent requires air exchange to help manage heat, humidity, and stagnant air. Most setups use an inline exhaust fan, ducting, and one or more intake openings. Internal circulation fans may also be used to move air around the plant canopy.
Do I need a carbon filter?
A carbon filter is mainly used for odor management. It is not required for every indoor garden, especially when the plants produce little odor and the room has suitable ventilation. When a filter is used, remember that it creates airflow resistance and may reduce the effective performance of the exhaust fan.
Can I use a grow tent without an exhaust fan?
A very small, low-heat setup may sometimes use passive airflow, but most enclosed tents benefit from an exhaust fan. Lights, plants, and moisture can quickly change the internal environment. Monitor temperature and humidity rather than assuming open vents will provide enough airflow.
Are complete grow tent kits good for beginners?
Complete kits can be useful for beginners who want the main components together. You will not need to select the tent, light, fan, filter, and basic accessories separately. However, compare the quality and specifications of every included component. A kit may offer convenience but less customization.
How can I check a grow tent for light leaks?
Place a bright light inside the closed tent and darken the surrounding room. Inspect the seams, zippers, corners, windows, cable ports, and ventilation sleeves. Small pinholes may be manageable, but large gaps or widespread leakage can indicate poor assembly, damaged fabric, or weak construction.
Where should I place a grow tent?
Choose a level, dry, and accessible location near suitable electrical outlets. The room should have enough clearance around the tent for doors, ducting, and maintenance. Avoid areas with extreme temperatures, excessive moisture, poor ventilation, or frequent contact with children and pets.
Can a grow tent damage the floor?
Water, soil, equipment pressure, or trapped moisture can damage some floors. Use the included floor tray and consider placing an additional waterproof mat beneath the tent. Clean spills promptly and inspect the area below the enclosure periodically, especially on wood, laminate, or carpeted surfaces.
How much weight can a grow tent hold?
Weight capacity varies by frame design, pole thickness, connectors, and hanging-bar configuration. Check the manufacturer’s stated limit, but do not treat it as a recommended working load. Add the weight of lights, fans, filters, ducting, cables, and hardware, then distribute the equipment carefully.
Should I buy a grow tent with an observation window?
An observation window is convenient but not essential. It allows you to check the plants without opening the main door. This may help reduce unnecessary environmental changes. Make sure the window has a secure cover that blocks light when it is not being used.
Conclusion
The best grow tents provide a practical balance of size, durable construction, equipment compatibility, and easy access. The right choice depends on your available room, planned grow light, ventilation requirements, and total budget.
For most beginners, the VIVOSUN S448 4×4 Grow Tent is the strongest overall option in this roundup. It offers a versatile 4×4 footprint, 80-inch height, reflective interior, metal frame, observation window, removable tray, and multiple equipment openings.
The MELONFARM 4×2 and Green Hut 2×2 may be more suitable when you need an affordable or compact enclosure. AC Infinity and Gorilla models are better choices when heavy-duty materials and stronger frames are priorities.
Buyers who do not want to select every component separately can consider one of the complete kits. However, a standalone grow tent provides more freedom to customize the lighting, ventilation, and environmental controls.
Measure your room carefully, plan the full equipment layout, and choose a tent you can comfortably operate and maintain. A manageable, well-planned enclosure will usually provide better value than the largest or cheapest option available.

I’m Maya L. Greenwood, a lifelong plant lover who believes anyone can grow something beautiful with the right guidance. After years of testing soil mixes, pruning methods, irrigation tricks, and pest-safe solutions, I started EasyGardenTips.com to turn hard-won lessons into step-by-step advice. From seed starting and container gardens to composting and seasonal checklists, my goal is to make gardening simple, sustainable, and fun.