What to Fill Bottom of Raised Garden Bed: Soil and Materials
For most raised garden beds on natural ground, the best material at the bottom is simply prepared native soil, with a quality topsoil-and-compost mixture placed above it. You do not need a gravel layer, plastic sheet, or a pile of branches. If your bed is very tall, clean woody material may help fill some of the lower space, but it changes how the bed settles and should not replace adequate soil for roots.
The right choice depends on what the bed sits on. Grass may need temporary weed suppression; a bed above concrete needs a contained growing medium and an outlet for excess water. Elevated planters also need a supported bottom, not just loose material resting on the ground.
Using the wrong bottom fill can waste planting depth, restrict root growth, or keep the growing medium too wet. Thick layers of fresh organic waste may also settle considerably as they decay.
In this article, I explain which materials belong at the bottom of raised beds on grass, native soil, concrete, and elevated stands. You’ll learn when cardboard, hardware cloth, logs, or leaves are appropriate, how much good soil to keep above them, and which common fillers to avoid.
What to Fill Bottom of Raised Garden Bed Based on Its Location
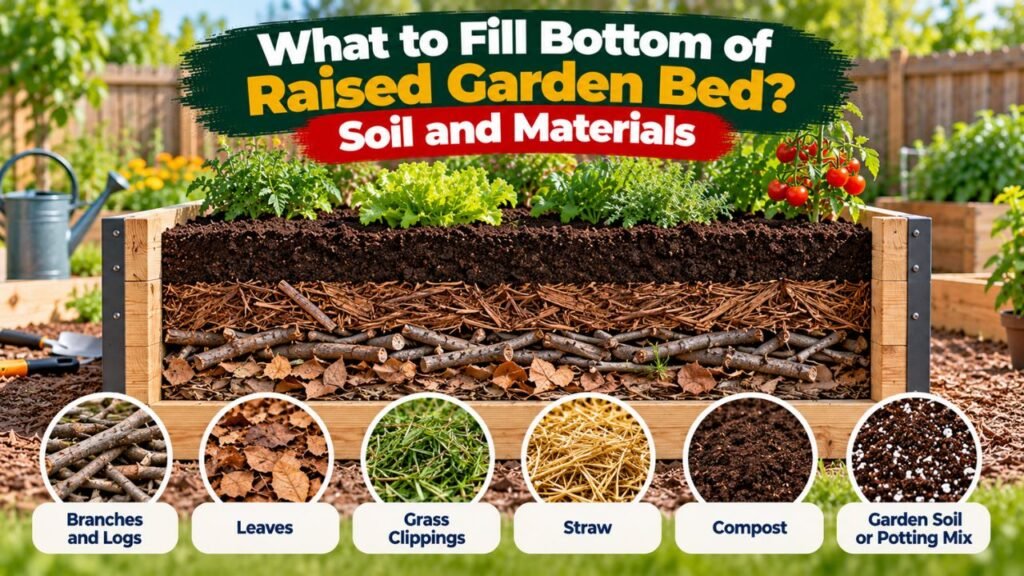
The right bottom material depends primarily on the raised bed’s location, depth, and construction.
A traditional open-bottom bed on healthy ground has different requirements from a tall metal bed or an elevated planter with a solid base.
| Raised bed location or type | Recommended bottom material |
| Directly on healthy garden soil | Prepared native soil with growing mix above |
| On grass or weeds | Remove vegetation or use temporary cardboard for suppression |
| On ground with burrowing rodents | Galvanized hardware cloth beneath the soil |
| Deep raised bed on natural ground | Optional clean logs, branches, or coarse organic material beneath adequate growing soil |
| On concrete or patio | Suitable growing medium with a reliable drainage outlet |
| Elevated planter with legs | Supported base, drainage openings, and container-appropriate mix |
For most ordinary backyard raised beds, you don’t need a separate bottom layer at all.
Leaving the bottom open allows plant roots to extend into the ground below, provided the native soil is suitable.
The University of Minnesota Extension’s raised-bed gardening recommendations explain that barriers between raised bed soil and native ground are generally unnecessary and may restrict root growth.
Why Good Soil Is Usually the Best Bottom Fill
Good-quality garden soil provides a stable growing medium with mineral particles, organic matter, and spaces for air and water.
Unlike branches or other decomposable fillers, mineral soil doesn’t lose substantial volume through decomposition.
It also provides a continuous growing area for roots.
For a typical 8- to 12-inch-tall raised bed, filling the growing area with suitable soil is usually simpler than constructing several different layers.
If the frame sits on healthy native ground, the roots may continue growing beneath the bed.
When a Separate Bottom Layer Makes Sense
A separate layer may be useful when you’re solving a specific problem.
For example:
- Cardboard can help suppress existing grass during bed preparation.
- Hardware cloth can help protect plants from burrowing pests.
- Clean woody materials can occupy some space in unusually deep beds.
- A permeable liner can help retain soil in certain planters on paved surfaces.
Each material serves a different purpose.
Avoid adding layers simply because a raised bed diagram shows several materials stacked together.
What to Put at the Bottom of a Raised Bed on Grass
Grass is a common starting surface for new raised garden beds.
The main challenge is preventing established turf and weeds from growing through the new planting area.
There are two practical approaches: removing the vegetation or suppressing it before planting.
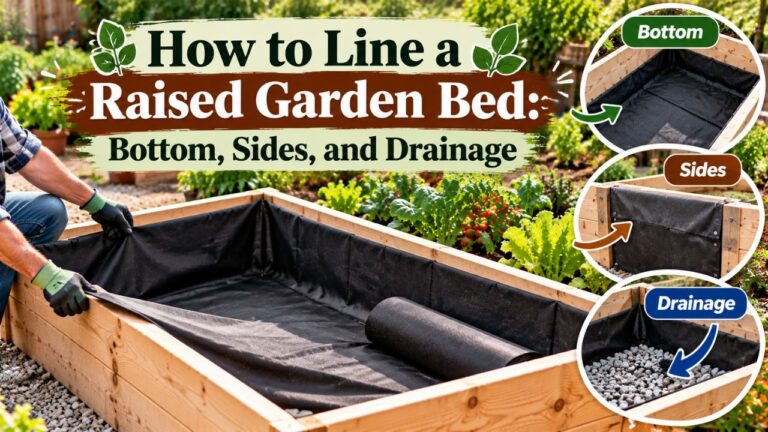
Remove the Grass Before Filling the Bed
Removing grass gives you direct access to the native soil.
Follow these steps:
- Mark the raised bed’s location.
- Remove the existing turf or unwanted vegetation.
- Pull out persistent perennial weed roots.
- Remove large stones and debris.
- Check whether the soil drains adequately.
- Gently loosen compacted ground with a garden fork if needed.
- Place the raised bed frame on the prepared area.
- Add suitable growing soil.
You generally don’t need to dig a deep hole beneath the frame.
The objective is to prepare a healthy connection between the raised soil and the ground underneath.
Can You Put Cardboard at the Bottom of a Raised Bed?
Yes. Plain cardboard is sometimes used to suppress grass and weeds before establishing a raised bed.
However, it isn’t necessary in every garden, and it can temporarily slow water infiltration until it softens and decomposes.
If you choose this method:
- Use plain, non-waxed cardboard.
- Remove plastic tape, staples, and packaging materials.
- Overlap the pieces so grass cannot easily grow through gaps.
- Wet the cardboard to help it settle.
- Cover it with suitable soil or compost.
- Allow enough time for the underlying vegetation to die.
The University of Maryland Extension’s vegetable raised-bed guidance describes using cardboard or newspaper to smother turf before establishing a raised bed, allowing approximately 8–12 weeks for the vegetation and covering to break down.
Cardboard can be useful for no-dig garden preparation, but it isn’t a permanent weed barrier.
For faster root access and water movement, removing the grass and leaving the bottom open may be preferable.
Should You Use Landscape Fabric Under Grass?
Permanent landscape fabric is generally unnecessary beneath a raised bed sitting directly on natural ground.
Although some landscape fabrics allow water through, they can interfere with root growth.
Aggressive weeds may also penetrate the fabric or grow through openings.
If using landscape fabric temporarily to kill existing vegetation, remove it before filling the bed.
The goal is to establish a healthy planting area, not permanently separate the raised soil from the ground.
Can You Fill the Bottom of a Raised Bed With Logs and Branches?
Yes. Logs, branches, and other clean woody materials can be used as lower fill in some deep raised beds.
This approach is related to hugelkultur, a gardening method that incorporates woody material beneath or within a growing mound.
It can reduce the amount of purchased soil needed for a large, tall bed.
However, it also introduces settling and nutrient-management considerations.
When Woody Bottom Fill Is Appropriate
Woody fill may be useful when:
- The raised bed is unusually deep, such as 24 inches or taller.
- The bed sits directly on suitable natural ground.
- You have clean branches or untreated wood available.
- You can leave enough growing soil above the woody material.
- You are prepared to replenish the soil as the wood decomposes.
The University of Minnesota Extension identifies sticks, leaves, compost, and soil as materials used in deep-bed layering methods, including hugelkultur.
It also notes that raised beds using these materials need additional soil as decomposition reduces their volume.
For shallow raised beds, using quality soil throughout the growing area is usually more practical.
What Kind of Wood Can Go in the Bottom?
Suitable materials may include:
- Clean, untreated logs.
- Small branches.
- Twigs.
- Partially decomposed untreated wood.
- Clean, natural wood chips.
Choose materials that are free from chemical contamination.
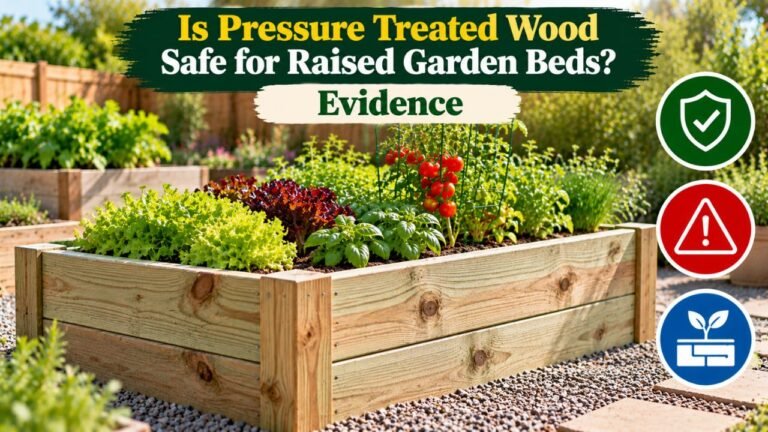
Avoid painted wood, unknown treated lumber, plywood, particleboard, and construction waste.
Don’t use wood with an uncertain history of pesticide or chemical exposure.
How to Arrange Woody Material in a Deep Raised Bed
If you decide to use woody fill, follow this general process:
- Prepare the natural ground and remove unwanted vegetation.
- Arrange larger, clean branches or logs in the lower portion of the bed.
- Fill excessive gaps with smaller twigs or appropriate organic material.
- Add suitable soil around the wood to reduce large air pockets.
- Water lightly to help the material settle.
- Add a substantial continuous layer of quality growing soil above the woody fill.
- Plant only after the upper growing layer is adequately prepared.
Keep the woody material below the primary planting zone.
The appropriate thickness of the growing layer depends on the crop and whether roots can extend into suitable ground beneath the bed.
For many vegetable beds that use buried woody fill, retaining at least 12–18 inches of suitable growing medium above it is a practical planning choice. Larger or deeper-rooted plants may need more unobstructed soil volume.
This is not a universal minimum for every crop or hugelkultur design.
Problems With Putting Logs at the Bottom
Wood-based filling has several limitations.
Soil settling: Logs and branches gradually decompose, leaving less volume than they occupied originally.
Nutrient management: Decomposing fresh woody material can temporarily immobilize nitrogen near the wood, particularly when small wood particles are mixed into the active root zone.
Uneven moisture: Large air gaps and different materials can affect how water moves through the bed.
Reduced immediate root space: Large pieces of wood occupy volume that would otherwise contain growing soil.
These drawbacks don’t make woody fill unusable.
They mean the method requires more planning and maintenance than filling a bed with a suitable soil mixture.
Can You Fill the Bottom of a Raised Bed With Leaves or Grass Clippings?
Leaves, straw, and other natural plant materials are sometimes used to fill part of a deep raised bed.
They decompose more quickly than many large logs, so their volume can decrease significantly.
Using Dry Leaves in the Bottom Layer
Clean, dry leaves can be included in the lower organic fill of a tall raised bed.
Shredding them helps reduce large, loosely packed spaces.
Avoid adding a very thick, compacted layer of whole leaves that may restrict water movement.
If you’re using leaves, mix them with other appropriate materials rather than creating a dense, isolated layer.
Keep enough suitable growing soil above the organic materials for the intended plants.
Using Straw as Bottom Fill
Clean straw can occupy space in a deep bed and gradually decompose.
However, straw is lightweight and can lose substantial volume as it breaks down.
It should not be used as the entire growing medium.
Avoid contaminated straw or material containing persistent herbicide residues.
Straw is often more useful as a surface mulch, where it helps conserve moisture and reduce weed growth.
Using Grass Clippings
Fresh grass clippings should not be packed into thick layers beneath raised bed soil.
Large, wet masses of grass can mat together and decompose under poorly aerated conditions.
This may produce unpleasant odors and uneven settling.
Small amounts of clean, untreated clippings can be composted separately and used after they have decomposed.
For most raised beds, finished compost is a more predictable ingredient than thick layers of fresh clippings.
What to Put at the Bottom of a Raised Bed on Concrete
Raised beds installed on concrete, pavers, or another hard surface behave differently from beds placed directly on natural soil.
Because roots cannot extend into the ground, all usable rooting space must be provided within the raised bed.
The design must also allow excess water to escape.
Use a Suitable Growing Medium Instead of Loose Fill
For raised beds on impermeable surfaces, University of Maryland Extension recommends a mixture of compost and soilless growing medium in approximately equal parts.
For beds at least 16 inches deep, it also permits adding mineral topsoil at up to 20% of the total mixture.
The exact product should be suitable for the size and drainage design of the bed.
Avoid filling a shallow planter with dense native clay soil.
Provide Enough Soil Depth
Raised beds on concrete must provide sufficient growing depth for their crops.
The University of Maryland Extension recommends:
| Crop group | Growing depth on hard surfaces |
| Leafy greens | At least 8 inches |
| Beans | At least 8 inches |
| Cucumbers | At least 8 inches |
| Peppers | Approximately 12–24 inches |
| Tomatoes | Approximately 12–24 inches |
| Squash | Approximately 12–24 inches |
These are general depth recommendations.
Larger plants also need adequate horizontal growing space and total soil volume.
Make Sure Water Can Drain
An open-bottom frame sitting directly on concrete still needs a drainage path.
Water must be able to escape through suitable openings or along the base without becoming trapped.
Check the slope of the surface before filling the bed.
Avoid placing an impermeable plastic sheet beneath the entire planting area unless the system includes appropriate drainage outlets.
If a liner is necessary to prevent soil from escaping, select a suitable permeable material and maintain drainage openings.
Do not allow water to collect against a house foundation or other vulnerable structure.
What to Put at the Bottom of an Elevated Raised Garden Bed
An elevated garden bed supported by legs is different from a ground-supported raised bed.
Its bottom must physically support the growing medium.
You cannot simply leave the container open beneath the soil unless it has another properly engineered support system.
Use a Strong, Supported Bottom
Depending on the planter’s design, suitable bottoms may include:
- Manufacturer-designed metal panels.
- Properly supported wooden slats.
- Reinforced planter bases.
- Structural support grids with compatible permeable liners.
- Other bases designed for the full weight of wet growing medium.
Do not rely on ordinary landscape fabric stretched across an unsupported opening to carry a large volume of soil.
The planter needs sufficient structural support and suitable drainage.
Use Container-Appropriate Growing Mix
Elevated planters generally benefit from a lightweight, well-draining growing medium.
A suitable commercial potting mix or raised planter mix may contain peat, coir, composted bark, perlite, or similar ingredients.
The exact mixture depends on the planter design and crop requirements.
Avoid adding large logs, rocks, or other bulky fillers to shallow elevated planters.
These materials can reduce available root space without improving the growing conditions.
Check the Weight of the Filled Planter
Wet soil can be considerably heavier than dry growing medium.
Before filling an elevated bed, confirm that the legs, supports, and base can carry its fully loaded weight.
This is especially important for planters placed on balconies, decks, or other elevated structures.
Follow the manufacturer’s load limits and installation instructions.
Should You Put Rocks or Gravel at the Bottom of a Raised Garden Bed?
No, a gravel layer is generally unnecessary for ordinary raised garden beds and should not be added solely to improve drainage.
Drainage depends on the growing medium, the underlying soil, and whether water has a suitable exit.
Adding gravel doesn’t automatically correct these conditions.
Why Gravel Doesn’t Solve Drainage Problems
In a container-like growing system, a coarse layer beneath a finer growing medium can interfere with the downward movement of water across the material boundary.
Water may remain in the finer material above the coarse layer until sufficient moisture accumulates.
Gravel also takes up space that could otherwise support plant roots.
For a traditional open-bottom raised bed, there is usually no reason to place rocks across the bottom.
When Gravel May Be Useful
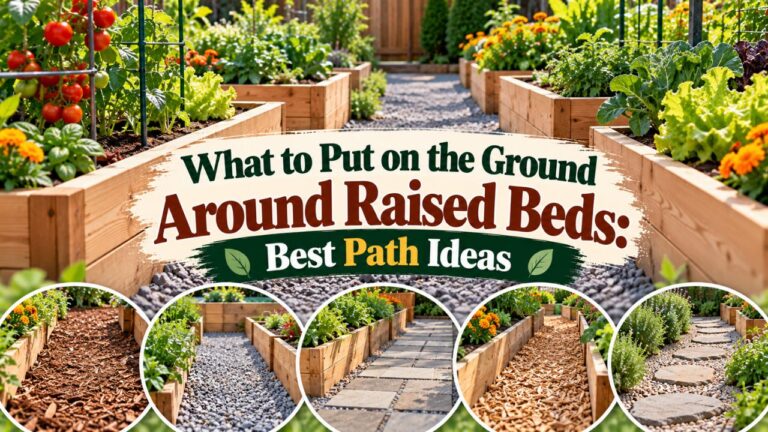
Compacted crushed stone can be useful beneath the perimeter of some raised bed frames or masonry walls to provide a stable construction base.
However, that is different from filling the entire lower growing area with gravel.
A structural foundation should be designed separately from the root-zone growing medium.
For ordinary vegetable beds, prioritize suitable soil structure and a functional drainage path.
What Should You Avoid Putting at the Bottom of Raised Garden Beds?
Some materials may seem inexpensive or convenient but create long-term gardening problems.
| Material | Why it may be unsuitable |
| Solid plastic sheeting | Can block drainage and root access |
| Thick gravel layer | Reduces rooting depth and doesn’t replace drainage |
| Construction rubble | May contain sharp or contaminated materials |
| Painted or unknown treated wood | May introduce unwanted chemicals |
| Plastic bottles and containers | Create unstable voids and reduce growing volume |
| Fresh manure | Can create food safety and nutrient problems |
| Large masses of fresh grass | May mat together and decompose unevenly |
| Excessive unfinished compost | Can cause settling and unpredictable growing conditions |
| Contaminated soil | May expose plants and gardeners to harmful substances |
Avoid Unnecessary Plastic Barriers
Solid plastic across the bottom of an open-ground raised bed prevents roots from growing into the native soil.
It may also trap water.
If the bed needs a liner for a specific purpose, choose the material and drainage arrangement carefully.
Avoid Household Trash as Cheap Fill
Plastic containers, painted boards, packaging waste, and construction debris are not suitable substitutes for healthy growing soil.
They may create empty spaces, interfere with moisture movement, or introduce contaminants.
Use clean materials with a known purpose.
Avoid Filling the Bed Entirely With Compost
Compost can improve soil structure and contribute nutrients, but it is not automatically a complete replacement for mineral soil.
An organic-heavy growing mixture may settle, dry unevenly, or develop nutrient imbalances.
For a permanent raised bed on natural ground, suitable topsoil combined with finished compost generally provides a more stable growing medium.
How to Fill a Raised Garden Bed From Bottom to Top
For most gardeners, a straightforward soil-based approach works better than creating many separate layers.
The following steps apply to a traditional raised bed placed directly on suitable natural ground.
Step 1: Prepare the Native Ground
Remove persistent weeds and unwanted vegetation.
Check drainage and gently loosen severely compacted soil where necessary.
Leave the bottom open unless there is a specific reason to install a protective barrier.
Step 2: Add Pest Protection if Needed
If burrowing animals regularly enter garden beds, place suitable galvanized hardware cloth beneath the frame.
Secure its edges to prevent pests from entering through gaps.
Use appropriate mesh for the specific animals present.
The mesh should allow water to move through while preventing unwanted entry.
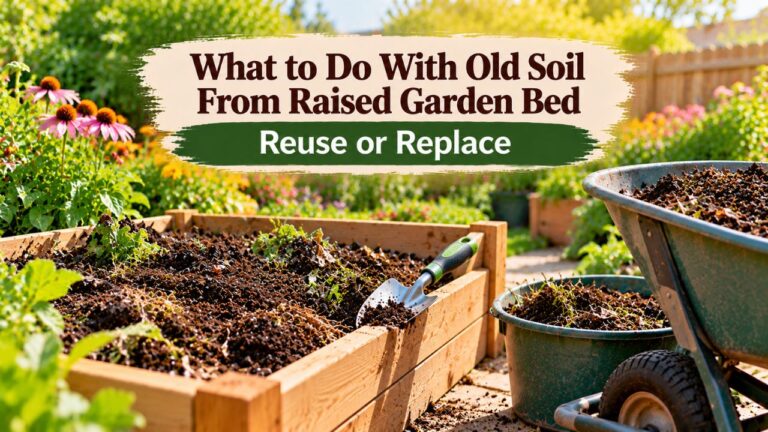
Step 3: Add Optional Organic Fill for a Deep Bed
If the bed is unusually tall and sits on natural ground, clean woody materials may be used to occupy some of the lower space.
Avoid filling the entire bed with logs.
Leave enough depth for a continuous upper layer of healthy growing soil.
Skip this step for shallow beds and most enclosed elevated planters.
Step 4: Add Quality Topsoil and Finished Compost
For a conventional open-bottom raised bed, a practical starting mixture is:
- Approximately two parts suitable mineral topsoil.
- Approximately one part finished plant-based compost.
This provides roughly two-thirds topsoil and one-third compost by volume.
Adjust the proportions according to soil quality and test results.
You can blend the components before filling or mix them within the bed.
Avoid creating abrupt layers of different soil materials when a uniform growing mixture is more appropriate.
Step 5: Leave Space for Watering and Mulch
Fill the bed to approximately 1–2 inches below the upper edge.
This provides space for irrigation water and mulch.
Gently level the surface without walking on the growing medium.
Step 6: Water and Check for Settling
Moisten the soil slowly and evenly.
Allow excess water to drain.
If the soil settles noticeably, add more suitable growing medium.
Check that the finished soil depth remains appropriate for the plants you intend to grow.
How Much Soil Should Be Above the Bottom Fill?
The upper soil layer must provide enough continuous growing space for roots.
This is especially important if logs, branches, or other bulky materials occupy the lower portion of a tall bed.
Soil Depth for a Shallow Raised Bed
For a raised bed on healthy natural ground, roots may extend below the frame.
A shallow 8- to 12-inch bed can therefore be suitable for many vegetables.
When the underlying soil is compacted, contaminated, or inaccessible, more growing depth may be necessary.
Soil Depth Above Woody Fill
If you’re using logs or branches in a deep raised bed, keep a substantial layer of suitable growing soil above them.
For many vegetables, approximately 12–18 inches of continuous soil is a useful planning range.
Large or deep-rooted crops may need more growing volume.
The correct depth depends on the crop, the amount of woody material, and whether roots can extend into suitable native soil.
Calculate the Total Growing Medium Needed
For a rectangular bed, use:
Length × Width × Soil Depth = Soil Volume
Measure all dimensions in feet.
For example, a 4 × 8-foot bed filled with 12 inches of growing soil requires:
4 × 8 × 1 = 32 cubic feet
Convert cubic feet to cubic yards:
32 ÷ 27 = approximately 1.19 cubic yards
If using 2-cubic-foot bags:
32 ÷ 2 = 16 bags
If you are using optional lower fill, calculate the volume occupied by the intended soil layer rather than the entire bed height.
Remember that irregular logs and branches create gaps, so the actual quantity of growing soil required can differ from a simple layered-volume estimate.
How to Prevent Problems After Filling the Bottom of a Raised Bed
The first growing season often reveals whether the bottom materials and growing medium are working as intended.
Check for changes in soil level, drainage, and plant growth.
Watch for Excessive Soil Settling
Some settling is normal after watering.
However, large amounts of decomposable organic material may cause more noticeable volume loss over time.
If the soil surface drops substantially, replenish it with an appropriate growing mixture.
Avoid burying the crowns of established plants.
Check for Waterlogged Conditions
If the bed remains saturated long after watering, inspect the drainage path.
For beds on natural ground, examine whether compacted or poorly drained native soil is restricting water movement.
For enclosed or hard-surface beds, check that drainage openings aren’t blocked.
Adding gravel to the growing layer will not fix a blocked outlet.
Monitor Nutrient Availability
Organic materials decompose at different rates.
If substantial quantities of fresh woody material were mixed into the growing layer, nitrogen availability may temporarily decrease near those materials.
However, slow growth or yellowing leaves can also result from overwatering, root injury, temperature stress, or disease.
Check soil moisture and obtain soil testing when necessary instead of applying fertilizer automatically.
Inspect for Persistent Weeds
Cardboard or temporary weed barriers don’t prevent every weed permanently.
Remove unwanted plants while they’re small.
Avoid disturbing the soil unnecessarily, because digging can bring buried weed seeds closer to the surface.
A suitable organic mulch applied after planting can help reduce weed growth and conserve moisture.
Conclusion
The answer to what to fill bottom of raised garden bed depends on the bed’s height, location, and growing conditions.
For most traditional raised beds on suitable natural ground, quality soil is the best choice. Leave the bottom open and use a balanced topsoil-and-compost mixture rather than adding unnecessary layers.
Cardboard may help suppress grass during garden preparation, while hardware cloth can protect against certain burrowing pests.
For tall raised beds, clean logs and branches may reduce the quantity of purchased soil, but they require careful planning because they decompose and settle.
Beds on concrete and elevated planters need different arrangements that provide sufficient root space and reliable drainage.
My recommendation is to use clean, suitable growing soil throughout shallow raised beds and reserve bulky organic fillers for deep beds where enough root-zone soil can remain above them.
Good drainage, adequate soil volume, and healthy roots matter more than the number of layers placed at the bottom.
FAQs About What to Fill Bottom of Raised Garden Bed
Can You Fill the Bottom of a Raised Bed With Dirt?
Yes. Clean, suitable garden soil or mineral topsoil can be used throughout an open-bottom raised bed. Mixing in finished compost when needed can improve the growing medium. Avoid contaminated fill or extremely compacted soil.
Can You Put Cardboard Under Raised Bed Soil?
Yes. Plain cardboard can be used temporarily to suppress grass and weeds. However, it may slow water infiltration until it decomposes, so removing vegetation before filling the bed is often preferable.
Can You Put Tree Branches at the Bottom of a Raised Bed?
Yes, particularly in deep raised beds built on natural ground. Use clean, untreated branches and retain enough suitable growing soil above them. Expect settling as the branches decompose.
Is It Okay to Put Rocks at the Bottom of a Raised Garden Bed?
Rocks aren’t usually needed at the bottom of a raised garden bed. A gravel layer doesn’t guarantee better drainage and may reduce usable root space. Proper soil structure and drainage outlets are more important.
Should You Put a Weed Barrier Under a Raised Garden Bed?
Usually not when the bed sits directly on healthy natural ground. Permanent barriers may restrict root growth. Temporary weed suppression or hardware cloth for burrowing animals may be more appropriate, depending on the problem.
What Is the Cheapest Safe Material for Filling a Deep Raised Bed?
Clean branches, natural woody material, and suitable existing soil may reduce the amount of purchased growing mix needed in a deep bed. However, woody material settles as it decomposes. Don’t sacrifice the necessary upper soil depth simply to save money.
Can You Fill a Raised Bed With Only Compost?
A bed filled entirely with compost may develop moisture-management, settling, and nutrient-balance problems. For a conventional open-bottom bed, a mixture of suitable topsoil and finished compost is usually more dependable.

I’m Maya L. Greenwood, a lifelong plant lover who believes anyone can grow something beautiful with the right guidance. After years of testing soil mixes, pruning methods, irrigation tricks, and pest-safe solutions, I started EasyGardenTips.com to turn hard-won lessons into step-by-step advice. From seed starting and container gardens to composting and seasonal checklists, my goal is to make gardening simple, sustainable, and fun.