How to Build a Raised Flower Bed: Materials, Soil, and Steps
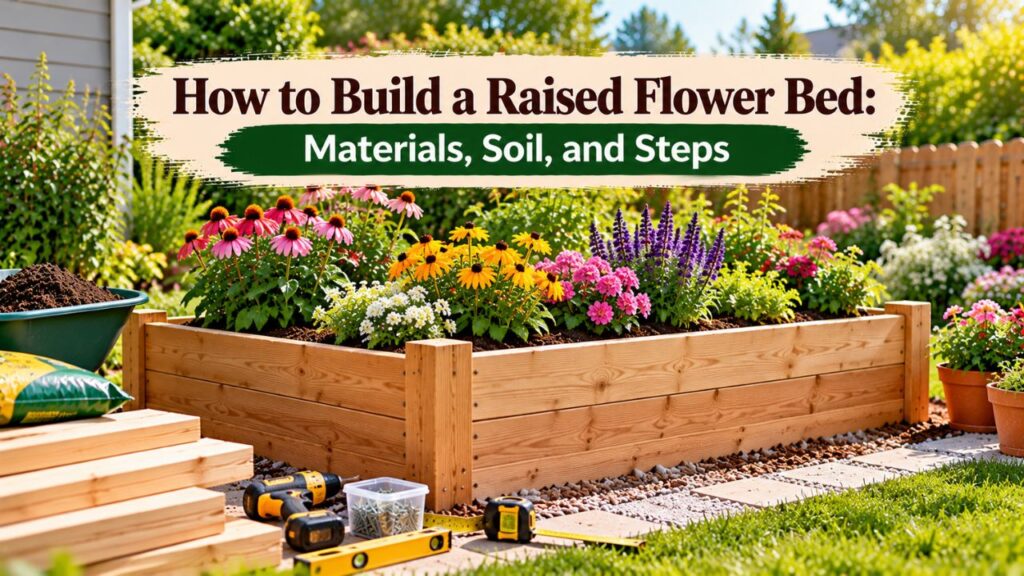
To build a raised flower bed, choose a suitable location, construct a sturdy wooden, metal, or stone frame, fill it with well-draining garden soil, and plant flowers according to their sunlight and spacing requirements. A simple rectangular wooden bed is one of the easiest designs for beginners because it requires basic tools and materials.
Raised flower beds make it possible to grow colorful annuals and perennials in a defined planting area. They can improve drainage, make flower arrangements more visible, and reduce the need to bend when planting or maintaining flowers.
However, a successful flower bed needs more than an attractive border. Poor soil, insufficient sunlight, unstable framing, and incorrect plant spacing can cause problems after the garden is established.
The right construction method depends on the available space, the flowers you want to grow, and whether the bed will sit on natural ground or a hard surface.
This guide explains how to select materials, determine suitable dimensions, assemble a raised flower bed, prepare the soil, and arrange flowers for a healthy, attractive garden.
Choose the Right Size and Location for a Raised Flower Bed
Before purchasing lumber or preparing the ground, determine where the flower bed will go and how large it should be.
The location should provide suitable light, adequate drainage, and enough room to reach the plants without stepping into the growing area.
Select a Location With Suitable Sunlight
Different flowers require different amounts of sunlight.
Many flowering annuals, including zinnias, marigolds, and petunias, perform best in full sun.
Shade-tolerant flowers, such as impatiens and certain begonias, can grow in locations receiving less direct sunlight.
Use these general guidelines:
- Full sun: Approximately six or more hours of direct sunlight daily.
- Partial sun or partial shade: Generally three to six hours of direct sunlight, depending on its intensity.
- Full shade: Less than three hours of direct sunlight, although bright indirect light may still be available.
Check the amount of sunlight reaching the intended location during different parts of the day.
Nearby trees, fences, buildings, and neighboring plants can create shade that changes throughout the growing season.
Choose the site based on the flowers you intend to grow rather than selecting plants only after construction.
Determine the Best Raised Flower Bed Dimensions
A raised flower bed should be narrow enough that plants can be reached comfortably from the surrounding paths.
For many home gardens, a width of 3–4 feet works well when both long sides remain accessible.
The length can vary according to the available space.
| Bed size | Best application |
| 2 × 4 feet | Small gardens and compact flower displays |
| 3 × 6 feet | Beginner-friendly flower beds |
| 4 × 4 feet | Square flower arrangements |
| 4 × 8 feet | Larger mixed annual and perennial gardens |
| 2 × 8 feet | Narrow borders alongside paths or fences |
If the bed will only be accessible from one side, consider limiting its width to approximately 2 feet.
The exact width should match the gardener’s comfortable reach.
How Deep Should a Raised Flower Bed Be?
The appropriate soil depth depends on the plants and the condition of the ground underneath.
For an open-bottom raised bed placed over suitable native soil, a frame approximately 8–12 inches tall can work for many flowers.
Roots may continue growing into the ground beneath the frame.
A deeper bed may be useful when the native soil is compacted, poorly drained, or unsuitable for the intended plants.
For a bed placed on concrete or another solid surface, the container must provide sufficient soil depth because roots cannot penetrate the surface below.
Consider these general starting points:
- Small annual flowers: Approximately 8–12 inches of growing depth.
- Many herbaceous perennials: Approximately 12–18 inches of prepared rooting space, or additional suitable soil beneath an open-bottom bed.
- Large perennials and compact flowering shrubs: More substantial rooting depth and volume based on the mature plant.
These are planning ranges, not universal requirements. Check the specific plant’s mature root system and growing recommendations.
Materials and Tools Needed to Build a Raised Flower Bed
A wooden frame is a practical option because it can be assembled using ordinary woodworking tools.
Cedar and redwood are common choices because they naturally resist decay better than many inexpensive softwoods.
Untreated pine can also be used, although its lifespan may be shorter in constant contact with moist soil.
Materials for a 3 × 6-Foot Wooden Flower Bed
For this example, the flower bed will have outside dimensions of approximately 3 feet wide and 6 feet long.
Two courses of standard nominal 2 × 8-inch boards will produce a frame approximately 14½ inches tall.
Materials include:
- Four 6-foot-long nominal 2 × 8 boards for the long sides.
- Four 33-inch-long nominal 2 × 8 boards for the short ends.
- Four suitable wooden corner support blocks or posts.
- Exterior-rated, corrosion-resistant wood screws.
- Optional additional side supports.
- Raised bed soil or a suitable topsoil-and-compost mixture.
- Mulch.
- Flower seeds or transplants.
The 33-inch end pieces account for the typical 1½-inch actual thickness of dimensional lumber. They fit between the 6-foot side boards to create an outside width of approximately 36 inches.
Check the actual dimensions of your lumber before cutting.
Tools for Building the Flower Bed
Gather these tools before starting:
- Tape measure.
- Pencil or marking tool.
- Carpenter’s square.
- Saw, unless the boards are precut.
- Drill or screwdriver.
- Appropriate drill bits.
- Level.
- Garden shovel.
- Garden rake.
- Garden fork.
- Work gloves and safety glasses.
Use hearing protection when operating power tools that require it.
If you’re purchasing lumber from a home improvement store, ask whether it offers cutting services. Having the boards cut to size can simplify the project.
How to Build a Raised Flower Bed Step by Step
The following instructions describe a rectangular wooden raised flower bed built directly on natural ground.
The finished structure will provide a defined planting area for annual flowers, many perennials, and compact ornamental plants.
Step 1: Measure and Mark the Flower Bed Area
Begin by measuring the intended garden location.
For the example design, mark a rectangle measuring approximately 3 feet wide and 6 feet long.
Use stakes and string to outline the proposed bed.
Check that the area is large enough for both the frame and convenient access around its sides.
If the bed is near a fence or building, leave enough room for watering, maintenance, and cleaning.
Avoid positioning the bed where water from roof downspouts collects.
The final location should be reasonably level.
Step 2: Remove Grass, Weeds, and Debris
Clear unwanted vegetation from the area inside the marked outline.
Remove large weeds, persistent roots, stones, and construction debris.
If the site contains established grass, remove the sod or suppress it before filling the bed.
For an open-bottom raised bed, gently loosen severely compacted native soil with a garden fork.
This can help roots extend below the new growing layer.
Avoid working the soil when it is saturated, because wet soil can become compacted during digging.
Important: If the bed is being constructed near a building, preserve proper drainage away from the foundation. Do not create a raised soil area that directs water toward the structure.
Step 3: Cut the Wooden Boards to Size
Measure and mark the lumber according to the planned dimensions.
For the two-course 3 × 6-foot example, prepare:
- Four long boards measuring 72 inches each.
- Four short boards measuring approximately 33 inches each.
- Four corner support blocks cut to fit within the assembled frame.
The precise end-board length depends on actual board thickness and whether the ends will sit between or outside the longer boards.
For a beginner-friendly assembly, position the shorter boards between the long side boards.
Use a carpenter’s square to mark straight cutting lines.
If cutting with a power saw, secure the lumber before operating the tool.
Step 4: Assemble the First Wooden Frame
Lay two long boards and two short boards on a flat surface.
Arrange them into a rectangle with the short boards positioned between the long boards.
Check the corners with a carpenter’s square.
Measure the two corner-to-corner diagonals. When the diagonals are equal, the rectangular frame is square.
Position suitable wooden support blocks inside the corners.
Pre-drill holes where necessary to prevent splitting.
Fasten the boards to the corner supports using exterior-rated screws of suitable length.
Check that screw tips do not protrude through exposed surfaces.
Step 5: Add the Second Layer of Boards
Position the remaining boards above the first course.
Align the corners and fasten the upper boards to the corner supports.
Check that the upper and lower boards remain straight.
A completed two-course frame made from standard 2 × 8 lumber will stand approximately 14½ inches high.
The Oregon State University Extension’s raised-bed construction guidance recommends reinforcement for framed beds longer than 6 feet or taller than about 18 inches to help prevent the sides from spreading under soil pressure.
For taller or longer flower beds, use appropriate bracing, stakes, or structural supports.
Even shorter frames should be checked for adequate rigidity before filling.
Step 6: Position and Level the Raised Flower Bed
Move the assembled frame into its marked location.
Check the level across both the length and width.
If the ground is uneven, make small adjustments to the surface beneath the frame.
The frame should rest securely without rocking.
On sloped land, a stepped or properly terraced design may be necessary.
Avoid stacking unsecured blocks beneath a large, soil-filled wooden frame.
The structure must remain stable after watering increases the weight of the soil.
Step 7: Prepare the Bottom of the Flower Bed
For a raised flower bed installed directly over suitable ground, leaving the bottom open is generally best.
This allows roots to extend into the native soil and excess moisture to move downward.
If grass has been removed thoroughly, the bed can be filled directly over the prepared ground.
Plain, overlapping cardboard can be used temporarily to suppress remaining grass in some no-dig installations, although it should not replace removal of persistent perennial weeds or invasive roots.
Avoid placing an impermeable plastic sheet across the bottom.
Plastic can block water movement and restrict root growth.
If burrowing animals are a concern, appropriately sized galvanized hardware cloth can be secured beneath the frame without sealing off drainage.
Step 8: Fill the Raised Flower Bed With Soil
Add a suitable, well-draining growing medium.
For an open-bottom wooden flower bed, a blend of mineral topsoil and finished compost is often practical.
A starting mixture might contain:
- Two parts good-quality loamy topsoil.
- One part finished compost.
However, the ideal proportions depend on the existing soil.
If the native soil already contains adequate organic matter and nutrients, less compost may be necessary.
Spread the growing medium evenly across the bed.
Break apart large clumps and gently level the surface with a rake.
Avoid stepping on the newly added soil.
Leave some space below the upper rim for mulch and watering.
Step 9: Water and Allow the Soil to Settle
After filling the frame, water the growing medium gently.
Allow the water to soak through the soil.
Check whether the surface settles unevenly or water collects in particular areas.
Add more soil where necessary.
The finished growing surface should remain relatively level, with enough room for the intended mulch layer.
Once the soil is moist and drainage is satisfactory, the bed is ready for planting.
How Much Soil Do You Need for a Raised Flower Bed?
Calculate soil volume before purchasing growing material.
For rectangular raised flower beds, use this formula:
Length × Width × Soil Depth = Soil Volume
Measure all dimensions in feet to calculate cubic feet.
Soil Calculation for a 3 × 6-Foot Flower Bed
Suppose the completed flower bed measures:
- Length: 6 feet.
- Width: 3 feet.
- Desired soil depth: 12 inches.
Convert the depth into feet:
12 inches = 1 foot
Calculate the soil volume:
6 × 3 × 1 = 18 cubic feet
This equals approximately 0.67 cubic yards.
If purchasing 2-cubic-foot bags of soil, the calculated amount is:
18 ÷ 2 = 9 bags
This is an approximate planning quantity. Actual internal dimensions, the chosen fill level, and settling can change the amount needed.
For larger beds, bulk soil may be more convenient than individual bags.
Should You Put Rocks Under the Flower Bed Soil?
No. A gravel or rock layer is generally unnecessary in an open-bottom raised flower bed.
The growing medium should connect with the soil beneath it.
If drainage is poor, address the underlying soil conditions or choose plants adapted to the available moisture.
Adding gravel does not automatically correct waterlogged soil.
How to Prepare the Best Soil for Raised Flower Beds
Flowers need a growing medium that provides enough air, moisture, and nutrients for healthy roots.
The ideal mixture depends on whether the flowers are annuals, perennials, or woody ornamentals.
Choose Well-Draining Soil for Flower Roots
Many common flowers grow best in loose soil that retains moisture without becoming saturated.
According to the University of Georgia Cooperative Extension’s ornamental planting guidance, raising flower beds approximately 6–12 inches can help improve drainage and make floral displays more visible.
The guidance also emphasizes preparing soil according to its existing texture and structure.
Good-quality loam is a useful starting point for many ornamental plants.
However, drought-tolerant flowers that prefer lean or sharply drained soil may not benefit from a compost-rich mixture.
Match the soil conditions to the plants rather than assuming every flower requires the same blend.
Check Soil pH and Fertility
Different flowers have different soil pH preferences.
Many common garden flowers grow well in slightly acidic to near-neutral soil, but certain species have more specific requirements.
A soil test can help identify pH and nutrient levels before planting.
Do not apply lime, sulfur, or fertilizer simply because the bed is new.
If a purchased soil mix already contains fertilizer, additional feeding may be unnecessary at planting time.
Excess nutrients can encourage weak, overly leafy growth or interfere with flowering in some species.
How to Arrange and Plant Flowers in a Raised Bed
Once the bed is built and filled, the next step is creating an attractive flower arrangement.
The most effective layouts consider plant height, mature width, flowering period, and sunlight needs.
Select Flowers Based on the Garden’s Light Conditions
Choose plants suited to the actual site.
| Growing conditions | Flower options |
| Full sun | Zinnias, marigolds, cosmos, petunias |
| Full sun, suitable climates | Coneflowers, black-eyed Susans, coreopsis |
| Partial shade | Certain begonias, impatiens, some columbines |
| Shade | Shade-adapted impatiens, certain begonias, flowering hostas |
Specific species and cultivars vary in their requirements.
For perennial flowers, check the USDA Plant Hardiness Zone for your location.
Choose species capable of surviving the local winter conditions.
Arrange Flowers According to Their Mature Height
Plant placement affects both appearance and growing conditions.
For a flower bed viewed mainly from one side:
- Place taller flowers toward the back.
- Position medium-height plants in the middle.
- Use shorter flowers or compact edging plants along the front.
For a bed that can be viewed from every side, taller plants often work best near the center, with lower-growing flowers around the edges.
For example, a sunny 3 × 6-foot raised flower bed might combine compact zinnias, dwarf marigolds, and appropriately sized salvias.
Choose varieties with mature heights and widths that fit the available space.
Avoid placing vigorous, tall plants directly in front of smaller flowers that need sunlight.
Mix Annuals and Perennials Carefully
Annual flowers generally complete their life cycle within one growing season and are useful for seasonal displays.
Many gardeners replant annuals each year to change the colors or layout.
Perennial flowers can return for multiple growing seasons when the climate and soil conditions are appropriate.
Combining the two can create a flower bed with both permanent structure and seasonal color.
However, consider winter conditions carefully.
Raised beds can experience greater temperature fluctuations than surrounding ground, particularly when they are tall or isolated.
In regions with severe winters, choose sufficiently cold-hardy perennials and provide suitable winter protection.
Plant Flower Transplants at the Correct Depth
Most nursery-grown flowers should be planted at approximately the same depth they occupied in their original containers.
Follow these steps:
- Water the plants before transplanting if their root balls are dry.
- Arrange the nursery pots on the soil surface to check spacing.
- Dig holes slightly wider than the root balls.
- Remove the plants carefully from their containers.
- Gently loosen tightly circling roots when necessary.
- Place each plant at its recommended planting depth.
- Return soil around the roots.
- Firm the soil lightly with your hands.
- Water thoroughly after planting.
Avoid burying the crowns of plants that require their growing points to remain near the surface.
Leave enough space for mature growth rather than planting every flower tightly together for immediate coverage.
How to Build a Raised Flower Bed Without Wood
A wooden frame is not the only option.
Raised flower beds can also be constructed with stone, brick, concrete blocks, metal edging, or simply mounded soil.
The best material depends on the desired appearance, budget, and permanence.
Build a Raised Flower Bed With Concrete Blocks
Concrete landscape blocks can form a durable raised flower bed.
For a simple, low wall:
- Mark the intended shape.
- Prepare a level, stable base.
- Arrange suitable landscape blocks along the perimeter.
- Check each course for level and proper alignment.
- Follow the block manufacturer’s stacking and reinforcement requirements.
- Fill the enclosed area with appropriate soil.
Use blocks designed for landscape retaining applications when constructing taller walls.
Ordinary loose blocks should not be stacked into a high, unstable structure.
Concrete blocks are useful for straight-sided or curved flower beds, depending on their shape.
However, thick block walls occupy more space than narrow wooden boards.
Make a Raised Flower Bed With Natural Stone
Natural stone creates a more informal appearance.
Low stone borders can be attractive around perennial gardens, cottage-style flower beds, and landscape features.
Choose stones that sit securely against one another.
Prepare a firm base and avoid building unsupported walls that could shift under soil pressure.
For taller stone walls, proper retaining-wall construction may be necessary.
Create a Mounded Flower Bed Without a Frame
A raised flower bed does not always need a rigid enclosure.
A simple mounded bed can be created by adding suitable soil and shaping it into a gently elevated planting area.
To make one:
- Mark the flower bed boundary.
- Remove unwanted vegetation.
- Loosen compacted soil where appropriate.
- Add suitable soil or organic amendments.
- Shape the soil into a gently raised mound.
- Slope the edges gradually.
- Plant flowers and cover exposed soil with mulch.
This approach avoids the cost of frame materials.
However, unframed beds may experience more erosion, especially during heavy rainfall.
Use stable edging where the soil needs additional containment.
How to Maintain a Raised Flower Bed After Planting
Building the flower bed is only the beginning.
Regular watering, mulching, and seasonal care help flowers remain healthy and attractive.
Water New Flowers Consistently
Newly planted flowers need consistent moisture while their roots become established.
Water gently around the base of each plant.
Allow water to soak into the soil rather than running across the surface.
Check moisture below the top layer before watering again.
Raised beds may dry more quickly than ground-level beds because their sides are exposed to surrounding air.
During hot weather, check the soil more frequently.
A drip irrigation system or soaker hose can simplify watering.
Add Mulch Around the Flowers
Apply an appropriate layer of organic mulch after planting.
Suitable materials include shredded bark, pine straw, and shredded leaves.
A layer approximately 2–3 inches deep is often useful around established ornamental plants.
Mulch helps conserve moisture, moderate soil temperatures, and suppress many weeds.
Keep it away from direct contact with plant stems and crowns.
Avoid covering emerging seedlings with thick mulch.
Maintain Proper Flower Spacing
As plants grow, check whether their foliage is becoming overcrowded.
Plants need sufficient room for light penetration and airflow.
Overcrowding can increase competition for water and nutrients and create conditions favorable to certain plant diseases.
For perennial beds, divide plants when their species and growth habits require it.
Remove Spent Flowers When Appropriate
Deadheading means removing old or faded flower heads.
For certain species, this encourages additional flowering and helps keep the display tidy.
However, not every flower requires deadheading.
Some native perennials provide useful seed heads for birds and other wildlife.
Choose the maintenance method according to the plant and the garden’s purpose.
Refresh the Soil Between Growing Seasons
Soil levels may gradually decline as organic materials decompose.
Before the next planting season:
- Remove unwanted weeds.
- Check the condition of the wooden frame.
- Inspect drainage.
- Add suitable soil if significant settling has occurred.
- Test soil fertility when needed.
- Apply compost or fertilizer only when appropriate.
Healthy raised flower bed soil generally does not need complete replacement every year.
Common Raised Flower Bed Building Mistakes to Avoid
A few construction and planting errors can create problems that become difficult to correct after the bed is filled.
Making the Flower Bed Too Wide
A very wide raised flower bed can make the center difficult to reach.
Keep the dimensions suitable for the gardener’s reach and the access available around the bed.
If only one side is accessible, use a narrower design.
Using Weak or Unsupported Framing
Soil becomes heavy when saturated with water.
Thin boards, loose screws, and inadequate corner supports may allow the frame to bow or separate.
Use suitable lumber thickness, strong fasteners, and additional reinforcement where necessary.
Filling the Bed With Poor-Quality Soil
Dense clay, contaminated fill, or excessive unfinished organic material can interfere with plant growth.
Use clean, suitable soil and check the drainage before planting.
Placing the Bed in the Wrong Location
A flower bed built in deep shade will not support flowers that require full sun.
Similarly, drought-tolerant plants may struggle in a site that stays continuously wet.
Match the flowers to the location before building.
Planting Too Close Together
Small nursery plants can make a new raised flower bed look empty.
However, most will expand considerably during the growing season.
Use mature plant spacing rather than current pot size when planning the layout.
Forgetting About Winter Conditions
Perennial flowers in raised beds may experience colder root-zone conditions than similar plants in surrounding soil.
In cold climates, choose hardy species and consider appropriate winter protection.
Do not assume that flowers suitable for nearby ground-level beds will perform identically in a tall or exposed raised planter.
Conclusion
Understanding how to build a raised flower bed starts with choosing the right location, dimensions, construction materials, and growing medium.
For a beginner, a 3 × 6-foot wooden frame made from suitable exterior-grade lumber is a manageable project that provides enough space for a colorful flower display.
Prepare the ground, assemble a stable frame, fill it with well-draining soil, and select flowers suited to the site’s sunlight and climate.
A mix of annual and perennial flowers can provide seasonal color and long-term interest, while mulching and consistent watering help maintain healthy growing conditions.
For most backyard gardens, an open-bottom wooden or stone-framed bed is a practical choice. It allows roots to reach suitable native soil and makes future maintenance straightforward.
Build the frame to last, but give equal attention to the soil and plants. Those decisions will determine how successfully the new flower bed grows.
FAQs About How to Build a Raised Flower Bed
What Is the Cheapest Way to Build a Raised Flower Bed?
A mounded flower bed without a rigid frame is often the least expensive option because it requires little or no construction material. A simple wooden frame made from suitable, affordable lumber can also be economical.
How Deep Should a Raised Flower Bed Be for Perennials?
Many perennials benefit from at least 12 inches of prepared rooting space, although some need substantially more. An open-bottom bed may allow roots to extend into suitable native soil. Check the particular plant’s root depth and winter hardiness requirements.
Can You Build a Raised Flower Bed Directly on Grass?
Yes, but existing grass should be removed or properly suppressed before filling the bed. Persistent perennial weeds and roots may need removal. Plain cardboard can help suppress remaining turf in suitable no-dig installations.
What Kind of Wood Is Best for a Raised Flower Bed?
Cedar and redwood are popular choices because of their natural decay resistance. Untreated pine is another option, although it may deteriorate sooner. Avoid reclaimed lumber with unknown chemical treatments.
Do Raised Flower Beds Need Drainage Holes?
Open-bottom raised flower beds placed directly on suitable ground usually do not need separate drainage holes. Elevated or enclosed planters with solid bottoms need functioning drainage openings to prevent water from accumulating around roots.
Can You Use Regular Garden Soil in a Raised Flower Bed?
Yes, clean, well-draining garden soil can be used. If the soil is heavy or poorly structured, adding an appropriate amount of finished compost may help. Avoid using contaminated material or relying entirely on dense, compacted soil.
When Is the Best Time to Build a Raised Flower Bed?
A raised flower bed can be constructed whenever the ground is workable and weather conditions are suitable. Fall and early spring are convenient times because the bed can be prepared before the main planting season. Plant tender annuals after the local frost risk has passed.

I’m Maya L. Greenwood, a lifelong plant lover who believes anyone can grow something beautiful with the right guidance. After years of testing soil mixes, pruning methods, irrigation tricks, and pest-safe solutions, I started EasyGardenTips.com to turn hard-won lessons into step-by-step advice. From seed starting and container gardens to composting and seasonal checklists, my goal is to make gardening simple, sustainable, and fun.