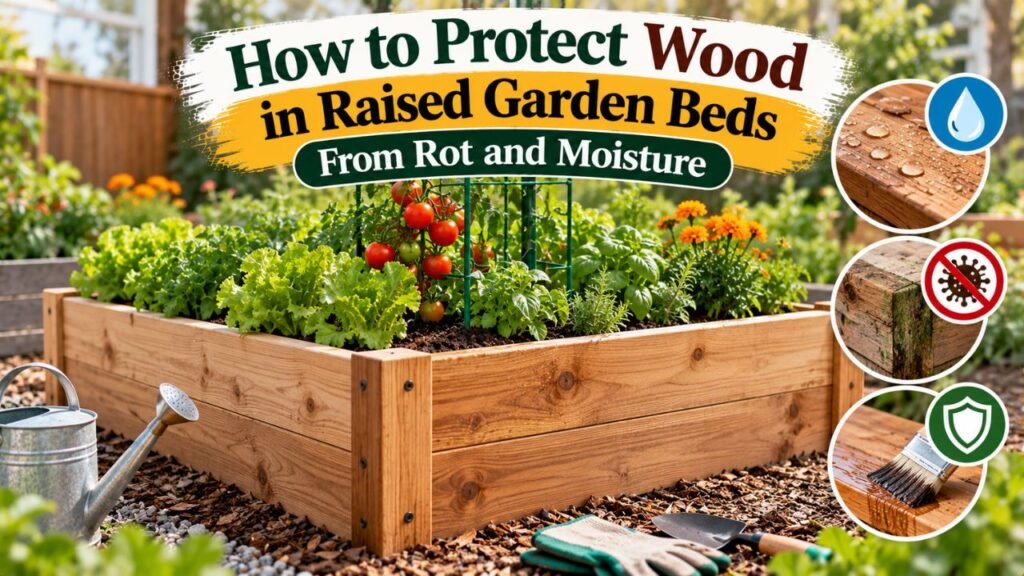
How to Protect Wood in Raised Garden Beds From Rot and Moisture
The best way to protect wood in raised garden beds is to choose decay-resistant lumber, control moisture around the frame, and use a suitable protective coating or sidewall liner when appropriate. No treatment makes wood completely rot-proof, so proper drainage and regular maintenance are equally important.
Wooden raised beds remain in contact with damp soil throughout much of the growing season. This repeated moisture exposure encourages fungal decay, particularly around the lower boards, corners, end grain, and fastener holes.
Choosing the right protection also matters for vegetable gardens. Some exterior wood preservatives contain ingredients unsuitable for prolonged contact with growing soil. Products labeled natural or waterproof aren’t automatically appropriate for edible gardening.
Untreated pine, cedar, redwood, and pressure-treated lumber also respond differently to moisture, making some protection methods more useful than others.
In this article, I cover how to seal wooden raised beds, select suitable coatings, install protective liners, improve drainage, prevent premature rotting, and maintain older wooden frames. You’ll also learn which treatments to avoid when growing vegetables and how to recognize wood that needs replacement.
How to Protect Wood in Raised Garden Beds Step by Step
Protecting a wooden raised bed works best when the boards are prepared before the frame is assembled and filled with soil.
The following process is suitable for a new wooden bed using materials appropriate for outdoor gardening.
Step 1: Choose Wood That Resists Rot
Start with lumber suited to repeated outdoor moisture exposure.
Cedar, redwood, and black locust are common naturally decay-resistant choices. Their heartwood contains naturally occurring compounds that can slow deterioration.
Ordinary untreated pine and fir are generally less resistant to decay.
Modern pressure-treated lumber offers another option when the treatment is appropriate for residential garden use.
For a permanent raised bed, selecting durable wood is often more effective than depending entirely on a surface coating.
Inspect each board before construction. Avoid lumber with existing fungal decay, substantial cracking, or serious structural damage.
Step 2: Allow the Lumber to Reach Suitable Moisture Conditions
Protective coatings need suitable surface conditions to bond correctly.
If the wood is wet from rain or recent pressure treatment, allow it to dry according to the coating manufacturer’s instructions.
Some pressure-treated lumber is sold with considerable retained moisture.
Applying a finish before the wood reaches the recommended moisture level can lead to poor adhesion, blistering, or premature coating failure.
Use a wood moisture meter if the selected coating specifies a maximum moisture content.
Avoid relying only on the board’s surface appearance.
Step 3: Clean and Prepare the Boards
Before applying a coating, remove dust, dirt, and loose wood fibers.
For new lumber:
- Brush away sawdust and debris.
- Inspect for splinters and sharp edges.
- Lightly sand rough areas if necessary.
- Remove sanding dust.
- Check that the wood is sufficiently dry.
- Place the boards on a clean work surface.
For weathered wood, remove loose or failing paint before applying another finish.
Wear suitable eye and respiratory protection when sanding or cutting lumber, especially pressure-treated wood or wood with an existing coating.
Do not dry-sand old paint of unknown composition without first assessing the potential for lead or other hazardous materials.
Step 4: Apply an Appropriate Wood-Protective Finish
Choose a coating designed for exterior wood exposure and suitable for the intended garden application.
Possible options include exterior latex paint or a compatible exterior wood stain.
Apply the product according to its instructions.
For an ordinary coating application:
- Stir or prepare the finish as directed.
- Apply an even coat using the recommended applicator.
- Cover exposed surfaces, edges, and suitable end-grain areas.
- Allow the required drying or recoating period.
- Apply additional coats only when specified.
- Allow the coating to dry or cure sufficiently before assembling and filling the bed.
Pay particular attention to end grain, where wood fibers are exposed at board ends.
End grain can absorb water rapidly and may require additional attention under the coating manufacturer’s instructions.
Don’t assume that any exterior sealant is suitable for contact with food-growing soil.
Step 5: Assemble the Raised Bed With Suitable Hardware
After preparing the boards, assemble the frame using corrosion-resistant fasteners.
For wood exposed to moisture, appropriate hardware may include exterior-rated stainless steel or suitable hot-dip galvanized fasteners.
The correct choice depends on the lumber and treatment.
Copper-based pressure-treated wood can accelerate corrosion in incompatible metals.
Use fasteners approved for the specific treated lumber.
Support the corners properly and add bracing where necessary.
A long raised bed wall can bow outward under soil pressure, especially when the growing medium becomes wet.
Structural reinforcement helps prevent gaps, loose joints, and unnecessary board movement.
Step 6: Install a Sidewall Liner if Needed
A liner can reduce direct contact between soil and the wooden frame.
This is especially useful when separating growing soil from certain wood treatments or finishes.
For an open-bottom raised bed, install suitable heavy-duty plastic or another approved barrier along the inside walls.
Keep the liner smooth, secure it without unnecessary punctures, and maintain drainage.
Do not automatically cover the entire bottom with impermeable plastic.
The underlying ground should remain available for drainage and root growth where site conditions permit.
Step 7: Position the Bed on Well-Drained Ground
Place the completed wooden frame on stable, reasonably level ground.
Avoid locations where rainwater collects around the outside of the boards.
Prepare the ground so the frame receives consistent support.
For an open-bottom bed, remove unwanted vegetation and loosen compacted underlying soil where appropriate.
This helps water move through the growing area rather than remain trapped near the frame.
If the site has persistent flooding or saturated native soil, address the drainage problem before filling the bed.
Step 8: Fill the Bed Without Trapping Excess Moisture
Use an appropriate raised bed soil mixture.
A suitable loamy soil and finished compost blend can provide moisture retention while allowing excess water to drain.
Avoid filling the bed with dense, poorly draining clay or excessive unfinished organic material.
Water gently after filling.
Keep soil and mulch from spilling over the frame and collecting against the exterior boards.
Once planting is complete, inspect the wood periodically for moisture damage.
What Is the Best Wood Sealer for Raised Garden Beds?
The best coating depends on whether the wood is untreated or pressure-treated, whether the bed contains edible plants, and what type of protection is needed.
A coating can reduce moisture absorption, but it doesn’t replace natural decay resistance or proper drainage.
Exterior Latex Paint
Exterior latex paint is an option for protecting wooden raised bed frames.
It creates a protective surface coating that helps limit direct moisture exposure.
The University of Maryland Extension’s guidance on raised bed materials identifies exterior latex paint as one option for preserving wooden raised beds and reducing contact between growing soil and treated lumber.
For the best results:
- Choose a quality exterior wood paint.
- Follow the manufacturer’s surface preparation instructions.
- Use an appropriate primer when required.
- Allow proper drying and curing.
- Inspect for peeling, cracking, or exposed wood.
Exterior latex paint can also provide a uniform appearance.
However, a paint suitable for exterior siding isn’t automatically approved for prolonged soil contact.
For vegetable beds, verify product suitability before coating surfaces that will directly touch the growing medium.
Exterior Wood Stain
A suitable exterior stain can help reduce weathering and water absorption.
Semi-transparent stains preserve more of the natural wood appearance than opaque paint.
Some products contain water-repellent ingredients or pigments that protect against sunlight.
Stains vary considerably in their composition and performance.
An exterior stain may be suitable for exposed outer surfaces without necessarily being suitable for the soil-facing side.
Choose a product according to its intended application and follow the manufacturer’s instructions.
Pure Tung Oil
Pure tung oil is sometimes used as a wood finish.
It penetrates the wood and hardens as it cures, producing a water-resistant finish.
However, a tung oil finish shouldn’t be considered equivalent to pressure treatment or a proven long-term decay preservative.
Its performance depends on the wood, application method, weather exposure, and maintenance.
Products marketed as “tung oil finish” may also contain solvents, resins, or other ingredients rather than pure tung oil.
Check the complete formulation before applying it to a food-growing garden bed.
Linseed Oil
Linseed oil is another traditional wood-finishing material.
It can reduce water absorption to some degree, but it doesn’t make wood immune to decay.
Raw and boiled linseed oil products may contain different ingredients.
Commercial boiled linseed oil can include metallic drying agents or other additives.
Don’t assume every linseed oil product is appropriate for contact with vegetable garden soil.
Oil-soaked application rags can also create a spontaneous-combustion hazard. Handle and dispose of them according to the product’s fire-safety instructions.
Which Wood Finish Should You Choose?
| Protective finish | Main advantage | Important limitation |
| Exterior latex paint | Provides a protective surface coating | Can peel or crack and needs suitable application conditions |
| Exterior wood stain | Reduces weather exposure while retaining wood appearance | Requires maintenance and product suitability checks |
| Pure tung oil | Creates a traditional water-resistant finish | Not a substitute for a decay preservative |
| Linseed oil | Can reduce moisture absorption | Formulations vary and protection is limited |
| Factory pressure treatment | Protects wood against biological decay | Requires appropriate treatment selection and use rating |
| Sidewall liner | Reduces direct soil-to-wood contact | May trap moisture if poorly installed |
Key Takeaway: No single finish is universally best. Choose a coating appropriate for the wood and garden application, and avoid using products with unknown ingredients on soil-contact surfaces.
How to Line Wooden Raised Beds to Prevent Rot
Lining the inside of a wooden bed can separate the boards from continuously damp growing soil.
However, a liner isn’t a guarantee against decay.
Rain, irrigation water, condensation, and moisture entering through joints can still affect the wood.
Use Heavy-Duty Plastic Along the Sidewalls
A durable plastic barrier can reduce direct contact between the growing medium and the wood.
For a typical open-bottom raised garden bed:
- Measure the inside wall dimensions.
- Cut the liner to fit each side.
- Position it against the inside surface.
- Secure the upper edge using a suitable fastening method.
- Avoid unnecessary folds where water could collect.
- Keep the bottom of the bed open.
- Inspect the liner before adding soil.
Use a material suitable for the intended garden application.
The liner should remain securely positioned during filling and normal cultivation.
Avoid allowing sharp fasteners or splintered wood to puncture it.
Should You Use Landscape Fabric Instead of Plastic?
Landscape fabric allows water to pass through while separating materials.
It may help reduce direct contact between soil and the wood, but it isn’t waterproof.
Because moisture can pass through, landscape fabric shouldn’t be expected to keep the boards dry.
A water-resistant plastic liner provides a different type of separation.
Neither material automatically prevents all fungal decay.
Choose the barrier based on whether the main goal is soil separation, moisture reduction, or another specific requirement.
Should You Line the Bottom of a Raised Bed?
For a conventional open-bottom raised bed, an impermeable bottom liner is generally unnecessary and may restrict drainage.
The soil should normally be able to drain into suitable native ground.
A sealed plastic bottom may cause water to accumulate within the planting area.
However, an elevated wooden planter with a solid base functions more like a container.
Such a planter requires suitable drainage openings and a growing medium appropriate for container conditions.
A liner should never block necessary drainage outlets.
Can a Plastic Liner Make Wood Rot Faster?
Potentially, if it traps moisture against the boards.
For example, water entering from the top may collect between a poorly fitted liner and the wooden frame.
This can keep certain sections damp longer than intended.
Avoid creating sealed pockets where moisture cannot escape.
Inspect the frame periodically, particularly near joints and lower corners.
If the wood remains wet behind the liner, correct the moisture problem rather than assuming an additional layer of plastic will solve it.
Which Wood Lasts Longest in Raised Garden Beds?
Choosing naturally durable wood can reduce dependence on protective coatings.
However, wood durability varies by species, heartwood content, climate, and growing conditions.
Cedar Raised Garden Beds
Cedar is a popular choice because certain cedar species have naturally decay-resistant heartwood.
It is relatively easy to work with and offers a traditional garden appearance.
Cedar also avoids added pressure-treatment preservatives when purchased untreated.
However, cedar isn’t entirely rot-proof.
Boards containing substantial sapwood may deteriorate sooner than durable heartwood.
Prolonged moisture exposure can eventually damage even high-quality cedar.
Redwood Raised Garden Beds
Redwood heartwood also offers natural decay resistance.
It can perform well in outdoor garden structures.
However, availability and price vary across the United States.
Redwood may be more economical in areas where it is commonly sold.
Use suitable grades and inspect the boards before construction.
Untreated Pine and Fir
Untreated pine and fir are often more affordable than naturally durable lumber.
However, they generally deteriorate faster when continuously exposed to damp soil.
A suitable coating, sidewall barrier, and careful moisture management may help reduce weather-related damage.
Still, they cannot make ordinary untreated softwood perform exactly like properly pressure-treated lumber.
Use these materials when lower upfront cost is more important than maximum service life.
Pressure-Treated Lumber
Modern residential pressure-treated wood is designed to resist fungal decay and certain wood-damaging insects.
Copper-based treatments such as copper azole and micronized copper azole are commonly used.
For a raised bed with direct soil contact, choose a product labeled for an appropriate ground-contact application.
An Oregon State University Extension study of pressure-treated raised beds compared untreated Douglas-fir with lumber treated using copper azole.
The researchers observed substantial decay in untreated beds by the sixth growing season, while treated beds remained largely intact.
The study also found a small increase in copper concentration within approximately 1 inch of treated boards, without a corresponding increase in copper measured in the vegetables and herbs over the four growing seasons analyzed.
These findings apply to the tested material and conditions and shouldn’t be generalized to every preservative.
Wood Type Comparison
| Wood type | Natural decay resistance | Treatment considerations |
| Untreated pine | Low | May benefit from coating and moisture management |
| Untreated fir | Low to moderate, depending on species and conditions | Requires attention to prolonged soil contact |
| Cedar heartwood | Generally good | Often used without added preservatives |
| Redwood heartwood | Generally good | Natural durability varies by grade |
| Black locust heartwood | High | Naturally durable but not always readily available |
| Ground-contact-rated treated lumber | Enhanced by preservative treatment | Verify treatment, use rating, and product instructions |
For gardeners who prefer not to use pressure-treatment chemicals, durable untreated heartwood is often a practical choice.
How to Keep Wooden Raised Garden Beds From Rotting at the Bottom
The lower part of a wooden raised bed is particularly vulnerable because it remains near damp soil.
The inside lower edge and joints may receive moisture from both the growing medium and the surrounding ground.
Keep the Ground Around the Frame Well Drained
Select a site where excess rainfall and irrigation water can move away.
Avoid placing the bed in a low area that collects runoff.
If the ground remains waterlogged, improving the bed’s soil mixture alone may not correct the problem.
The surrounding drainage conditions must also be addressed.
Don’t place a thick gravel layer beneath an open-bottom raised bed solely to protect the wood.
Gravel doesn’t automatically improve drainage through a poorly designed soil profile.
Avoid Piling Mulch Against Exterior Boards
Mulch helps conserve soil moisture, but thick piles against exterior wood can keep the surface damp.
Maintain a reasonable separation between exterior mulch piles and vulnerable wooden joints.
Keep nearby paths tidy and remove accumulated debris.
The objective is to reduce unnecessary moisture contact without exposing the planting soil to excessive drying.
Protect the Board Ends and Corners
Board ends and corners often experience repeated wetting.
Use appropriate coating methods for exposed end grain.
Construct tight, well-supported joints with suitable fasteners.
Avoid leaving unnecessary gaps where water and soil can collect.
A well-fitted top cap may also reduce direct rainfall on exposed board edges.
However, any cap should be installed so that water doesn’t become trapped beneath it.
Control Irrigation Around the Frame
Sprinklers that repeatedly spray the wooden walls may increase their moisture exposure.
Drip irrigation or soaker hoses can help deliver water more directly to the growing soil.
Position irrigation equipment to reduce unnecessary wetting of exterior boards.
Don’t reduce watering below the plants’ needs merely to protect the frame.
The better solution is to manage water placement while maintaining suitable soil moisture.
How to Protect Pressure-Treated Wood in Raised Beds
Pressure-treated lumber already contains preservatives intended to resist biological deterioration.
Additional surface treatments aren’t always necessary for decay resistance.
However, installation details can affect its performance.
Use Lumber Rated for Ground Contact
Raised bed walls regularly touch damp growing soil.
For that reason, above-ground-rated treated lumber may be unsuitable for the application.
Choose lumber with a treatment label indicating appropriate ground-contact use.
Check the specific preservative and manufacturer’s intended applications.
Do not rely on the green or brown color of the lumber to identify its treatment.
Protect Freshly Cut Ends
Cutting pressure-treated wood may expose areas that received less preservative penetration.
The Oregon State University guidance referenced earlier recommends applying an appropriate end-cut preservative to newly cut surfaces.
Follow the treated lumber and preservative manufacturers’ instructions.
For vegetable beds, confirm that the selected cut-end treatment is appropriate for the intended application.
Don’t substitute a random deck preservative or industrial wood-treatment chemical.
Use Compatible Corrosion-Resistant Fasteners
Copper-based treatments can accelerate corrosion in unsuitable metal hardware.
Fasteners and connectors must be compatible with the lumber’s preservative system.
Use approved exterior-rated hardware.
Inspect screws, brackets, and corner joints during routine maintenance.
A structurally weak connection can cause frame failure even when the boards themselves remain sound.
How to Protect Existing Wooden Raised Garden Beds
An older raised bed may already show discoloration, rough surfaces, cracking, or early decay.
Not every visible change requires replacing the frame.
Begin by assessing the actual condition of the wood.
Step 1: Check for Structural Rot
Inspect the lower interior and exterior boards.
Look for:
- Soft or crumbly wood.
- Fungal decay.
- Boards breaking apart near fasteners.
- Deep deterioration around corners.
- Excessive bowing.
- Loose structural connections.
- Sections that have lost substantial thickness.
A little surface discoloration doesn’t necessarily indicate serious decay.
Gray weathering is common in untreated wood.
However, boards that have become soft or structurally weak may need replacement.
Step 2: Clean the Wood Gently
Remove loose dirt, surface debris, and deteriorating coating material.
Use a brush and mild cleaning method appropriate for the existing finish.
Avoid aggressive pressure washing that damages wood fibers.
Allow the frame to dry before applying a suitable finish.
If the existing coating is unknown, identify it before sanding or stripping.
Step 3: Repair Damaged Sections
Replace boards that can no longer support the soil safely.
Check adjacent boards and fasteners before installing new material.
A raised bed filled with wet soil can exert substantial outward pressure.
If a wall is bowing or separating, reduce the load safely and repair the structure before it fails.
Don’t attempt to restore severely decayed boards merely by applying a thick layer of sealant.
Wood coatings cannot replace lost structural strength.
Step 4: Reapply a Compatible Finish
If the boards remain structurally sound, a compatible protective coating may help reduce future moisture exposure.
Clean and prepare the surface according to the product instructions.
Allow sufficient drying time.
Recoat only where suitable.
Don’t paint over active decay or persistent moisture problems.
Step 5: Correct the Cause of Repeated Wetting
Examine the ground, drainage, irrigation layout, and liner condition.
If water regularly collects near the frame, determine why.
Repair damaged liners if they are contributing to trapped moisture.
Adjust irrigation where appropriate.
Remove accumulated debris around vulnerable joints.
Correcting the source of prolonged moisture is often more important than adding another surface coating.
How Often Should You Seal Wooden Raised Garden Beds?
There is no universal resealing schedule.
The appropriate interval depends on the coating, wood species, climate, sunlight, and moisture exposure.
Some finishes require more frequent maintenance than others.
Inspect the Coating Every Growing Season
Before planting, inspect exposed wood surfaces.
Look for peeling, cracking, fading, and areas where the finish no longer appears intact.
Also examine the corners and lower boards.
These sections may experience greater moisture exposure.
Reapply protective coatings according to the product manufacturer’s instructions rather than following an arbitrary annual schedule.
Does Unfinished Cedar Need Regular Sealing?
Not necessarily.
Cedar can be used unfinished because its heartwood has natural decay resistance.
Over time, it commonly changes to a weathered gray color.
This color change doesn’t automatically mean the wood is rotting.
A compatible finish may help preserve appearance and reduce surface weathering, but it isn’t required solely because the cedar has turned gray.
Can You Seal a Raised Bed After It Has Been Filled?
Yes, exposed exterior surfaces can often be coated after the bed is in use.
However, access to the interior surfaces may be limited.
Avoid spraying or spilling coating products onto growing soil or plants.
Protect the planting area during application and follow all product instructions.
If interior protection is necessary, it may be better to wait until the bed is empty and the wood can be prepared correctly.
Wood Protection Mistakes That Can Shorten Raised Bed Lifespan
Some common protection methods provide little benefit or may create additional problems.
Using Any Waterproof Sealer Without Checking Ingredients
A waterproof label doesn’t establish suitability for edible gardening.
Deck coatings, industrial preservatives, and exterior construction treatments serve different purposes.
Check the full product information and intended application before use.
Avoid applying unidentified chemicals directly against vegetable-growing soil.
Sealing Wood While It Is Wet
Coatings applied to excessively damp wood may not adhere properly.
Moisture trapped beneath the finish can contribute to peeling or blistering.
Follow the manufacturer’s moisture and curing requirements.
Covering the Entire Bottom With Plastic
An impermeable bottom liner can prevent water from draining into native soil.
This may leave the growing medium saturated.
For a traditional open-bottom raised bed, line the sidewalls only when a barrier is needed.
Enclosed planters require their own properly designed drainage system.
Assuming Natural Oils Prevent All Rot
Tung oil, linseed oil, and similar finishes are sometimes described as complete solutions for wooden garden beds.
However, their water resistance and durability vary.
They don’t provide the same biological decay protection as properly pressure-treated wood.
Avoid relying on an oil finish as the only protection for inexpensive softwood exposed to constant moisture.
Using Old Railroad Ties or Unknown Treated Lumber
Railroad ties may contain creosote.
Older pressure-treated lumber may contain chromated copper arsenate or other treatments unsuitable for the intended garden application.
Avoid unidentified reclaimed industrial wood in vegetable raised beds.
Use lumber with a known treatment history.
Ignoring Rotten Boards Until They Collapse
Softened wood may no longer support the pressure from the growing soil.
Inspect the structure regularly and replace deteriorated components before the walls fail.
Applying fresh paint to severely decayed wood won’t restore its strength.
Is It Better to Seal, Line, or Replace Wooden Raised Beds?
The best choice depends on the existing material and the condition of the frame.
| Situation | Practical approach |
| New untreated pine bed | Consider an appropriate finish, sidewall protection, and good drainage |
| New cedar or redwood bed | Natural decay resistance may be sufficient; coating is optional |
| New ground-contact-treated bed | Follow treatment instructions and protect cut ends as specified |
| Existing sound wood with a worn coating | Clean, dry, and refinish with a compatible product |
| Sound wood with persistent soil-side moisture | Investigate drainage and consider an appropriate liner |
| Wood with minor surface weathering | Inspect and maintain; replacement may not be necessary |
| Boards with deep structural decay | Replace damaged sections |
| Repeated premature frame failure | Reconsider wood species, moisture conditions, or alternative materials |
For a new raised bed, investing in suitable wood and construction details often provides a more reliable starting point than depending on a coating alone.
For an existing bed, focus on identifying the real cause of deterioration before spending money on additional products.
Conclusion
Learning how to protect wood in raised garden beds starts with understanding that moisture exposure and fungal decay are the main long-term concerns.
Choosing suitable lumber is the first step. Cedar, redwood, and other naturally durable species provide useful resistance without pressure-treatment preservatives, while properly rated modern pressure-treated wood can offer longer service life.
Exterior coatings and sidewall liners may help protect the frame when selected and installed appropriately. However, neither replaces drainage, suitable construction, or regular inspection.
Pay particular attention to board ends, lower corners, fasteners, and areas exposed to persistent moisture.
For a new vegetable bed, I recommend starting with naturally decay-resistant wood when avoiding added preservatives is a priority. If treated lumber is acceptable, choose a clearly identified product rated for ground contact.
For older beds, replace structurally decayed boards and correct moisture problems rather than covering deterioration with another layer of finish.
The goal is to slow wood decay while keeping the growing environment suitable for healthy vegetables, herbs, and flowers.
FAQs About How to Protect Wood in Raised Garden Beds
Can You Use Wood Sealant Inside a Raised Garden Bed?
Yes, but only when the product is suitable for the intended application.
Not every exterior wood sealant is appropriate for prolonged contact with vegetable-growing soil. Check the manufacturer’s instructions and ingredients before coating interior surfaces.
Does Cedar Need to Be Sealed for Raised Garden Beds?
No. Suitable cedar heartwood is naturally decay-resistant and can be used unfinished.
A compatible coating may help preserve its original appearance, but sealing doesn’t make cedar completely immune to rot.
Is Plastic Lining Good for Wooden Raised Beds?
A suitable plastic sidewall liner can reduce direct contact between damp soil and wood.
However, the liner must not block drainage or trap water against the frame. An open-bottom garden bed generally shouldn’t have its entire base covered with impermeable plastic.
Can You Use Tung Oil on Raised Garden Beds?
Pure tung oil can be used as a traditional wood finish, but it isn’t a complete solution for preventing fungal decay.
Check the exact formulation and its intended use, particularly for vegetable beds. Products sold as tung oil finishes may contain additional chemicals.
How Long Will Untreated Wood Last in a Raised Garden Bed?
Lifespan depends on the wood species, board thickness, climate, soil moisture, and construction quality.
Untreated pine and fir generally decay faster than suitable cedar or redwood heartwood. There is no reliable universal replacement interval.
Can You Paint a Raised Garden Bed With Exterior Paint?
Yes. Exterior latex paint is one option for protecting wooden raised bed frames.
Use a compatible product, prepare the wood properly, and follow drying and curing instructions. Verify suitability before applying paint to surfaces that will directly contact growing soil.
What Should You Do if Raised Bed Wood Is Already Rotting?
Inspect the affected boards to determine whether the damage is superficial or structural.
If the wood is soft, crumbling, or unable to support the soil safely, replace the damaged sections. Then address poor drainage or repeated wetting to help prevent further deterioration.

I’m Maya L. Greenwood, a lifelong plant lover who believes anyone can grow something beautiful with the right guidance. After years of testing soil mixes, pruning methods, irrigation tricks, and pest-safe solutions, I started EasyGardenTips.com to turn hard-won lessons into step-by-step advice. From seed starting and container gardens to composting and seasonal checklists, my goal is to make gardening simple, sustainable, and fun.