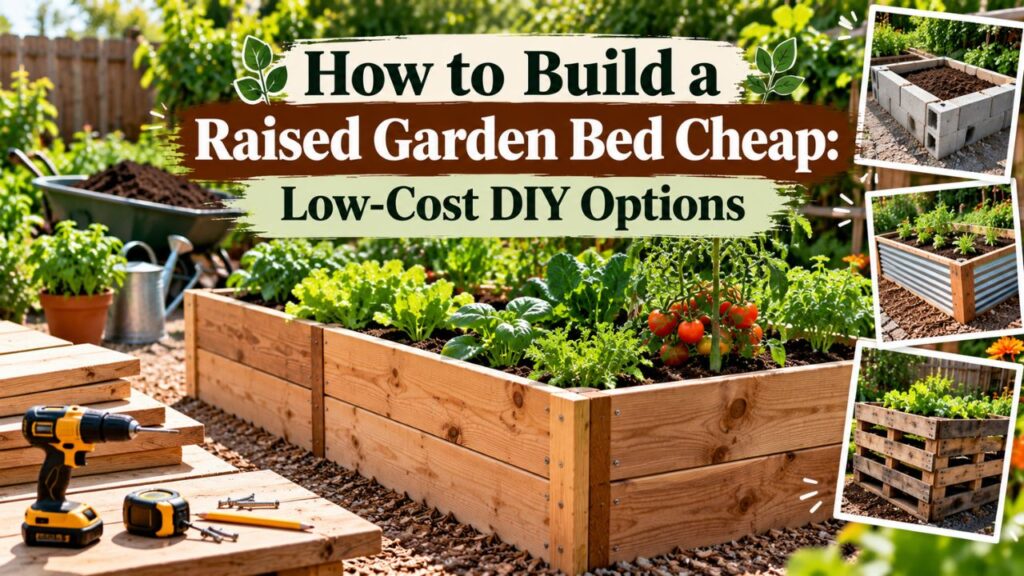
How to build a raised garden bed cheap: Low-Cost DIY Options
The cheapest way to build a raised garden bed is to create an unframed soil mound or construct a simple wooden frame using affordable untreated lumber. A basic 4×8-foot raised bed can be made with three 8-foot boards, exterior screws, and a few corner supports. If the existing garden soil is suitable, you can also reduce expenses by reusing it instead of purchasing enough bagged soil to fill the entire bed.
Building a raised garden bed doesn’t require expensive cedar boards, elaborate designs, or prefabricated kits. The biggest expenses usually come from framing materials, purchased soil, and optional accessories.
For a beginner, a low wooden frame with an open bottom is often a practical balance between affordability, durability, and ease of construction. It gives vegetables a defined growing area while allowing roots to extend into the natural ground below.
However, choosing the cheapest materials without considering safety, drainage, and structural strength can create problems later.
A successful budget raised bed starts with the right dimensions, safe materials, a simple construction method, and an economical soil-filling plan.
What Is the Cheapest Way to Build a Raised Garden Bed?
The least expensive method depends on which materials are already available.
If the yard contains suitable soil, an unframed raised bed can cost very little because it doesn’t require lumber or hardware.
If a framed bed is preferred, inexpensive untreated pine or fir boards are often among the most affordable new materials.
| Building method | Relative material cost | Main advantage | Main limitation |
| Unframed soil mound | Very low | No lumber or hardware required | Edges can erode |
| Reclaimed untreated lumber | Low when available | Reduces lumber expenses | Material condition varies |
| New pine or fir boards | Low to moderate | Easy to cut and assemble | Less decay-resistant |
| Reused concrete blocks | Low when available | No woodworking required | Heavy and harder to move |
| Cedar boards | Usually higher | Better natural decay resistance | More expensive initially |
| Prefabricated metal kit | Varies | Convenient assembly | May cost more than a basic DIY frame |
These are relative comparisons, not fixed prices. Local lumber availability, delivery charges, and existing materials can change which option is cheapest.
Unframed Raised Beds Cost the Least
An unframed raised bed is simply a wide mound of prepared soil with a relatively flat planting surface and sloped sides.
It doesn’t require wooden boards, screws, brackets, or masonry blocks.
Gardeners can use suitable existing soil from the site, adding finished compost or other amendments when needed.
The University of Maryland Extension’s raised-bed construction guidance explains that gardeners can avoid the expense of an enclosure by creating raised beds with sloped sides.
This method works especially well when the garden already has safe, reasonably fertile soil.
However, the soil mound may require occasional reshaping after heavy rain.
Cheap Wooden Raised Beds Are Easier to Maintain
A basic wooden frame provides defined edges and helps keep loose soil inside the growing area.
Untreated pine and fir are generally less expensive than naturally decay-resistant woods such as cedar.
They are also widely available in standard lumber dimensions.
A simple rectangular frame can be built without complicated joints or specialized woodworking tools.
The main disadvantage is that inexpensive untreated wood generally deteriorates faster in contact with damp soil.
For gardeners who want a low initial investment, that tradeoff may be acceptable.
Materials Needed for a Cheap 4×8 Raised Garden Bed
A single-layer wooden frame is one of the simplest DIY designs for beginners.
The example below uses three standard 2×6 boards, each 8 feet long, to create an approximately 4×8-foot raised bed.
Standard 2×6 dimensional lumber is generally about 1.5 inches thick and 5.5 inches wide.
The finished frame therefore stands approximately 5.5 inches above the ground.
Budget Raised Bed Materials
| Material | Quantity | Purpose |
| Untreated 2×6×8 lumber | 3 boards | Long and short sides |
| Scrap 2×4 lumber | 4 short corner blocks | Supports corner joints |
| Exterior-rated wood screws | As needed | Secures boards to supports |
| Additional wood stakes | 2, optional | Supports long sides |
| Suitable garden soil | As needed | Provides growing medium |
| Finished compost | As needed | Improves soil structure |
| Mulch | Optional | Reduces moisture loss and weeds |
Use corrosion-resistant screws suitable for exterior construction.
Screw length should match the actual lumber thickness and fastening arrangement. For boards fastened into substantial wood corner blocks, exterior screws around 2½ inches long are a practical starting point.
Avoid screws so long that sharp points protrude through the opposite side of the supports.
Basic Tools
Most of the work can be completed with common household or gardening tools:
- Measuring tape
- Pencil
- Handsaw or circular saw
- Drill or screwdriver
- Carpenter’s square
- Shovel
- Garden fork
- Rake
- Work gloves and safety glasses
A power saw is not essential.
Many lumber retailers offer cutting services, which can eliminate the need to purchase a saw for a single garden project.
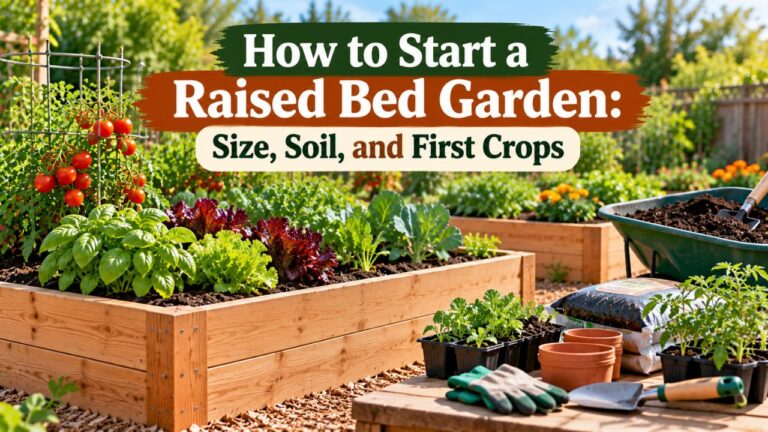
How to Build a Raised Garden Bed Cheap With Three Boards
The following method creates a low, open-bottom wooden raised bed suitable for installation directly over garden soil.
It is intended for a beginner-friendly garden, not an elevated planter or a load-bearing structure.
Step 1: Choose a Sunny, Level Location
Select an area that receives enough sunlight for the vegetables you plan to grow.
Most fruiting vegetables, including tomatoes and peppers, perform best with approximately 6–8 hours of direct sunlight daily.
Also consider:
- Convenient access to a water source
- Ground that drains reasonably well
- Enough surrounding space for walking
- Distance from large tree roots
- Exposure to roof runoff or standing water
A relatively level location simplifies construction.
Avoid placing a raised bed where rainwater repeatedly collects or where the ground may be contaminated.
Step 2: Mark the Raised Bed Dimensions
Measure an approximately 4×8-foot rectangle on the chosen site.
Use stakes, string, or small ground markers to identify the corners.
A 4-foot-wide bed is convenient when gardeners can reach it from both long sides.
If the bed will sit against a wall or fence, consider making it narrower so the center remains accessible.
Important: A 4×8-foot bed is a useful example, but smaller beds require less lumber, soil, and available garden space.
A 4×4-foot bed may be a better starting point when the budget is especially limited.
Step 3: Cut the Lumber to Length
For the approximately 4×8-foot wooden frame, use three 8-foot boards.
Prepare the pieces as follows:
- Keep two boards at their original 8-foot length.
- Cut the third 8-foot board into two approximately 4-foot pieces.
- Cut four short corner supports from scrap 2×4 lumber.
- Check that all pieces have reasonably straight, sound edges.
This produces two long sides and two short ends.
The final outside dimensions will vary slightly depending on how the corners overlap.
If precise exterior dimensions are necessary, account for the actual thickness of the boards before cutting.
Step 4: Assemble the Wooden Frame
Lay the boards on a flat surface in a rectangular arrangement.
Position the two long boards parallel to each other, then place the shorter boards at the ends.
Attach the corners using the prepared wood blocks.
For each corner:
- Position a support block against the inside faces of the adjoining boards.
- Drill pilot holes where necessary to reduce splitting.
- Drive exterior screws through the side boards into the support.
- Use enough fasteners to secure both adjoining boards firmly.
- Check that the frame remains reasonably square.
Measure diagonally between opposite corners to confirm that the rectangle is square.
The two diagonal measurements should be approximately equal.
A simple butt-joint arrangement is sufficient for this low garden frame.
Step 5: Reinforce the Long Sides if Necessary
An 8-foot board may bow outward over time as damp soil pushes against it.
To reduce this risk, add a supporting stake near the midpoint of each long side.
Secure the stakes to the boards and seat them firmly in suitable ground.
For taller or stacked-board beds, additional bracing becomes more important because the structure must resist greater soil pressure.
Avoid relying on thin boards without adequate support.
Step 6: Prepare the Ground Beneath the Bed
Before placing the frame permanently, remove unwanted vegetation from the growing area.
If the soil is compacted, gently loosen the upper layer with a garden fork when conditions are suitable.
This helps roots move from the raised growing medium into the native ground below.
Avoid digging or working clay soil when it is saturated.
For a typical open-bottom bed built over healthy garden soil, a permanent bottom panel is unnecessary.
Keeping the bottom open reduces material costs and provides access to the soil beneath the frame.
Step 7: Position and Level the Frame
Move the assembled wooden frame onto the prepared location.
Check that the sides sit firmly on the ground.
Use a level or straight board to identify major uneven areas.
Minor adjustments can be made by removing small amounts of soil from high spots or stabilizing low corners.
Avoid leaving large gaps beneath the frame where growing medium can wash out.
The frame should feel stable before filling.
Step 8: Add Soil and Compost
Fill the bed with a suitable mixture of mineral soil and finished compost.
For many open-bottom vegetable beds, a practical starting mixture is:
- 2 parts quality topsoil
- 1 part finished plant-based compost
If the existing soil is already healthy, use it as part of the growing medium rather than automatically purchasing entirely new soil.
Gently rake the mixture level.
Water it to encourage natural settling, then check the final height.
For a low frame, preserve as much useful growing depth as practical while allowing a small amount of space beneath the rim for watering and mulch.
Step 9: Plant and Mulch the Raised Bed
After the soil has settled, the bed is ready for planting.
Good starting crops include lettuce, spinach, radishes, bush beans, and other vegetables suited to the available rooting depth and growing season.
Apply mulch around established plants where appropriate.
Do not walk inside the raised bed, since repeated foot traffic can compact the growing medium.
Key Takeaway: A low wooden frame is inexpensive because it uses fewer boards and less purchased soil. It works best over suitable native ground that roots can penetrate.
How to Build a Raised Garden Bed Without Buying Lumber
An unframed raised bed is worth considering when the goal is to minimize construction expenses.
This design requires no wooden sides and can be created using basic gardening tools.
Step 1: Mark a Wide Planting Area
Choose a location with suitable sunlight and drainage.
Mark a bed approximately 3–4 feet wide, leaving enough space along the sides for access.
The length can be adjusted to the available garden area.
Avoid making the bed so wide that reaching the middle requires stepping onto the growing surface.
Step 2: Prepare the Existing Soil
Remove weeds and unwanted grass.
Loosen compacted soil when appropriate, then incorporate suitable finished compost based on the existing soil condition.
Avoid bringing in soil from unknown locations that may contain contaminants, persistent weeds, or plant pathogens.
Step 3: Shape the Soil Into a Mound
Use a shovel and rake to pull suitable soil toward the center of the bed.
Form a broad planting mound with a relatively level top and gently sloping sides.
A mound raised approximately 6–8 inches above the surrounding paths is a practical starting design.
The sides should slope enough to remain reasonably stable without retaining walls.
Step 4: Finish the Planting Surface
Rake the top of the mound smooth.
Water it gently and allow the soil to settle.
Add mulch to the planting area or paths where needed.
The mound may need occasional reshaping after heavy rainfall, especially when the soil is sandy or the slopes are steep.
This method is often the cheapest option when the existing soil is safe and suitable for vegetable gardening.
Cheap Raised Garden Bed Materials: What Is Safe to Use?
Reusing existing materials can reduce expenses, but material safety is especially important when growing edible crops.
Not every discarded board, container, or building material belongs in a vegetable garden.
Untreated Pine or Fir Lumber
Untreated pine and fir are practical choices for a basic low-cost wooden bed.
They are easy to cut, widely available, and usually less expensive than cedar or redwood.
The tradeoff is shorter service life because untreated softwood is susceptible to decay when exposed to damp soil.
These materials are often suitable for temporary or budget-focused garden structures.
Reclaimed Wood
Reclaimed lumber can be economical when its condition and previous use are known.
Look for boards that are:
- Structurally sound
- Free from obvious rot
- Not coated with unknown paint or chemicals
- Not contaminated by oils or industrial substances
- Strong enough to hold soil without breaking
Avoid old railroad ties, creosote-treated wood, and wood with an unknown chemical treatment history.
Pallet wood also deserves caution. Even when a pallet has a heat-treatment mark, its previous storage and transport history may be unknown.
For edible gardens, clean, traceable materials are preferable.
Concrete Blocks and Bricks
Reused concrete blocks or bricks can form a simple low retaining edge.
For a low bed, sound blocks can often be arranged on stable, level ground without constructing a permanent mortared wall.
However, the arrangement must remain stable and resist movement.
Concrete blocks are heavy, and purchasing enough new blocks can cost more than using inexpensive lumber.
They make the most financial sense when suitable materials are already available.
Modern Pressure-Treated Lumber
Pressure-treated lumber may last longer than untreated pine, but the chemical treatment matters.
Older lumber treated with chromated copper arsenate (CCA) should not be reused in edible raised beds.
Modern residential treated lumber generally uses different preservatives, including copper-based systems.
The University of Minnesota Extension’s raised-bed gardening guidance discusses material selection, the risks associated with older treated wood, and appropriate considerations for modern products.
If choosing treated lumber, verify its treatment type, intended application, and current manufacturer guidance.
For a basic budget project, new untreated lumber avoids much of this uncertainty.
How to Fill a Raised Garden Bed Cheap Without Buying Too Much Soil
The soil can cost as much as or more than the frame, particularly when building tall raised beds.
Controlling soil expenses is therefore just as important as finding inexpensive construction materials.
Use Suitable Existing Garden Soil
If the existing soil is safe, fertile, and reasonably well-draining, consider using it as part of the raised bed growing medium.
This reduces the amount of imported material needed.
For example, an open-bottom bed built over healthy garden soil may need only an improved upper growing layer rather than an entirely new soil column.
However, don’t reuse soil from locations with suspected contamination.
Soil from older urban properties, industrial locations, or sites with a history of chemical use may require testing before being used for edible crops.
Purchase Soil in Bulk When Practical
Bulk topsoil or a bulk topsoil-and-compost blend can be more economical than purchasing numerous small bags.
Compare the total delivered price rather than focusing only on the price per cubic yard.
Delivery charges can make a small bulk order expensive.
For a single shallow raised bed, bagged materials may still be more convenient.
For several raised beds, sharing a bulk delivery with another gardener can reduce transportation costs.
Calculate the Soil Volume Before Buying
For a rectangular raised bed:
Soil volume (cubic feet) = Length (feet) × Width (feet) × Soil depth (feet)
Divide cubic feet by 27 to convert the result to cubic yards.
For a bed with exactly 4×8 feet of interior planting area:
| Added soil depth | Soil volume | Cubic yards |
| 4 inches | 10.7 cubic feet | 0.40 |
| 4.5 inches | 12 cubic feet | 0.44 |
| 6 inches | 16 cubic feet | 0.59 |
| 8 inches | 21.3 cubic feet | 0.79 |
| 10 inches | 26.7 cubic feet | 0.99 |
| 12 inches | 32 cubic feet | 1.19 |
These are calculated volumes, not prices. Actual requirements depend on interior dimensions, the existing soil level, and settling.
For example, a one-board-high 2×6 wooden frame stands approximately 5.5 inches tall.
If the finished soil level is about 4.5 inches above the original ground, a bed with exactly 32 square feet of interior area needs approximately 12 cubic feet of added growing medium.
A taller bed requires considerably more material.
Can You Put Logs and Branches at the Bottom to Save Money?
Large woody materials are sometimes used in tall raised beds to reduce the volume of purchased soil.
This is associated with hugelkultur-style growing beds, where wood and other organic matter gradually decompose beneath the planting area.
However, the method has limitations.
Large branches and logs can create air gaps, cause significant settling, and temporarily affect nitrogen availability as decomposition progresses.
These materials also do not replace the need for a sufficiently deep layer of suitable growing soil.
For a shallow, inexpensive raised bed, filling the bottom with logs usually offers little benefit.
For tall beds, woody material may be considered only when the design provides enough stable growing medium above it and proper drainage.
Avoid using treated lumber, painted wood, or unknown wood waste as filler.
How to Reduce Raised Bed Building Costs Further
Small decisions during planning can significantly change the total project cost.
Start With One Small Bed
A 4×4-foot raised bed requires less lumber and soil than a 4×8-foot model.
For a one-board-high wooden frame, two 8-foot boards can be cut into four approximately 4-foot pieces.
This creates a compact growing area suitable for several smaller vegetables.
Starting small also makes it easier to understand local watering needs and decide whether additional beds are worthwhile.
Compare Lumber by Total Project Cost
The cheapest individual board is not necessarily the cheapest choice for the finished project.
Consider:
- Board length and the amount of cutting required
- Waste from offcuts
- Actual lumber thickness
- Need for additional supports
- Expected service life
- Delivery or transportation charges
A simple design using standard lumber lengths generally creates less waste than one requiring unusual dimensions.
Ask about straight, structurally sound discount lumber, but reject boards with serious splits, extensive rot, or damage that would compromise the frame.
Use Existing Tools
Borrowing a drill or saw may be more economical than purchasing tools for one garden project.
Retail cutting services can also reduce tool requirements.
Avoid buying specialized corner brackets or decorative accessories unless they provide a necessary structural function.
Make Finished Compost at Home
Homemade compost can reduce future spending on organic amendments.
Use properly composted leaves, yard trimmings, and other suitable materials.
Compost should be mature before being incorporated into the main growing medium.
Do not substitute unfinished compost for all the mineral soil needed to support vegetable roots.
Use Free Mulch From Safe Sources
Shredded leaves and other suitable organic materials can provide inexpensive mulch.
Mulch helps conserve moisture, limits soil splash, and reduces weed establishment.
Keep thick layers away from small seedlings and plant crowns.
Avoid using chemically contaminated mulch or materials with unknown treatment histories.
Raised Garden Bed Building Mistakes That Waste Money
An inexpensive raised bed should still function properly and remain structurally stable.
Several avoidable mistakes can turn a low-cost project into an expensive repair.
Building the Bed Taller Than Necessary
A 24-inch-high bed requires more framing material and growing medium than a 6-inch-high bed of the same footprint.
Taller beds may be worthwhile for accessibility or difficult growing sites, but they are not always necessary.
When native soil is suitable, a shallow open-bottom frame can provide adequate rooting space because roots can extend into the ground.
Choose the height based on actual plant and accessibility needs.
Using Thin Boards Without Supports
Thin, long boards may bow outward when filled with wet soil.
This can loosen fasteners and distort the frame.
A simple wooden support near the midpoint of long sides is often a worthwhile expense.
For higher beds, use a construction design appropriate for the weight and pressure of the contained growing medium.
Installing Plastic Across the Bottom
A waterproof plastic sheet beneath a raised bed can prevent natural drainage.
When water has no outlet, the growing medium may remain saturated.
For a normal open-bottom bed on healthy soil, a plastic bottom is unnecessary.
If a raised planter is installed over a patio, it needs a different design with suitable depth, structural support, and drainage openings.
Filling the Bed Entirely With Cheap, Unsuitable Material
Low-quality soil containing excessive clay, large wood pieces, construction debris, or unknown contaminants can create persistent growing problems.
Buying the cheapest material may lead to additional expenses when the soil needs replacement.
Choose suitable topsoil and finished compost from reliable sources.
Ignoring the Condition of Reclaimed Materials
Free materials are not useful when they create safety hazards or deteriorate immediately.
Inspect salvaged boards, bricks, and blocks carefully.
Avoid materials with uncertain chemical exposure, serious structural damage, or sharp edges that cannot be made safe.
Skipping Soil Preparation
Placing a raised frame directly over compacted ground without assessing the underlying soil can restrict root growth and water movement.
For an open-bottom bed, gently loosening suitable native soil may improve the connection between the raised growing medium and the ground beneath it.
This small preparation step can reduce the need for a much taller, more expensive bed.
How Long Will a Cheap Raised Garden Bed Last?
The lifespan of a budget raised bed depends on its material, climate, drainage, and exposure to soil moisture.
Untreated pine and fir generally deteriorate more quickly than cedar or other naturally decay-resistant woods.
However, there is no reliable universal lifespan for every inexpensive wooden bed.
Moisture exposure, board quality, wood thickness, and local conditions can produce substantial differences.
Make a Wooden Raised Bed Last Longer
Several maintenance practices can help protect a simple wooden frame:
- Keep surrounding pathways reasonably well-drained.
- Avoid constantly soaking the wooden sides during irrigation.
- Remove accumulated debris that holds moisture against the boards.
- Inspect corner joints and supports periodically.
- Replace badly deteriorated boards before the frame becomes unstable.
Avoid applying unknown wood preservatives to surfaces that will contact vegetable-growing soil.
If extending the life of the frame is more important than minimizing the initial cost, compare the longer-term value of naturally decay-resistant lumber or suitable modern treated materials.
Maintain the Soil Instead of Replacing It
Raised bed soil does not normally need complete replacement every growing season.
Organic matter decomposes and soil settles, so occasional additions may be necessary.
Check soil fertility and condition before applying fertilizer or large amounts of compost.
Maintaining the existing growing medium is usually more economical than repeatedly purchasing an entirely new fill.
Which Cheap Raised Garden Bed Design Should You Choose?
The best budget design depends on the condition of the yard and the intended use.
| Situation | Practical low-cost choice |
| Healthy native soil and almost no budget | Unframed raised mound |
| Small backyard vegetable garden | Low untreated pine or fir frame |
| Existing clean lumber available | Reclaimed wood frame |
| Spare concrete blocks available | Low dry-stacked block border |
| Growing on a patio | Properly drained, structurally supported planter |
| Poor native soil | Open-bottom framed bed with improved soil |
| Need less bending | Taller reinforced bed, allowing for higher costs |
For most beginners with suitable yard soil, a low wooden frame or unframed mound offers the simplest starting point.
If garden accessibility is the main concern, a taller bed may justify additional spending.
If the native soil is contaminated or unsuitable for growing edible crops, prioritize safe growing media and an appropriate bed design rather than choosing the least expensive construction method.
Conclusion
Understanding how to build a raised garden bed cheap starts with choosing a simple design and avoiding unnecessary materials.
An unframed soil mound is often the least expensive approach when suitable native soil is available. For gardeners who prefer a defined structure, a low wooden frame built from three 8-foot boards provides a practical DIY option.
The biggest opportunities to save money come from using standard lumber lengths, choosing appropriate materials, reusing safe existing soil, and calculating soil volume before purchasing growing media.
A raised garden bed doesn’t need to be tall or elaborate to grow vegetables successfully.
For a first project, start with a manageable bed, keep the bottom open over suitable garden ground, and invest in a good growing medium rather than decorative features.
FAQs About How to Build a Raised Garden Bed Cheap
What Is the Cheapest Material for Raised Garden Beds?
The cheapest option is often no framing material at all. An unframed raised soil mound can be constructed using suitable existing garden soil.
For framed beds, untreated pine or fir and clean reclaimed lumber are often economical choices. Reused concrete blocks may also be inexpensive when already available.
Can You Build a Raised Garden Bed Without Buying Wood?
Yes. Raised garden beds can be constructed as unframed soil mounds or with suitable bricks, concrete blocks, or stones.
An unframed mound is particularly economical because it requires no retaining walls or hardware.
Is It Cheaper to Build or Buy a Raised Garden Bed?
Building a basic wooden frame is often cheaper than purchasing a comparable prefabricated kit, especially when tools and some materials are already available.
However, inexpensive kits can sometimes be competitive after accounting for lumber, hardware, delivery, and tool costs.
Compare the total project cost rather than only the price of the frame.
How Deep Should a Cheap Raised Garden Bed Be?
A low raised bed approximately 6–8 inches tall can be suitable for many vegetables when the bottom is open and the native soil beneath it supports root growth.
For beds placed on concrete or built with enclosed bottoms, the contained soil must provide enough depth for the intended crops.
Larger plants may need substantially more rooting volume.
Can You Use Regular Garden Soil in a Cheap Raised Bed?
Yes. Suitable garden soil can be used in an open-bottom raised bed, often with finished compost to improve its structure.
Avoid soil that is contaminated, severely compacted, or poorly drained without appropriate correction.
Testing existing soil may be worthwhile before making significant amendments or growing edible crops.
Do Cheap Raised Garden Beds Need a Bottom?
Most raised beds built directly over suitable garden soil do not need a solid bottom.
Leaving the base open allows plant roots and water to move into the ground beneath the frame.
Raised planters installed above hard surfaces require appropriate structural support and drainage.
Is It Worth Building a Cheap Raised Bed With Untreated Wood?
Yes, when low initial cost is the priority and the gardener accepts that untreated softwood may eventually need replacement.
A simple pine or fir frame can provide a useful growing area without expensive materials.
If long-term durability is more important, compare the initial expense and maintenance requirements of more decay-resistant materials.

I’m Maya L. Greenwood, a lifelong plant lover who believes anyone can grow something beautiful with the right guidance. After years of testing soil mixes, pruning methods, irrigation tricks, and pest-safe solutions, I started EasyGardenTips.com to turn hard-won lessons into step-by-step advice. From seed starting and container gardens to composting and seasonal checklists, my goal is to make gardening simple, sustainable, and fun.