How to Start a Raised Bed Garden: Size, Soil, and First Crops
To start a raised bed garden, choose a sunny location, select a manageable bed size, prepare the ground, build or install the frame, fill it with suitable soil, and plant vegetables that match your growing season. A single 4 × 4-foot or 4 × 8-foot bed is an excellent starting point for beginners.
Raised bed gardening gives you greater control over soil quality, drainage, and plant spacing. Instead of digging an entire backyard, you can create a defined growing area that is easier to access, water, and maintain.
However, a successful raised bed requires more than putting soil inside a wooden or metal frame. The location needs sufficient sunlight, the soil must support healthy roots, and the vegetables should have enough room to reach their mature size.
Beginners sometimes spend too much on oversized beds, use unsuitable soil mixtures, or plant more vegetables than the available space can support.
Starting with a simple design helps avoid these problems.
This guide explains the complete setup process, recommended dimensions, soil preparation, beginner-friendly vegetables, planting methods, watering schedules, and maintenance practices for your first raised bed garden.
How to Start a Raised Bed Garden Step by Step
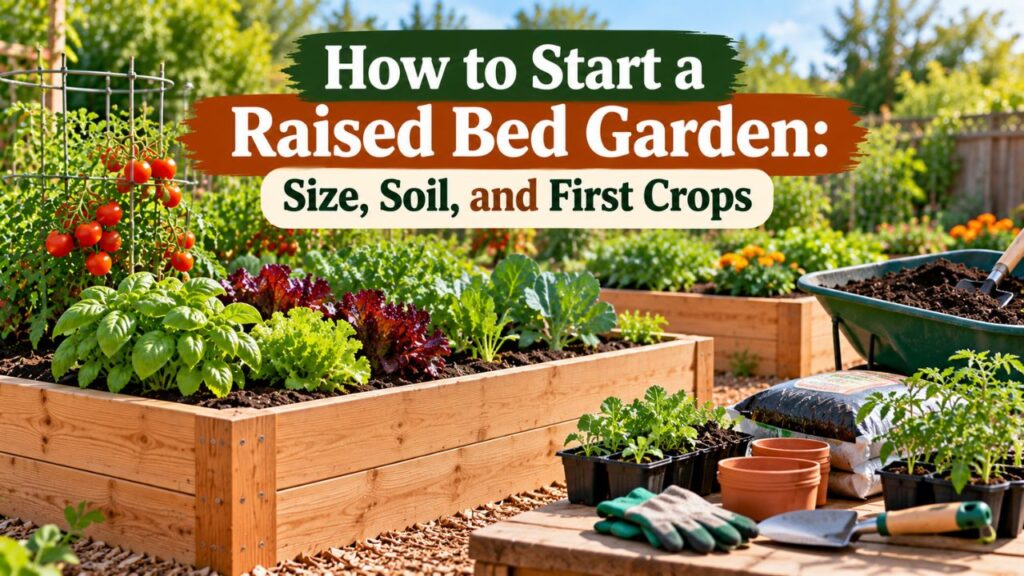
A raised bed garden can be established using basic materials and a suitable outdoor space.
The following steps cover the process from selecting a location to planting your first vegetables.
- Choose a sunny location for the raised bed.
Most vegetables need plenty of direct sunlight to grow and produce well.
Choose a location that receives at least 6–8 hours of direct sunlight daily if you plan to grow tomatoes, peppers, cucumbers, or similar fruiting vegetables.
Leafy greens such as lettuce, spinach, and kale can tolerate somewhat less sunlight, especially during warm weather.
According to the University of Minnesota Extension’s raised bed gardening guidance, crops such as tomatoes, peppers, and eggplants generally need 6–8 hours of sunlight, while some leafy vegetables can grow in partially shaded locations.
Observe the area throughout the day before installing the bed.
Avoid locations where buildings, fences, or large trees create prolonged shade.
The site should also have convenient access to water and enough surrounding space for comfortable gardening. - Select the raised garden bed size and depth.
A 4 × 8-foot bed is a popular size because it provides 32 square feet of growing space while remaining manageable from both sides.
A 4 × 4-foot bed is also useful for beginners with limited space.
Keep the bed narrow enough that you can reach the center without stepping into the soil.
A width of approximately 3–4 feet works for many gardeners when both sides are accessible.
If you can reach the bed from only one side, make it narrower.
For soil depth, 12 inches is a practical starting point for an open-bottom raised bed placed over healthy garden soil.
Taller beds may be useful for accessibility, restricted rooting conditions, or gardening over hard surfaces. - Choose a suitable raised bed material.
Raised garden beds can be constructed from wood, galvanized metal, plastic, stone, or other suitable materials.
Wood is popular because it is easy to cut and assemble.
Cedar offers natural resistance to decay, while untreated pine is usually more affordable but may deteriorate faster.
Galvanized metal beds are often available as prefabricated kits and can provide a durable alternative.
Plastic raised beds vary in quality. Choose materials intended for outdoor gardening, particularly when growing edible plants.
Avoid old railroad ties, unknown chemically treated lumber, or materials that may have been exposed to contaminants.
For a first garden, a simple wooden frame or ready-made metal kit is usually easier than a complicated custom design. - Prepare the ground beneath the raised bed.
Mark the bed’s location and remove large rocks, debris, and unwanted vegetation.
If you’re placing the bed over an existing lawn, remove the turf or use an appropriate no-dig vegetation-suppression method.
Plain cardboard can help suppress grass, although it may temporarily restrict water movement and root penetration until it decomposes.
If the soil beneath the bed is compacted, gently loosen it with a garden fork.
Avoid aggressively digging wet soil because it can damage the soil structure.
When using native ground for vegetable gardening, consider soil testing before making amendments. This is especially important in older urban locations where contamination is possible.
An ordinary open-bottom bed generally doesn’t need a waterproof plastic liner beneath the soil. - Assemble and position the raised bed frame.
Place the frame on level ground and check that the corners are square.
If building with wood, secure the boards using suitable exterior-rated screws and corner supports.
Long wooden or metal sidewalls may require additional bracing to prevent outward bowing after the bed is filled.
Make sure the frame sits firmly on the ground without major gaps beneath its lower edges.
For open-bottom beds, keep the soil connected to suitable native ground whenever possible.
If the bed sits on concrete or another hard surface, provide an appropriate drainage arrangement.
Water should be able to escape without accumulating in the growing medium. - Fill the raised bed with suitable soil.
Use a growing medium that retains moisture while allowing excess water to drain.
For an open-bottom bed, a mixture of suitable mineral topsoil and finished plant-based compost is a practical starting point.
A commonly recommended blend contains approximately two-thirds topsoil and one-third plant-based compost.
According to the University of Maryland Extension’s guidance on growing vegetables in raised beds, soil preparation should account for existing ground conditions, and suitable topsoil, compost, or soilless materials can be used to develop the growing area.
Avoid filling the entire bed with pure compost or unsuitable fill dirt.
Spread the soil evenly and water it gently to help the material settle.
Leave approximately 1–2 inches below the top rim for watering and mulch. - Choose and plant your first vegetables.
Begin with a small selection of vegetables that match your climate and season.
Lettuce, radishes, bush beans, kale, and compact herbs are manageable choices for many beginners.
Tomatoes and peppers can also be grown successfully, but they require more growing space and attention.
Follow the seed packet or transplant label for planting depth and spacing.
Don’t place plants too close together simply because they appear small when first planted.
Water immediately after planting to settle soil around seeds or roots. - Maintain the raised bed throughout the growing season.
Check soil moisture regularly, particularly during warm or windy weather.
Raised beds can dry faster than surrounding garden soil.
Water when the root zone needs moisture rather than following an inflexible daily schedule.
Add suitable mulch around established plants to help reduce evaporation and weed growth.
Watch for insects, damaged leaves, and signs of plant stress.
Harvest vegetables at the appropriate stage and remove unwanted weeds before they become established.
What Do You Need to Start a Raised Bed Garden?
You don’t need an extensive collection of equipment to begin.
The basic materials depend on whether you’re building a frame yourself or purchasing a ready-made kit.
Essential Raised Bed Gardening Supplies
For a simple first garden, gather:
- Raised bed frame or suitable construction materials
- Quality raised bed soil or topsoil and finished compost
- Vegetable seeds or healthy transplants
- Garden gloves
- Hand trowel
- Garden fork
- Watering can or garden hose
- Measuring tape
- Organic mulch
- Suitable fasteners and assembly tools if building the frame
A rake is useful for leveling soil, while plant labels help identify crops and planting dates.
Trellises, drip irrigation, and protective netting can be added when the chosen plants or local pest conditions justify them.
Optional Raised Bed Accessories
Some accessories make regular gardening easier.
Drip irrigation delivers water near plant roots and can simplify moisture management.
Trellises support climbing vegetables such as pole beans and cucumbers.
Insect netting can protect selected crops from certain pests when installed correctly.
Row covers may help protect young plants from some weather conditions or insect damage, depending on the material.
You don’t need to purchase every accessory before planting. Start with the essentials and add equipment when a specific need becomes clear.
What Is the Best Raised Garden Bed Size for Beginners?
The best size provides enough planting space without making watering, harvesting, and maintenance difficult.
A single manageable bed is usually better for learning than several large beds installed at once.
4 × 4-Foot Raised Garden Bed
A 4 × 4-foot bed provides 16 square feet of planting space.
It works well for beginners who want to grow lettuce, spinach, radishes, herbs, or a small number of other vegetables.
The compact design is easy to reach from all sides.
It also requires less soil than larger beds.
4 × 8-Foot Raised Garden Bed
A 4 × 8-foot bed provides 32 square feet of planting space.
This size is useful when you want to combine several vegetables.
For example, you can grow bush beans, lettuce, radishes, and a small number of larger plants, provided their mature spacing requirements are respected.
The longer frame may require extra support to prevent the sidewalls from bending.
Raised Bed Height for New Gardeners
For a bed built over suitable native soil, a frame approximately 8–12 inches high can work well because roots can grow into the soil underneath.
A 12-inch frame is a practical beginner choice.
Beds with solid bottoms or those placed over concrete may require more depth for larger vegetables.
For gardeners who find bending difficult, a taller structure can improve accessibility.
However, the frame height and usable soil depth are not necessarily the same.
How Much Soil Do You Need to Start a Raised Bed Garden?
Before purchasing soil, calculate how much growing medium is required.
The amount depends on the bed’s interior dimensions and actual filling depth.
Raised Bed Soil Volume Formula
For a rectangular raised bed:
Soil volume (cubic feet) = Length (feet) × Width (feet) × Soil depth (inches) ÷ 12
To convert cubic feet into cubic yards:
Cubic yards = Cubic feet ÷ 27
For example, a 4 × 8-foot bed filled 12 inches deep requires:
4 × 8 × 12 ÷ 12 = 32 cubic feet
That equals approximately 1.19 cubic yards.
Soil Requirements for Common Raised Bed Sizes
| Raised Bed Size | Soil Depth | Soil Required |
| 2 × 4 feet | 12 inches | 8 cubic feet |
| 3 × 4 feet | 12 inches | 12 cubic feet |
| 4 × 4 feet | 12 inches | 16 cubic feet |
| 3 × 6 feet | 12 inches | 18 cubic feet |
| 4 × 8 feet | 12 inches | 32 cubic feet |
| 4 × 8 feet | 18 inches | 48 cubic feet |
These calculations assume the bed is filled to the stated soil depth.
If you’re leaving space below the rim, calculate using the actual fill depth rather than the frame height.
Bulk soil can be more economical for larger beds, while bagged products are convenient for small gardens.
What Soil Should You Use for Your First Raised Bed?
Soil quality has a major influence on how well vegetables grow.
The ideal growing medium provides moisture, air, nutrients, and sufficient space for roots.
Topsoil and Compost Mix
A suitable mineral topsoil forms the main portion of many open-bottom raised bed mixtures.
Finished compost adds organic matter and can help improve soil structure.
A practical starting blend is approximately:
- Two-thirds suitable topsoil
- One-third finished plant-based compost
This mixture is not required for every growing situation.
Existing soil conditions, the compost’s nutrient content, and the type of raised bed can change the appropriate proportions.
For example, a contained planter on pavement may need a different, lighter growing medium than an open-bottom bed connected to natural ground.
Can You Use Regular Garden Soil?
Yes. Suitable garden soil can be used in raised beds.
However, avoid filling the bed with heavily compacted clay, contaminated soil, or material containing large amounts of stones and debris.
Healthy native soil may be combined with finished compost to improve its structure.
A soil test can help determine whether additional fertilizer or pH amendments are necessary.
Should You Put Rocks or Logs at the Bottom?
A layer of gravel or rocks is generally unnecessary for drainage and reduces the space available for growing soil.
Large logs and branches are sometimes used in very tall raised beds as part of a woody-layer gardening method.
However, woody material decomposes and settles over time. It may also temporarily affect nitrogen availability.
For a beginner using a shallow or standard-height raised bed, a continuous layer of suitable growing soil is generally the simpler choice.
Best Vegetables to Grow in a Raised Bed Garden for Beginners
Choosing manageable vegetables helps make the first growing season easier.
Consider how much space each crop needs, whether it prefers cool or warm weather, and how it is normally planted.
| Vegetable | Planting Method | General Growing Season |
| Lettuce | Seeds or transplants | Cool season |
| Spinach | Direct-seeded | Cool season |
| Radishes | Direct-seeded | Cool season |
| Bush beans | Direct-seeded | Warm season |
| Kale | Seeds or transplants | Cool season |
| Swiss chard | Seeds or transplants | Cool to warm season |
| Cherry tomatoes | Usually transplants | Warm season |
| Basil | Seeds or transplants | Warm season |
Actual planting dates depend on your local climate and the variety.
Lettuce and Spinach
Lettuce and spinach are useful for beginners because they require relatively little growing space.
They perform best during cooler periods in many parts of the United States.
Plant them according to local seasonal conditions and maintain consistent soil moisture.
Some leafy greens can be harvested gradually by removing suitable outer leaves while leaving the growing point intact.
Radishes
Radishes are a practical choice for learning how to sow seeds directly into raised bed soil.
Many common varieties mature relatively quickly.
Their small size makes them useful for compact gardens.
Thin seedlings when necessary to prevent overcrowding and provide enough space for root development.
Bush Beans
Bush beans are suitable for warm-season raised bed gardening.
They generally don’t require the tall trellises used for pole beans.
Sow seeds after the danger of frost has passed and the soil has warmed sufficiently.
Provide adequate spacing and avoid allowing the soil to dry excessively during flowering and pod development.
Cherry Tomatoes
Cherry tomatoes can be productive in raised beds with sufficient sunlight, growing space, and support.
They require more room than leafy greens or radishes.
Choose a compact or determinate variety if garden space is limited.
Install an appropriate cage or support early to avoid disturbing established roots later.
Herbs
Basil, parsley, cilantro, and chives can be grown in raised beds when their seasonal needs are met.
Basil prefers warm growing conditions, while cilantro often performs better during cooler weather.
Avoid grouping plants with very different moisture requirements too closely together.
How to Plan a Simple Raised Bed Garden Layout
A planting layout helps you use space efficiently without crowding the vegetables.
Start by considering the mature size of each crop rather than the size of the seedling.
Simple 4 × 4 Raised Bed Layout
For a beginner garden, one possible layout is:
- One section for lettuce
- One section for radishes
- One section for bush beans
- One section for a compact herb or additional leafy vegetables
Adjust the number of plants according to their recommended spacing.
You can also plant radishes between slower-growing crops when their growth periods and spacing requirements are compatible.
Avoid filling every available inch with seedlings.
Simple 4 × 8 Raised Bed Layout
A 4 × 8-foot bed provides more flexibility.
Place taller crops toward the north side of the bed in a typical Northern Hemisphere garden when doing so will help prevent shading smaller plants.
Grow shorter leafy vegetables in areas that receive suitable sunlight.
If you’re planting climbing crops, position the trellis where it won’t create unwanted shade.
Leave enough room for mature plants to spread and for air to move through the planting area.
Use Plant Spacing Rather Than Guesswork
Seed packets and transplant labels usually provide recommended spacing.
These recommendations account for the plant’s expected mature size.
Crowding may reduce airflow, increase competition for nutrients and water, and make harvesting more difficult.
Some intensive gardening methods use closer spacing, but they require careful crop selection and maintenance.
For a first raised bed, ordinary recommended spacing is a dependable starting point.
When Is the Best Time to Start a Raised Bed Garden?
The best planting time depends on the vegetables and local climate.
Raised beds can be constructed during many parts of the year, provided the ground and weather conditions allow safe installation.
However, planting schedules should follow crop temperature requirements.
Starting a Raised Bed Garden in Spring
Spring is a popular time to begin.
Cool-season vegetables such as spinach, lettuce, peas, and radishes may be planted before warm-season vegetables, according to local recommendations.
Tomatoes, peppers, cucumbers, and bush beans generally need warmer conditions.
Many warm-season crops should be planted after the local danger of frost has passed.
Check the average last spring frost date for your area, but remember that an average date doesn’t guarantee frost-free weather.
Starting a Raised Bed Garden in Summer
You can start a garden during summer, but hot weather makes establishment more challenging.
New seedlings may experience moisture stress, and some cool-season crops may bolt in high temperatures.
Choose vegetables suitable for the remaining warm season.
Provide consistent watering and avoid letting the seedbed dry out during germination.
In very hot regions, waiting for a suitable late-summer or fall planting window may be more practical for cool-season vegetables.
Starting a Raised Bed Garden in Fall
Fall can be a productive planting period in many U.S. regions.
Lettuce, spinach, kale, radishes, and other cool-season crops may grow well as temperatures decline.
However, the available growing period depends on frost dates and day length.
Choose varieties that have enough time to mature before conditions become unsuitable.
In mild-winter climates, some cool-season vegetables can continue growing through much of winter.
How to Plant Seeds and Transplants in a Raised Bed
Seeds and transplants require slightly different planting methods.
Both can work well when the soil is prepared correctly.
Planting Vegetable Seeds
Direct seeding means placing seeds into the raised bed where the plants will grow.
Follow these steps:
- Level the soil surface gently.
- Create shallow planting holes or furrows at the recommended depth.
- Place seeds according to packet instructions.
- Cover them with the appropriate amount of soil.
- Water gently to avoid washing seeds away.
- Maintain suitable moisture during germination.
- Thin seedlings when they become large enough.
Some seeds need light for germination, while others require soil coverage.
Always check the instructions for the particular crop.
Planting Vegetable Transplants
Transplants are young plants started elsewhere and moved into the garden.
They are commonly used for tomatoes, peppers, and certain other vegetables.
Choose healthy seedlings with suitable root development.
Before planting indoor-grown seedlings outdoors, gradually acclimate them to direct sunlight, wind, and outdoor temperatures.
This process is called hardening off.
Dig a planting hole suitable for the root ball and follow the crop’s recommended planting depth.
Water thoroughly after transplanting.
Most vegetable transplants should not have their stems buried deeper than recommended. Tomatoes are an exception because they can form roots along buried portions of their stems.
How Often Should You Water a New Raised Bed Garden?
New raised beds need regular moisture monitoring, particularly during the first growing season.
The amount of water required depends on the soil mixture, weather, crop, growth stage, and bed design.
Watering After Planting
Water the bed after sowing seeds or transplanting vegetables.
For newly planted seeds, keep the germination zone consistently moist without saturating the soil.
Young transplants may require frequent checking until their roots become established.
Use a gentle stream or watering attachment to avoid disturbing seeds and young plants.
Checking Soil Moisture
Insert a finger into the soil a couple of inches below the surface.
If the root zone feels dry, watering may be necessary.
If the soil remains moist, additional water may not be needed immediately.
For established plants, water thoroughly enough to moisten the active root zone rather than repeatedly wetting only the surface.
Avoid following a fixed daily watering rule regardless of conditions.
Using Drip Irrigation
Drip irrigation can make raised bed watering more consistent.
Drip tubing or soaker hoses deliver water close to the roots.
This can reduce unnecessary water application outside the planting area.
However, the system still needs to be adjusted for weather and plant growth.
Check that water reaches the intended root depth rather than assuming the irrigation system is working perfectly.
How to Maintain a Raised Bed Garden After Planting
Regular maintenance helps keep the growing area productive.
Most tasks are straightforward when the garden begins with good soil and appropriately spaced plants.
Keep the Raised Bed Free From Weeds
Remove weeds while they are small.
Weeds compete with vegetables for water, nutrients, and sunlight.
Hand-pulling is often easy in loose raised bed soil.
Avoid deep cultivation around established plants because it can damage their roots.
Add Mulch Around Growing Plants
Organic mulch helps reduce moisture loss and suppress weeds.
Suitable materials include clean straw, shredded leaves, and other appropriate garden mulches.
Apply mulch after plants are established, keeping it away from direct contact with stems.
Avoid burying small seedlings beneath thick mulch layers.
Fertilize According to Plant Needs
A new raised bed mix may already contain useful nutrients.
Additional fertilizer isn’t automatically required.
Check the product ingredients and use soil test results when available.
If vegetables require supplemental fertilizer during growth, choose a suitable product and follow its application instructions.
Too much fertilizer can cause nutrient imbalances or damage plant roots.
Check for Pests and Plant Diseases
Inspect leaves, stems, and nearby soil regularly.
Look for damaged foliage, unusual discoloration, insect activity, and signs of disease.
Not every insect is harmful.
Identify the problem before applying any treatment.
Depending on the pest, hand removal, protective netting, sanitation, or another targeted method may be appropriate.
Use pesticides only when necessary and according to the label.
Harvest Vegetables at the Right Time
Harvesting methods differ by crop.
Leafy greens may allow repeated harvesting, while radishes are usually harvested when their roots reach the desired size.
Bush beans should be picked when pods are suitable for eating.
Tomatoes are harvested according to variety, color, and ripeness.
Regular harvesting of some crops encourages continued production.
Remove spent annual plants when they stop producing or become seriously diseased.
Common Raised Bed Gardening Mistakes Beginners Should Avoid
Several early mistakes can make a new raised bed less productive than expected.
Building the Bed in Too Much Shade
Vegetables that require full sunlight may grow poorly in heavily shaded locations.
Before installing the bed, observe how sunlight moves across the yard.
A location that appears sunny in the morning may receive shade for most of the afternoon.
Filling the Bed With Pure Compost
Compost is useful, but a raised bed filled entirely with compost may settle significantly and develop nutrient or moisture-management problems.
Use an appropriate growing-medium mixture instead.
The best proportions depend on the bed design and soil ingredients.
Adding a Thick Gravel Layer for Drainage
Gravel at the bottom of a contained bed doesn’t automatically improve drainage.
It also reduces usable growing depth.
Focus on providing suitable soil structure and an effective drainage outlet.
Planting Too Many Vegetables
Small seedlings can make an empty bed look underused.
However, mature vegetables often need substantially more space.
Overcrowding creates competition and can restrict airflow.
Plan around mature plant dimensions rather than the appearance of newly planted seedlings.
Walking on the Raised Bed Soil
One advantage of raised beds is the ability to reach plants from surrounding pathways.
Walking inside the bed compresses the soil.
Design the bed so you can maintain the center without stepping into the planting area.
Ignoring the Underlying Ground
An open-bottom raised bed doesn’t automatically isolate plants from unsuitable native soil.
Roots may grow downward into the ground below.
If the site has suspected contamination, investigate before planting edible crops.
Use a properly designed contained growing system with verified clean soil when separation is necessary.
How Much Does It Cost to Start a Raised Bed Garden?
The cost depends on the frame material, bed size, soil quantity, and whether you already own gardening tools.
For a small beginner project, the main expenses usually include:
- Raised bed frame or lumber
- Soil or growing-medium ingredients
- Seeds and transplants
- Watering equipment
- Basic hand tools
- Optional mulch and plant supports
A small open-bottom bed can reduce costs because it requires less purchased soil than a tall, fully contained bed.
Bagged soil is convenient for small projects, while bulk soil may offer a better unit price for larger installations.
To avoid unnecessary spending, calculate the required soil volume before purchasing and choose only the vegetables and accessories needed for the first season.
Starting with one bed also makes it easier to learn watering, planting, and crop maintenance before expanding.
How to Prepare a Raised Bed for the Next Growing Season
A raised bed doesn’t need to be completely rebuilt after every harvest.
With proper maintenance, the same growing area can support vegetables for many seasons.
After removing spent crops:
- Clear unwanted weeds and plant debris.
- Inspect the frame for damage.
- Check soil level and drainage.
- Review soil fertility and previous fertilizer applications.
- Add suitable finished compost or replacement soil when needed.
- Plan the next crop according to the season.
- Protect unused soil with mulch or an appropriate cover crop.
Rotating crops where practical can help reduce some pest and disease problems, although rotation is more difficult in a single small bed.
Avoid repeatedly planting crops affected by the same soil-borne disease in the same location.
Maintain healthy soil rather than replacing the entire growing medium every year.
Conclusion
Understanding how to start a raised bed garden begins with choosing a suitable location, building a manageable growing area, and filling it with soil that supports healthy roots.
For most beginners, a 4 × 4-foot or 4 × 8-foot open-bottom bed provides a practical starting point. A depth of around 12 inches works well when the native soil underneath is suitable for root growth.
Start with a few vegetables that match your climate and planting season. Follow appropriate spacing, maintain consistent moisture, and monitor plant growth regularly.
You don’t need an expensive frame, complicated soil recipe, or numerous accessories to begin.
A simple, properly prepared raised bed is easier to maintain and provides a useful foundation for expanding your vegetable garden in future seasons.
FAQs About How to Start a Raised Bed Garden
Can I Start a Raised Bed Garden Directly on Grass?
Yes. A raised bed can be installed over an existing lawn, but the grass should be removed or adequately suppressed.
You can strip away the turf or use a suitable no-dig method. Plain cardboard is sometimes used to suppress vegetation, although it may temporarily restrict water movement until it decomposes.
The best approach depends on the condition of the ground and the intended planting depth.
Do I Need to Put Anything Under a Raised Garden Bed?
Not necessarily. An open-bottom raised bed placed over healthy, well-drained ground generally doesn’t need a liner.
If burrowing animals are a problem, suitable metal mesh may be installed below the bed while maintaining drainage and root access.
Beds built over contaminated ground require a different design that prevents contact with the unsuitable soil.
Can I Start a Raised Bed Garden Without Building a Frame?
Yes. Raised garden beds can be constructed as elevated soil mounds without wooden, metal, or plastic walls.
Shape suitable soil into a stable, flat-topped growing area with sloped sides.
However, unframed mounds may need more maintenance to prevent erosion and maintain their shape.
How Deep Should My First Raised Garden Bed Be?
Approximately 12 inches is a practical starting depth for an open-bottom bed over suitable native soil.
A shallower bed can work for some crops when roots can grow into the ground underneath.
For contained beds on concrete or other hard surfaces, larger vegetables may benefit from 18–24 inches of usable soil.
Can I Start a Raised Bed Garden With Only One Bed?
Yes. One raised bed is enough to begin growing vegetables.
A single 4 × 4-foot or 4 × 8-foot bed allows you to practice planting, watering, soil care, and harvesting without managing a large garden.
Additional beds can be added after you understand how much time and space your crops require.
What Is the Easiest Vegetable to Grow in a Raised Bed?
Radishes, lettuce, and bush beans are approachable choices for many beginners.
Radishes and lettuce are useful during suitable cool-season conditions, while bush beans grow during warm weather.
The easiest crop for your particular garden depends on sunlight, local climate, planting season, and available space.
Do I Need to Replace Raised Bed Soil Every Year?
No. Healthy raised bed soil can support many growing seasons.
Organic matter gradually decomposes, and the soil level may settle over time.
Add suitable compost or replacement soil when needed, monitor nutrient levels, and address any drainage or compaction problems rather than replacing all the soil annually.

I’m Maya L. Greenwood, a lifelong plant lover who believes anyone can grow something beautiful with the right guidance. After years of testing soil mixes, pruning methods, irrigation tricks, and pest-safe solutions, I started EasyGardenTips.com to turn hard-won lessons into step-by-step advice. From seed starting and container gardens to composting and seasonal checklists, my goal is to make gardening simple, sustainable, and fun.