How to Warm Soil in Raised Beds: Methods for Earlier Planting
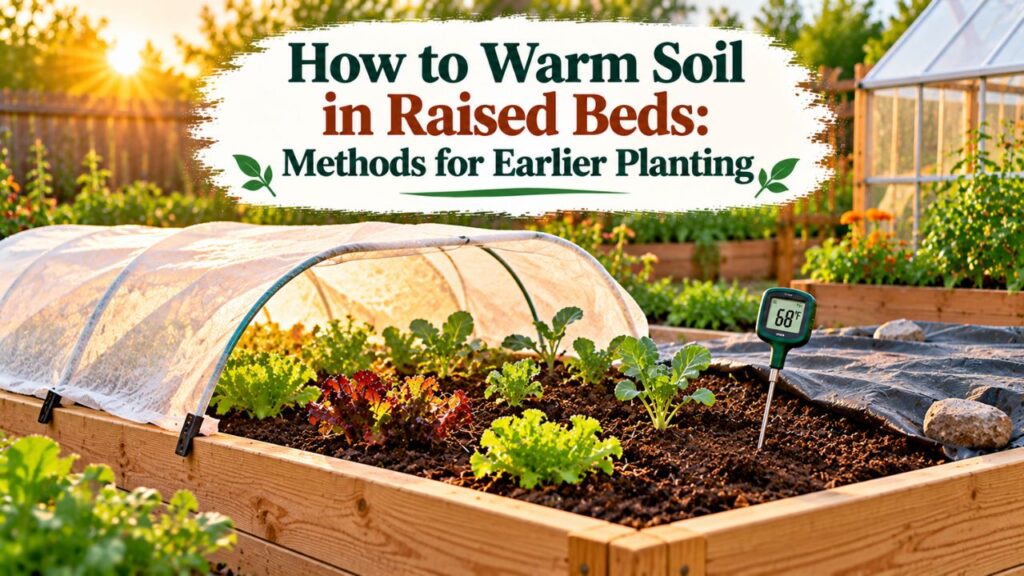
The fastest practical way to warm soil in raised beds is to remove thick winter mulch, expose the soil to sunlight, and cover it with clear plastic one to two weeks before planting. Black plastic mulch is another effective option, especially when weed control is also important.
Cold soil is a common problem during early spring. Even when daytime temperatures become comfortable, the growing medium may remain too cold for vegetables such as tomatoes, peppers, cucumbers, and squash.
Planting in cold soil can slow germination, restrict root growth, and increase the risk of seed rot. A few warm afternoons won’t necessarily solve the problem because soil temperatures change more slowly than air temperatures.
Raised beds naturally warm earlier than many traditional garden beds, but their temperature still depends on sunlight, moisture, soil composition, and overnight weather.
Fortunately, several simple techniques can help capture and retain warmth without special heating equipment.
The following methods explain how to prepare cold raised bed soil, choose warming covers, measure temperatures, and determine when conditions are suitable for spring planting.
How to Warm Soil in Raised Beds Before Planting
Warming an empty raised bed is usually easier than warming soil around established plants. Without growing crops in the way, you can expose the entire surface to sunlight and install temporary covers.
Follow these steps to prepare the bed for earlier spring planting.
Step 1: Remove Winter Mulch and Plant Debris
Start by removing thick layers of straw, shredded leaves, or other organic mulch left over from winter.
Organic mulch acts as insulation, reducing temperature changes in the soil beneath it. Although this protects soil during cold weather, it can delay warming when spring arrives.
Remove the mulch from the planting area and set aside clean material for later use.
Clear away fallen branches, weeds, and other debris that might prevent plastic sheeting from lying smoothly over the surface.
Avoid disturbing the soil more than necessary. Deep digging is not required simply to increase soil temperature.
Step 2: Expose the Raised Bed Soil to Sunlight
Direct sunlight provides the energy needed to warm the soil.
Make sure nearby objects aren’t unnecessarily shading the growing area.
Temporary fencing, storage containers, garden equipment, and other movable objects can sometimes block several hours of sunlight.
If you’re building a new raised bed, select a location with adequate sun exposure for the intended crops.
A south-facing garden location with minimal shading often provides favorable spring sunlight in the Northern Hemisphere.
However, sunlight exposure matters more than the direction the bed itself faces.
Step 3: Check Soil Moisture and Drainage
Before installing a warming cover, examine the soil’s moisture level.
Very wet soil generally takes longer to warm because water requires considerable energy to increase its temperature.
Saturated soil can also create unfavorable conditions for newly planted roots.
Squeeze a small handful of soil:
- If water drips out, allow the bed to drain.
- If the soil forms a sticky, dense mass, it may still be too wet to work.
- If the soil feels slightly moist and crumbles when handled, conditions are generally more suitable.
Don’t try to dry saturated soil by repeatedly turning it with a shovel. Working excessively wet soil can damage its structure.
If the soil is completely dry, lightly moisten it before laying plastic. Moderate moisture helps heat move through the growing medium.
Step 4: Install Clear Plastic Over the Soil
Clear polyethylene plastic is particularly useful for warming an empty raised bed.
It allows sunlight to pass through the covering and reach the soil while reducing heat loss.
To install it correctly:
- Level the soil surface with a garden rake.
- Remove sharp objects that could tear the plastic.
- Cut a sheet of clear plastic slightly larger than the bed.
- Spread it smoothly over the entire growing surface.
- Pull the material reasonably tight.
- Secure the edges with suitable weights, soil, or landscape staples.
- Check that wind cannot lift the covering.
Choose plastic intended for suitable outdoor gardening applications when possible.
For temporary spring warming, the covering should be secure enough to withstand ordinary weather without becoming difficult to remove.
Keep clear plastic away from established plant foliage during intense sunshine. Excessive heat can damage growing plants.
Step 5: Leave the Cover in Place Before Planting
A practical starting point is to install the plastic approximately one to two weeks before the intended planting date.
The University of Minnesota Extension’s guidance on extending the growing season recommends placing plastic mulch one to two weeks before planting heat-loving crops.
The time required depends on several conditions, including sunshine, soil moisture, nighttime temperatures, and the type of covering.
Don’t assume that seven sunny days will produce the same result as seven cloudy days.
Inspect the bed periodically and monitor temperatures rather than relying entirely on the calendar.
Step 6: Measure the Soil Temperature
Use a soil thermometer to determine whether the warming process is working.
Insert the probe approximately 2–4 inches below the growing surface, or at the depth appropriate for the crop.
Measure at roughly the same time each day, preferably during the morning when overnight cooling can be assessed.
For a more reliable picture:
- Measure soil temperature over several consecutive days.
- Check more than one location in a large raised bed.
- Avoid measuring directly against metal or other frame materials.
- Compare readings with the preferred temperature range of the crop.
- Check the weather forecast before removing protective covers.
A bed that becomes warm during the afternoon may still be too cold for tender crops the following morning.
Step 7: Remove the Plastic and Plant
Once temperatures are consistently suitable, remove the temporary clear plastic.
Prepare planting holes or seed furrows without unnecessarily disturbing the warmed soil.
Plant seeds or transplants according to their specific requirements.
If cold weather remains possible, use row covers or a low tunnel to protect newly planted vegetables.
You can also use black plastic as ongoing mulch, provided it has suitable planting openings and allows the soil to receive water.
Clear Plastic vs. Black Plastic for Warming Raised Bed Soil
Clear and black plastic both help raise soil temperature, but they serve slightly different purposes.
Clear plastic generally provides stronger solar warming, while black plastic combines warming with weed suppression.
| Feature | Clear Plastic | Black Plastic |
| Soil warming | Generally stronger | Moderate |
| Sunlight transmission | Allows light through | Blocks light |
| Weed prevention | Weeds may grow underneath | Suppresses most covered weeds |
| Best application | Preheating empty beds | Warming and mulching planted beds |
| Planting method | Usually remove before planting | Cut planting holes |
| Main limitation | Possible overheating | Less direct solar heating |
Why Clear Plastic Warms Soil Faster
Clear plastic allows incoming sunlight to reach the soil.
The soil absorbs solar energy, and the covering reduces some of the heat escaping from the surface.
Under favorable conditions, this can produce a substantial temperature increase.
University of Minnesota Extension reports that clear plastic can increase soil temperature by as much as 14°F, while black plastic can increase it by approximately 5°F.
These are potential increases, not guaranteed results. Actual temperatures depend on weather and growing conditions.
Clear plastic is especially suitable when the main objective is getting an empty raised bed ready for planting.
Why Black Plastic Works Better for Weed Control
Black plastic absorbs sunlight rather than transmitting it directly to the soil.
Heat transfers from the plastic into the growing medium, especially when the material remains in close contact with the soil.
Because sunlight cannot easily penetrate the covering, many weeds struggle to grow underneath it.
Black plastic can remain around tomatoes, peppers, cucumbers, and other appropriate crops after planting.
For effective installation, smooth the material over the soil and secure its edges.
Provide watering access through planting holes or drip irrigation beneath the covering.
Is Landscape Fabric Good for Warming Raised Beds?
Dark landscape fabric can help warm exposed soil, depending on the material and its contact with the surface.
Its main advantage is that many woven products allow water to pass through while suppressing weeds.
However, results differ because landscape fabrics vary in thickness, permeability, and construction.
Clear plastic is generally the better choice when rapid soil warming is the primary objective.
How to Warm Raised Bed Soil Without Plastic
Plastic sheeting isn’t the only option for improving soil temperature.
Several methods use sunlight, drainage, and temporary protective structures.
These are particularly useful for gardeners who prefer reusable or lower-waste materials.
Remove Insulating Mulch Until the Soil Warms
One of the simplest approaches is to leave the soil surface exposed during suitable spring weather.
Dark, bare soil can absorb sunlight directly.
Remove thick winter mulch and allow the sun to reach the growing medium.
Once soil temperatures become appropriate for planting, return organic mulch where needed to conserve moisture and reduce weed growth.
This method is straightforward but depends heavily on natural weather conditions.
Improve Drainage in Wet Raised Beds
Poor drainage can keep the growing medium cold for longer.
Check whether excess rainfall can move out of the bed.
For raised beds on native ground, examine whether the underlying soil is heavily compacted.
For elevated beds with solid bottoms, check that drainage openings aren’t blocked.
If the growing medium is persistently saturated, correcting the drainage problem is more important than adding a warming cover.
Avoid placing gravel beneath the soil as a substitute for proper drainage.
Use a Cold Frame to Capture Solar Heat
A cold frame is a shallow enclosure with a transparent cover.
It creates a protected growing environment by collecting sunlight and reducing exposure to cold wind.
A cold frame placed over a raised bed can help maintain more favorable temperatures for early vegetables.
For effective use:
- Position it where it receives direct sunlight.
- Keep the transparent lid clean.
- Secure the structure against wind.
- Open the lid when temperatures become excessive.
- Check soil moisture regularly.
Cold frames are especially useful for lettuce, spinach, kale, and other vegetables that tolerate cooler growing conditions.
They can also help protect young transplants while outdoor temperatures remain unpredictable.
How to Keep Raised Bed Soil Warm After Planting
Once vegetables have been planted, the focus shifts from rapidly heating bare soil to maintaining suitable growing conditions.
Plant protection becomes especially important when nighttime temperatures remain low.
Build a Low Tunnel Over the Raised Bed
A low tunnel consists of flexible hoops covered with greenhouse film or agricultural row-cover fabric.
The covering creates a protected space above the growing area.
To build a basic low tunnel:
- Install hoops across the raised bed.
- Space them evenly to support the covering.
- Drape suitable plastic film or row-cover fabric over the hoops.
- Secure the edges against wind.
- Leave a practical way to open the tunnel.
- Monitor temperatures and ventilate when necessary.
Low tunnels reduce exposure to cold wind and can increase temperatures around plants during sunny weather.
However, they are not guaranteed to prevent frost damage during severe cold.
Safety Note: Plastic-covered tunnels can become excessively hot even when outside temperatures are relatively cool. Provide ventilation during sunny conditions.
Use Floating Row Covers for Young Vegetables
Floating row covers are lightweight fabrics designed to protect crops from cold, wind, and some insects.
Unlike solid plastic, suitable row-cover materials allow air and moisture to pass through.
They can be placed over supported hoops or directly above certain low-growing crops.
Choose a fabric weight appropriate for the expected weather.
Heavier covers generally provide greater cold protection but transmit less sunlight.
For crops that depend on insect pollination, remove or open the covers when flowers appear so pollinators can reach them.
Protect Individual Plants With Cloches
A cloche is a small protective covering placed over an individual plant.
Clear plastic garden cloches, vented plant protectors, and similar structures can trap daytime warmth.
They may be useful for protecting a small number of tender transplants.
However, the enclosed air can heat rapidly in direct sunlight.
Use a vented design and remove the cover when the plant becomes too large or temperatures rise.
What Temperature Should Raised Bed Soil Reach Before Planting?
Different vegetables require different soil temperatures.
Cool-season crops can germinate in relatively cold conditions, while warm-season crops generally need a warmer root zone.
According to the University of Minnesota Extension’s 2026 garden planting guidance, many cool-season crops can be planted when soil temperatures reach 40–50°F, while heat-loving vegetables should generally wait until the soil reaches at least 65°F.
| Vegetable group | Examples | General planting soil temperature |
| Cool-season vegetables | Spinach, peas, radishes, lettuce | 40–50°F |
| Moderate-temperature crops | Broccoli, cabbage, cauliflower | 55–60°F |
| Warm-season vegetables | Tomatoes, peppers, cucumbers, squash | 65°F or warmer |
| Other heat-loving crops | Melons, beans, basil | 65°F or warmer |
These are broad planting guidelines. Individual varieties may have different germination and establishment requirements.
Soil Temperature for Tomatoes and Peppers
Tomatoes and peppers prefer warm growing conditions.
Although established plants may tolerate some cool weather, persistently cold soil can restrict root growth and nutrient uptake.
A general target of 65°F or warmer is useful before planting.
Also check nighttime air temperatures.
If frost remains likely, soil warming alone will not adequately protect tender foliage.
Soil Temperature for Lettuce, Spinach, and Peas
Cool-season crops can begin growing at much lower soil temperatures.
Peas, lettuce, and spinach generally do not need the same level of preheating required for tomatoes or cucumbers.
Excessively warm conditions may even reduce the performance of certain cool-season vegetables.
For these crops, focus on workable soil, adequate drainage, and protection from severe weather.
Soil Temperature for Cucumbers and Squash
Cucumbers and squash are sensitive to cold growing conditions.
Seeds placed in cold, wet soil may germinate slowly or fail before seedlings emerge.
Prewarming a raised bed with clear plastic can improve the planting environment.
Wait until temperatures become suitable and the immediate forecast does not indicate damaging cold conditions.
How Long Does Raised Bed Soil Take to Warm Up?
Raised bed soil can begin warming during the first sunny days of spring, but reaching a suitable planting temperature may take considerably longer.
For planning purposes, begin using temporary warming covers approximately 7–14 days before the expected planting date.
This is a starting window rather than a fixed requirement.
Several factors determine how quickly the growing medium warms.
Sunlight Exposure
A bed receiving direct sunlight throughout much of the day generally warms faster than one in partial shade.
Cloud cover reduces incoming solar energy, while cold nights can reverse some of the daytime temperature increase.
Soil Moisture
Excessively wet soil often warms more slowly than moderately moist soil.
If the bed remains saturated after rainfall, allow it to drain before planting.
Don’t remove all moisture in an effort to speed warming. Seeds and new roots still require water.
Raised Bed Depth
Shallow raised beds may respond quickly to changes in air temperature.
However, they can also cool more rapidly during cold nights.
Deeper beds have greater soil volume, so their internal temperatures may change more gradually.
The effect also depends on soil composition, exposure, and the surrounding environment.
Raised Bed Materials
Wood, galvanized steel, stone, and other frame materials interact with sunlight and outdoor temperatures differently.
Metal surfaces may become warm quickly in direct sunlight, while wood generally transfers heat more slowly.
However, frame material alone does not determine whether the soil is ready for planting.
Soil temperature measurements are more dependable than judging the warmth of the bed’s sides.
Why Is Raised Bed Soil Still Cold in Spring?
Sometimes soil remains cold despite several mild afternoons.
Several common conditions can explain the delay.
The Raised Bed Is Heavily Shaded
Limited sunlight reduces solar warming.
Check whether nearby structures or trees shade the bed during important daylight hours.
Remove temporary obstructions when practical.
The Soil Has Too Much Moisture
Waterlogged soil may remain cold even when the air becomes warmer.
Inspect drainage conditions and avoid watering unnecessarily.
Do not work the soil while it is saturated.
Thick Mulch Is Holding in the Cold
A heavy insulating layer can prevent sunlight from heating the soil directly.
Move winter mulch aside until the bed reaches an appropriate temperature.
Return mulch after planting when moisture conservation becomes more important.
Nighttime Temperatures Remain Too Low
Cold nights can reduce the warmth accumulated during the day.
A plastic cover may improve conditions, but it cannot guarantee consistent temperatures during prolonged cold weather.
Continue monitoring the soil and delay tender crops when necessary.
Mistakes to Avoid When Warming Raised Bed Soil
Some warming methods are ineffective or create unnecessary problems for plants and soil.
Pouring Hot Water Into the Raised Bed
Hot water is not a reliable method for maintaining soil warmth.
Any temperature increase is usually temporary, and very hot water can damage roots and soil organisms.
Use controlled solar warming instead.
Adding Fresh Manure to Generate Heat
Fresh manure can produce heat while decomposing, but adding it directly to the vegetable root zone is not a suitable shortcut.
It may introduce excessive nutrients, soluble salts, and food safety concerns.
Traditional manure-heated hotbeds use carefully managed systems that are different from ordinary vegetable raised beds.
Use finished compost to improve soil properties when needed, not fresh manure simply to produce heat.
Covering Growing Plants With Unventilated Plastic
Clear plastic can produce high temperatures during sunny weather.
Plants enclosed beneath unventilated plastic may suffer heat damage.
Use properly supported protective structures with ventilation rather than leaving plastic sealed tightly around growing foliage.
Planting Too Early Because the Air Feels Warm
Spring air temperature and soil temperature are not the same.
A sunny afternoon does not guarantee that the growing medium is suitable for warm-season crops.
Check soil temperature over several days and consider the frost forecast before planting.
Conclusion
Understanding how to warm soil in raised beds makes spring planting more predictable, especially in areas with cold or wet early-season weather.
For empty beds, removing winter mulch and installing clear plastic is usually the simplest way to capture additional solar warmth. Black plastic is a practical alternative when ongoing weed suppression is also needed.
Cold frames, low tunnels, and floating row covers can help maintain favorable conditions after planting.
Begin preparing the soil one to two weeks before the intended planting date, but let actual temperature readings determine when the bed is ready.
The best approach is to combine adequate sunlight, suitable soil moisture, reliable drainage, and protection against unexpected cold weather.
FAQs About How to Warm Soil in Raised Beds
Does Clear Plastic Warm Raised Bed Soil Faster Than Black Plastic?
Yes. Clear plastic generally produces greater soil warming because sunlight passes through it and heats the soil underneath. Black plastic is usually more effective at suppressing weeds.
Can You Warm Raised Bed Soil Without Using Plastic?
Yes. Remove insulating mulch, expose the soil to sunlight, and improve drainage if the growing medium is excessively wet. Cold frames and reusable row covers can also help create warmer growing conditions.
Should You Water Soil Before Covering It With Plastic?
Yes, if the soil is too dry. The growing medium should contain adequate moisture, but it should not be saturated. Excessively wet soil can take longer to warm and may create unfavorable planting conditions.
Can Raised Bed Soil Get Too Hot Under Plastic?
Yes. Clear plastic can create excessive temperatures during strong sunshine, especially in warm weather. Monitor soil temperature and avoid leaving growing plants trapped beneath unventilated coverings.
Do Raised Beds Warm Faster Than Regular Garden Soil?
Raised beds often warm earlier in spring because their elevated structure and improved drainage help the soil respond to warming conditions. However, the difference depends on bed design, moisture, sunlight, and local weather.
Will a Low Tunnel Keep Raised Bed Soil From Freezing?
A low tunnel can moderate temperatures and provide some protection against cold weather, but it cannot guarantee that the soil will remain above freezing during prolonged or severe cold.
When Should You Remove Plastic From a Raised Bed?
Remove temporary clear plastic when the soil reaches a suitable planting temperature. If using black plastic as mulch, it may remain around appropriate crops, provided water can reach the roots and excessive heat is avoided.

I’m Maya L. Greenwood, a lifelong plant lover who believes anyone can grow something beautiful with the right guidance. After years of testing soil mixes, pruning methods, irrigation tricks, and pest-safe solutions, I started EasyGardenTips.com to turn hard-won lessons into step-by-step advice. From seed starting and container gardens to composting and seasonal checklists, my goal is to make gardening simple, sustainable, and fun.