How to Set Up a Metal Raised Garden Bed: Assembly to Planting
To set up a metal raised garden bed, choose a sunny, level location, assemble the metal panels using the supplied bolts and connectors, install the required supports and safety edging, and fill the bed with suitable growing soil. Most metal raised garden beds have open bottoms, allowing plant roots to grow into the native soil underneath.
Metal raised beds are popular because they’re durable, resistant to wood rot, and available in several sizes and shapes. Many galvanized steel kits also have modular panels that allow you to create rectangular, oval, or other configurations without cutting materials.
However, proper installation involves more than connecting the panels. Uneven ground can make the frame unstable, missing braces can allow the sides to bow outward, and unsuitable soil can affect drainage and plant growth.
Preparing the location and assembling the frame correctly helps prevent these problems.
In this article, I cover how to choose and prepare a location, assemble a metal raised bed, install its supports, and fill it with the right soil. You’ll also learn about drainage, soil depth, safety edging, planting, maintenance, and common installation mistakes.
How to Set Up a Metal Raised Garden Bed Step by Step
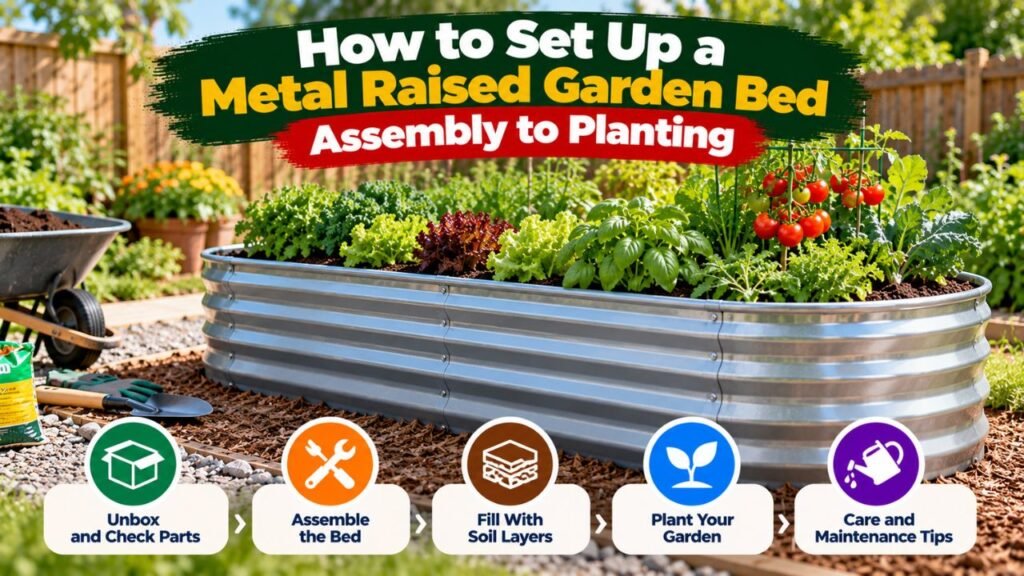
Most prefabricated metal raised garden beds use galvanized or coated steel panels connected with bolts and nuts.
The exact hardware and assembly sequence vary by manufacturer, but the following process applies to many common modular kits.
Step 1: Choose the Best Location for Your Metal Raised Bed
Start by choosing a location that receives enough sunlight for the crops you intend to grow.
Most fruiting vegetables, including tomatoes, peppers, cucumbers, and eggplants, perform best with at least 6–8 hours of direct sunlight daily.
Leafy vegetables such as lettuce, spinach, and kale can tolerate some shade, particularly during hot weather.
According to the University of Minnesota Extension’s raised bed gardening guidance, raised beds should be located where plants receive appropriate sunlight and have convenient access to water.
A suitable location should have:
- Adequate direct sunlight
- Good natural drainage
- Firm, reasonably level ground
- Convenient access to a garden hose
- Enough room for walking and harvesting
- Minimal competition from large tree roots
Avoid areas where water regularly collects after heavy rainfall.
Also consider the surrounding surfaces. Metal raised beds placed near concrete walls, pavement, or other heat-absorbing materials may experience additional reflected heat.
Step 2: Select the Metal Raised Bed Size and Shape
Metal raised beds come in different heights, widths, and configurations.
For most home gardeners, a bed approximately 3–4 feet wide is practical when both sides are accessible.
This allows you to reach the center without stepping into the soil.
Common options include:
| Metal Raised Bed Size | Suitable Application |
| 2 × 4 feet | Small gardens, herbs, leafy vegetables |
| 3 × 4 feet | Compact vegetable gardens |
| 4 × 4 feet | Small mixed vegetable gardens |
| 4 × 8 feet | Larger vegetable growing areas |
| 17-inch-high bed | General-purpose vegetable gardening |
| 24-inch-high bed | Additional soil depth and easier access |
| 32-inch-high bed | Taller growing areas with reduced bending |
The actual dimensions depend on the manufacturer.
Oval beds and modular kits may have several possible configurations.
Before assembling the frame, choose the configuration that best fits your garden space.
Leave enough room around the bed for watering, weeding, harvesting, and transporting soil.
Step 3: Gather the Required Tools and Materials
Most metal raised garden bed kits include the structural panels and fastening hardware.
However, check the package contents before beginning.
Common materials and tools include:
- Metal raised garden bed panels
- Corner or curved panels
- Manufacturer-supplied bolts and nuts
- Flat washers, if included
- Cross braces or support rods, if required
- Protective rubber or plastic edge trim
- Wrench or socket tool
- Screwdriver or hex key, depending on the hardware
- Measuring tape
- Level
- Work gloves
- Suitable raised bed soil
- Garden fork or shovel
Some kits include assembly tools, while others require common household tools.
Safety Note: Wear gloves when handling metal panels. Unprotected sheet-metal edges and corners can be sharp enough to cause cuts.
Wear suitable eye protection when handling springy components or using tools that could release debris.
Step 4: Prepare and Level the Ground
Before assembling the frame, prepare the exact location where the bed will sit.
Remove rocks, debris, and unwanted vegetation.
If the area is covered with lawn grass, you can remove the sod or use a suitable vegetation-suppression method.
For an open-bottom metal bed, check whether the native soil underneath is compacted.
If necessary, gently loosen the ground with a garden fork.
Avoid digging wet clay soil because it can become compacted and form hard clumps as it dries.
Next, check the ground level.
Use a straight board and a level to identify uneven areas.
Remove small amounts of soil from high spots or make appropriate foundation adjustments.
The metal frame should sit firmly without excessive rocking or major gaps beneath the walls.
Don’t compact the entire growing area just to support the frame. The perimeter needs stability, while the planting soil should remain loose enough for roots to grow.
Step 5: Unpack and Arrange the Metal Panels
Open the packaging and identify each component.
Depending on the kit, you may find:
- Straight side panels
- Curved end panels
- Corner sections
- Connecting bolts
- Nuts and washers
- Support rods
- Protective edge strips
- Assembly instructions
Inspect the panels for damage before installation.
Minor cosmetic marks may not affect performance, but severely bent panels, damaged protective coatings, or distorted fastening holes should be addressed before assembly.
If the panels have removable protective packaging film, follow the manufacturer’s instructions for removing it.
Arrange the panels on a clean, level surface in the desired configuration.
This makes it easier to identify the correct connections and avoid assembling the wrong shape.
Step 6: Connect the Metal Raised Bed Panels
Begin assembling the frame using the hardware supplied with the kit.
For many modular designs, the process involves joining straight panels to curved or corner sections.
A typical assembly sequence is:
- Place two adjoining panels together.
- Align their factory-made fastening holes.
- Insert the supplied bolts through the designated openings.
- Install the required washers and nuts.
- Tighten the hardware lightly.
- Connect the remaining panels in the correct order.
- Check the overall frame shape before final tightening.
Don’t fully tighten every bolt immediately unless the instructions require it.
Leaving the fasteners slightly loose during initial assembly can make it easier to align the remaining panels.
Once the frame is correctly assembled, tighten the hardware according to the manufacturer’s specifications.
Avoid using excessive force that could deform thin panels or damage protective coatings.
Never drill additional holes or substitute different hardware without verifying compatibility.
Step 7: Install Cross Braces and Support Rods
Some metal raised beds include cross braces, tension rods, or other structural supports.
These components help the frame resist outward pressure from the soil.
They are particularly important for taller and longer bed configurations.
Install every brace required for the configuration you’ve selected.
Depending on the design, a support rod may connect two opposing walls or attach to specific panel joints.
Follow the manufacturer’s instructions for:
- Brace location
- Rod orientation
- Bolt placement
- Connection hardware
- Final tightening
Don’t leave braces out simply because the empty frame appears stable.
A frame that looks rigid before filling may begin bowing once it contains a large volume of wet soil.
If your kit requires additional support for longer configurations, install those components before filling.
Step 8: Install Protective Edging Around the Top
Many corrugated metal garden bed kits include protective edging that covers the upper metal rim.
This is an important part of the assembly.
An exposed sheet-metal edge may cause cuts during planting, watering, or harvesting.
To install the edging:
- Identify the protective trim supplied with the kit.
- Start at one end of the upper rim.
- Press the edging securely over the exposed metal.
- Continue around the entire perimeter.
- Follow the manufacturer’s instructions for corners and joints.
- Check that the edging remains firmly attached.
Don’t stretch the material excessively unless the instructions permit it.
After installation, run a gloved hand around the upper edge to check for loose sections.
If your kit doesn’t include protective edging and has exposed sharp metal, obtain a compatible edge guard before regular use.
Step 9: Position and Level the Assembled Bed
Move the assembled metal frame to its prepared location.
Large frames may require two people to lift and position them without bending the panels.
Check the level from side to side and end to end.
The base should sit evenly against the ground.
Inspect the frame for:
- Uneven corners
- Gaps along the bottom
- Loose bolts
- Missing braces
- Bowed panels
- Sharp exposed edges
Make any necessary adjustments before filling.
Important: Once a large raised bed is filled with soil, moving or repositioning it becomes difficult and can damage the frame.
Step 10: Prepare the Bottom of the Metal Raised Bed
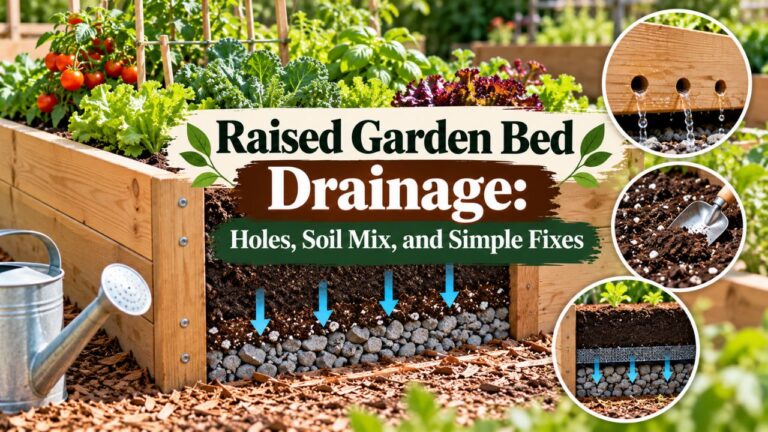
Most metal raised garden beds are designed without a solid bottom.
If the bed is installed directly over healthy garden soil, leaving the bottom open is generally beneficial.
It allows excess water to move into the underlying ground and plant roots to grow deeper.
You may use plain cardboard temporarily to suppress grass, although it can slow water movement and root penetration until it decomposes.
If the area has burrowing pests, suitable hardware cloth may be installed beneath the frame.
Avoid placing impermeable plastic across the bottom of an ordinary open-bottom bed.
The appropriate bottom preparation changes when the frame sits on concrete, paving, or contaminated ground.
Step 11: Fill the Metal Raised Bed With Suitable Soil
Fill the frame with a growing medium that supports healthy roots.
A suitable raised bed soil mixture should retain moisture without remaining waterlogged.
For an open-bottom bed, quality topsoil mixed with finished plant-based compost is a practical option.
Add the material gradually and distribute it evenly.
Avoid pressing the soil down aggressively or walking inside the bed.
As you fill, inspect the sidewalls for unusual movement or bowing.
Water the growing medium gently to help it settle.
Leave approximately 1–2 inches between the soil surface and the upper rim to provide space for watering and mulch.
Step 12: Plant and Water Your Vegetables
Once the soil settles, the bed is ready for planting.
Choose vegetables suited to the local climate, season, and available sunlight.
Follow the seed packet or transplant label for planting depth and spacing.
Water the soil after planting.
Continue checking moisture regularly, especially during warm weather.
For taller metal beds, pay attention to the upper soil layer because the exposed sides and elevated growing area can contribute to faster drying.
What Should You Put Under a Metal Raised Garden Bed?
The material underneath depends on whether the bed sits on natural soil, lawn grass, concrete, or another surface.
A metal frame doesn’t automatically need a manufactured bottom.
Metal Raised Bed Directly on Soil
If the existing ground is healthy and well-drained, the simplest option is to place the frame directly on the soil.
Remove unwanted vegetation and loosen compacted areas when necessary.
Leave the bottom open.
This gives plant roots access to the native soil and allows water to move downward.
A permanent plastic barrier is usually unnecessary.
Cardboard Under a Metal Raised Bed
Plain cardboard can help suppress grass when converting part of a lawn into a garden.
Remove plastic tape and labels before installation.
Overlap the cardboard pieces so grass cannot easily grow through the gaps.
Cover the cardboard with appropriate growing material.
However, cardboard isn’t a permanent weed barrier.
Some persistent perennial weeds can survive beneath it or grow around the frame.
Landscape Fabric Under a Metal Raised Bed
Landscape fabric may be useful for certain contained installations or surrounding pathways.
However, placing permanent fabric across the bottom of a bed over natural ground can restrict root access and complicate future soil management.
For conventional open-bottom beds, leaving the soil connected to the ground is usually preferable.
Hardware Cloth Under a Metal Raised Bed
Galvanized hardware cloth may help prevent gophers, voles, and other burrowing animals from entering from below.
Choose a mesh opening size suitable for the target pest.
Secure the material around the base so animals cannot easily enter through gaps.
Don’t use lightweight plastic netting as a direct replacement for sturdy metal mesh when protection from burrowing pests is required.
Should You Put Gravel Under a Metal Raised Bed?
A gravel layer is generally unnecessary beneath a metal raised bed placed on soil.
Gravel doesn’t automatically improve the drainage of the growing medium.
In contained beds, abrupt changes between soil and coarse gravel can interfere with drainage behavior.
Use a suitable soil mix and address the actual drainage outlet rather than automatically adding rocks.
How to Set Up a Metal Raised Garden Bed on Concrete
A metal raised bed can be installed on concrete, pavers, or a patio, but the drainage and rooting conditions differ from those of a bed installed over garden soil.
Because roots cannot grow into the ground below, the bed needs enough growing-medium depth to support the intended plants.
Check the Surface Before Installation
Choose a stable, reasonably level location.
Consider whether water draining from the bed could stain the concrete or affect nearby structures.
Make sure excess water can move away safely.
Avoid positioning the bed where runoff could enter a doorway, basement, or other vulnerable area.
Provide an Effective Drainage Path
An open-bottom metal frame sitting directly on concrete may hold soil in place, but water still needs a clear route to escape.
Depending on the design, a suitable permeable base, manufacturer-approved support arrangement, or raised platform may be necessary.
A permeable fabric can help contain soil particles, but it doesn’t correct poor site drainage.
Don’t line the bottom with an impermeable sheet unless the structure has a properly designed drainage system.
Choose Enough Soil Depth
According to the University of Maryland Extension’s raised bed vegetable gardening recommendations, beds placed on hard surfaces can use at least 8 inches of growing medium for crops such as leafy greens, beans, and cucumbers. Tomatoes, peppers, and squash benefit from approximately 12–24 inches.
For a general-purpose contained vegetable bed, 18–24 inches provides more flexibility.
The same guidance recommends using a mixture of finished compost and soilless growing media for beds on hard surfaces, with limited topsoil added in sufficiently deep beds.
How Deep Should a Metal Raised Garden Bed Be?
Metal raised beds are available in several heights.
The best choice depends on the crops, growing surface, and preferred working height.
11-Inch Metal Raised Beds
An approximately 11-inch-tall metal bed can be useful for compact gardens.
It works particularly well when placed on suitable native soil because roots can extend below the frame.
Leafy greens, herbs, and many other vegetables can grow successfully in this arrangement.
However, a shallow metal bed with a solid bottom provides less growing volume.
17-Inch Metal Raised Beds
A 17-inch bed offers additional soil depth while remaining manageable for many gardeners.
This height is useful for growing a combination of leafy vegetables, peppers, bush beans, and other crops.
When the bottom is open, roots may extend into the native soil.
The larger growing volume can also help provide more moisture storage than a very shallow bed.
24-Inch Metal Raised Beds
A 24-inch bed provides substantial soil depth.
It can be practical for growing larger vegetables on hard surfaces or in areas where the native ground is unsuitable.
It also raises the planting surface, reducing the need for bending.
However, the additional depth increases soil costs and total weight.
32-Inch Metal Raised Beds
Extra-tall metal raised beds can improve access for gardeners who prefer a higher working surface.
However, filling a large 32-inch-deep bed requires substantial material.
These beds need a frame specifically designed to resist the pressure of the growing medium.
Don’t increase the height of a shorter modular kit by stacking additional panels unless the manufacturer approves the configuration.
What Is the Best Soil Mix for a Metal Raised Garden Bed?
Metal raised beds don’t require a special soil formulation simply because their walls are made from steel.
The appropriate mixture depends mainly on whether the bed has access to native soil and how the growing medium drains.
Topsoil and Finished Compost
For an open-bottom metal bed, a mixture containing approximately two-thirds suitable topsoil and one-third finished plant-based compost is a useful starting point.
Topsoil supplies mineral particles and structure.
Finished compost contributes organic matter and nutrients.
The exact proportions may need adjustment based on the materials and soil test results.
Avoid using poorly screened fill dirt containing construction debris or excessive stones.
Can You Use Potting Soil in a Metal Raised Bed?
Potting soil can be useful in contained planters, particularly when a lightweight medium is required.
However, filling a large open-bottom metal bed entirely with bagged potting mix can be expensive.
Some lightweight mixes also dry excessively and settle as organic components break down.
Choose a product intended for the specific growing system.
Should You Fill a Metal Raised Bed With Pure Compost?
No. Pure compost isn’t usually the best complete growing medium for a raised bed.
Compost composition varies, and large quantities can create nutrient imbalances or moisture-management problems.
Manure-based compost may contribute substantial phosphorus and soluble salts.
Use a suitable growing-medium mixture rather than assuming that more compost always improves plant growth.
How Much Soil Do You Need for a Metal Raised Garden Bed?
The amount depends on the bed’s interior dimensions and actual soil depth.
For a rectangular bed, use the following formula:
Soil volume (cubic feet) = Length (feet) × Width (feet) × Soil depth (inches) ÷ 12
To convert cubic feet into cubic yards:
Cubic yards = Cubic feet ÷ 27
For example, a 4 × 8-foot metal bed filled 17 inches deep requires:
4 × 8 × 17 ÷ 12 = 45.33 cubic feet
That equals approximately 1.68 cubic yards.
Soil Volume for Common Metal Raised Bed Sizes
| Bed Size | Soil Depth | Cubic Feet | Cubic Yards |
| 2 × 4 ft. | 12 inches | 8 | 0.30 |
| 4 × 4 ft. | 12 inches | 16 | 0.59 |
| 4 × 4 ft. | 17 inches | 22.67 | 0.84 |
| 4 × 8 ft. | 12 inches | 32 | 1.19 |
| 4 × 8 ft. | 17 inches | 45.33 | 1.68 |
| 4 × 8 ft. | 24 inches | 64 | 2.37 |
These calculations assume rectangular interior dimensions and soil filled to the stated depth.
Rounded or oval metal raised beds have different volumes.
For those designs, use the manufacturer’s interior measurements and calculate the correct shape volume.
Also account for any space left below the top rim.
How to Fill a Tall Metal Raised Garden Bed Without Wasting Soil
Tall metal raised beds can require substantial amounts of soil.
Some gardeners use lower layers of organic materials to reduce the quantity of purchased growing medium.
However, this approach needs careful planning.
Using Woody Materials in the Lower Section
Large branches, logs, and other woody materials are sometimes incorporated into deep growing beds.
This resembles certain Hügelkultur gardening methods.
The materials gradually decompose and may contribute organic matter over time.
However, woody layers can settle and create air pockets.
Fresh wood can also temporarily reduce nitrogen availability near the decomposing material.
For a first raised bed, a continuous layer of quality growing medium is usually simpler.
Maintain Enough Usable Soil Above Fillers
If you choose a layered filling system, preserve sufficient depth of suitable growing medium above the bulky material.
For a tall bed growing several types of vegetables, approximately 12–18 inches or more of continuous, suitable soil above the filler can be a useful planning target, depending on the crops.
A solid-bottom bed with restricted rooting depth may need substantially more usable soil.
Don’t count large logs or stones as equivalent to productive growing soil.
Expect Some Settling
Beds containing decomposing organic materials may settle over time.
Check the growing level between planting seasons.
Add suitable soil when necessary to maintain the desired depth.
Are Galvanized Metal Raised Garden Beds Safe for Vegetables?
Modern galvanized metal raised garden beds are generally considered suitable for vegetable gardening when they are manufactured from appropriate materials.
Galvanized steel has a protective zinc coating that helps resist corrosion.
Some zinc may move into nearby soil under certain conditions, particularly when the soil is strongly acidic.
The University of Minnesota Extension notes that zinc leaching can become a concern in highly acidic soils, especially below approximately pH 5.
However, ordinary vegetable garden soils are generally maintained at higher pH levels.
Check the Manufacturer and Coating
Choose a product intended for growing edible plants.
Ask the manufacturer about the metal and coating if the material specifications are unclear.
Some low-quality metal products may contain unwanted contaminants or coatings unsuitable for garden use.
Avoid repurposing metal containers with unknown chemical histories.
Do Metal Raised Beds Need a Plastic Liner?
Not necessarily.
A suitable modern galvanized metal bed generally doesn’t require a plastic liner against its walls.
However, some gardeners prefer a compatible sidewall barrier as an additional precaution.
If you install one, avoid blocking drainage.
A waterproof bottom can create waterlogging problems when the bed lacks an adequate drainage outlet.
Can Metal Raised Beds Rust?
Yes, galvanized steel can eventually corrode.
Its protective zinc coating delays rust formation but doesn’t make the material permanently immune to damage.
Deep scratches, damaged coatings, constantly wet contact points, and certain soil conditions may contribute to corrosion.
Inspect damaged areas and follow the manufacturer’s maintenance recommendations.
Do Metal Raised Garden Beds Get Too Hot?
Metal bed walls can become hot in direct sunlight.
However, the temperature of the growing soil depends on more than the wall material.
Color, metal thickness, soil volume, moisture, surrounding pavement, and sun exposure all affect heating.
Metal Wall Temperature vs. Soil Temperature
A metal panel may feel hot to the touch without the entire raised bed soil reaching the same temperature.
Heat moves from the wall into nearby soil, while moisture and the larger soil mass influence temperature changes.
A deep bed may behave differently from a shallow metal container.
Don’t assume that a hot exterior panel means the plant roots are experiencing the same temperature.
How to Reduce Heat Stress
In hot climates:
- Maintain suitable soil moisture.
- Use organic mulch around established plants.
- Avoid unnecessary exposure to reflected heat.
- Choose an appropriate bed depth.
- Select crops suited to the season.
- Check the soil during prolonged hot weather.
Light-colored metal beds may absorb less solar energy than darker finishes, although actual performance depends on surface properties.
Don’t rely on paint color alone to manage plant heat stress.
How to Install Irrigation in a Metal Raised Garden Bed
Metal raised beds can be watered using a hose, watering can, soaker hose, or drip irrigation system.
Drip irrigation is useful when you want to deliver water directly near the plant roots.
Using a Soaker Hose
Lay the hose across the growing area according to its watering pattern.
Keep it close to the intended root zones.
Avoid sharp bends that may restrict water flow.
Connect the hose according to the manufacturer’s instructions and monitor the soil to confirm moisture reaches the desired depth.
Installing Drip Irrigation
A basic drip system may include:
- Water supply connection
- Backflow prevention where required
- Pressure regulator
- Filter
- Distribution tubing
- Drip lines or emitters
- End fittings
Choose components compatible with your water source and the bed dimensions.
Follow local plumbing and backflow-prevention requirements where applicable.
Protect Tubing From Metal Edges
When routing irrigation tubing over the frame, protect it from sharp edges.
Use compatible clips or edge protection when needed.
Don’t drill through a finished metal panel simply to pass tubing unless the manufacturer approves the modification.
Damaging the protective coating can create a corrosion point.
Common Metal Raised Garden Bed Setup Mistakes to Avoid
Several installation mistakes can affect the frame’s safety and growing performance.
Assembling the Frame on Uneven Ground
A twisted or poorly supported frame may become unstable after filling.
Level the ground before installation and check the frame before tightening every connection.
Forgetting Support Braces
Long or tall metal beds may depend on internal bracing.
Without the required braces, the sides can bow outward under soil pressure.
Install the supports included in the approved configuration.
Leaving Sharp Metal Edges Exposed
Exposed sheet-metal edges can cause injuries during routine gardening.
Install the supplied protective edging and replace it if it becomes loose or damaged.
Overtightening Assembly Bolts
Excessive tightening can deform thin panels or damage their protective coatings.
Use the recommended hardware and tightening method.
Don’t assume more force means a stronger connection.
Filling the Bed With Poor-Quality Soil
A durable metal frame won’t compensate for compacted fill dirt, poorly decomposed organic matter, or unsuitable drainage.
Choose an appropriate growing medium and check its condition before planting.
Adding a Thick Gravel Layer for Drainage
Gravel isn’t a substitute for a proper drainage arrangement.
It can also reduce usable soil depth.
Focus on good soil structure and a clear path for excess water.
Ignoring Soil Volume Before Purchasing
Deep metal beds require large amounts of soil.
Calculate the volume using the actual interior dimensions.
Purchasing material before measuring the bed can lead to unnecessary costs or an incomplete installation.
Installing the Bed Over Contaminated Ground Without Separation
Open-bottom raised beds allow roots to reach underlying soil.
If the native ground is contaminated, a normal open-bottom installation may not provide adequate protection.
Use site-specific soil testing and an appropriate contained growing system with clean soil when necessary.
How to Maintain a Metal Raised Garden Bed After Installation
Metal raised beds generally require less decay-related maintenance than ordinary wooden beds, but they still need inspection.
Check the Bolts and Braces
Inspect structural connections periodically.
Look for loose hardware, damaged braces, or movement at panel joints.
Tighten fasteners according to the manufacturer’s instructions.
Inspect the Protective Coating
Check for scratches, rust spots, and other coating damage.
Use only compatible repair products recommended for the particular metal and coating.
Don’t apply unidentified chemicals to surfaces that contact vegetable-growing soil.
Maintain Soil Fertility
Raised bed soil can be used for many growing seasons.
Add appropriate organic matter and fertilizer based on soil conditions and crop requirements.
A laboratory soil test every few years can help identify nutrient and pH issues.
Avoid applying large amounts of compost automatically every season.
Monitor Watering and Drainage
Check moisture below the soil surface rather than judging only by appearance.
Metal raised beds may dry out relatively quickly, particularly when they are tall or installed on pavement.
Water deeply enough to reach the active root zone.
Avoid allowing the growing medium to remain saturated.
Keep the Bed Safe to Use
Inspect the protective edging and any exposed panel connections.
Replace loose or damaged edge guards.
Keep paths around the bed clear so you can access the plants without leaning heavily against the sidewalls.
Metal Raised Garden Bed Setup Checklist
Before planting, confirm that the installation is complete.
- The location receives sufficient sunlight.
- The ground is stable and reasonably level.
- Grass and weeds are controlled.
- The correct panel configuration has been assembled.
- All required bolts and connectors are installed.
- Cross braces are securely attached where required.
- Protective top edging covers exposed sharp metal.
- The frame is level and properly supported.
- Drainage is suitable for the installation surface.
- The soil mixture is appropriate for the intended crops.
- The correct soil depth has been maintained.
- The soil has been watered and checked for settling.
- Irrigation equipment is installed when needed.
- Seeds or transplants are spaced appropriately.
Completing these checks helps prevent avoidable adjustments after the bed is filled.
Conclusion
Understanding how to set up a metal raised garden bed starts with selecting a suitable location and assembling the frame according to its approved design.
Choose a level surface, connect the panels securely, install every required brace, and cover sharp upper edges with protective trim.
For beds placed directly on healthy garden soil, an open bottom usually provides good root access and natural drainage. Beds installed on concrete need a separate plan for drainage and sufficient growing depth.
Fill the frame with suitable soil rather than using unnecessary gravel or thick layers of unsuitable filler.
A properly assembled galvanized metal raised bed can provide a durable, manageable growing area for vegetables, herbs, and flowers.
The most practical approach is to follow the manufacturer’s assembly instructions, prepare the ground carefully, and establish a growing environment that supports healthy plant roots.
FAQs About How to Set Up a Metal Raised Garden Bed
Can I Put a Metal Raised Garden Bed Directly on Grass?
Yes. A metal raised bed can be installed over grass, but the existing vegetation should be removed or adequately suppressed.
You can remove the sod or use plain cardboard as a temporary weed-control layer. Persistent perennial weeds may require more thorough preparation.
Do Metal Raised Garden Beds Need a Bottom?
No. Most conventional metal raised beds are designed with open bottoms.
This allows plant roots to extend into suitable native soil and helps excess water move downward.
Beds placed on concrete or contaminated ground require additional consideration.
Do I Need to Drill Drainage Holes in a Metal Raised Bed?
Not if the metal raised bed has an open bottom over well-drained natural ground.
Contained metal planters with solid bottoms need appropriate drainage openings or another approved drainage arrangement.
Don’t drill into a prefabricated metal frame without checking the manufacturer’s instructions.
How Much Soil Do I Need for a 17-Inch Metal Raised Bed?
The quantity depends on the bed’s length and width.
A rectangular 4 × 8-foot bed filled to a 17-inch depth requires approximately 45.33 cubic feet, or 1.68 cubic yards of soil.
Calculate using the actual interior dimensions and planned fill depth.
Can I Put Logs at the Bottom of a Metal Raised Bed?
Yes, some gardeners use logs and branches in the lower sections of very tall beds.
However, woody material decomposes and settles over time. It can also temporarily affect nitrogen availability.
Leave enough continuous growing soil above the wood for the intended vegetables.
Do I Need to Line the Inside of a Galvanized Metal Raised Bed?
A liner is not automatically necessary for a suitable modern galvanized steel raised bed.
Some gardeners choose a sidewall liner as an additional precaution, but it should not interfere with drainage.
Check the material specifications if you’re unsure about the metal or coating.
Can One Person Assemble a Metal Raised Garden Bed?
Many small modular metal raised bed kits can be assembled by one person.
However, larger frames can be awkward to handle, and assistance may help prevent bending panels or damaging the structure.
Follow the manufacturer’s assembly instructions and use suitable protective equipment.
How Long Does a Metal Raised Garden Bed Last?
A quality galvanized steel raised bed can remain usable for many years, but the actual lifespan depends on coating quality, climate, soil conditions, and maintenance.
Inspect the frame periodically for corrosion, loose connections, and damaged protective edging.
There is no single guaranteed lifespan for every metal raised bed product.

I’m Maya L. Greenwood, a lifelong plant lover who believes anyone can grow something beautiful with the right guidance. After years of testing soil mixes, pruning methods, irrigation tricks, and pest-safe solutions, I started EasyGardenTips.com to turn hard-won lessons into step-by-step advice. From seed starting and container gardens to composting and seasonal checklists, my goal is to make gardening simple, sustainable, and fun.