How to Make Potting Soil at Home: Easy Recipes That Really Work
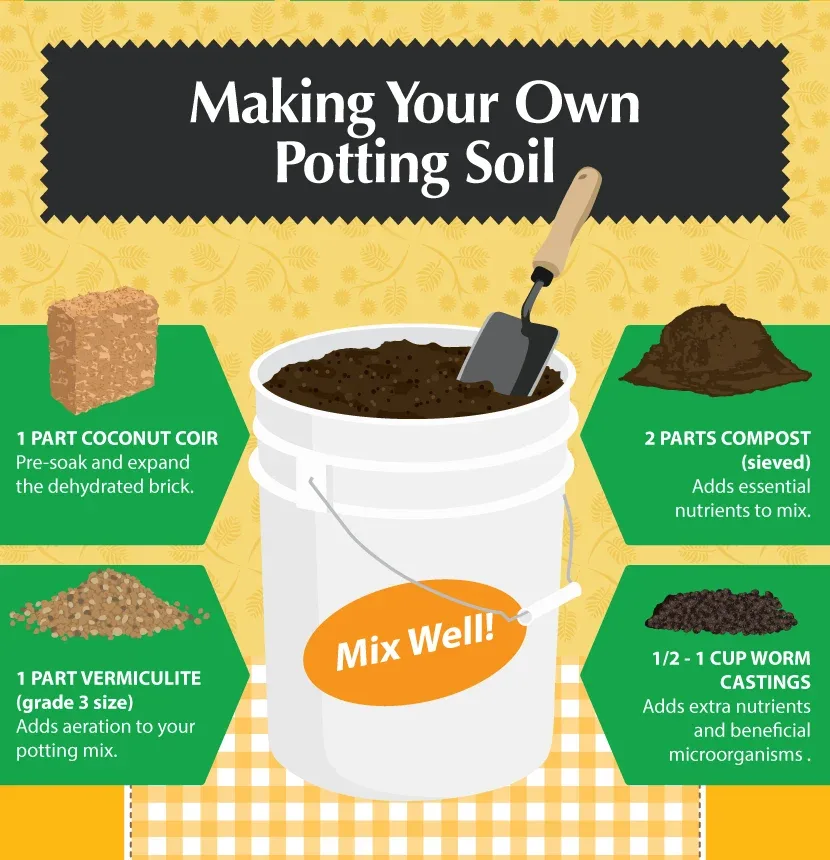
You can make potting soil by blending a moisture-holding base, airy materials, and mature compost or fertilizer in proportions suited to your plants. A simple all-purpose mix is 2 parts coir or peat moss, 1 part perlite or pumice, and 1 part finished compost.
Have you opened a bag of mix and found it packed like a brick, or watched a container stay soggy long after watering? Getting the texture and ingredients right can save you money and spare your plants a slow, frustrating start.
I once mixed a batch that looked rich and fluffy, then watered it and watched it slump into a dense, wet mass. I’d used too much fine compost and not enough coarse material, so the roots had little air; that’s a common mistake, not a dumb one.
I wrote this for anyone filling a few patio pots, starting seedlings, or trying to make a reliable mix without buying a different bag for every plant. You’ll get practical recipes, ingredient swaps, and ways to adjust a batch before it goes into your containers.
Get the balance right and you can make watering more predictable, give roots room to breathe, and reuse ingredients you already have. Get it wrong and you may deal with waterlogged roots, dry pockets, or containers that feel heavier than they need to be.
This takes about 16 minutes to read. By the end, you’ll know how to:
- Blend a dependable all-purpose potting mix from common ingredients.
- Adjust the recipe for seedlings, vegetables, succulents, and hanging baskets.
- Recognize when a homemade batch is too wet, too dense, or too light.
- Store the mix and avoid ingredients that can cause trouble.
How to Make Potting Soil with a Reliable Basic Recipe
To make a general-purpose potting mix, blend 2 parts coir or peat moss, 1 part perlite or pumice, and 1 part mature compost by volume. Moisten the dry base first, mix until the texture looks even, then check how water moves through it before filling every pot.
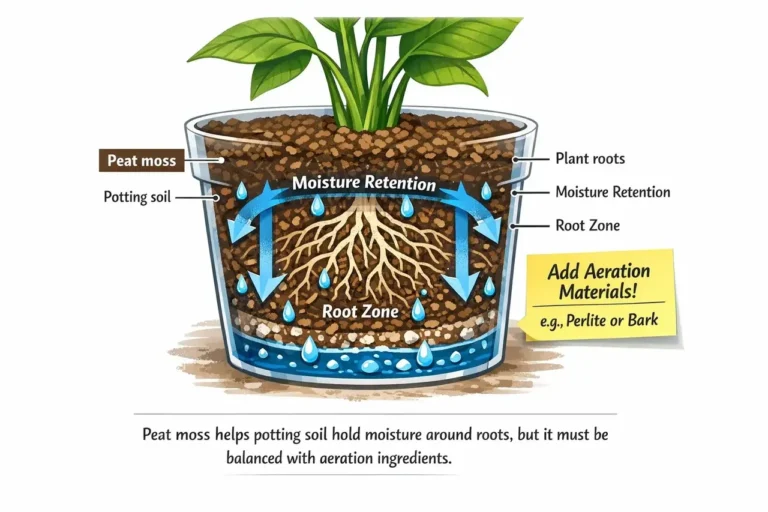
In a container, roots rely on you to provide both water and air. A useful mix holds enough moisture between waterings while leaving air spaces for roots to breathe, so the goal isn’t simply to make soil that feels rich or damp.
The recipe uses volume rather than weight because ingredients have different densities. A scoop, small bucket, or measuring container can serve as your “part,” as long as you use the same measure for each ingredient.
- Put on gloves and use a clean tub or wheelbarrow. If dry mix or perlite creates dust, dampen the materials lightly and avoid breathing the particles.
- Measure the base, airy material, and compost separately.
- Add water slowly to the coir or peat until it’s evenly damp, not dripping.
- Add the perlite or pumice and compost, then turn the mix from the bottom until the color and texture look consistent.
- Squeeze a handful. It should hold together briefly when pressed, then crumble when you touch it.
- Fill one test container, water it thoroughly, and watch whether water drains from the bottom without leaving the mix muddy.
Use a container with drainage holes. A layer of gravel at the bottom won’t fix a mix that drains poorly, and it can reduce the useful space available for roots.
The basic mix is a starting point, not a sacred formula. A thirsty tomato in a hot, windy spot may benefit from a little more moisture-holding base, while a cactus in a cool room needs more coarse material and less water-retentive compost.
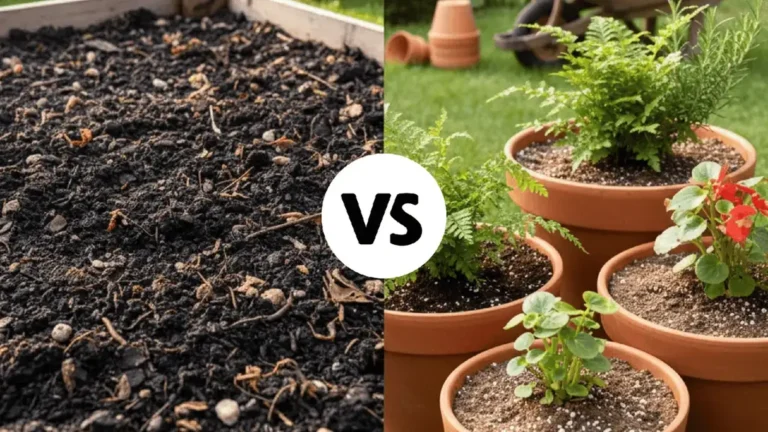
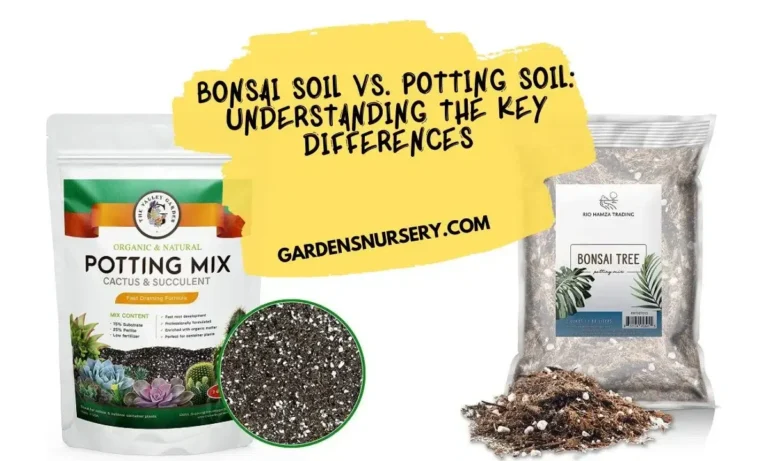
If you’re comparing homemade material with a packaged product, first get clear on what potting soil contains. Potting mixes are made for containers and differ from garden soil, which can become dense in a pot.
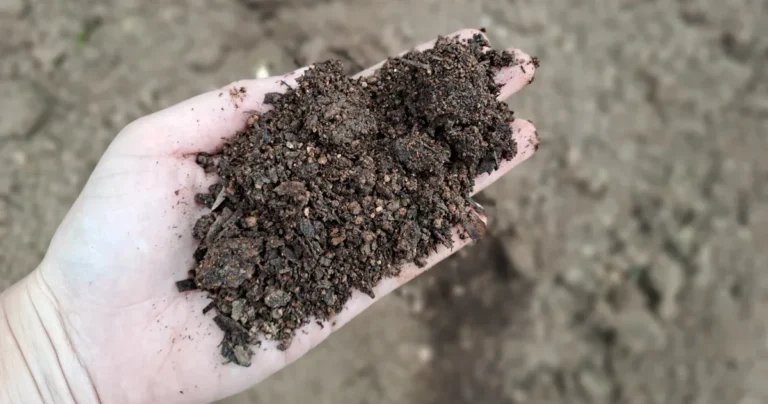
A good first batch should feel springy and loose, not slick or powdery. If it feels heavy before you water it, fix the texture now rather than hoping the roots will sort it out later.
What Each Potting Soil Ingredient Does
Every ingredient has a job: the base holds moisture, coarse materials create air space, and compost or fertilizer supplies nutrients. When you know what each part contributes, you can swap ingredients without turning a recipe into guesswork.
Coir is made from coconut husk fiber and is sold compressed or loose. It can hold water while still feeling relatively airy, though compressed coir needs thorough rehydration before you measure it; follow the package instructions because some products need rinsing.
Peat moss is a lightweight organic material that holds water and is commonly used in mixes. Dry peat can resist wetting, so moisten it gradually and mix well before adding the other ingredients.
Perlite is expanded volcanic glass, usually sold as small white pieces. It helps create drainage and air space without adding much weight, but fine dust can irritate your lungs, so handle it gently and keep it slightly damp.
Pumice is a porous volcanic rock used to add lasting air space. It’s heavier than perlite and doesn’t break down quickly, which makes it useful in pots that need a steadier, longer-lasting structure.
Finished compost adds organic matter and some nutrients, but its nutrient level and texture vary. Use compost that smells earthy and looks dark and crumbly, not material that’s hot, sour-smelling, or full of recognizable fresh scraps.
Bark fines are small pieces of aged bark that create a chunky structure. They can help mixes stay open, particularly for orchids and some woody plants, but large chunks aren’t a great fit for tiny seed cells.
Vermiculite is a lightweight mineral that holds water and nutrients. It can be useful for seed starting or plants that prefer even moisture, but a mix heavy in vermiculite may stay too wet in a cool or poorly lit spot.
Limestone may be used in some peat-based recipes to adjust acidity. Don’t add it by habit: coir, compost, and commercial ingredients vary, and the needs of your plant matter. A soil test or a recipe from a trusted growing guide is a better basis for adjusting pH.
Fertilizer is a separate decision from structure. Compost may provide some nutrients, but the amount depends on the compost and the plants you’re growing, so a measured, labeled fertilizer can make feeding more predictable.
| Ingredient | Main job | Good fit | Watch for |
|---|---|---|---|
| Coir or peat moss | Holds moisture | General container mixes | Dry material may need slow rewetting |
| Perlite | Adds air space, lightens mix | Seedlings, vegetables, many houseplants | Dust when dry |
| Pumice | Adds durable air space | Succulents, long-lived pots | Heavier and often coarser |
| Finished compost | Adds organic matter and nutrients | Vegetables, flowers, outdoor containers | Quality and nutrient levels vary |
| Vermiculite | Holds moisture and nutrients | Seed starting, moisture-loving plants | Can keep a mix too wet |
| Aged bark fines | Adds coarse structure | Orchids and woody plants | Large pieces don’t suit small cells |
When you read a label or recipe, compare the ingredients and their roles, not just the bag’s name. Terms like “potting soil” and “potting mix” are used inconsistently, so the ingredients tell you more about how the material is likely to behave.
Pro Tip: Keep a note of the recipe and your first watering results. If a batch drains too fast in your sunny porch pots, you can adjust the next one instead of trying to remember what went into the tub.
Homemade Potting Soil Recipes for Common Plants
A general mix suits many container plants, but seedlings, succulents, and moisture-loving plants don’t all want the same balance. Start with a basic recipe, then change one ingredient at a time so you can tell what helped.
All-purpose mix for flowers and leafy plants
Blend 2 parts coir or peat moss, 1 part perlite or pumice, and 1 part finished compost. Use this for many annual flowers, leafy houseplants, and patio plants, then adjust based on how quickly the container dries.
If the mix dries too quickly in a small pot, add a little more coir or peat. If it stays wet for days, increase the proportion of perlite or pumice rather than repeatedly watering on a fixed schedule.
Vegetable mix for containers
For tomatoes, peppers, and many other container vegetables, blend 2 parts coir or peat moss, 1 part compost, and 1 part perlite or pumice. Choose a large container with drainage holes, since a small volume of mix can dry quickly around a full-grown plant.
Vegetables need nutrients over a long growing season, so plan for feeding according to the fertilizer label and the crop’s needs. Extra compost isn’t a reliable shortcut: too much can make a mix heavy or lead to excess nutrients.
Seed-starting mix
For seed starting, try 2 parts coir or fine peat and 1 part fine perlite or vermiculite. Use clean containers and a fine, even texture so small seeds can stay in contact with the moist mix.
Seeds contain stored energy for germination, so a rich compost blend usually isn’t needed at the start. Once seedlings develop true leaves, their first leaves after the seed leaves, they’ll need appropriate light and eventually nutrients as they grow.
Succulent and cactus mix
Blend 1 part coir or peat moss with 2 parts pumice or coarse perlite as a starting point for many succulents. The mix should drain freely, and watering still needs to match the plant, pot size, light, and temperature.
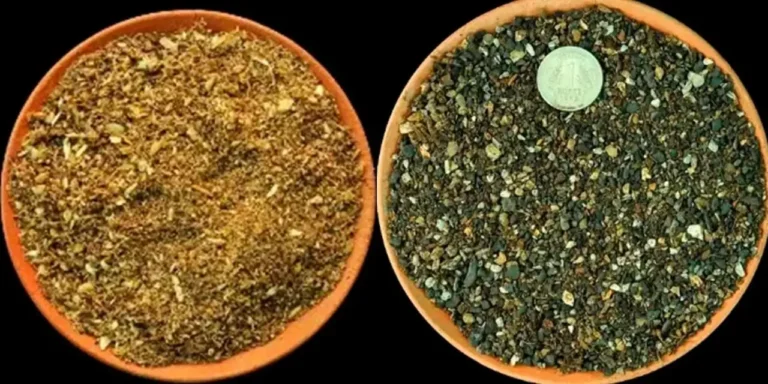
Some cactus mixes use coarse sand, but use horticultural-grade material rather than fine beach or play sand. Fine sand can pack into gaps and make the mix denser instead of improving drainage.
Orchid and chunky-root mix
Many epiphytic orchids grow in a coarse bark-based medium rather than a fine potting mix. A simple starting blend can include aged bark with a smaller amount of perlite or pumice, but the right texture depends on the orchid type, pot, and growing conditions.
Don’t bury exposed roots in a dense, wet mix just because it looks tidy. A root system that needs air won’t thank you for a tightly packed pot.
Lightweight mix for hanging baskets
To make a lighter mix, choose coir as the base and use perlite or a modest amount of pumice to add air space, while keeping heavy compost to a small share. The container still needs enough moisture-holding material to avoid drying out after a warm afternoon.
A lightweight recipe is useful when you have to lift or hang the pot, but going too light can mean more frequent watering. The practical balance depends on the basket’s size, sun exposure, and how often you can check it; the lightweight potting soil recipe needs to suit those conditions.
A strong basic mix is not always the cheapest route if you’re filling many large containers. If you’re trying to trim the bill, compare budget-friendly potting mix options and use the recipe that fits your plants rather than choosing ingredients by price alone.
How to Mix, Moisten, and Test a Batch
Mixing order matters because dry peat or coir can resist water, and dry perlite can create irritating dust. Moisten the base first, combine the ingredients evenly, and test a small amount before committing the batch to all your pots.
- Choose a clean mixing space. A large tub, wheelbarrow, or tarp works; remove old roots and debris first.
- Dampen the base. Add water in small amounts to coir or peat while turning it over. Aim for the feel of a wrung-out sponge, not mud.
- Measure the other ingredients. Use the same container for each “part,” and keep the ingredients loose rather than tamping them into the measure.
- Blend thoroughly. Turn the mix several times, breaking up clumps by hand while wearing gloves.
- Test the texture. A handful should hold briefly under pressure, then fall apart with a light poke.
- Test drainage. Put mix in a pot with drainage holes, water it evenly, and check how quickly excess water leaves the bottom.
- Adjust in small amounts. Add more coir or peat if it dries too fast; add more perlite or pumice if it stays dense and wet.
Don’t squeeze or pack mix hard around roots. Fill the container loosely, set the plant at the right depth, and water to settle the mix; add a little more if the surface drops, but leave room at the top for watering.
When I first started batching mixes in a large tub, I found that the ingredients at the bottom were wetter and finer than those at the top. Turning the mix from the bottom up fixed the uneven texture and stopped some pots from drying while others stayed soggy.
If you want a mix with a softer, more soil-like feel, the term loamy potting soil generally points to a balanced, crumbly texture rather than a guaranteed ingredient recipe. A balanced loamy mix can still need extra drainage material for small pots or plants that dislike wet roots.
Water behavior gives you a useful test, but it doesn’t replace checking the plant. A container in bright sun can dry much faster than the same mix in a dim room, so test where the pot will actually live.
Adjust the Recipe for Organic, Garden Soil, and Budget Needs
You can adapt a homemade recipe to organic inputs, garden soil, or a tight budget, but each choice changes the mix’s weight, drainage, or nutrient supply. Keep the basic goal in view: roots need moisture, air, and suitable nutrition.
Making an organic mix
For an organic-style mix, choose ingredients sold and labeled for organic gardening, such as coir, finished compost, and suitable natural amendments. Product standards and allowed inputs can vary, so check the label if organic certification matters to you.
A simple starting point is 2 parts coir, 1 part perlite or pumice, and 1 part finished compost. Don’t assume “organic” means the mix can’t burn roots or cause other issues; manure-based compost and concentrated amendments still need careful handling and sensible amounts.
Mixing at home gives you control over the ingredients, but it doesn’t automatically make a batch organic. If that matters for a garden or business, check the applicable certification rules and product labels before making claims.
Using garden soil carefully
Garden soil can be heavy and may bring weed seeds, pests, or plant disease into a container. A small amount may work in some outdoor container recipes, but straight garden soil often compacts in pots and can block the air spaces roots need.
If you’re asking how garden soil behaves in pots, the key issue is structure: a garden bed has a much larger volume around roots than a container does. Don’t collect soil from a spot with disease problems, standing water, or a history of pesticide use you can’t verify.
Avoid trying to “sterilize” a large batch in a household oven. Heating soil can create unpleasant odors and may not reliably solve every contamination problem; for containers, a fresh, purpose-made mix is usually the safer, simpler choice.
Keeping costs down without making a poor mix
Home mixing can cost less when you’re filling many containers and can buy ingredients in useful quantities. It may cost more for a couple of small pots if you need to buy several bulky materials, and storage space and leftover ingredients matter too.
To lower the price, compare ingredient costs per usable volume, not just the sticker price. A compressed coir block expands after water is added, while a bag of lightweight amendment can take up plenty of shelf space.
You can also use a simpler recipe with fewer ingredients, such as coir, perlite, and a modest amount of finished compost. If you have only a few pots, ready-made lower-cost potting soil choices may be cheaper than buying every ingredient separately.
Is it cheaper to mix your own? Usually, the answer depends on how much you need, which ingredients you already own, and whether you can use the leftovers before they degrade or get contaminated. A homemade mix cost comparison should include your time and unused material, not just the cost of one bag.
Important Tip: Don’t use fresh manure or unfinished compost to make a quick bargain batch. Unfinished materials can be too strong for roots and may keep breaking down after planting.
Common Potting Soil Problems and How to Fix Them
A potting mix that behaves badly usually needs a change in texture, watering, or container setup. Diagnose the cause before adding anything, because a soggy pot and a thirsty pot can look similar from the surface.
| What you notice | Likely cause | What to change |
|---|---|---|
| Water sits on top | Dry peat, compacted surface, or fine ingredients | Rewet slowly, loosen the surface gently, or add coarser material to the next batch |
| Mix stays soggy | Poor drainage, oversized pot, or too much watering | Check drainage holes, let the mix dry as suited to the plant, and improve the next batch |
| Mix dries very fast | Small pot, hot conditions, or too much coarse material | Add moisture-holding base and adjust watering to the plant’s conditions |
| Pot feels too heavy | Dense soil, excess compost, or a large container | Use a more open mix and avoid garden soil in future batches |
| White crust appears | Mineral buildup from water or fertilizer | Remove the crust, review fertilizer use, and flush only if the plant and pot drain well |
| Seedlings wilt in wet mix | Roots may lack air or may have damage | Check the roots and drainage; don’t add more water just because leaves droop |
If water beads and runs down the sides of a dry peat-based pot, add water in small passes rather than dumping a large amount on top. Dry peat can be hard to rewet, and a slow soak gives the material time to take up moisture.
If the mix is wet and the plant looks wilted, pause before watering again. Check the drainage holes and feel below the surface; roots short of air can droop even when the pot is soaked.
Yellow leaves have several possible causes, including watering stress, low nutrients, unsuitable light, and root problems. Don’t dump fertilizer into a struggling plant without checking the mix and growing conditions first, since extra salts can make root stress worse.
A sour smell, persistent waterlogging, or mushy roots calls for a closer look at the container and plant. Remove badly damaged roots with clean tools, replace the mix if it smells rotten or has clear contamination, and use a clean pot with open drainage.
White mineral crust on the pot surface can come from fertilizer or minerals in irrigation water. Scrape away the crust and check how often you feed; changing the mix alone won’t help if the same buildup keeps returning.
Store Homemade Potting Mix Safely
Store unused potting mix in a clean, covered container in a dry place, and keep it separate from garden soil, plant debris, and chemicals. The aim is to keep the mix usable without trapping excess moisture or inviting pests.
Let a batch that feels overly wet air out before storing it. A sealed container full of damp mix can develop unpleasant odors or support unwanted growth, while a loose lid or breathable cover helps the material dry without collecting debris.
Label the container with the ingredients and mixing date if you make several recipes. That small note is handy when you’re reaching for a seed-starting blend and don’t want to scoop from the succulent mix by accident.
Don’t keep a contaminated batch just because you spent time making it. If the mix contains diseased roots, pest-infested debris, or a strong rotten odor, discard it responsibly rather than spreading the problem to healthy containers.
Unused ingredients need their own care. Keep perlite and coir dry and covered, close compost containers against pests, and follow each product label for storage directions.
FAQs About How to Make Potting Soil
Can I make potting soil without perlite?
Yes, you can replace perlite with pumice or another suitable coarse ingredient that creates air space. The best substitute depends on the plants and how heavy you want the pot to be. Don’t use fine sand as a direct swap, since small particles can make a mix denser.
Can I use compost as potting soil?
No, compost alone usually isn’t a dependable potting mix because it can hold too much water, settle, or provide nutrients at levels that vary by batch. Blend finished compost with a moisture-holding base and an airy ingredient, then watch how the mix drains in the actual container.
Should homemade potting soil include fertilizer?
Not always; finished compost may provide some nutrients, but the amount depends on its source and condition. For plants that need regular feeding, use a fertilizer labeled for the crop and follow its directions. Avoid adding extra fertilizer just to make a new mix seem richer.
How wet should potting soil be before planting?
Homemade potting mix should feel evenly damp, like a wrung-out sponge, before planting. A squeezed handful may hold together briefly but should crumble when touched. If water drips from your fist or the mix feels sticky, let it drain or add dry ingredients before filling pots.
Can homemade potting soil be reused?
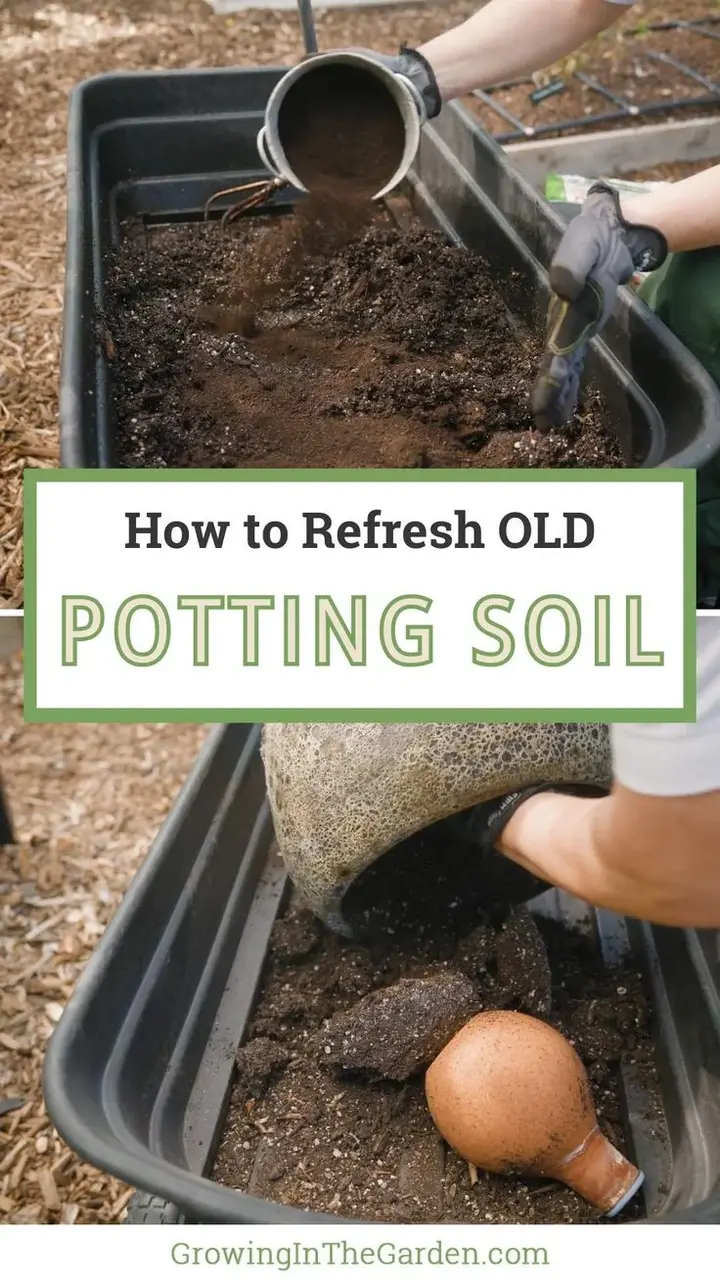
Yes, sometimes, if the previous plants were healthy and the mix hasn’t become contaminated, compacted, or sour-smelling. Remove roots and debris, refresh the structure with suitable airy material, and account for depleted nutrients. Replace mix from a diseased or pest-infested plant rather than risking a repeat problem.
Make a Small Batch, Then Tune It
The best homemade potting soil is the mix that suits your plant, container, and watering habits, not the recipe with the longest ingredient list. Start with a small batch of coir or peat, an airy amendment, and finished compost, then check the texture and drainage before making more.
I’d rather make a modest adjustment after a test pot than fill a whole patio with a mix that stays wet for a week. That little pause can save you from replanting, wasted ingredients, and the familiar worry of watching a healthy plant wilt in soggy soil.
Your next step is simple: choose one plant you’re potting, make a small batch for its needs, and test it in a container with drainage holes. Once you see how it holds water in your space, you’ll have a recipe you can repeat with confidence.

I’m Maya L. Greenwood, a lifelong plant lover who believes anyone can grow something beautiful with the right guidance. After years of testing soil mixes, pruning methods, irrigation tricks, and pest-safe solutions, I started EasyGardenTips.com to turn hard-won lessons into step-by-step advice. From seed starting and container gardens to composting and seasonal checklists, my goal is to make gardening simple, sustainable, and fun.