
5 Best Potting Soil for Container Vegetables: Mixes Gardeners Love
A container garden can stall before you get a single tomato if the soil packs down, dries too quickly, or holds water around the roots. Buy a bag that is too small and you may run short halfway through planting; buy a mix that needs more feeding than you expect and your routine gets complicated fast. Choosing soil by the front-of-bag promises alone can leave you guessing at exactly the point you wanted gardening to feel simple.
For vegetables in pots, the mix needs to let extra water drain while staying moist enough between waterings; garden dirt from the yard is usually too dense for that job. Feeding matters, too, since a small container has less soil to hold nutrients than a garden bed, and the fertilizer already in a mix affects when you need to add more. Bag size is easy to overlook, so estimate how many containers you’ll fill before choosing a small or multi-bag option.
Here’s what this guide will help you sort out:
- Match a bag’s volume and feeding window to your containers.
- Understand coir, peat, and moisture-control ingredients in plain terms.
- Prepare a pot and soil without compacting the roots.
- Avoid common watering and feeding mistakes that trip up new growers.
Quick Picks
-
Best For Outdoor Organic Mix

Miracle-Gro Organic Outdoor Potting Mix, 16 qt.
Quick-release natural fertilizer feeds outdoor container plants for up to two months, helping new growers start with fewer early feeding decisions.
-
Best For Longer Feeding Window

Miracle-Gro Potting Mix, 16 qt. (2-Pack)
Two 16-quart bags feed containers for up to six months, suiting gardeners filling several pots or wanting fewer fertilizer reminders.
Top 5 Potting Soils for Container Vegetables at a Glance
Start with Miracle-Gro Organic if you want an outdoor mix with a short, clearly stated feeding window, or look at Miracle-Gro Potting if you need more volume and longer feeding. The other choices differ mainly in bag size, moisture ingredients, and how concentrated or peat-free the mix is, so think first about the number of pots and the care routine you want.
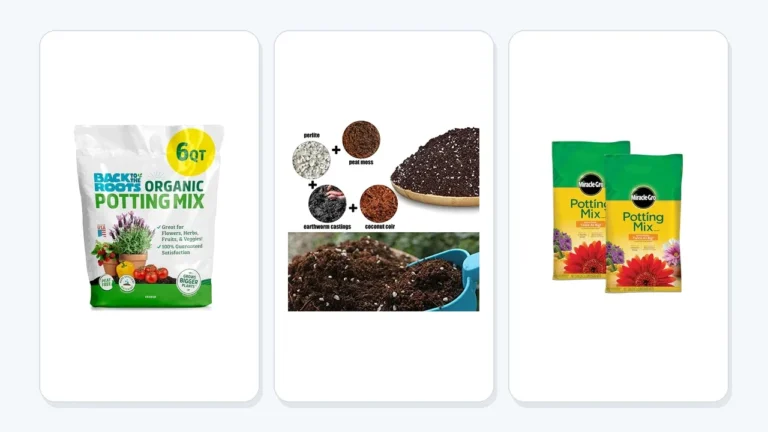
| Product image | Product name | Check product |
|---|---|---|
| 1 |
Miracle-Gro Organic Outdoor Potting Mix, 16 qt. | Check Price |
| 2 |
Miracle-Gro Potting Mix, 16 qt. (2-Pack) | Check Price |
3 |
Burpee Premium Organic Potting Mix Garden Soil | Check Price |
4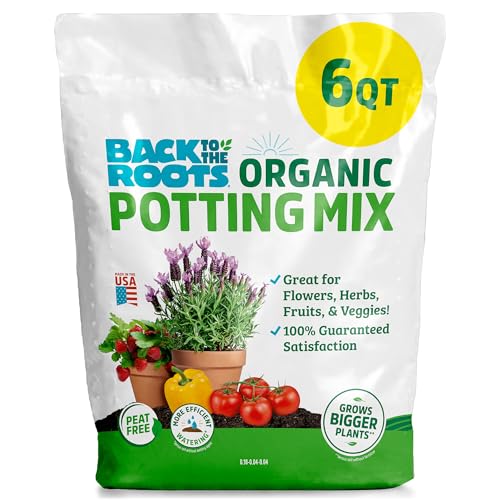 |
Back to the Roots Organic Potting Soil, | Check Price |
5 |
Compressed Organic Potting Soil for Garden, Plants | Check Price |
5 Best Potting Soils for Container Vegetables: Detailed Reviews
When I chose the best potting soil for container vegetables, I focused on what affects a beginner’s day-to-day results: how the mix handles moisture, what its feeding window says, how much soil comes in the bag, and whether its ingredients suit the way you plan to grow. Those details can help prevent soggy roots, surprise fertilizer chores, and running out of mix while a plant waits in its nursery pot.
The picks include familiar outdoor mixes, a smaller coir blend, a peat-free option, and compressed soil that expands after watering. Looking at those differences together makes it easier to match a bag to your space and routine rather than assuming every potting mix works the same way.
1. Miracle-Gro Organic Outdoor Potting Mix, 16 qt.
Quick-release natural fertilizer feeds outdoor container plants for up to two months, helping new growers start with fewer early feeding decisions.
- Colorbrown
- Size16QT
- Number Of Items1
- COVERAGEOne 16 qt. bag of Miracle-Gro Organic Outdoor Potting Mix fills one 12-inch pot with garden soil for containers (am
Miracle-Gro Organic Mix is an outdoor potting mix for someone planting vegetables, herbs, or flowers in containers and wanting fertilizer included from the start. Its 16-quart bag is listed as enough to fill one 12-inch pot, though the amount can vary with the size of the root ball.
The mix uses peat moss, a lightweight material that helps create a looser growing medium than ordinary yard soil. In a pot, that lighter texture can make filling and planting easier, while responsibly sourced peat is the feature to note if you’re comparing ingredient choices. The product information says all peat is sourced from certified producers, but that statement doesn’t tell you how the mix will perform in your own container.
A quick-release natural fertilizer is fertilizer intended to become available to plants soon after planting. The mix is described as feeding plants for up to two months, giving you a simple starting window before you need to consider additional feeding. That’s useful if a separate fertilizer schedule feels like one more thing to remember, but it doesn’t mean every vegetable needs the same feeding plan for its entire growing season.
Pros:
- Natural fertilizer included, so feeding starts with the mix.
- Up to two months of feeding, giving you a clear starting window.
- Peat moss creates a lightweight potting medium.
- Suitable for outdoor container vegetables, herbs, and flowers.
- 16-quart bag is sized for a 12-inch pot.
Cons:
- One bag may not cover several large containers.
- Outdoor use is the stated fit, not indoor planting.
- You’ll need to plan feeding after the stated two-month window.
Buy it if: you’re filling an outdoor vegetable pot and want natural fertilizer already included for the first part of the growing season.
Skip it if: you need soil for indoor plants or several big containers, because a single outdoor-use bag may not fit your planting plan. For another fit, consider Miracle or Burpee.
I’d pick Miracle-Gro Organic Mix if a clear first feeding window matters more to you than buying a larger amount at once. The peat-based mix is aimed at outdoor container use, and the stated coverage gives you a useful planning reference. Check the bag size and the ingredient details before ordering, especially if you’re trying to avoid peat.
This is a sensible fit for a beginner planting one or a few outdoor pots.
2. Miracle-Gro Potting Mix, 16 qt. (2-Pack)
Two 16-quart bags feed containers for up to six months, suiting gardeners filling several pots or wanting fewer fertilizer reminders.
- ColorMulticolor
- Size2-Pack
- Number Of Items1
- COVERAGEThis bundle includes two 16 qt. bags of Miracle-Gro Potting Mix, an outdoor potting soil; each bag fills one 12-inc
Miracle-Gro Potting Mix is an outdoor container mix sold here as two 16-quart bags, making it a practical choice if you’re filling more than one pot. Each bag is described as enough for one 12-inch container, with the final amount depending on the root ball size.
The standout detail is the stated feeding window, the period the mix is intended to provide plant food. This mix feeds outdoor potted plants for up to six months, which can reduce the number of early fertilizer decisions you need to make. Treat that as a starting point, not a guarantee that every plant, climate, or watering routine will use nutrients at the same rate.
Miracle-Gro Potting Mix is listed for vegetables, herbs, flowers, shrubs, and other outdoor containers. The instructions say to fill a pot about one-third full, place the plant, then add mix and press lightly; gentle pressure helps settle soil without turning it into a hard, compressed block. The bundle’s volume is helpful, though two bags take more storage space than a single small bag.
Pros:
- Two 16-quart bags, so you can fill multiple containers.
- Up to six months of feeding for outdoor potted plants.
- Listed for vegetables, herbs, flowers, and shrubs.
- Each bag is sized to fill a 12-inch pot.
- Simple planting directions give beginners a clear starting method.
Cons:
- The two-bag bundle needs more storage space.
- The stated use is outdoor containers.
- A longer feeding window may not match every plant’s needs.
Buy it if: you’re planting several outdoor containers and want a larger supply with a longer stated feeding window.
Skip it if: you have only one small pot or want an indoor-specific mix, because the bundle and outdoor focus may be more than you need. Miracle and Burpee are worth a closer look instead.
What I like about Miracle-Gro Potting Mix is the useful combination of volume and a clearly stated feeding period. It earns its place for people who are starting several outdoor pots and don’t want to shop for soil one container at a time. Check that you have room to store the second bag and read the feeding guidance for your particular vegetables.
It suits a gardener who wants a straightforward multi-pot setup.
3. Burpee Premium Organic Potting Mix Garden Soil
The catalog lists SUPPORTS VIBRANT GROWTH: Transform your garden with our premium indoor/outdoor potting soil! This nutrient-ric. Compare fit and care needs before choosing.
- ColorPotting Mix
- Size9 Quart
- Number Of Items1
- WeightNot listed; check details
Burpee Premium Organic Potting Mix is a smaller coir-containing blend for a gardener who wants one bag for vegetables, herbs, or flowers in containers. The 9-quart size may suit a small planting job, but it can run short quickly if you’re filling several deep pots.
The mix contains coco coir, a material made from coconut husk fibers that helps hold moisture while allowing air and water to move through the mix. That balance can be handy in a container, where a pot may dry faster than a garden bed but still needs water to drain away. The product information says the coir helps with drainage and moisture retention; still, a pot’s drainage holes and your watering habits matter just as much.
Burpee says the mix feeds plants immediately and provides slow-release nutrition for up to three months. Slow-release nutrition means nutrients are intended to become available over time rather than all at once, which can make feeding less frequent during that period. The mix is also described for indoor and outdoor use, but a vegetable grown indoors still needs suitable light and a container with drainage.
Pros:
- Coco coir helps the mix retain moisture while supporting drainage.
- 9-quart bag offers a smaller amount for limited planting.
- Listed for vegetables, herbs, and flowers.
- Intended for indoor and outdoor containers.
- Nutrition is described as lasting up to three months.
Cons:**
- Smaller bag may not fill multiple large pots.
- Coir helps with moisture but doesn’t replace checking the soil.
- Indoor vegetables still need enough light and a draining container.
Buy it if: you need a smaller container mix with coco coir and want a stated feeding period of up to three months.
Skip it if: you’re filling a large patio garden, because a 9-quart bag may not stretch far enough for your containers. If those trade-offs rule it out, Miracle-Gro Organic Outdoor Potting Mix, 16 or Miracle-Gro Potting Mix, 16 qt. (2-Pack) may suit you better.
I’d look at Burpee Premium Organic Potting Mix for a small planting project where the coir’s moisture balance is appealing. It gives you indoor and outdoor flexibility, plus a feeding period that’s easy to understand. The main thing to double-check is the bag volume against your pot sizes; “small bag” can mean a second trip to the store if you’re filling deep containers.
This is the pick for a modest setup, not a long row of large planters.
4. Back to the Roots Organic Potting Soil,
The catalog lists Includes 6qt of Back to the Roots Premium Blend Potting Mix. 100% Organic and Peat-Free, made from upcycled pl. Compare fit and care needs before choosing.
- ColorPremium Potting Mix
- Size6 Quart
- WeightNot listed; check details
- DimensionsNot listed; check details
Back to the Roots Organic Potting Soil is an all-purpose, peat-free mix for someone who wants to grow vegetables, herbs, fruit, or flowers in a small number of pots. The 6-quart bag is compact, so check the volume before choosing it for a large container garden.
The mix is described as peat-free and made from upcycled plant matter and wood fines. Wood fines are small pieces of wood included in a growing mix; the product description doesn’t give a specific texture or drainage measurement, so check the bag details if those are central to your choice. It also includes yucca extract for moisture control, which is intended to help the soil handle water more evenly.
The blend includes dolomitic limestone for pH balancing. pH describes how acidic or alkaline a growing medium is, and it can affect how readily plants take up nutrients; the ingredient is included to help manage that balance. This is a useful ingredient note, not a promise that every pot will have an exact pH, so follow the care advice for the vegetable you’re growing.
Pros:
- Peat-free blend for gardeners avoiding peat-based mix.
- Made with upcycled plant matter and wood fines.
- Yucca extract is included for moisture control.
- Dolomitic limestone is included for pH balancing.
- Listed for vegetables, herbs, fruit, and flowers.
Cons:
- 6-quart bag is a small amount for multiple pots.
- No specific feeding duration is given in the product details.
- The ingredient list doesn’t state a measured pH value.
Buy it if: you want a peat-free mix for a small container garden and value the stated moisture-control and pH-balancing ingredients.
Skip it if: you need a larger supply or want a stated feeding schedule, because the 6-quart size and available nutrition details may leave you wanting more information.
To me, the most useful feature of Back to the Roots Organic Potting Soil is its peat-free composition paired with a clear list of moisture and pH ingredients. The smaller bag makes it easier to try in a limited planting area without storing a bulky reserve. Check the volume against your container and look for any feeding directions you’ll need to follow later.
It’s a reasonable match for a small patio or herb-and-vegetable setup where peat-free matters.
5. Compressed Organic Potting Soil for Garden, Plants
The catalog lists A LITTLE DOES A LOT – Easy to use compressed soil granules quickly expand up to 4X and make up to 3 gallons of. Compare fit and care needs before choosing.
- SizeOne 2 lb Bag
- Number Of Items1
- WeightNot listed; check details
- DimensionsNot listed; check details
Compressed Organic Potting Soil is a compact mix for gardeners who want to carry and store less material before planting. The 2-pound bag is described as expanding up to four times when mixed with water and making up to three gallons of soil.
The compressed format contains coconut coir and worm castings, which are material from worms used as an organic soil ingredient. The mix also lists compost, kelp, and other ingredients, but the key practical difference is that you need to add water and allow the material to expand before filling a pot. The directions say to use a one-to-one ratio of water to compressed soil, so prepare it in a container large enough to hold the expanded mix.
The product description says the expanded soil stays moist three times longer and can be used on its own or blended one part mix to two parts other soil. Those are product claims, not a guarantee that a pot won’t need watering; hot sun, wind, pot material, and plant size all change how quickly soil dries. A resealable bag is also described, which can help keep the unused compressed material together between planting jobs.
Pros:
- Compact 2-pound bag is easier to carry and store.
- Expands up to four times when mixed with water.
- Makes up to three gallons, according to the product details.
- Coconut coir and worm castings are listed ingredients.
- Can be used alone or blended with other soil.
Cons:
- Requires water and preparation before planting.
- Expanded volume is limited to up to three gallons.
- Moisture claims don’t remove the need to check pots.
Buy it if: you want a compact bag that expands after watering and have a small planting job or storage space to save.
Skip it if: you want ready-to-use soil straight from the bag, because this compressed mix needs preparation before you can fill a pot.
I’d consider Compressed Organic Potting Soil when storage space is tight and a smaller bag is easier to handle than a bulky one. The expansion directions are clear, and the listed ingredients make the blend’s intended use easy to understand. Double-check how much expanded soil your pots need, because “up to three gallons” may not cover a large planter.
This pick suits a small container or a gardener who likes preparing the mix before planting.
How to Choose the Best Potting Soil for Container Vegetables
The best choice depends on your pot size, the kind of vegetables you’re growing, and how often you’re willing to water and feed. Before choosing among the best potting soil for container vegetables, measure your containers and read the bag’s stated use and feeding information; volume and care needs matter more than a grand promise on the front.
Start with the right amount of mix
Bag volume is usually shown in quarts, while container capacity may be listed in gallons or by dimensions. A quart is a measure of volume, and four quarts make one gallon; that gives you a rough way to compare a bag with a pot, though the root ball and the space left at the top affect the amount you’ll use.
Check the product’s stated coverage when it gives one, then compare it with your pot. Miracle-Gro Organic Mix says a 16-quart bag fills one 12-inch pot, while Miracle-Gro Potting Mix gives the same estimate for each 16-quart bag. For other containers, use the dimensions or capacity printed on the pot and buy enough mix to fill without packing it down.
A wide, deep container needs more soil than a small herb pot, even if both hold one plant. If you’re growing more than one vegetable, allow space for the root systems and mature plant size rather than crowding seedlings together to stretch a bag. For the broader choices involved in selecting a mix for pots and planters, see container gardening soil choices.
Match the mix to the plant and location
Check whether the bag is intended for outdoor containers, indoor plants, or both. Several mixes here name outdoor container use, while Burpee and Back to the Roots describe indoor and outdoor use; that difference helps narrow the choice, but it doesn’t provide the light, drainage, or temperature a vegetable needs.
Large fruiting vegetables such as tomatoes need a pot with enough room for roots and a place where excess water can escape. A soil bag alone can’t make an undersized pot suitable, so check the plant’s mature size and pot requirements before filling a container. If tomatoes are the main crop, compare the container-specific considerations in tomato potting soil guidance.
Herbs and smaller vegetables may fit a compact planter, but herbs don’t all want the same watering routine. A mix that holds moisture can help in a sunny location, while a pot that stays wet may be a poor match for a plant that prefers to dry a little between waterings. For pots devoted to culinary herbs, use herb pot soil advice to think through the smaller-container trade-offs.
Understand fertilizer already in the bag
Some potting mixes include fertilizer and state how long it is intended to feed plants. Miracle-Gro Organic Mix states up to two months, Miracle-Gro Potting Mix up to six months, and Burpee up to three months; those periods give you a planning starting point, not a substitute for checking plant growth or the product’s directions.
If a bag doesn’t list a feeding duration, don’t assume it feeds for a particular number of weeks. Read the package before adding more fertilizer, since doubling up without checking directions can make your care routine harder and may not suit the plant. Keep a note of the planting date and the mix’s stated feeding period so you know when to review the instructions again.
Choose ingredients for the job they do
Peat moss and coconut coir are common ingredients that can help keep a mix light and hold moisture. Coir comes from coconut husks, while peat is a different material; each ingredient’s presence alone doesn’t tell you how much water a finished mix will hold or how quickly it will drain.
If avoiding peat is a priority, look for that phrase on the bag, as Back to the Roots specifically describes its mix as peat-free. If you’re considering making a blend yourself, the proportions and ingredients need to suit containers, not just a garden bed; making potting soil for vegetables can help you compare that approach with a ready-made bag.
Check the drainage and watering plan
A useful container mix should allow extra water to drain while keeping enough moisture around the roots between waterings. The pot must have drainage holes, and water should be able to leave them; no bag ingredient can compensate for a container that traps water at the bottom.
Think about where the pot will sit. A dark pot in full sun, a windy balcony, and a shaded porch can dry at different rates, so there isn’t one watering schedule that suits every container. If your priority is tomatoes in a patio pot, the considerations for soil for tomatoes in pots are worth checking alongside the pot’s size and drainage.
Decide what convenience is worth to you
A ready-to-use mix is faster to plant with, while compressed soil takes preparation but stores in a smaller bag. A multi-bag bundle can be convenient for several pots but needs storage room; a small bag avoids excess but may not cover the plan.
There’s no need to pay for a feature you won’t use. Decide whether you value a longer stated feeding window, peat-free ingredients, a coir blend, or compact storage, then confirm the bag’s volume and directions before buying.
How to Use Potting Soil for Container Vegetables for the Best Results
Start with a clean container that has drainage holes, then fill it loosely with mix and water it thoroughly after planting. Keep the plant’s needs and the bag directions in view; a careful first setup makes later watering and feeding easier to judge.
- Check the pot. Make sure the container has open drainage holes and enough room for the mature plant. A saucer can catch runoff, but don’t leave the pot sitting in standing water.
- Estimate the soil needed. Compare pot capacity with bag volume before opening every bag. Leave space near the rim so watering doesn’t wash mix over the edge.
- Prepare compressed soil first. If using the compressed option, follow its water ratio and let the material expand before planting. Don’t guess the final volume from the small dry bag.
- Fill partway. Add mix until the plant will sit at a suitable height, then loosen the root ball gently if the planting directions call for it. Avoid crushing the mix into a dense layer.
- Set the plant in place. Keep the root ball supported and add mix around it. Follow the plant’s own planting depth rather than burying the stem simply to use up soil.
- Settle the mix lightly. Press just enough to remove large empty spaces, then stop. Firm pressure can reduce the airy texture that helps water move through the pot.
- Water thoroughly. Add water until the mix is moist and excess can escape through the drainage holes. If the soil level sinks, top up gently rather than tamping it hard.
- Watch the container. Check moisture with a finger near the surface and lower into the mix as the plant grows. A dry top alone doesn’t always mean the full root zone needs water.
For a tomato, a stable container and room for roots are as important as choosing a bag labeled for vegetables. A new gardener should avoid treating every wilted leaf as a signal to pour in more water; check the soil first, since both dry and overly wet roots can stress a plant.
How to Make Your Container Vegetable Potting Soil Last Longer
Protect the mix from avoidable compaction, contamination, and poor storage, and it will be easier to use for the whole planting period. Potting mix doesn’t become a permanent resource just because it’s still in the pot; roots, watering, and time change how it behaves.
Keep unopened bags dry and out of direct weather. Close or reseal an opened bag so rain doesn’t soak it and wind doesn’t scatter the lightweight mix; follow any storage directions on the package, especially for a compressed blend.
Don’t walk on soil or push it down hard when filling a container. A loose mix leaves room for air and water movement, while repeated compression can make watering less even. When a plant settles, add a little fresh mix around the surface rather than crushing the whole pot to make the soil line look tidy.
Water according to the plant and the pot’s conditions, not a fixed calendar alone. Check more often during hot or windy weather, and less often when the pot is shaded or the weather is cool; the right interval changes with container size, material, and plant growth.
Remove dead leaves and plant debris from the soil surface. If you notice persistent sour smells, poor drainage, or a mix that stays soggy, check the drainage holes and watering routine before adding more soil or fertilizer. Don’t reuse old mix for a new vegetable without first considering what grew in it and whether the texture or condition has changed.
Follow the bag’s feeding instructions and keep a simple date note. A mix with a stated feeding window gives you a time to revisit care, but adding fertilizer early “just in case” can create unnecessary work and may not match the plant’s needs.
Common Mistakes to Avoid When Buying and Using Potting Soil
Most beginner trouble comes from mismatching the soil, pot, and care routine rather than from a mysterious gardening secret. These quick checks can prevent wasted bags and avoidable plant stress.
- Using yard dirt in a container: Garden soil can be too dense for a pot. Choose a potting mix intended for containers instead.
- Buying by bag size alone: A small bag may not fill a deep planter. Measure the pot and compare its capacity with the stated volume.
- Ignoring drainage holes: Water trapped in the pot can leave roots sitting wet. Check the container before filling it.
- Assuming all mixes feed for the same time: Feeding windows differ, and some are not stated. Read the bag and note the planting date.
- Pressing the mix down hard: Heavy packing can reduce air space. Settle soil gently and let watering finish the job.
- Watering on autopilot: Sun, wind, and pot size change how quickly soil dries. Check moisture before watering instead of relying on the same schedule every day.
- Treating an ingredient as a full guarantee: Coir or a moisture-control ingredient doesn’t remove the need to check drainage and soil moisture. Judge the pot, plant, and conditions together.
A final common mistake is filling a planter before checking its location. A large vegetable pot can be heavy once watered, so place it where it will get suitable light and where excess water can drain without damaging the surface below.
How to Set Up Potting Soil for Container Vegetables
Setting up a vegetable pot is simple when you do the checks in order: prepare the container, confirm the amount, and follow the mix’s directions. Compressed soil needs one extra preparation step, so allow enough time and room for it to expand before planting.
- Choose the final spot. Check that the location suits the vegetable’s light needs and lets water drain safely. Move a heavy pot before filling it, not after it’s soaked.
- Inspect the container. Clear blocked drainage holes and check for cracks or sharp edges. A decorative outer pot without drainage may need a suitable inner planter.
- Read the bag. Confirm whether it is for outdoor or indoor use, and check any feeding or preparation directions. Don’t assume two mixes with similar names have identical instructions.
- Measure the amount. Compare the bag’s quart or gallon volume with the container. For a multi-pot planting, set out the containers first so you can spot a shortfall before planting.
- Expand compressed mix if needed. Add water according to the package directions in a tub large enough to hold the expanded soil. Break up dry pockets gently rather than pouring a plant into partly expanded material.
- Fill without packing. Add mix loosely, leaving room for the root ball and a little space at the top. A beginner’s common stumbling point is filling to the brim, which makes watering messy.
- Plant and water. Position the root ball, fill around it, and water until excess drains. If the level drops, add a small amount of mix without pressing firmly.
- Record the start date. Note the planting date and any stated feeding period. That simple reminder helps you return to the package directions at the right time.
Common Questions About Potting Soil for Container Vegetables
Can I use garden soil in a pot for vegetables?
It’s usually better to use potting mix made for containers rather than digging up garden soil. Yard soil can be dense in a pot, where roots have limited room and excess water needs a clear path out. Choose a container mix, use a pot with drainage holes, and follow the planting directions on the bag.
How much potting soil do I need for a vegetable container?
You need enough mix to fill the pot around the root ball while leaving a little space at the rim for watering. Check the container’s capacity and compare it with the bag volume; one of the listed 16-quart products says a bag fills one 12-inch pot, though root-ball size changes coverage.
Does potting mix with fertilizer mean I don’t need to feed vegetables?
No, it means you should read the stated feeding directions before deciding when to add more. Some mixes here give a feeding window, while the available information for others doesn’t state one. Plant type, watering, and growing conditions affect the routine, so don’t treat a bag’s time estimate as a universal schedule.
Is coconut coir better than peat moss for container vegetables?
Neither ingredient is automatically better for every pot or gardener. Coconut coir and peat moss are different materials that can help a mix hold moisture, but the finished blend, drainage, plant, and watering habits matter too. If avoiding peat is important, choose a mix that clearly states it is peat-free.
How often should I water vegetables in potting soil?
Check the soil regularly and water when the root area needs it, rather than following one fixed schedule. Containers dry at different rates based on size, sunlight, wind, and plant growth. Feel the mix below the surface, and make sure excess water can drain before watering again.
Can compressed potting soil be used straight from the bag?
No, the compressed mix described here needs water to expand before it is used to fill a pot. Follow its stated mixing ratio and prepare it in a container with room for the expanded soil. Check the final amount against your planter, since the bag is described as making up to three gallons.
Make Your First Container Planting Easier
Before buying, measure the pot, check that it drains, and decide whether you want fertilizer included or a smaller bag that needs preparation. Then match the mix’s stated use and volume to your planting plan, and keep the package directions nearby when you water and feed.

I’m Maya L. Greenwood, a lifelong plant lover who believes anyone can grow something beautiful with the right guidance. After years of testing soil mixes, pruning methods, irrigation tricks, and pest-safe solutions, I started EasyGardenTips.com to turn hard-won lessons into step-by-step advice. From seed starting and container gardens to composting and seasonal checklists, my goal is to make gardening simple, sustainable, and fun.
One Comment