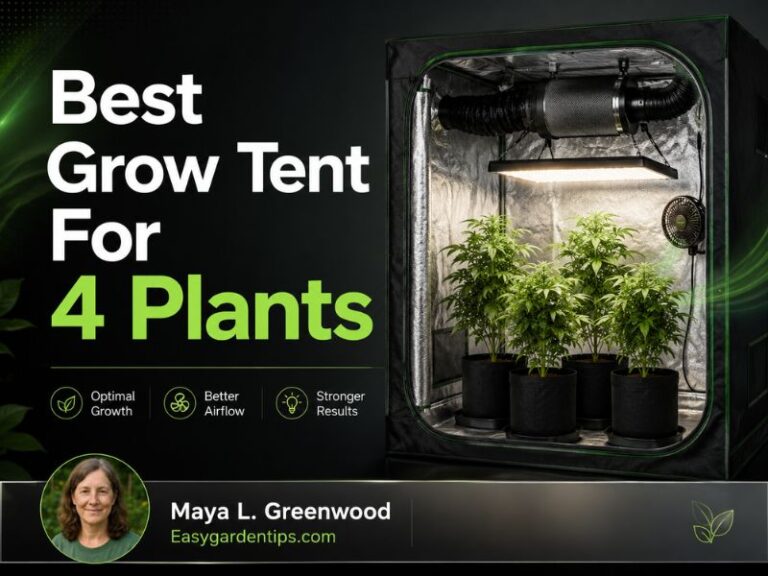
Best Grow Light for 2×2 Tent: 5 Compact Full-Spectrum LEDs
A 2×2 tent may be compact, but it still requires deliberate lighting. With only four square feet of canopy space, a fixture that is too weak can leave plants stretching, while an oversized light can create excessive center intensity, unnecessary heat, and limited vertical clearance.
The best grow light for 2×2 tent use should provide an even square footprint, adjustable intensity, and enough output for the intended plant stage. A 100- to 115-watt fixture can be suitable for seedlings, herbs, vegetative growth, and moderate full-cycle use. A 150-watt model provides more flowering headroom but generally needs more careful dimming and heat management.
My primary recommendation is the VIPARSPECTRA XS1500 Pro 150W LED Grow Light. Its lens-assisted design is intended to distribute its 150-watt output toward the edges of a 2×2 canopy, making it a strong choice when uniformity and higher maximum intensity are priorities.
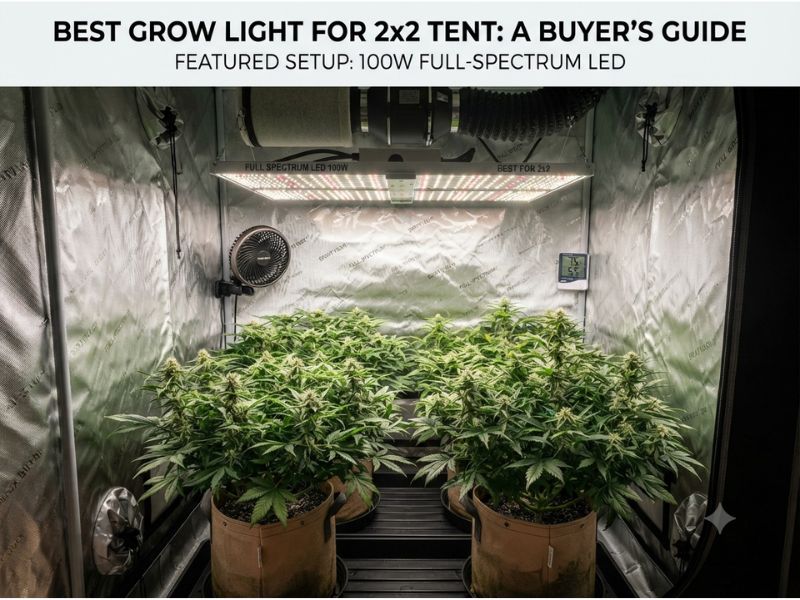
The Mars Hydro TS1000 offers similar power with a reflective hood, while the Spider Farmer SF1000 provides a simpler 100-watt setup. The AC Infinity IONBOARD S22 adds IP65 construction and smart-controller compatibility, and the VIVOSUN LumaLight 100W provides four-level dimming with optional GrowHub integration.
5 Best Grow Lights for a 2×2 Tent
| Image | Product Name | Check Price |
|---|---|---|
Best Choice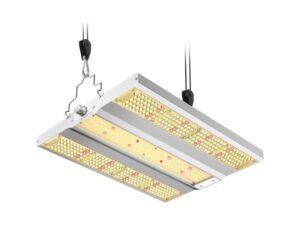 | VIPARSPECTRA XS1500 Pro 150W LED Grow Light | Check Price |
Second Best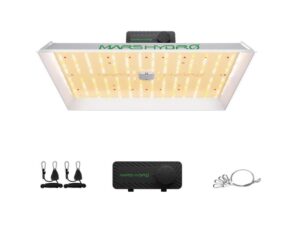 | Mars Hydro TS1000 150W LED Grow Light | Check Price |
Third Choice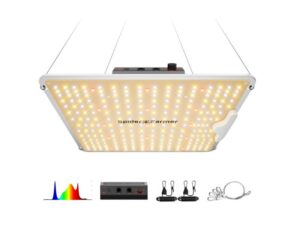 | Spider Farmer SF1000 100W LED Grow Light | Check Price |
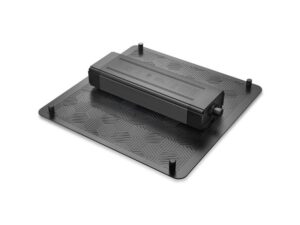 | AC Infinity IONBOARD S22 115W LED Grow Light | Check Price |
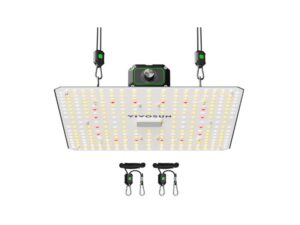 | VIVOSUN LumaLight 100W LED Grow Light | Check Price |
1. VIPARSPECTRA XS1500 Pro 150W LED Grow Light
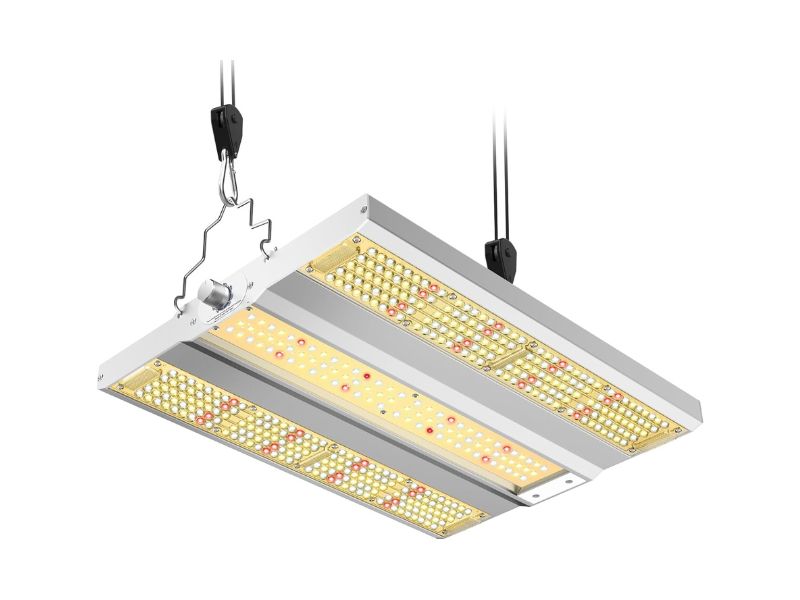
Key Features
- 150W actual power draw
- Lens-assisted light distribution
- Designed for approximately 2×2 coverage
- Full-spectrum LED output
- Adjustable dimming
- Daisy-chain capability
- Passive fanless cooling
- Compact square fixture
- Suitable for multiple growth stages
The VIPARSPECTRA XS1500 Pro is the highest-ranked option because it combines a strong 150-watt output with a lens system designed to improve light distribution from the canopy center toward the edges.
A 2×2 tent contains four square feet, so 150 watts equals approximately 37.5 watts per square foot. This is a high-output level for an efficient modern LED fixture. It provides useful intensity reserve for mature plants, but the light should not be operated at maximum power automatically.
The lens design is the feature that distinguishes the XS1500 Pro from a basic flat LED board. Individual optics help shape the output and direct more light toward the usable canopy. That can reduce the difference between center and corner PPFD when the fixture is positioned correctly.
Optics do not eliminate the need for careful hanging. If the fixture is too close, the center and individual lens zones may become overly intense. Raising the light improves beam blending but reduces total canopy intensity.
The dimmer allows the fixture to be adapted to seedlings, vegetative plants, and mature growth. A lower setting is appropriate when plants have limited leaf area, while higher settings can be introduced gradually as the canopy fills.
The compact frame should be centered with equal clearance from all four tent walls. Since the coverage area is square, even a small positioning error can leave one side stronger than the other.
Passive cooling keeps the fixture quiet and removes the need for a built-in cooling fan. The aluminum body still needs open air around it so heat can move away from the diodes and driver.
The XS1500 Pro is designed as a 150-watt full-spectrum fixture for compact indoor growing areas and uses a lens-assisted configuration with dimming and daisy-chain functions.
What I Like
- Strong maximum output for four square feet
- Lens design supports edge distribution
- Dimmable through different plant stages
- Compact fixture footprint
- Daisy-chain capability
- Full-spectrum operation
- Silent passive cooling
What I Do Not Like
- Produces more heat than 100W alternatives
- Full power can be excessive for seedlings
- Lens optics make hanging height important
- No integrated environmental-controller ecosystem
- Higher intensity requires closer plant monitoring
The XS1500 Pro is my primary recommendation for growers who want strong full-canopy capability from one compact fixture. Its 150-watt reserve is valuable, provided the dimmer and hanging height are used to prevent excessive intensity.
2. Mars Hydro TS1000 150W LED Grow Light
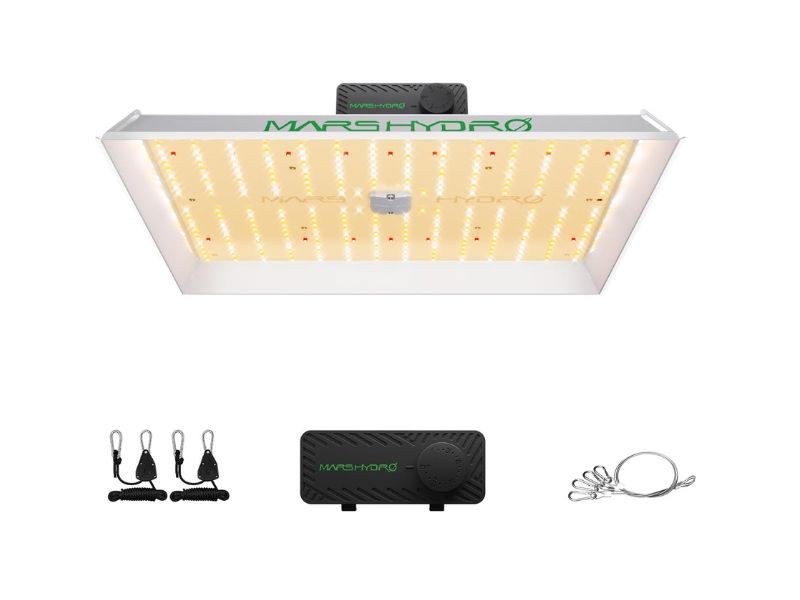
Key Features
- 150W actual power draw
- 354 LEDs
- Reflective hood design
- Five dimming levels
- Daisy-chain capability
- Full-spectrum output
- Approximately 2.5×2.5-foot practical coverage
- Passive fanless construction
- Square board-style fixture
The Mars Hydro TS1000 is another 150-watt option, but it uses a reflective hood rather than individual lenses to manage the light pattern.
The hood surrounds the LED board and redirects some sideward output toward the growing area. This can improve light utilization inside a reflective tent and reduce the amount of light that immediately strikes the sidewalls.
The current TS1000 design uses 354 LEDs, a 150-watt power draw, five dimming levels, and a revised diode arrangement intended to improve the balance between the center and sides. Its practical coverage extends beyond a 2×2 tent, giving it substantial reserve for a four-square-foot canopy.
The five-level dimmer is simple and repeatable. Instead of trying to return an analog dial to an estimated position, the user can select a defined stage and record it.
The disadvantage is reduced adjustment precision. If one level is too weak and the next level is too strong, hanging height may need to be adjusted to reach the desired canopy intensity.
The 150-watt output is suitable for a dense 2×2 canopy, but young plants should begin under reduced power. The combination of reflective walls and a reflective fixture hood can produce strong intensity in a compact enclosure.
The fixture’s square shape matches the tent well. Center it carefully and verify that it hangs level. A tilted board creates a shorter plant-to-light distance on one side, which can cause uneven growth.
The TS1000 does not depend on app controls or a brand-specific environmental ecosystem. This makes it practical for users who prefer a conventional timer and physical dimmer.
What I Like
- Strong 150-watt output
- Reflective hood helps direct sideward light
- Five repeatable dimming settings
- Square shape matches a 2×2 canopy
- Daisy-chain support
- Full-spectrum operation
- Straightforward controls
- Fanless cooling
What I Do Not Like
- Five levels provide less precision than continuous dimming
- Reflective hood adds physical width
- Full output can create significant heat
- Basic control system
- Center intensity still requires monitoring
The TS1000 is a strong choice for buyers who want 150 watts without relying on wireless controls. Its hood and updated diode pattern make it well suited to a reflective 2×2 enclosure.
3. Spider Farmer SF1000 100W LED Grow Light
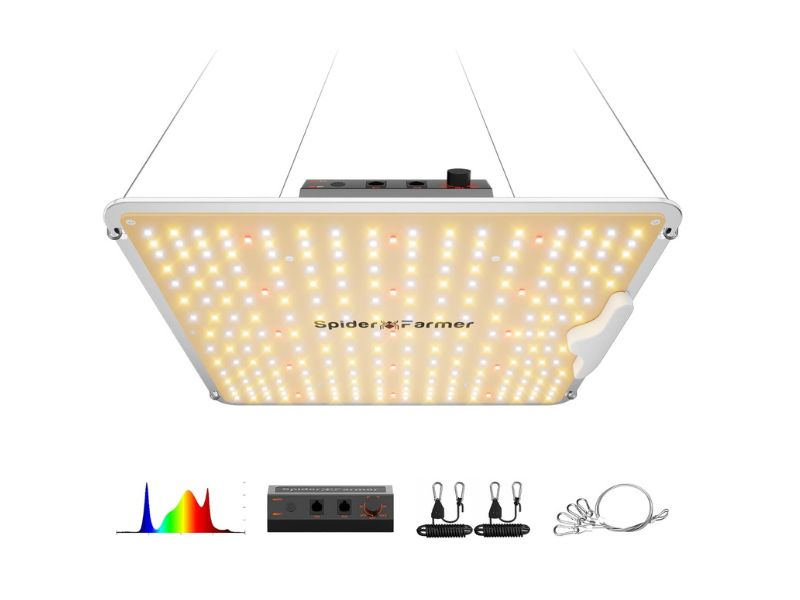
Key Features
- 100W actual power draw
- Approximately 2.5 µmol/J system efficacy
- High-efficiency Bridgelux diodes
- 2×2 maximum coverage
- Dimmable full-spectrum output
- Compact board-style construction
- Passive fanless cooling
- Low electrical demand
- Suitable for compact ventilation systems
The Spider Farmer SF1000 is a lower-powered alternative for growers who prefer simpler heat and electricity management.
At 100 watts, it provides approximately 25 watts per square foot across a 2×2 tent. This is enough for seedlings, herbs, leafy crops, vegetative plants, and moderate full-cycle applications when the canopy is managed carefully.
The current SF1000 uses upgraded Bridgelux diodes, draws 100 watts, has an efficacy rating around 2.5 µmol/J, and is intended for approximately 2×2 maximum coverage.
The lower wattage creates less heat than the 150-watt XS1500 Pro and TS1000. That difference can be important in a short tent, a warm room, or a setup using a relatively small exhaust system.
Its compact board is easy to hang and leaves more overhead space for the carbon filter, exhaust fan, ducting, and sensors. The fixture also draws less current, reducing the demand placed on timers and controllers.
The limitation is maximum flowering headroom. A fully occupied canopy requiring high PPFD may benefit from a stronger fixture. The SF1000 works best when efficiency and manageable conditions matter more than maximum intensity.
Its dimming system remains useful even with a 100-watt draw. Seedlings may still require lower output, especially when the fixture hangs close due to limited tent height.
Because the LEDs are mounted on a compact board, center intensity may be stronger than corner intensity. Reflective walls help, but the light should be positioned and leveled carefully.
What I Like
- Low heat output
- Low electricity consumption
- Exact 2×2 coverage positioning
- Dimmable full-spectrum output
- Compact and lightweight design
- Quiet passive cooling
- Simple installation
- Practical for short tents
What I Do Not Like
- Less maximum output than 150W fixtures
- Limited high-intensity flowering reserve
- Board design can create stronger center PPFD
- Fewer advanced control features
- May need a higher setting during mature growth
The SF1000 is the most practical choice when the tent’s cooling capacity or electrical budget is limited. It offers sufficient output for many compact setups without creating the environmental demands of a 150-watt fixture.
4. AC Infinity IONBOARD S22 115W LED Grow Light
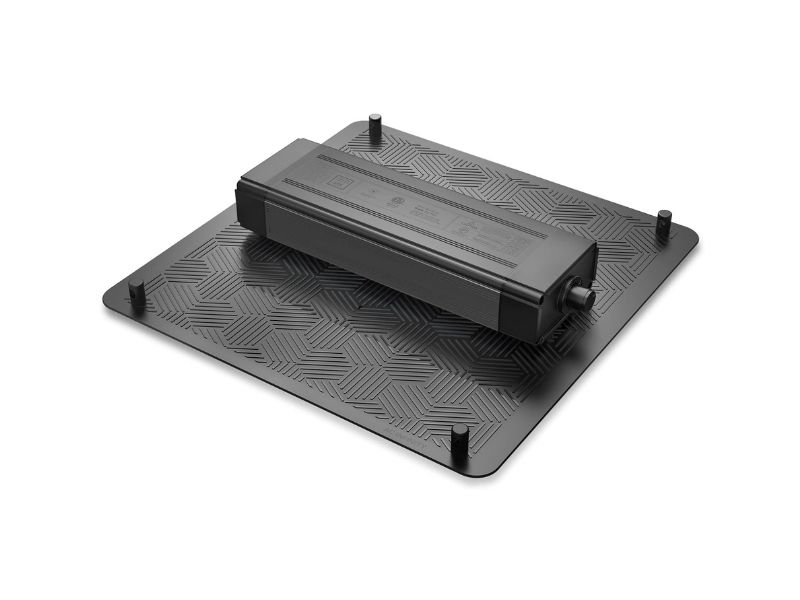
Key Features
- 115W actual power draw
- Samsung LM301H diodes
- 2×2 coverage
- 0–100% dimming in defined increments
- Algorithmically positioned LEDs
- Full-spectrum output
- IP65-rated construction
- Smart-controller compatibility
- Fanless unibody aluminum board
- Daisy-chain expansion support
The AC Infinity IONBOARD S22 sits between the 100- and 150-watt groups. Its 115-watt draw provides more output than a basic 100-watt board while maintaining a relatively moderate heat load.
It uses Samsung LM301H diodes arranged across a square aluminum board. The diode placement is designed to improve PAR uniformity and canopy penetration inside a reflective tent.
The fixture offers 0–100% dimming through defined 20% steps. It can also connect to compatible controllers for schedules, programmed grow cycles, wireless app functions, and coordinated operation with other supported equipment.
The S22 is rated at 115 watts, designed for 2×2 coverage, built on a fanless aluminum board, and sealed to IP65 standards for humid growing environments.
IP65 protection is a useful feature in a tent where humidity can remain elevated. It does not mean the fixture, plugs, or controller should be deliberately sprayed. Electrical connections still need to remain dry.
The smart-control platform is most valuable when the tent already uses compatible ventilation or humidity devices. A user with a basic exhaust fan and mechanical timer may not need the additional integration.
At approximately 28.75 watts per square foot, the S22 provides a balanced output for full-cycle use. It offers more capacity than a 100-watt fixture without reaching the heat and intensity of the 150-watt models.
What I Like
- Balanced 115-watt output
- Samsung horticultural diodes
- IP65-rated construction
- Smart-controller compatibility
- Repeatable dimming increments
- Square 2×2 design
- Fanless aluminum cooling
- Useful system integration
What I Do Not Like
- Full smart functions require compatible equipment
- Stepped dimming offers limited fine adjustment
- More complex than a basic board
- Lower maximum output than 150W models
- Ecosystem expansion can increase total cost
The IONBOARD S22 is the strongest option for a coordinated smart tent. It combines manageable power with environmental protection and controller integration, making it particularly suitable for users already building around the UIS platform.
5. VIVOSUN LumaLight 100W LED Grow Light
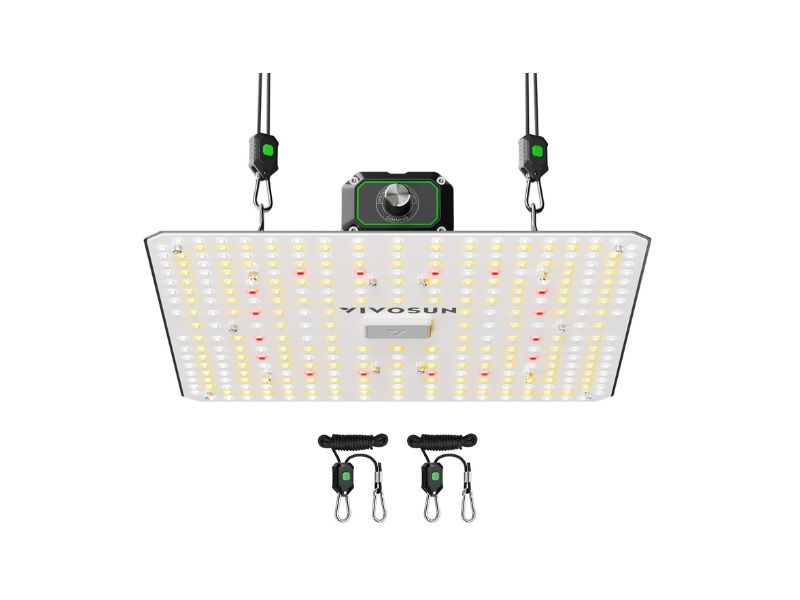
Key Features
- 100W actual power class
- Full-spectrum white, blue, red, and far-red output
- 3000K and 5000K white light
- 660 nm deep red
- 730 nm far red
- Four manual dimming levels
- Optional GrowHub and app control
- IP65 construction
- Passive thermal management
- Intended for compact grow tents
The VIVOSUN LumaLight 100W is a smart-compatible alternative for growers who want a broad spectrum and a simple four-level dimmer.
Its spectrum includes warm white, cool white, blue, 660 nm deep red, and 730 nm far red. The white and deep-red LEDs provide most of the useful full-cycle output, while far red modifies the overall spectral balance.
The LumaLight uses four manual levels from 25% to 100% and can connect to a GrowHub controller for scheduling and app-based adjustment. It also uses IP65-rated construction intended for warm and humid growing environments.
The 100-watt power class is easy to manage inside a compact tent. It produces less heat than a 150-watt model and places less load on the exhaust system.
The four-step dimmer is convenient but not precise. If the difference between two levels is too large, fixture height can be adjusted to fine-tune the canopy intensity.
GrowHub compatibility is useful when the user already owns compatible ventilation and circulation equipment. Without the controller, the fixture remains a straightforward manually dimmable light.
Far-red output should not be treated as proof that the product will outperform another full-spectrum fixture. Distribution, total output, PPFD, plant stage, and environmental conditions remain more important than one supplemental wavelength.
What I Like
- Low 100-watt heat load
- Four repeatable dimming levels
- Broad full-spectrum configuration
- Optional smart-system integration
- IP65-rated construction
- Deep-red and far-red supplementation
- Quiet passive cooling
- Suitable for compact tents
What I Do Not Like
- Lower maximum output
- Only four manual intensity levels
- Smart control requires GrowHub equipment
- Far-red is not essential for every setup
- Less flowering reserve than 150W options
The LumaLight is a practical choice for users who want a low-power fixture that can integrate with the VIVOSUN control system. It is better suited to manageable full-cycle growing than maximum-intensity applications.
Grow Light Comparison Table
| Product | Power | Light-Distribution Design | Coverage | Dimming | Smart Control | Main Strength | Main Limitation |
| VIPARSPECTRA XS1500 Pro | 150W | Lens-assisted board | Approx. 2×2 | Adjustable | No dedicated ecosystem | Strong output and edge distribution | Higher heat |
| Mars Hydro TS1000 | 150W | Reflective-hood board | 2×2 and larger | Five levels | Optional accessories | Strong output with simple controls | Limited dimming precision |
| Spider Farmer SF1000 | 100W | Compact board | Approx. 2×2 | Adjustable | Basic compatible controls | Low heat and power use | Less flowering headroom |
| AC Infinity IONBOARD S22 | 115W | Algorithmic diode board | 2×2 | 20% increments | UIS compatible | Smart control and IP65 protection | Added ecosystem complexity |
| VIVOSUN LumaLight 100W | 100W | Full-spectrum board | Compact tents | Four levels | GrowHub compatible | Low-power smart option | Lower maximum output |
The XS1500 Pro and TS1000 provide the most output. The SF1000 and LumaLight prioritize lower heat, while the IONBOARD S22 provides a middle ground with stronger environmental integration.
How Much Light Does a 2×2 Tent Need?
A 2×2 tent contains:
2 feet × 2 feet = 4 square feet
A practical LED range is approximately 100 to 150 actual watts.
That equals:
- 100W ÷ 4 = 25 watts per square foot
- 115W ÷ 4 = 28.75 watts per square foot
- 150W ÷ 4 = 37.5 watts per square foot
These calculations are useful for broad sizing but do not measure actual plant-usable light.
A 100-watt fixture can be appropriate when:
- Heat control is limited
- The tent is short
- Plants need moderate intensity
- Electricity use is a priority
- The canopy is not extremely dense
A 150-watt fixture can be more suitable when:
- Strong flowering intensity is desired
- The complete canopy is occupied
- The fixture will be dimmed during early stages
- Ventilation is adequate
- Higher hanging positions are needed for uniformity
The correct fixture is not automatically the one with the highest wattage. A well-distributed 115-watt light can provide a more useful canopy than a poorly positioned 150-watt fixture.
100W vs. 150W in a 2×2 Tent
Choosing 100W
A 100-watt light is easier to cool and less expensive to operate. It is appropriate for compact tents where excessive heat can quickly become a problem.
It also provides a wider usable dimming range for seedlings because the maximum output is already moderate.
The limitation is mature-stage reserve. If plants fill the entire canopy and require high PPFD, a 100-watt fixture may need to run near maximum.
Choosing 150W
A 150-watt fixture provides more intensity reserve. It can be hung higher to improve corner blending while maintaining adequate average PPFD.
It can also be dimmed to approximately 100 watts when full output is unnecessary.
The disadvantages are higher heat, higher electrical use, and a greater risk of light stress when the fixture is too close.
Matching the Light to a Square Canopy
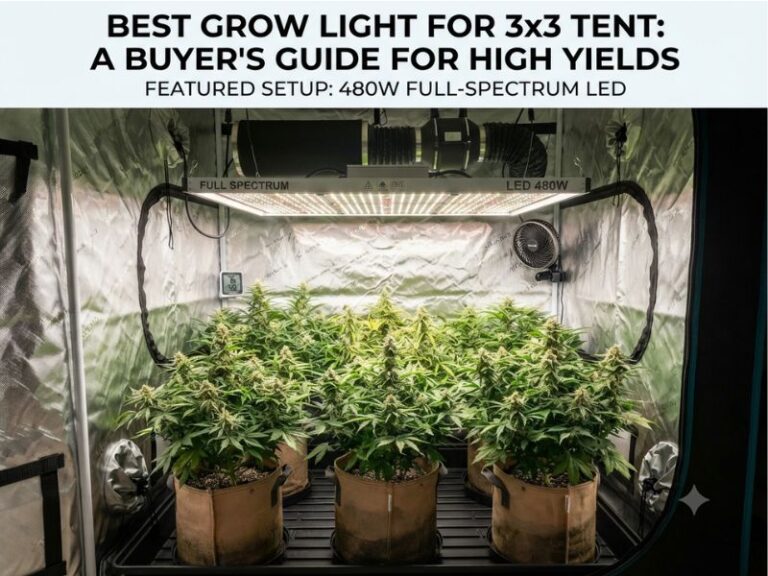
A 2×2 tent has equal length and width. The fixture should therefore provide a square or near-square light pattern.
Center the light with equal distance from all four walls:
[ Corner ] — [ Center ] — [ Corner ]
Check that:
- The fixture hangs level
- The driver does not pull one side downward
- Cables do not interfere with suspension
- The light is not pressed against a wall
- The carbon filter leaves enough clearance
A narrow rectangular fixture can work, but it may produce stronger output along one axis than the other. Square boards and square lens patterns generally match this tent shape more naturally.
Lens, Reflector, and Flat-Board Designs
Lens-assisted fixtures
A lens can shape the beam and direct more light toward the perimeter.
Advantages include:
- Better edge targeting
- Strong downward intensity
- Potentially improved uniformity
Limitations include:
- Greater sensitivity to hanging height
- Distinct beam overlap
- More careful cleaning requirements
Reflective-hood fixtures
A hood redirects sideward light toward the canopy.
Advantages include:
- Better light utilization
- Reduced immediate wall loss
- Simple construction
Limitations include:
- Added fixture width
- Heat concentration around the board
- Less precise control than individual optics
Flat-board fixtures
A flat board is compact and simple.
Advantages include:
- Easy hanging
- Low physical profile
- More ceiling clearance
- Straightforward cooling
Limitations include:
- Stronger center intensity
- Greater dependence on reflective walls
- Potential corner falloff
How to Map PPFD in a 2×2 Tent
A nine-point measurement pattern provides a useful overview:
| Position | Position | Position |
| Front left | Front center | Front right |
| Middle left | Center | Middle right |
| Back left | Back center | Back right |
Compare:
- Center PPFD
- Four corner readings
- Average intensity
- Highest reading
- Lowest reading
If the center is much higher than the corners, raise the fixture slightly to improve beam blending.
If the complete map is too weak after raising the light, increase output gradually.
If one side is weaker, verify that the fixture is centered and level before changing the dimmer.
Dimming Through the Growth Cycle
A dimmable fixture allows one light to support different stages.
Begin conservatively after:
- Germination
- Transplanting
- Moving plants from a windowsill
- Replacing a weaker light
- Lowering the fixture
- Increasing the photoperiod
Increase intensity in small steps. Avoid making multiple large changes before the plants have time to respond.
Possible signs of excessive intensity include:
- Pale upper leaves
- Bleaching
- Upward curling
- High leaf-surface temperature
- Rapid drying
- Reduced growth beneath the center
Possible signs of inadequate intensity include:
- Stretching
- Thin stems
- Wide spacing between nodes
- Plants leaning toward the center
- Slow canopy filling
- Weak corner growth
Heat and Ventilation
Use this formula to estimate light-generated heat:
BTU per hour = watts × 3.412
| Fixture Power | Approximate Heat Output |
| 100W | 341 BTU/h |
| 115W | 392 BTU/h |
| 150W | 512 BTU/h |
A 150-watt fixture produces about 171 BTU/h more than a 100-watt model.
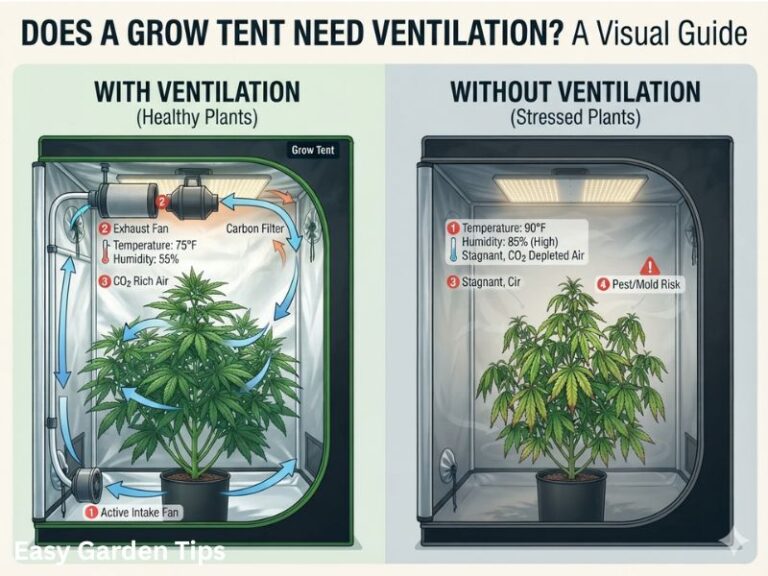
A compact tent generally needs:
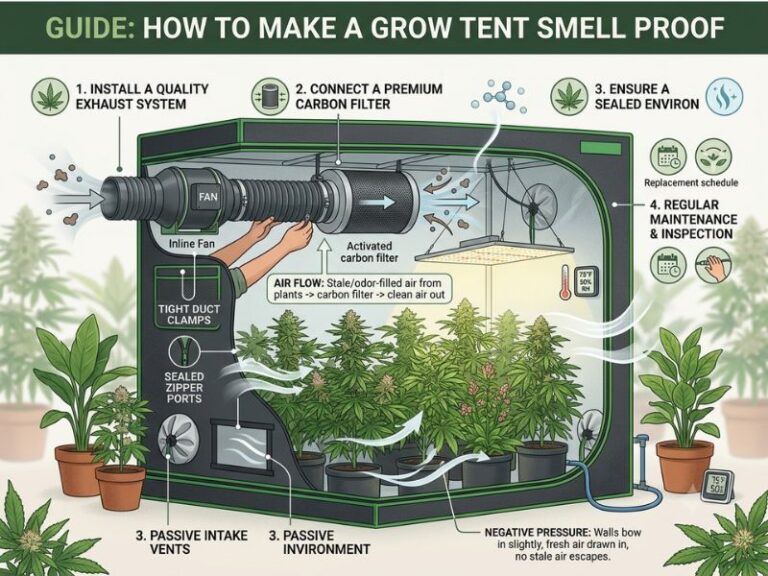
- An inline exhaust fan
- Open passive intake
- Internal circulation
- Canopy-level temperature monitoring
- Adequate surrounding-room ventilation
The exhaust system can only replace the tent’s air with room air. It cannot cool below the intake-room temperature.
Electricity-Cost Comparison
Use:
Monthly cost = kilowatts × daily hours × 30 × electricity rate
Assume 12 hours per day and an electricity rate of $0.16 per kWh.
| Fixture Power | Monthly Energy | Estimated Monthly Cost |
| 100W | 36 kWh | $5.76 |
| 115W | 41.4 kWh | $6.62 |
| 150W | 54 kWh | $8.64 |
These figures assume continuous full-power operation during the 12-hour schedule. Dimming lowers actual consumption.
The complete setup also uses electricity for ventilation, circulation, humidity control, heating, and pumps.
Planning Vertical Clearance
A 2×2 tent is often available in relatively short heights. Lighting clearance can become more important than raw wattage.
Use:
Usable plant height = tent height − container height − fixture depth − hanger length − canopy gap
For example:
- Tent height: 60 inches
- Container height: 10 inches
- Fixture and driver: 4 inches
- Hanging hardware: 5 inches
- Canopy gap: 16 inches
60 − 10 − 4 − 5 − 16 = 25 inches
Only 25 inches remain for the plant structure.
Use short ratchet hangers, compact filters, and safe driver positioning to preserve vertical room. Do not reduce the canopy gap below a safe level merely to accommodate taller plants.
Common 2×2 Grow-Light Mistakes
Choosing maximum output without checking tent height
A 150-watt fixture may need more canopy distance than a low-profile tent can provide.
Running full power on seedlings
Young plants generally need a fraction of the fixture’s maximum output.
Trusting the center reading
A high center PPFD does not prove that the corners receive enough light.
Ignoring the fixture shape
A square tent benefits from a square or evenly distributed footprint.
Pressing the light against the ceiling
Passive heat sinks need airflow around them.
Ignoring driver heat
The driver contributes to the total tent temperature.
Using smart controls without checking load limits
Confirm that timers and controller ports support the fixture’s electrical demand.
Increasing light to solve unrelated problems
More light will not correct poor roots, incorrect watering, inadequate airflow, or unsuitable temperature.
Maintenance and Long-Term Use
Disconnect the fixture before cleaning or adjustment.
Inspect regularly:
- LED surface
- Optical lenses
- Reflective hood
- Heat sink
- Driver
- Dimmer
- Cables
- Connectors
- Hangers
- Tent support bars
Use a soft, dry material for routine cleaning. Avoid abrasive products on lens surfaces and reflective hoods.
Do not spray cleaning liquids directly onto electrical components, even when the fixture carries an IP rating.
Keep passive-cooling surfaces unobstructed. Recheck the light’s height as the canopy grows.
Stop using the fixture if it develops:
- Flickering
- Burned odor
- Damaged wiring
- Excessive driver heat
- Loose connections
- Unstable dimming
- Visible diode damage
Frequently Asked Questions
What is the best grow light for a 2×2 tent?
My primary recommendation is the VIPARSPECTRA XS1500 Pro. Its 150-watt output and lens-assisted distribution provide strong intensity and useful edge coverage.
The Mars Hydro TS1000 is a strong reflector-based alternative, while the Spider Farmer SF1000 is easier to cool.
Is 100 watts enough for a 2×2 tent?
Yes. A modern 100-watt LED fixture can be enough for seedlings, vegetative plants, herbs, leafy crops, and moderate full-cycle use.
A dense mature canopy may benefit from 115 to 150 watts.
Is 150 watts too much for a 2×2 tent?
No, but it may need to be dimmed.
A 150-watt light provides strong headroom and can be hung higher for improved uniformity. Early plants rarely need the full output.
Can one LED light cover a 2×2 tent?
Yes. Every fixture in this guide is designed for a compact coverage area that includes a 2×2 canopy.
One centered fixture is generally simpler than using several small lamps.
Should I choose a lens or a flat board?
Choose a lens-assisted light when edge distribution and stronger directional output are priorities.
Choose a flat board when compact size, simple maintenance, and overhead clearance matter more.
How high should a 2×2 grow light hang?
Begin with the fixture’s current instructions and adjust according to PPFD, dimmer position, and plant response.
Raising the light improves blending. Lowering it increases intensity and hotspot risk.
Do I need a dimmable grow light?
Dimming is highly recommended.
It allows one fixture to support seedlings, vegetative growth, and mature plants without depending only on hanging-height changes.
How much heat does a 150W grow light produce?
A 150-watt fixture contributes approximately 512 BTU per hour to the tent or surrounding room.
Adequate exhaust and room ventilation are still necessary.
Is app control necessary?
No. A physical dimmer and reliable timer are sufficient for many compact setups.
App control is useful for remote schedules and integration with compatible environmental equipment.
Is IP65 important in a grow tent?
It is useful because it indicates resistance to dust and moisture exposure.
It does not make the light or its electrical connections safe for direct spraying or immersion.
How can I improve weak corner growth?
Center and level the fixture, raise it slightly for better blending, check the corner PPFD, and ensure that central plants are not shading the perimeter.
Should the driver be outside the tent?
External driver placement can reduce internal heat when the fixture specifically supports it.
The driver must remain dry, secure, and adequately ventilated.
How many plants fit under a 2×2 grow light?
That depends on plant size, training, container dimensions, and the intended canopy.
Lighting should be planned around the complete leaf area rather than a fixed plant count.
What spectrum is best for a 2×2 tent?
A broad white full spectrum with red supplementation can support the complete growth cycle.
Spectrum matters, but total output, uniformity, and correct intensity are more important than advertising a long list of individual wavelengths.
Conclusion
Selecting the best grow light for 2×2 tent use depends on whether you prioritize maximum output, manageable heat, smart control, or simple operation.
My primary recommendation is the VIPARSPECTRA XS1500 Pro 150W LED Grow Light. Its lens-assisted design and 150-watt output provide strong full-canopy capacity for users prepared to manage the added intensity.
The Mars Hydro TS1000 150W LED Grow Light is a practical alternative with a reflective hood and repeatable dimming levels.
The Spider Farmer SF1000 100W LED Grow Light is better suited to lower heat and electricity consumption. The AC Infinity IONBOARD S22 adds IP65 protection and environmental-controller integration, while the VIVOSUN LumaLight 100W offers a low-power route into GrowHub automation.
For most 2×2 setups, 100 to 115 watts provides manageable full-cycle lighting. Choose 150 watts when stronger flowering headroom is needed and the tent has sufficient height, airflow, and dimming control.

I’m Maya L. Greenwood, a lifelong plant lover who believes anyone can grow something beautiful with the right guidance. After years of testing soil mixes, pruning methods, irrigation tricks, and pest-safe solutions, I started EasyGardenTips.com to turn hard-won lessons into step-by-step advice. From seed starting and container gardens to composting and seasonal checklists, my goal is to make gardening simple, sustainable, and fun.