Best Camera for Grow Tent: 3 Smart Picks for Plant Monitoring
Finding the best camera for grow tent monitoring is different from choosing a normal indoor security camera. Inside a tent, the camera may sit close to bright LED grow lights, reflective Mylar walls, circulation fans, elevated humidity, irrigation equipment, and significant temperature changes between lighting cycles. A camera that works perfectly in a living room may therefore be less convenient once it is mounted a few feet from a reflective plant canopy.
For most growers, I would prioritize clear video resolution, a wide field of view, reliable Wi-Fi, local recording, compact mounting, moisture resistance, and control over visible LEDs or night-vision lighting. A dedicated time-lapse function is also valuable if you want to document canopy development rather than simply check the tent remotely.
My first recommendation is the WYZE Cam v4. It combines 2.5K QHD video, IP65 weather resistance, a wide viewing angle, microSD recording, app-based live viewing, and a built-in time-lapse function. Its status LED can also be switched off in the app, which is useful when the camera operates inside an enclosed plant environment.
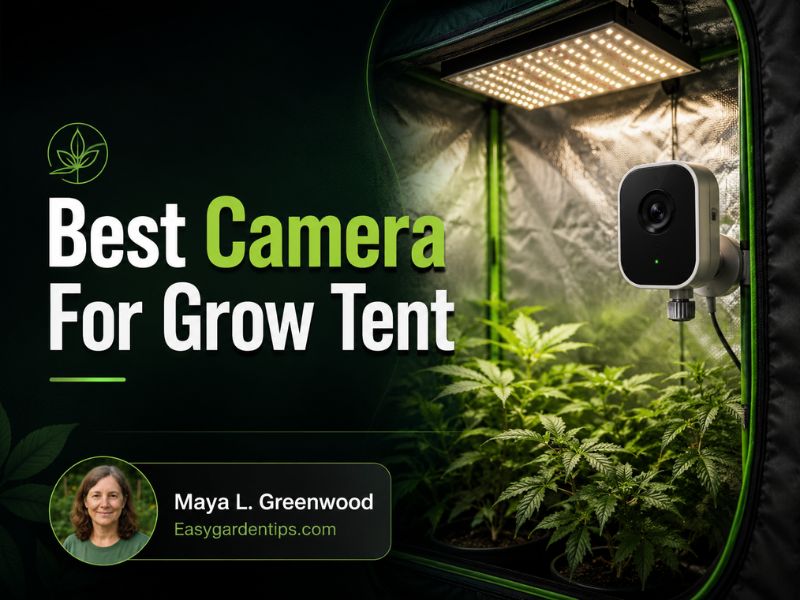
The Blink Mini 2 is my second recommendation. It has an exceptionally compact body, a very wide 143-degree diagonal field of view, 1080p video, app-based live viewing, and the ability to disable its recording LED and infrared night-vision light. Its customer-feedback profile is particularly strong, although local recording is less straightforward than with a camera that accepts a memory card directly.
The TP-Link Tapo C120 takes third place. Technically, it may actually be the most grow-tent-friendly camera of the three because it combines 2K QHD resolution, IP66 water and dust resistance, a magnetic mount, 120-degree field of view, 940nm discreet infrared mode, and direct microSD storage up to 512GB. Its lower position reflects a smaller current customer-feedback base than the first two cameras rather than weaker specifications.
3 Best Cameras for Grow Tent Monitoring
| Image | Product Name | Check Price |
|---|---|---|
Best Choice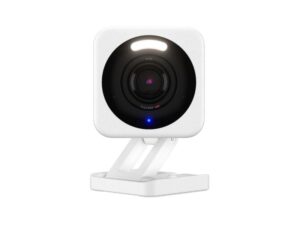 | WYZE Cam v4 | Check Price |
Second Best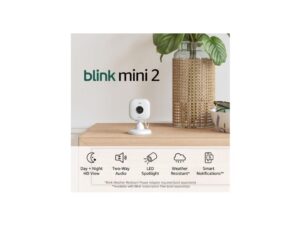 | Blink Mini 2 | Check Price |
Third Choice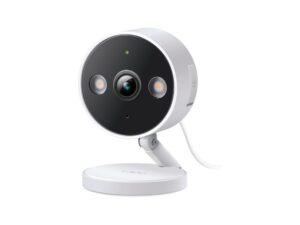 | TP-Link Tapo C120 | Check Price |
These cameras are not specialized horticultural devices. They are compact monitoring cameras whose specifications happen to work particularly well inside or immediately outside a grow tent.
I evaluated them based on:
- Video clarity
- Field of view
- Remote live viewing
- Local recording
- Low-light capability
- Camera size
- Mounting flexibility
- Moisture resistance
- LED and infrared controls
- Long-term monitoring convenience
1. WYZE Cam v4
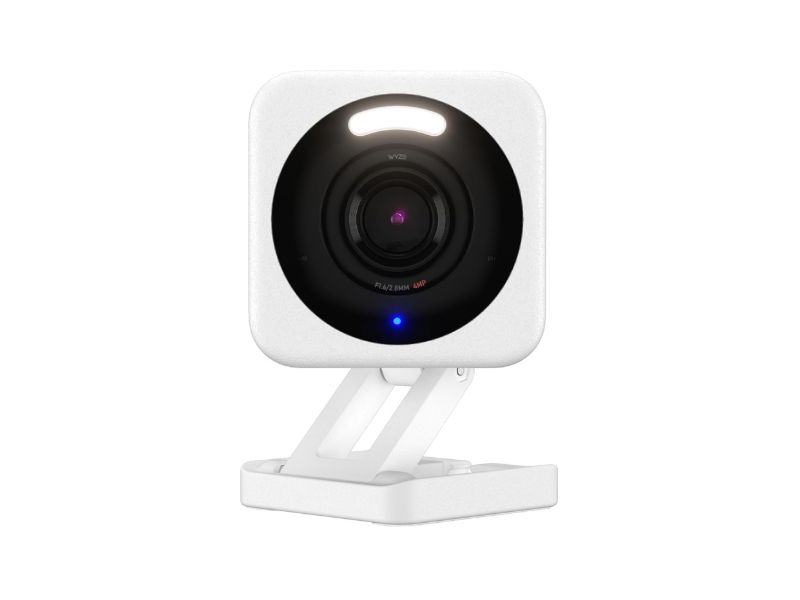
Key Features
- 2560 × 1440 2.5K QHD video
- Wide-angle lens
- IP65 weather-resistant enclosure
- Local microSD recording
- Built-in time-lapse function
- Enhanced color night vision
- Magnetic and screw mounting options
The WYZE Cam v4 is my first choice because it does almost everything a plant-monitoring camera needs without requiring a complicated installation.
Its 2.5K resolution provides enough detail to inspect overall canopy condition, leaf posture, light coverage, and whether irrigation equipment is operating as expected. WYZE specifies a roughly 116-degree diagonal field of view, which is wide enough to cover a substantial part of a 2×4, 3×3, or 4×4 tent when the camera is mounted high in a corner.
The feature that separates it for this application is time-lapse recording. WYZE includes a time-lapse menu on the Cam v4, allowing you to document changes over a longer period rather than relying only on motion-triggered clips. That is useful for following canopy development, plant movement, flowering progression, or how plants respond after training.
Its IP65 rating is also reassuring in a humid gardening environment, although water-resistant should never be interpreted as permission to spray the camera or place electrical connections where irrigation water can reach them. The camera itself is designed for indoor/outdoor exposure, while its operating range extends well beyond the temperatures normally expected inside a properly managed grow tent.
What I Like
- Excellent 2.5K image quality
- Direct local recording
- True time-lapse capability
- Weather-resistant camera body
- Compact mounting options
What I Do Not Like
- Uses 2.4GHz Wi-Fi rather than dual-band Wi-Fi
- Built-in spotlight should be configured carefully if nighttime darkness matters
For growers who want both live monitoring and a way to document plant development over time, WYZE Cam v4 provides the most complete feature set.
2. Blink Mini 2
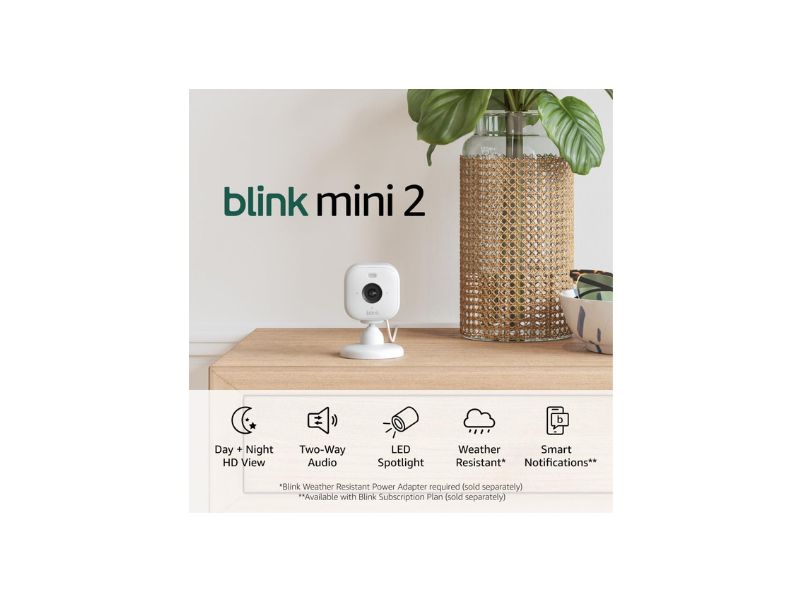
Key Features
- 1080p video
- 143-degree diagonal field of view
- Up to 30 fps
- Extremely compact body
- App-based live view
- Adjustable night vision
- Recording LED can be disabled
Blink Mini 2 earns second place because its tiny size and exceptionally wide field of view make it easy to install in a crowded grow tent.
The camera body measures only about two inches across, yet Blink specifies a 143-degree diagonal field of view. That can be very useful in a 2×2 or 3×3 where there may not be enough distance between the camera and canopy for a narrow lens to capture the full space.
Video resolution tops out at 1080p rather than 2K, but the camera can record at up to 30 frames per second. For remotely checking whether plants are upright, whether a fan is moving, or whether a watering system has obviously failed, 1080p is normally sufficient.
Blink also lets you turn off both the recording LED and infrared night-vision light in appropriate settings. That is particularly useful when monitoring an environment in which you do not want unnecessary indicator lights operating after the primary grow light switches off.
The biggest drawback is storage. The Mini 2 does not simply accept a microSD card in the camera. Local video storage requires compatible Blink hardware such as a Sync Module 2, while cloud features depend on Blink’s service structure.
What I Like
- Extremely wide viewing angle
- Very compact
- Strong customer-feedback history
- Easy LED and IR control
What I Do Not Like
- Only 1080p
- Direct onboard microSD storage is unavailable
For a small grow tent where mounting room is tight and a wide image matters more than maximum resolution, Blink Mini 2 is a very practical option.
3. TP-Link Tapo C120
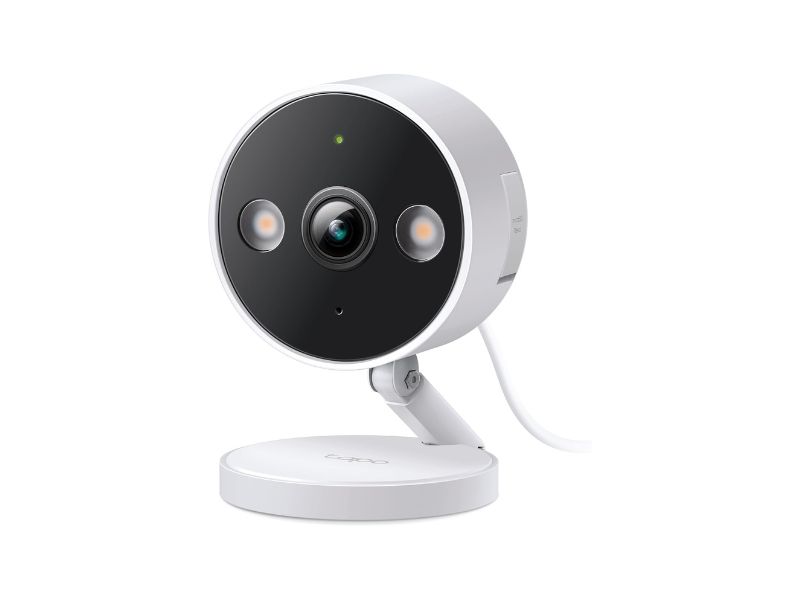
Key Features
- 2K QHD 4MP resolution
- 120-degree diagonal field of view
- IP66 weather resistance
- Magnetic mounting base
- Up to 512GB microSD storage
- 850nm and discreet 940nm IR modes
- Long power cable
The Tapo C120 arguably has the strongest hardware specifications for a humid grow-tent environment.
TP-Link gives it an IP66 water- and dust-resistance rating, which is higher than the IP65 rating of the WYZE camera. It also combines 2K QHD resolution with a 120-degree diagonal viewing angle and a magnetic mounting base.
That magnetic base is particularly convenient around grow-tent frames and nearby metal shelving because the camera can be repositioned as the canopy height changes. The supplied cable is also longer than many compact-camera cables, making it easier to keep the camera in the tent while placing electrical connections outside or away from irrigation equipment.
Another advantage is its night-vision flexibility. The C120 supports conventional infrared as well as a 940nm discreet infrared mode that avoids the obvious red glow associated with some traditional IR LEDs. It also supports direct local recording to microSD cards up to 512GB.
Its third-place position is therefore not a criticism of the camera itself. It simply has less accumulated customer feedback than the two products above.
What I Like
- Excellent IP66 protection
- Sharp 2K video
- Direct microSD recording
- Flexible night-vision options
- Convenient magnetic mount
What I Do Not Like
- No dedicated plant time-lapse feature comparable with WYZE
- Smaller customer-feedback base than the first two picks
For a humid tent or a setup where moisture resistance and local recording matter most, the Tapo C120 may be the most technically attractive choice.
Grow Tent Camera Comparison
| Product | Video Resolution | Field of View | Moisture Protection | Local Recording | Main Strength |
| WYZE Cam v4 | 2.5K QHD | ~116° diagonal | IP65 | microSD | Time-lapse and sharp video |
| Blink Mini 2 | 1080p | 143° diagonal | IP65 with appropriate outdoor power setup | Requires compatible Sync Module | Very wide view in a tiny body |
| Tapo C120 | 2K QHD | 120° diagonal | IP66 | microSD up to 512GB | Strong moisture protection and local storage |
The right camera depends on whether your priority is time-lapse, wide coverage, or environmental durability.
Why Put a Camera in a Grow Tent?
A camera will not replace direct plant inspection.
It can, however, make routine monitoring much easier.
Instead of opening the tent every time you want to check conditions, a camera can let you quickly confirm:
- Plants are standing normally
- Grow lights are operating
- Fans are spinning
- Irrigation equipment has not obviously failed
- Containers have not tipped
- A humidifier or duct has not shifted
- The canopy has not grown dangerously close to a light
- Water is not visibly accumulating on the floor
A camera is particularly useful when the grow tent is in a basement, spare room, garage, or another part of the home you do not constantly visit.
Security Camera vs Dedicated Time-Lapse Camera
These are two different approaches.
Wi-Fi Monitoring Camera
A Wi-Fi camera such as WYZE, Blink, or Tapo prioritizes:
- Live viewing
- Smartphone access
- Continuous or event recording
- Night vision
- Remote alerts
- Easy mounting
This is the better choice when your main question is:
“What is happening in my grow tent right now?”
Dedicated Time-Lapse Camera
A dedicated interval camera prioritizes long-term documentation.
It may capture one frame every few seconds, minutes, or hours and combine those images into a video.
Dedicated time-lapse cameras can produce excellent growth documentation, but they are often less convenient for continuous remote monitoring.
For most growers, a smart monitoring camera is more useful day to day.
The WYZE Cam v4 stands out because it bridges both categories by offering normal live monitoring plus a built-in time-lapse feature.
Is 1080p Enough for a Grow Tent Camera?
Usually, yes.
A 1080p camera can easily show:
- General plant posture
- Canopy shape
- Fan operation
- Light operation
- Large discoloration areas
- Water spills
- Equipment movement
Blink Mini 2 records at up to 1920 × 1080 and 30 fps, making it perfectly capable of routine remote monitoring.
The reason I prefer 2K or 2.5K when possible is that extra resolution gives you more room to zoom into recorded footage.
WYZE Cam v4 records at 2560 × 1440, while Tapo C120 also provides 2560 × 1440 2K QHD video.
That additional detail can help when the camera is mounted several feet away from the canopy.
2K vs 2.5K for Plant Monitoring
Do not choose solely by the number printed on the box.
Camera performance also depends on:
- Sensor quality
- Lens
- Dynamic range
- Compression
- Lighting
- Mounting angle
A reflective grow-tent wall and powerful LED fixture can create a difficult scene because the light may be extremely bright while lower foliage remains relatively dark.
Both WYZE Cam v4 and Tapo C120 incorporate imaging features intended to handle varied lighting and low-light scenes.
The difference between good 2K and 2.5K footage is therefore less important than choosing the right camera position.
Why Field of View Matters
Grow tents are small.
That means the camera may be only two or three feet from the nearest plant.
A narrow field of view can show a beautiful detailed image of one plant while cutting half the tent out of frame.
This is where Blink Mini 2 excels.
Blink specifies a 143-degree diagonal and 115-degree horizontal field of view, substantially wider than many compact monitoring cameras.
Tapo C120 provides 120 degrees diagonally, while WYZE Cam v4 is roughly 116 degrees diagonally.
A wider lens is especially useful in:
- 2×2 tents
- 2×4 tents
- 3×3 tents
- Low corner-mounted positions
Best Camera Position Inside a Grow Tent
For a fixed camera, I generally prefer a high corner looking diagonally downward.
That perspective gives the camera the longest possible line across the enclosure.
In a square tent, mounting in one upper corner and aiming toward the opposite lower corner can help capture:
- Most of the canopy
- Multiple containers
- Floor area
- Fans
- Part of the lighting system
Avoid pointing the camera directly into the grow light if possible.
A bright LED fixture facing straight into the lens can dominate exposure and make the plants appear darker than they really are.
Should the Camera Be Above or Below the Canopy?
For general monitoring, slightly above canopy height is usually easier.
It allows you to see:
- Plant spacing
- Canopy development
- Leaf posture
- Overall light coverage
A camera below the canopy can be useful for checking:
- Containers
- Irrigation
- Drainage
- Lower foliage
but it provides a poorer overall view.
For larger tents, two inexpensive cameras can sometimes be more useful than one expensive camera: one high for canopy monitoring and one lower for irrigation or reservoir checks.
Can You Mount the Camera Outside the Grow Tent?
Yes.
This can be a good solution when humidity is high or interior space is extremely limited.
However, pointing a camera through an observation window can cause reflections.
Blink specifically notes that night vision and motion detection can be affected when the Mini 2 operates through glass, and its setup guidance recommends disabling the recording LED and infrared light when using it through a window to avoid glare.
The same basic optical problem can occur with clear grow-tent windows.
If the image is reflective or hazy, an internal camera position usually works better.
Humidity and Grow Tent Cameras
Grow tents can become significantly more humid than a normal room, particularly after watering or when a large canopy is transpiring heavily.
That makes environmental protection useful.
WYZE Cam v4 is IP65-rated, while Tapo C120 is IP66-rated.
Blink Mini 2 can reach an IP65 weather-resistant configuration when used with Blink’s weather-resistant power adapter, but the supplied standard indoor power arrangement should not automatically be treated as equivalent.
Regardless of IP rating, keep electrical connectors away from water.
Do not mount a camera:
- Directly beside a humidifier outlet
- Where irrigation spray can hit it
- Beneath a leaking hose
- On the floor beside runoff
- Where condensation regularly forms on electrical connections
Water resistance is backup protection, not a substitute for sensible placement.
IP65 vs IP66
An IP rating describes resistance to solid particles and water exposure under defined test conditions.
For grow-tent purposes, both IP65 and IP66 are much more reassuring than an unrated indoor-only camera body.
Tapo C120’s IP66 enclosure gives it the strongest published environmental rating among these three cameras.
That does not mean it should be submerged or exposed directly to irrigation.
The practical advantage is greater confidence around ordinary humid-air exposure and accidental splashes.
Should You Use Night Vision in a Grow Tent?
It depends on why you are monitoring the tent.
If you only need to watch plants during the normal light cycle, there is little reason to use active night illumination.
You can simply:
- View the camera while the grow light is on.
- Leave the tent dark during its scheduled dark period.
- Review recorded daytime footage when necessary.
If nighttime monitoring is necessary, understand what the camera is emitting.
WYZE Cam v4 uses infrared LEDs and also has a visible spotlight.
Tapo C120 offers multiple night-vision modes, including 850nm IR, discreet 940nm infrared, and visible spotlights for full-color night viewing.
Blink Mini 2 uses 850nm infrared and lets the IR illumination be disabled through its settings.
For crops that require a carefully controlled dark period, the simplest approach is to disable unnecessary camera lighting and rely on recording during the primary light cycle.
Turn Off Visible Status Lights
Small status LEDs are easy to overlook.
WYZE allows Cam v4’s status light to be disabled in the app.
Blink Mini 2 also allows its status/recording LED to be set to off.
When using any camera in a light-controlled tent, review its settings after installation rather than assuming every indicator is disabled by default.
Color Night Vision vs Infrared Night Vision
Color night vision generally requires either a very sensitive imaging sensor, additional visible illumination, or both.
Infrared night vision uses light outside the normal visible range to help the camera form an image in darkness.
WYZE combines a starlight sensor with infrared and visible spotlight hardware.
Tapo C120 offers a starlight sensor, visible spotlights, and infrared options.
Blink Mini 2 uses infrared illumination and can also provide color nighttime viewing with its spotlight-based features.
For a grow tent, I care less about impressive nighttime color and more about having the ability to control what the camera emits.
Local Storage vs Cloud Recording
Local recording can be particularly useful for plant monitoring.
You may want hours or days of footage without paying a recurring fee simply to review plant development.
WYZE Cam v4
WYZE supports local microSD recording and continuous 24/7 recording.
Tapo C120
Tapo supports direct microSD storage up to 512GB as well as optional cloud storage.
Blink Mini 2
Blink’s local-storage approach requires compatible Sync Module hardware rather than inserting a memory card directly into the camera.
For a dedicated grow-tent camera, direct microSD support is the simpler arrangement.
Do You Need a Subscription?
Not necessarily.
WYZE and Tapo can both provide useful local recording without requiring cloud storage when configured with compatible microSD cards.
Blink can also use local storage, but it requires additional compatible hardware.
Subscription features may add cloud history, enhanced alerts, AI classification, or extended viewing, but most of those functions are optional for basic plant monitoring.
Is Motion Detection Useful for Plants?
Sometimes, but it is not the feature I would prioritize.
Plants move.
Fans move leaves.
Lighting cycles change shadows.
A normal motion-detection system may therefore generate events that are not particularly meaningful.
For a grow tent, I would prioritize:
- Scheduled recording
- Continuous recording
- Live view
- Time-lapse
- Stable camera connection
over sophisticated person or vehicle detection.
Those AI features are useful in home-security applications but add little when the camera spends all day looking at plants.
Time-Lapse Is More Useful Than Motion Alerts
Time-lapse recording can reveal changes that are difficult to notice when checking the plants several times per day.
A time-lapse may show:
- Canopy expansion
- Plant movement
- Response after watering
- Daily leaf movement
- Training recovery
- Gradual vertical stretch
WYZE Cam v4 directly exposes a time-lapse feature through its camera controls, which is a major reason it ranks first for this specific application.
Blink offers a Photo Capture feature that can create daily summaries from periodic snapshots on supported cameras, but that feature is tied to Blink’s service structure rather than operating as the same kind of dedicated local time-lapse tool.
Wi-Fi Strength Inside a Grow Tent
Grow tents often use reflective materials and contain electrical equipment, so do not assume Wi-Fi performance will be identical to an open room.
All three cameras in this guide rely primarily on 2.4GHz Wi-Fi, which generally offers useful range for smart-home devices.
Before permanently mounting the camera:
- Place it in the intended position.
- Close the grow tent.
- Start the grow light and fans.
- Check live video.
- Confirm recordings continue normally.
A connection that works perfectly with the door open may behave differently once the enclosure is closed.
Wired Power Is Usually Better Than Battery Power
For permanent grow-tent monitoring, I prefer a wired camera.
The camera may operate continuously for months.
A wired setup avoids:
- Battery charging
- Camera downtime
- Repeated tent access
- Power-saving recording limitations
WYZE Cam v4, Blink Mini 2, and Tapo C120 are all plug-powered cameras in their standard configurations.
The important part is routing the power cable safely.
How to Route Camera Cables Safely
Whenever possible, keep plug connections and power strips outside the wettest part of the tent.
Use an existing cable port rather than leaving the main tent zipper partly open.
Keep cords:
- Away from drainage trays
- Away from humidifier output
- Off wet floors
- Away from moving fan blades
Leave enough slack for camera adjustment, but do not create large loops that can catch on plants or equipment.
How to Mount a Camera in a Grow Tent
1. Decide What You Actually Need to See
Do you care most about:
- Entire canopy?
- Irrigation system?
- Containers?
- Reservoir?
- Grow light clearance?
The answer determines camera height.
2. Start in an Upper Corner
A diagonal view usually covers the largest area with one camera.
3. Avoid Direct Light Glare
Angle the lens away from the center of a bright LED fixture.
4. Check the View With the Door Closed
Reflective tent walls may change exposure.
5. Test Night Settings
Confirm status LEDs and spotlights behave the way you expect.
6. Secure the Power Cable
Keep it away from water and moving equipment.
7. Recheck the Angle as Plants Grow
A perfect seedling-stage view may become a screen full of leaves six weeks later.
Camera Position for a 2×2 Tent
Space is tight.
A wide-angle camera such as Blink Mini 2 is useful because the lens can capture a large percentage of the enclosure from very short range.
Mount it as high as practical in one corner.
Avoid placing it directly in the middle of a wall because the nearest plant may block the plants behind it.
Camera Position for a 2×4 Tent
A 2×4 tent presents a long rectangular canopy.
Mount the camera near one of the short ends and aim diagonally down the length of the tent.
A second option is an upper corner near the center, angled across both rows.
The correct arrangement depends on whether the plants are lined up lengthwise or spread across the full footprint.
Camera Position for a 3×3 or 4×4 Tent
A high corner works particularly well in square tents.
For a full 4×4 canopy, one camera may eventually lose sight of containers beneath dense foliage.
If irrigation monitoring is important, consider one high camera for the canopy and another low camera focused on the floor or reservoir.
Common Mistakes When Buying a Grow Tent Camera
Buying Only for Resolution
A narrow 4K camera can be less useful than a wide 1080p camera in a tiny tent.
Ignoring Field of View
Measure how far the camera will be from the canopy.
Ignoring Humidity
An unrated indoor camera deserves more cautious placement in a humid environment.
Mounting Directly Beside a Humidifier
Keep electronics away from concentrated moisture.
Pointing Directly at the Grow Light
This can compromise exposure and make plant detail harder to see.
Forgetting About Status LEDs
Review the app settings after installation.
Leaving the Spotlight on Automatically
A security feature can become an unwanted light source inside a controlled growing environment.
Assuming Every Camera Has Direct Local Storage
Blink’s local-storage arrangement differs significantly from WYZE and Tapo.
Ignoring Wi-Fi Before Permanent Installation
Test the connection with the tent completely closed.
Mounting Too Low
Plants may quickly grow in front of the lens.
Expecting a Camera to Diagnose Plant Problems
Remote video is useful for monitoring, but leaf color, pests, substrate moisture, roots, and nutrient symptoms often require direct inspection.
Frequently Asked Questions
1. What is the best camera for grow tent monitoring?
WYZE Cam v4 is my first recommendation because it combines 2.5K video, local recording, time-lapse, IP65 protection, and flexible mounting.
Its combination of remote live viewing and dedicated time-lapse capability makes it especially useful for monitoring both day-to-day conditions and longer-term plant development.
2. Can I put a security camera inside a grow tent?
Yes, provided the camera is positioned safely away from irrigation water, excessive condensation, and direct humidifier output.
A weather-resistant model such as WYZE Cam v4 or Tapo C120 provides more environmental protection than an ordinary unrated indoor camera.
3. Is WYZE Cam v4 good for a grow tent?
Yes. Its 2.5K resolution, local microSD recording, weather resistance, wide view, and time-lapse mode make it particularly well suited to plant monitoring.
The camera’s visible status LED can also be switched off through the app.
4. Is Blink Mini 2 good for a grow tent?
Yes, especially in a small tent where its compact size and 143-degree diagonal field of view are useful.
Its main disadvantages are 1080p resolution and a less direct local-storage arrangement.
5. Is Tapo C120 good for a grow tent?
Yes. It is arguably the strongest choice when humidity protection and direct local storage are top priorities.
The C120 provides IP66 protection, 2K resolution, microSD recording, a magnetic base, and multiple infrared viewing options.
6. Do I need a 2K camera in a grow tent?
No. 1080p is adequate for basic monitoring, but 2K gives you more detail when zooming into recorded footage.
This can be useful when the camera is mounted several feet away from the canopy.
7. What field of view is best for a grow tent?
A wide field of view around 115 degrees or more is very useful in compact tents.
Blink Mini 2 reaches 143 degrees diagonally, Tapo C120 reaches 120 degrees, and WYZE Cam v4 is roughly 116 degrees.
8. Can a camera record a plant time-lapse?
Yes, but features vary by camera. WYZE Cam v4 includes a dedicated time-lapse function.
Other monitoring cameras may require snapshots, external software, or subscription features to create a similar result.
9. Can I watch my grow tent remotely?
Yes. All three cameras provide app-based live viewing over Wi-Fi.
A stable home internet connection and reliable 2.4GHz signal at the camera location are important for consistent remote access.
10. Should I use night vision in my grow tent?
Only if you actually need nighttime monitoring.
If maintaining a controlled dark period is important, disabling unnecessary visible LEDs, spotlights, and camera lighting is the simplest approach.
11. Can I turn off the camera status light?
Yes on WYZE Cam v4 and Blink Mini 2.
WYZE provides a Camera Status Light toggle, while Blink allows the status LED to be set to Always Off.
12. Can I turn off infrared night vision?
Blink Mini 2 allows the IR night-vision light to be disabled, and Tapo provides selectable infrared viewing modes.
WYZE Cam v4 also provides configurable night-vision settings.
13. Is IP65 enough for a humid grow tent?
IP65 provides useful environmental protection, but the camera should still be kept away from direct water exposure.
Tapo C120 provides the higher IP66 rating if stronger published water resistance is a priority.
14. Should I use local or cloud recording?
Local recording is usually the simpler long-term choice if you primarily want plant-monitoring footage without recurring cloud costs.
WYZE and Tapo support direct microSD recording, while Blink requires additional compatible hardware for local clip storage.
15. Where should I mount a camera in a grow tent?
An upper corner aimed diagonally across the canopy is the best starting position for most tents.
It maximizes viewing distance and reduces the chance that the nearest plant immediately blocks the entire image.
16. Can I put the camera outside the tent and point through the window?
Yes, but reflective clear panels can create glare and reduce nighttime image quality.
Blink specifically recommends disabling recording LEDs and infrared illumination when a camera is used through glass because reflected light can interfere with the image.
17. Does a grow tent camera need motion detection?
No. Continuous recording, scheduled monitoring, or time-lapse is usually more useful for plants than security-style motion alerts.
Leaves moving under circulation fans can generate motion even when nothing meaningful has changed.
18. Can one camera cover a 4×4 grow tent?
Usually, if it is mounted high in a corner and has a wide-angle lens.
Once the canopy becomes very dense, however, a second lower camera can be useful for monitoring pots, runoff trays, reservoirs, or irrigation equipment.
Conclusion
The best camera for grow tent monitoring should help you see what is happening without becoming another piece of equipment that is difficult to manage inside the enclosure.
For most growers, the WYZE Cam v4 is my first recommendation. Its 2.5K resolution, weather-resistant IP65 body, local microSD recording, configurable status light, and built-in time-lapse capability make it unusually well matched to long-term plant monitoring.
Blink Mini 2 is the better option when physical size and viewing angle matter most. Its tiny enclosure and 143-degree diagonal view allow it to cover a surprising amount of a compact tent, while its recording and infrared LEDs can be disabled when necessary.
Tapo C120 is the alternative I would favor for a particularly humid environment. Its IP66 protection, 2K video, direct microSD storage, magnetic mount, and flexible infrared modes make it technically excellent for grow-tent use.
Whichever camera you select, positioning matters as much as specifications. Mount the camera high enough that foliage will not immediately block it, keep the lens out of direct grow-light glare, route electrical connections away from water, and test Wi-Fi with the tent fully closed.
A good grow-tent camera will not replace opening the door and inspecting the plants directly. What it can do is give you an instant view of the canopy, lighting, fans, irrigation, and overall tent condition whenever you are away—and make it much easier to document how the garden changes from one day to the next.

I’m Maya L. Greenwood, a lifelong plant lover who believes anyone can grow something beautiful with the right guidance. After years of testing soil mixes, pruning methods, irrigation tricks, and pest-safe solutions, I started EasyGardenTips.com to turn hard-won lessons into step-by-step advice. From seed starting and container gardens to composting and seasonal checklists, my goal is to make gardening simple, sustainable, and fun.