How to Hill Potatoes in a Raised Bed: Soil, Straw, and Timing
To hill potatoes in a raised bed, mound loose soil around the lower stems when the plants reach approximately 6–12 inches tall, leaving healthy green leaves exposed. Add another few inches of soil as the plants grow, usually repeating the process once or twice. The goal is to keep developing potatoes covered and protected from sunlight.
Hilling is particularly important in raised beds because potato tubers sometimes develop close to the soil surface. When exposed to light, potatoes can turn green and accumulate potentially harmful glycoalkaloids. A proper soil covering helps prevent this problem while supporting healthy underground growth.
Unlike traditional garden rows, raised beds have limited space for pulling soil toward the plants. You may need to add extra growing medium or use clean straw to maintain adequate coverage. The correct approach depends on bed depth, potato spacing, and available soil.
In this guide, I explain when to start hilling potatoes, how much soil to add each time, and how to hill plants without damaging their roots. You’ll also learn how to use straw, manage shallow raised beds, calculate soil requirements, and avoid mistakes that can affect the potato harvest.
How to Hill Potatoes in a Raised Bed Step by Step

Hilling potatoes means gradually adding soil or another suitable covering around the lower stems as the plants grow.
The process helps keep developing tubers underground and prevents sunlight from reaching them.
You don’t need specialized equipment for a small raised bed.
A hand trowel, garden soil, and a little care are usually sufficient.
Materials You’ll Need
Before starting, gather:
- Loose, well-draining garden soil or raised-bed growing medium
- Hand trowel or small garden hoe
- Small bucket or watering can
- Optional finished compost
- Optional clean straw mulch
- Gardening gloves
- Watering hose or irrigation system
Avoid using heavy, compacted clay or soil that stays waterlogged.
Potatoes grow best in loose soil that allows roots and tubers to develop without excessive resistance.
Step 1: Wait Until the Potato Plants Are Tall Enough
Begin hilling once the potato plants have developed healthy green stems and leaves.
A common starting point is when plants reach approximately 6–12 inches tall.
Different extension services give slightly different timing recommendations.
According to Oregon State University Extension’s potato-growing guide, gardeners can begin adding soil or clean straw when plants are approximately 6 inches tall.
The University of Minnesota Extension recommends beginning when stems reach about 12 inches and repeating hilling once or twice during the growing season.
Both approaches focus on protecting growing tubers while allowing the foliage to remain productive.
For a small raised bed, starting around 6–8 inches tall is often convenient.
Step 2: Loosen the Soil Around the Plants
Use a hand trowel to gently loosen available surface soil.
Avoid digging deeply near the potato stems.
Potato roots and developing stolons can be damaged by aggressive cultivation.
If the raised bed is already filled close to the top, bring in extra soil rather than removing substantial amounts from the root zone.
The material should be loose enough to move around the plants without forming hard clumps.
Step 3: Add Soil Around the Lower Stems
Carefully place soil around the base of each potato plant.
For a young plant approximately 6–8 inches tall, adding 2–4 inches of loose soil is a practical starting point.
Spread the soil evenly around the lower stems.
Leave the upper green leaves exposed.
Avoid burying the entire plant beneath a large amount of material.
The plant needs sufficient foliage above the soil to continue photosynthesis.
Step 4: Shape a Gentle Hill
Form a broad mound around the plant rather than a narrow, steep pile.
A broad hill provides space for developing tubers and helps maintain soil coverage.
In a raised bed, the mound may blend into the surrounding soil instead of looking like a traditional farm row.
That is normal.
The goal is adequate coverage, not a perfectly shaped hill.
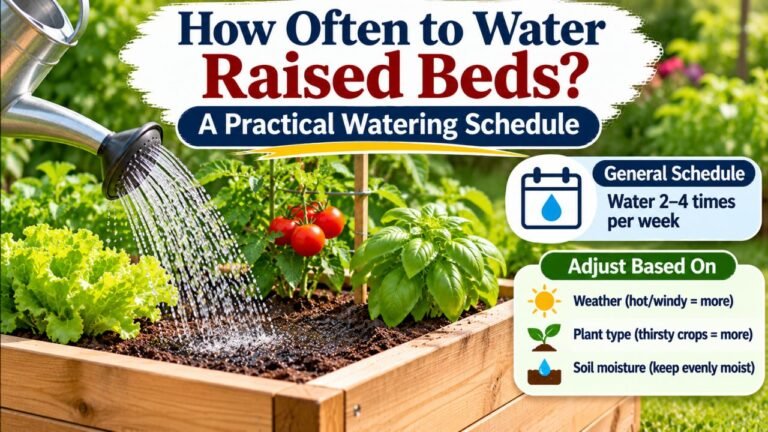
Step 5: Water the Soil
After adding soil, water gently if necessary.
This helps settle the new material around the stems.
Keep the soil evenly moist but not waterlogged.
Avoid applying such a strong stream of water that the newly formed hill washes away.
Step 6: Allow the Plants to Grow
Continue normal care.
As the potato plants develop, new stem growth will extend above the mound.
Check the soil around the plants periodically.
If developing tubers begin approaching the surface, additional coverage may be needed.
Step 7: Repeat the Hilling Process
When the plants develop another several inches of growth, add more soil around the lower stems.
A second application of approximately 2–3 inches may be sufficient.
Some beds require a third application.
However, repeated hilling should be based on actual soil coverage rather than following a fixed number of applications.
Step 8: Stop When the Tubers Are Adequately Covered
Once the soil provides sufficient coverage and the plants are well established, additional hilling may no longer be necessary.
University of Minnesota Extension describes a typical total buildup of approximately 6–8 inches of hilled soil over the season.
This doesn’t mean every raised bed must receive exactly eight additional inches.
The original planting depth, bed height, and potato variety influence how much coverage is needed.
Key Takeaway: Start hilling when potato plants are roughly 6–12 inches tall, add a few inches of loose soil at a time, and repeat as needed to keep developing tubers covered.
When Should You Start Hilling Potatoes in a Raised Bed?
The best time to begin is after the potato plants emerge and develop enough healthy foliage to remain above the added soil.
Plant height is a more useful indicator than the number of days since planting.
First Hilling: When Plants Reach 6–12 Inches
For the first hilling, look for:
- Several healthy green leaves
- Upright stems
- Approximately 6–12 inches of growth
- Soil that can be worked without becoming compacted
- Enough room to add soil around the lower stems
A small plant with only one or two emerging leaves usually doesn’t need several inches of soil piled over it immediately.
Allow it to establish first.
Second Hilling: After More Stem Growth
After the first hilling, wait until the plant has grown several more inches.
Depending on temperature and growing conditions, this may take approximately one to three weeks.
Don’t rely solely on that time range.
Watch plant growth and inspect the soil around the stems.
Add more soil when necessary.
Third Hilling: Only if Needed
A third hilling may be helpful if:
- The original mound has settled.
- Rain or watering has exposed soil around the plants.
- Tubers are forming close to the surface.
- The plants have developed additional lower stem growth.
- The raised bed still has room for more soil.
However, don’t continue adding soil indefinitely.
Once the plants have formed a substantial canopy, unnecessary digging may disturb roots and developing potatoes.
Potato Hilling Schedule
| Growing Stage | Plant Condition | Recommended Action |
| Planting | Seed potatoes placed in soil | Cover at the recommended planting depth |
| Early emergence | Small green shoots appear | Maintain moisture and allow growth |
| First hilling | Plants approximately 6–12 inches tall | Add about 2–4 inches of loose soil |
| Second hilling | Several more inches of growth | Add approximately 2–3 inches if needed |
| Later growth | Established plants and developing tubers | Cover exposed tubers; avoid unnecessary disturbance |
| Near harvest | Plants mature or begin dying back | Stop major soil disturbance |
This schedule is flexible.
Different varieties and climates may require adjustments.
Key Takeaway: Hill according to the plant’s growth stage and tuber coverage rather than hilling automatically every week.
How High Should You Hill Potatoes in a Raised Bed?
For many home gardens, the total amount of hilled soil added during the growing season is approximately 6–8 inches.
However, that figure depends on how deeply the seed potatoes were planted.
The aim is to maintain enough soil above developing tubers so they remain protected from light.
Recommended Hilling Depth by Growth Stage
| Stage | Suggested Soil Addition |
| First hilling | Approximately 2–4 inches |
| Second hilling | Approximately 2–3 inches |
| Third hilling, if necessary | Enough to restore adequate coverage |
| Total typical buildup | Approximately 6–8 inches, adjusted to conditions |
These figures describe gradual additions, not a requirement to bury the entire plant.
How Much Green Growth Should Remain Visible?
Leave healthy upper foliage exposed.
The exact amount depends on plant size and growth habit.
For example, if a plant is approximately 8 inches tall, adding 3 inches of soil around its lower stem leaves approximately 5 inches above the new soil level.
That is a reasonable starting approach.
Avoid repeatedly burying most of a mature plant.
Can You Hill Potatoes Too High?
Yes.
Excessive hilling can create several problems.
A very tall mound may:
- Bury too much productive foliage
- Interfere with watering
- Increase the amount of soil needed
- Make soil moisture difficult to manage
- Disturb developing roots when additional soil is collected
- Waste growing medium without providing a reliable yield benefit
The goal isn’t to create the tallest possible mound.
Focus on maintaining adequate coverage over the tubers.
Do Taller Hills Produce More Potatoes?
Not necessarily.
Potato tubers develop on underground stems called stolons.
Hilling can protect tubers and may support additional stolon development under suitable conditions.
However, adding soil indefinitely doesn’t guarantee a proportionate increase in potatoes.
Yield also depends on variety, growing season, sunlight, water, soil fertility, and plant health.
Key Takeaway: Build hills gradually and stop when developing potatoes have sufficient protection. Taller isn’t automatically better.
How to Hill Potatoes in a Raised Bed With Limited Soil
Raised beds have a particular challenge: there may not be enough loose soil between plants to create traditional hills.
Fortunately, several methods can solve this problem.
Method 1: Add Extra Raised-Bed Soil
This is often the simplest option.
Keep a small supply of suitable growing medium available.
When plants need hilling, add material around their lower stems.
This prevents you from digging deeply into the existing root zone.
A soil blend with good structure and drainage works well.
Avoid using pure compost as the entire hilling material.
Finished compost can be a component of the mixture, but it doesn’t always provide the same physical structure as a suitable soil blend.
Method 2: Plant Potatoes in Shallow Trenches
If you are planning a new potato crop, leave space for future hilling from the beginning.
One approach is to dig a shallow trench approximately 4–6 inches deep.
Place the seed potatoes inside and initially cover them with a smaller amount of soil.
As the plants grow, gradually fill the trench.
This creates additional cover without immediately raising the surface above the rest of the bed.
The University of Maine Cooperative Extension describes planting seed potatoes in a 4–6-inch furrow and covering them initially with approximately 2 inches of soil.
Once plants reach around 6 inches tall, gardeners begin forming hills.
This technique is especially useful when the raised-bed sides limit how much soil can be mounded above the surface.
Method 3: Leave Extra Space Below the Bed Rim
When preparing a deep raised bed, consider leaving some room for later soil additions.
For example, a 16-inch-tall raised bed doesn’t necessarily need to be filled flush to the rim at planting.
If the growing medium and planting depth are appropriate, leaving several inches of available space may make future hilling easier.
However, don’t start potatoes in an excessively shallow soil layer simply to leave headroom.
The initial planting depth and growing medium remain important.
Method 4: Use Clean Straw for Additional Coverage
Clean straw can provide a light-blocking covering when extra soil is unavailable.
It is especially useful in deeper beds or container-style potato-growing systems.
However, straw must be sufficiently dense to keep sunlight away from the developing tubers.
More information about straw hilling appears below.
Which Method Is Best?
| Raised Bed Situation | Practical Hilling Method |
| Deep bed with spare space below rim | Add raised-bed soil gradually |
| Shallow bed with little available soil | Use small mounds and suitable mulch |
| New potato planting | Start in a shallow trench |
| Bed already filled to the top | Bring in additional soil or use straw |
| Tall container-style bed | Add soil gradually as plants grow |
| Very crowded potato planting | Carefully add soil without disturbing roots |
Key Takeaway: You don’t need to remove soil from between potato plants to hill them. Adding suitable soil or starting with a trench is often easier in a raised bed.
Can You Hill Potatoes With Straw Instead of Soil?
Yes. Clean straw can be used to hill potatoes or provide additional coverage over developing tubers.
Oregon State University Extension specifically recommends adding a few inches of soil or clean straw around growing potato stems.
Straw is light, relatively easy to handle, and useful when raised-bed soil is limited.
However, it has different properties from soil.
Benefits of Using Straw for Potato Hilling
Straw can:
- Help block sunlight from developing tubers
- Reduce evaporation
- Moderate soil temperature changes
- Limit some weed growth
- Make harvesting easier in certain growing systems
- Gradually contribute organic matter as it decomposes
It is particularly useful in beds where additional soil would be expensive or difficult to obtain.
How to Hill Potatoes With Straw
- Wait until potato plants have established several inches of green growth.
- Choose clean, seed-free straw suitable for vegetable gardening.
- Loosen the straw before applying it.
- Arrange a layer around the lower potato stems.
- Keep healthy upper foliage exposed.
- Make sure the covering is dense enough to block light.
- Water as needed so moisture reaches the underlying soil.
- Check for settling and add more straw when necessary.
A few inches of loosely spread straw may be a useful starting layer.
However, light can pass through thin or poorly distributed straw.
Inspect frequently for exposed tubers.
Is Straw Better Than Soil?
Each has advantages.
| Feature | Soil | Straw |
| Blocks light | Excellent when coverage is adequate | Good when thick enough |
| Holds moisture | Depends on soil mix | Helps reduce evaporation |
| Supports root and stolon development | Yes | Different from mineral soil |
| Adds growing-medium depth | Yes | Provides cover but not equivalent soil volume |
| Ease of application | Heavier | Lightweight |
| Risk of introduced seeds | Depends on source | Possible if straw contains seed heads |
| Decomposition | Mineral soil remains | Straw breaks down over time |
| Harvesting | Requires digging | May allow easier inspection |
For conventional raised-bed potatoes, soil is the most straightforward hilling material.
Straw is useful as a supplement or in a system specifically designed around mulch-based potato growing.
Can You Use Hay Instead of Straw?
Hay can provide a similar physical covering, but it often contains more viable seeds.
This may introduce additional weeds into the raised bed.
Clean straw is generally preferable when available.
Can You Mix Soil and Straw?
Yes.
One practical approach is to build the main hill using soil, then apply clean straw over the surface.
The soil provides reliable coverage and support.
The straw helps conserve moisture and reduce light exposure.
Avoid mixing large quantities of undecomposed straw deeply into the soil without considering its effects on nitrogen availability.
Key Takeaway: Straw can help protect potato tubers, but use enough to block light and remember that it isn’t an exact substitute for the growing conditions provided by soil.
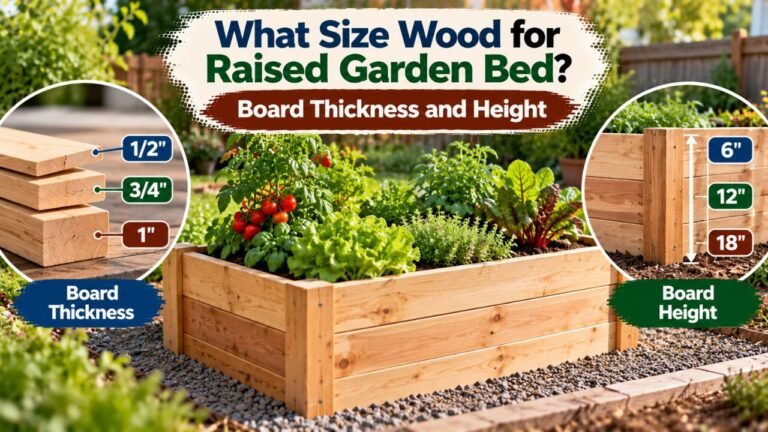
How Deep Should a Raised Bed Be for Hilling Potatoes?
The appropriate bed depth depends on whether the bed is open to the ground below and how you plan to plant the potatoes.
Potatoes need space for roots, developing tubers, and protective soil coverage.
Is a 6-Inch Raised Bed Deep Enough?
A 6-inch raised bed built directly over loose, healthy garden soil may work because roots can grow into the soil below.
However, it provides limited room above the existing ground level for hilling.
In this situation, you may need to mound additional soil or use suitable mulch.
If the raised bed has a solid bottom and only 6 inches of growing medium, it is generally too shallow for a productive, conventionally grown potato crop.
Is a 12-Inch Raised Bed Good for Potatoes?
A 12-inch bed can work well, particularly when it sits over soil that roots can penetrate.
You can plant seed potatoes at an appropriate depth and add soil as the plants grow.
If the bed has a solid bottom, available root and tuber space is more limited.
Choose planting depth and crop density carefully.
Is an 18-Inch Raised Bed Better?
An 18-inch bed provides more flexibility.
It generally offers more room for planting, hilling, and maintaining soil coverage.
However, deeper beds also require more growing medium.
Good drainage remains essential.
Raised Bed Depth Comparison
| Bed Depth | Potato Growing Considerations |
| 6 inches | Limited hilling room; works best over suitable native soil |
| 8 inches | May work over ground soil, but extra hilling material may be needed |
| 12 inches | Practical for many raised-bed potato plantings |
| 16 inches | More room for gradual soil additions |
| 18 inches | Flexible planting and hilling depth |
| 24 inches | Useful for deeper contained systems, but not always necessary |
These are general planning considerations rather than guaranteed production ratings.
Raised beds on concrete or other impermeable surfaces require particular attention to root-zone depth and drainage.
According to University of Maryland Extension’s guidance on raised-bed vegetable gardening, beds built over existing soil allow roots to enter the ground below, while raised beds over hard surfaces depend entirely on the contained growing medium.
Key Takeaway: A 12–18-inch raised bed provides useful hilling flexibility, while shallow beds may still work when potatoes can root into good native soil below.
How Far Apart Should You Plant Potatoes in a Raised Bed?
Plant spacing affects both potato development and how easily you can hill the plants.
Crowded potato plants make soil movement more difficult.
They may also compete for water, nutrients, and sunlight.
Recommended Potato Spacing
A practical starting range is:
- 10–12 inches between seed potatoes for many home plantings
- More room when growing particularly large varieties or aiming for larger tubers
- Wider pathways between conventional rows than are usually available inside compact raised beds
University of Minnesota Extension recommends approximately 10–12 inches between seed pieces in conventional rows.
University of Maryland Extension also notes that spacing can be adjusted according to the intended tuber size.
How Many Potatoes Can You Plant in a 4×4 Raised Bed?
A 4×4-foot bed provides 16 square feet.
A practical starting arrangement might contain approximately 6–9 seed potatoes, depending on the spacing and variety.
A tighter arrangement can support more plants, but it may increase competition and complicate hilling.
For beginners, leaving more space is usually easier than overcrowding.
How Many Potatoes Can You Plant in a 4×8 Raised Bed?
A 4×8-foot bed provides 32 square feet.
Approximately 12–18 seed potato pieces may be a reasonable starting range for many layouts, depending on the cultivar and spacing.
The exact count should be based on mature growth and available root-zone space.
Don’t assume that adding more seed pieces automatically increases total usable yield.
Why Spacing Matters During Hilling
Each potato plant needs enough space for soil to be added around its lower stems.
If plants grow too close together, you may struggle to avoid disturbing neighboring roots.
Healthy spacing also helps maintain airflow through the foliage.
Key Takeaway: Around 10–12 inches between seed potatoes is a useful starting point, but allow more room when growing large varieties or when ease of hilling is a priority.
How Much Soil Do You Need to Hill Potatoes in a Raised Bed?
The soil required depends on the area being covered and the depth of each addition.
For rough planning, use:
Soil volume (cubic feet) = Length (feet) × Width (feet) × Added depth (inches) ÷ 12
This calculates the amount needed for a uniform layer over the entire bed.
Actual potato hills are mounds, so they may require less material.
Soil Required for a 4×4 Raised Bed
A 4×4 bed has 16 square feet of surface area.
| Uniform Added Soil Depth | Approximate Soil Volume |
| 1 inch | 1.33 cubic feet |
| 2 inches | 2.67 cubic feet |
| 3 inches | 4 cubic feet |
| 4 inches | 5.33 cubic feet |
Soil Required for a 4×8 Raised Bed
A 4×8 bed has 32 square feet of surface area.
| Uniform Added Soil Depth | Approximate Soil Volume |
| 1 inch | 2.67 cubic feet |
| 2 inches | 5.33 cubic feet |
| 3 inches | 8 cubic feet |
| 4 inches | 10.67 cubic feet |
These amounts assume even coverage across the whole bed.
If you’re adding soil only around individual potato plants, you may need less.
Should You Buy Extra Soil Before Planting?
Yes, keeping some additional growing medium available can make hilling easier.
This is especially helpful when the raised bed is already nearly full.
Store unused soil where it remains clean and protected from contamination.
Avoid introducing soil from areas with known plant diseases, pests, or chemical contamination.
What Is the Best Soil for Hilling Potatoes?
The ideal hilling material should be loose, well-draining, and suitable for vegetable production.
Potatoes generally perform best in soil that allows developing tubers to expand without severe compaction.
Good Soil Characteristics
Look for a growing medium that:
- Crumbles relatively easily
- Allows excess water to drain
- Retains some moisture
- Contains appropriate organic matter
- Does not contain large amounts of stones
- Is free from known chemical contamination
- Does not form a hard crust after watering
A suitable raised-bed soil blend can work well.
Can You Use Potting Mix?
Yes, a suitable container or raised-bed growing mix can be used as part of the hilling material.
However, some lightweight potting mixes dry quickly.
Monitor soil moisture carefully.
Avoid choosing a material based only on how light and fluffy it feels.
The full root zone must provide adequate water, air, and nutrients.
Can You Use Compost for Hilling?
Finished compost can be added with suitable soil.
However, pure compost isn’t always the best sole hilling material because its physical properties and nutrient concentration vary.
A balanced growing medium is usually more predictable.
Can You Use Topsoil?
Yes, if it is suitable for vegetable gardening.
Avoid topsoil that is:
- Heavily compacted
- Contaminated
- Full of large stones
- Excessively clay-rich
- Poorly drained
Mixing appropriate mineral soil with finished compost can improve growing conditions.
Should You Add Fertilizer When Hilling?
Potatoes require adequate nutrients, but fertilizer should be based on soil conditions.
A soil test is the best starting point.
University of Minnesota Extension recommends side-dressing potatoes during the growing season, including around the hilling period.
However, the correct fertilizer rate depends on the soil, growing area, and product.
Do not use lawn fertilizers containing weed killers in a vegetable bed.
Excessive nitrogen can encourage lush foliage without necessarily improving tuber production.
Key Takeaway: Use a loose, well-draining growing medium with appropriate fertility. Hilling material should protect tubers without creating waterlogged or compacted conditions.
Why Do Potatoes Need Hilling in Raised Beds?
The main reason is to prevent developing tubers from receiving sunlight.
Potato tubers form underground on stems called stolons.
Some develop close enough to the surface that normal soil settling, erosion, or plant growth can expose them.
Hilling Prevents Green Potatoes
When potato tubers are exposed to light, they can develop green coloration.
The green color itself comes from chlorophyll.
However, light exposure can also increase the concentration of naturally occurring glycoalkaloids, including solanine.
These compounds can be harmful when consumed in sufficiently high amounts.
Are Green Potatoes Safe to Eat?
Avoid eating potatoes that are extensively green, bitter, or otherwise suspicious.
Removing a small green area may reduce exposure, but trimming isn’t a reliable solution for heavily green potatoes.
Cooking doesn’t reliably eliminate the concern.
For safer gardening, prevent greening by keeping developing tubers covered and storing harvested potatoes away from light.
Hilling Can Help Control Weeds
Moving soil around young potato plants can bury or uproot small weeds.
This reduces competition for nutrients and water.
However, cultivation should remain shallow.
Aggressive digging can damage potato roots and stolons.
Hilling Helps Maintain Protective Coverage
Rain, irrigation, and soil settling can reduce the amount of material over developing potatoes.
Periodic hilling restores this protection.
In raised beds, straw or another suitable mulch may also help maintain coverage.
Does Hilling Increase Potato Yield?
It may help by supporting proper growing conditions and reducing losses from exposed tubers.
However, the relationship between hilling height and yield is not unlimited.
A healthy potato harvest depends on multiple factors, including variety, growing season, soil fertility, moisture, and disease management.
Key Takeaway: The primary reason to hill potatoes is to protect developing tubers from light and greening, not to build excessively tall mounds.
How to Water Potatoes After Hilling
Potatoes need consistent soil moisture, particularly during tuber formation and enlargement.
Raised beds can dry faster than traditional in-ground gardens.
Newly added soil may also change how water moves into the root zone.
Water After Adding Soil
After hilling, water gently enough to settle the material without washing it away.
Make sure water reaches the original root zone below the new soil.
Avoid judging moisture only by the surface of the mound.
How Much Water Do Potatoes Need?
Approximately 1 inch of water per week from rainfall and irrigation is a useful general starting point for many garden conditions.
Hot, windy weather and fast-draining raised-bed soil may increase demand.
Actual needs vary with the growth stage, climate, and soil mixture.
Check moisture below the surface and adjust irrigation accordingly.
Avoid Waterlogged Soil
Potatoes don’t grow well in saturated conditions.
Poor drainage can increase the risk of tuber rot and other problems.
Water thoroughly when needed, but allow excess water to drain away.
Should You Mulch After Hilling?
A suitable straw or organic mulch can help reduce evaporation.
Apply it over the soil surface without excessively burying the foliage.
Make sure the mulch is clean and appropriate for vegetable production.
Key Takeaway: Keep the potato root zone consistently moist without saturating it, and check beneath the hilled soil before watering.
Should You Hill Potatoes Before or After Flowering?
Hilling is generally performed before or during the earlier stages of tuber development, rather than being delayed until flowering is finished.
Flowering isn’t a reliable universal indicator of when to hill.
Some potato varieties flower heavily, some produce few flowers, and some may develop tubers without noticeable flowering.
Hill While Plants Are Still Growing
The best approach is to begin when the plants reach the appropriate height.
Continue as necessary while they develop.
Avoid waiting until tubers are already exposed.
Can You Hill Potatoes While They’re Flowering?
Yes, if they need additional protective coverage.
However, use a gentle approach.
By this stage, underground roots, stolons, and tubers may already occupy considerable space.
Avoid digging deeply or disturbing the root zone.
If the plants are mature and only a few tubers are becoming exposed, gently adding soil or suitable mulch may be safer than reshaping the entire hill.
When Should You Stop Hilling?
Stop major hilling when the plants are mature and the existing soil adequately covers the tubers.
Near harvest, unnecessary cultivation can damage developing potatoes.
Maintain protective cover but avoid aggressive soil disturbance.
Can You Hill Potatoes in a Raised Bed After Heavy Rain?
Yes, but wait until the soil is suitable for working.
Heavy rain can compact loose soil, wash away parts of hills, or expose tubers.
However, digging wet soil can damage its structure.
What to Do After Heavy Rain
- Inspect the bed for exposed tubers.
- Check whether the soil is waterlogged.
- Avoid heavy cultivation while the soil is saturated.
- Allow the surface to become workable.
- Gently restore missing soil around the plants.
- Cover exposed tubers promptly.
- Check drainage and irrigation practices.
If a potato is directly exposed to light, you can carefully cover it without disturbing the rest of the bed.
How to Know When Soil Is Ready
Take a handful of soil.
If it forms a sticky, compact ball that doesn’t crumble, it may be too wet to work.
If it breaks apart relatively easily, conditions are generally more suitable.
Avoid repeatedly walking on or compacting the raised bed.
Common Mistakes When Hilling Potatoes in Raised Beds
Several mistakes can interfere with potato growth or create unnecessary work.
1. Hilling Too Early
Very small plants may not have enough foliage above the added soil.
Wait until the stems have developed enough height.
2. Adding Too Much Soil at Once
A thick layer can bury excessive green foliage.
Add soil gradually.
3. Using Heavy, Compacted Soil
Dense soil may restrict tuber development and drainage.
Use a loose growing medium.
4. Digging Too Close to Potato Roots
Potato roots and stolons may extend beyond the visible stem.
Avoid deep cultivation near established plants.
5. Filling the Bed Without Planning for Hilling
A shallow bed filled to the rim leaves little room for additional material.
When possible, plan the planting depth and future soil additions before planting.
6. Assuming Straw Always Blocks Sunlight
Thin straw can allow light to reach the soil surface.
Use sufficient coverage and inspect for exposed potatoes.
7. Using Contaminated Straw or Soil
Avoid materials with unknown herbicide residues, excessive weed seeds, or potential plant pathogens.
Use reputable sources.
8. Overwatering After Hilling
New soil may retain moisture differently from the original mix.
Check the root zone before watering.
9. Continuing to Hill Mature Plants Unnecessarily
Repeated late cultivation can damage roots and tubers.
Stop when adequate coverage has been achieved.
10. Expecting Extremely Tall Hills to Guarantee Higher Yields
Adding more material doesn’t automatically produce more potatoes.
Maintain proper soil depth, spacing, moisture, and fertility instead.
Key Takeaway: The most common errors are burying too much foliage, using unsuitable material, disturbing roots, and continuing to hill when the plants no longer need it.
How to Know if Your Potato Hilling Is Working
Properly hilled potato plants should continue producing healthy foliage while their developing tubers remain below the soil surface.
Signs of Good Hilling
Look for:
- Healthy green leaves above the mound
- No visible potato tubers at the surface
- Loose but stable soil coverage
- Consistent moisture in the root zone
- No severe waterlogging
- Minimal damage to stems
- Continued plant growth
Signs of Potential Problems
Watch for:
- Exposed or green potato tubers
- Yellowing leaves associated with other stress symptoms
- Waterlogged soil
- Damaged stems
- Very compacted hills
- Excessive wilting
- Soil washing away from the plants
Not every yellow leaf indicates a hilling problem.
Potato foliage naturally declines as the crop approaches maturity.
However, sudden widespread yellowing, wilting, or unusual spotting earlier in the season may require investigation.
Should You Dig to Check for Potatoes?
Avoid repeatedly digging around developing plants.
This can damage roots, stolons, and young tubers.
If you’re checking for new potatoes, carefully explore near the outside of the hill when the crop is sufficiently mature.
Otherwise, let the plants grow until the intended harvest stage.
When Can You Harvest Potatoes From a Hilled Raised Bed?
Harvest timing depends on whether you want tender new potatoes or mature storage potatoes.
The variety and growing season also affect maturity.
Harvesting New Potatoes
New potatoes are harvested before their skins become fully mature.
Some varieties may provide new potatoes approximately seven to eight weeks after planting.
However, growth rates vary.
Carefully loosen soil near the plant and check tuber size when appropriate.
Avoid unnecessarily damaging the remaining root system if you want the plant to continue growing.
Harvesting Mature Potatoes
For storage potatoes, wait until the plants have completed their growth cycle.
Foliage often yellows and dies back as maturity approaches.
Follow the variety’s maturity guidance.
When the tuber skins have become sufficiently firm, carefully harvest the potatoes.
How to Harvest From a Raised Bed
- Choose an appropriate harvest time.
- Stop unnecessary hilling and cultivation.
- Gently move mulch away from the plants.
- Loosen soil from the outside of the planting area.
- Carefully lift the tubers.
- Avoid cutting or bruising them.
- Separate damaged potatoes from sound ones.
- Keep harvested potatoes out of direct sunlight.
A small hand fork can be useful, but use it carefully.
Tubers can be damaged by sharp tines.
What to Do With the Soil After Harvest
Remove damaged or diseased plant debris as appropriate.
Check the growing medium for compaction and nutrient needs.
Consider crop rotation before planting another potato crop.
Potatoes belong to the nightshade family, along with tomatoes, peppers, and eggplants.
These crops can share certain soilborne diseases.
Where practical, avoid repeatedly growing them in the same raised bed.
Conclusion
Learning how to hill potatoes in a raised bed is straightforward once you understand when to add soil and how much coverage the plants need.
Begin when the potato stems reach approximately 6–12 inches tall.
Add a few inches of loose, well-draining soil around the lower stems while keeping healthy green foliage exposed.
Repeat the process once or twice as needed, with a typical total soil buildup of approximately 6–8 inches.
If your raised bed has limited space, start potatoes in shallow trenches or keep additional growing medium available for hilling.
Clean straw can also provide protective coverage when used correctly, although it should be sufficiently thick to block sunlight.
The main purpose of hilling is to protect developing tubers from light exposure and prevent greening. Building unusually tall mounds doesn’t guarantee higher yields.
Maintain consistent moisture, avoid disturbing roots, and stop major hilling once the tubers are adequately covered.
With the right timing and a little attention, your raised bed can provide suitable growing conditions for healthy potatoes and an easier harvest.
FAQs About How to Hill Potatoes in a Raised Bed
When Should I First Hill Potatoes in a Raised Bed?
Begin when the potato plants are approximately 6–12 inches tall. Add about 2–4 inches of loose soil around the lower stems while keeping healthy upper foliage exposed. The exact timing depends on plant growth and the original planting depth.
How Many Times Should You Hill Potatoes in a Raised Bed?
Most potato plantings need approximately two or three hillings, although some require fewer. Add soil as plants grow and stop when developing tubers are adequately covered. Excessive hilling isn’t necessary and can disturb established roots.
Can You Hill Potatoes With Straw Instead of Dirt?
Yes. Clean straw can be used as a light-blocking cover around potato plants. Make sure the layer is dense enough to protect developing tubers from sunlight. Straw can also be combined with soil, but it doesn’t provide all the same growing-medium properties as soil.
How Much Soil Should You Add When Hilling Potatoes?
Approximately 2–4 inches during the first hilling is a practical starting point. Subsequent applications may add another 2–3 inches. The total buildup is often around 6–8 inches, but adjust according to the planting depth, plant size, and tuber coverage.
Can You Hill Potatoes Too Much?
Yes. Excessive hilling can bury too much green foliage, interfere with watering, and disturb roots or developing tubers. Stop when the potatoes are adequately covered rather than trying to make the hill as tall as possible.
Do Potatoes Need Hilling in a Raised Bed?
Usually, yes, especially if developing tubers approach the soil surface. Hilling protects potatoes from sunlight, which can cause greening and increased glycoalkaloid concentrations. Potatoes planted sufficiently deep may require less added soil than shallow plantings.
Can You Hill Potatoes After They Flower?
Yes, if additional soil or mulch is needed to protect developing tubers. However, avoid aggressive digging because roots and stolons are already established. Gently cover exposed areas and stop unnecessary cultivation as the crop approaches maturity.

I’m Maya L. Greenwood, a lifelong plant lover who believes anyone can grow something beautiful with the right guidance. After years of testing soil mixes, pruning methods, irrigation tricks, and pest-safe solutions, I started EasyGardenTips.com to turn hard-won lessons into step-by-step advice. From seed starting and container gardens to composting and seasonal checklists, my goal is to make gardening simple, sustainable, and fun.