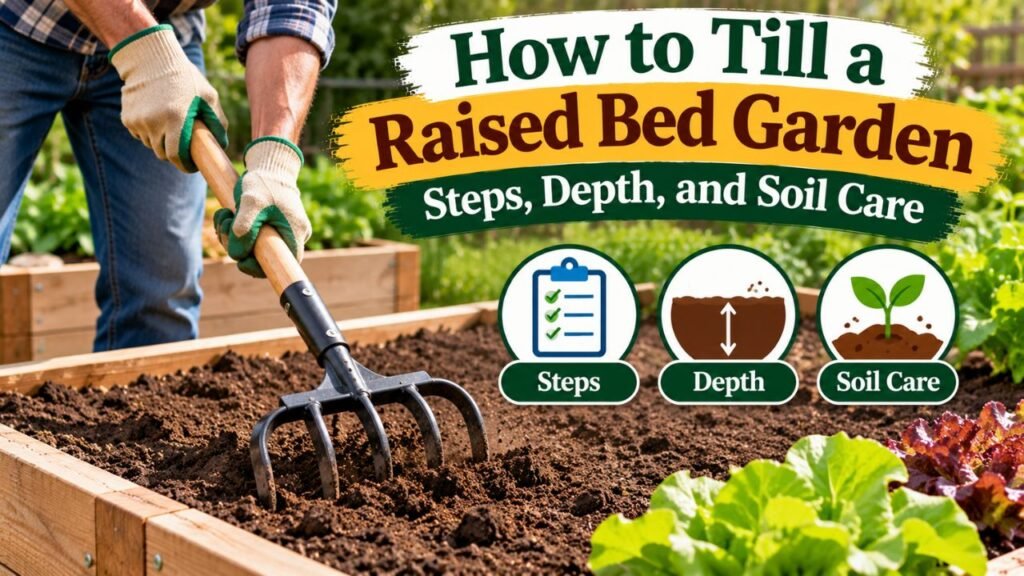
How to Till a Raised Bed Garden: Steps, Depth, and Soil Care
To till a raised bed garden, remove old plant debris, check that the soil is moist but not wet, and loosen compacted areas with a garden fork or broadfork. Work approximately 6–8 inches deep when necessary, gently lift the soil without completely turning it over, and incorporate finished compost only if the soil needs improvement. Finish by raking the surface level before planting.
However, not every raised bed needs tilling. Established beds with loose, well-drained soil usually perform better with minimal disturbance. Repeated tilling can damage soil structure, bring buried weed seeds to the surface, and disrupt beneficial soil organisms.
The best approach depends on whether you’re preparing a new bed, improving compacted soil, or refreshing an existing vegetable garden. Choosing the right tool and soil moisture conditions is particularly important.
In this article, I explain how to till a raised bed garden step by step, including which tools to use, how deeply to loosen the soil, and when to prepare it for planting. I also cover compost application, clay soil, new versus established beds, common tilling mistakes, and no-till alternatives that help maintain healthy garden soil.
Do You Need to Till a Raised Bed Garden?
Most established raised bed gardens do not need annual tilling. If the soil is already loose, drains properly, and supports healthy plant roots, regular cultivation may cause more problems than it solves.
Tilling can be useful when establishing a new bed over compacted ground or correcting a specific soil problem.
However, it should have a clear purpose.
According to the University of Minnesota Extension’s raised bed gardening guidance, established raised beds should require minimal or no tillage.
The university also recommends avoiding foot traffic on the planting area to help prevent compaction.
When Tilling a Raised Bed May Be Helpful
Consider loosening the soil when:
- You’re establishing a new raised bed over compacted ground.
- The soil has become unusually hard or dense.
- Plant roots struggle to penetrate the soil.
- Water collects on the surface because of compaction.
- The bed contains large, hardened soil clumps.
- You need to incorporate amendments into poor native soil during initial preparation.
- Heavy foot traffic or construction activity has compacted the soil.
Even in these situations, a garden fork may be sufficient.
A mechanical tiller isn’t always necessary.
When You Should Avoid Tilling
Avoid unnecessary tilling when:
- The existing soil is loose and workable.
- Earthworms and root channels are abundant.
- The bed drains properly.
- You’re simply adding compost for seasonal maintenance.
- Established plants are growing in the bed.
- The soil is wet and sticky.
- The bed contains permanent irrigation lines that could be damaged.
For routine maintenance, spreading finished compost over the surface is often preferable to digging it deeply into the soil.
Tilling vs. No-Till at a Glance
| Raised bed condition | Recommended approach |
| New bed over compacted ground | Loosen the native soil before filling |
| New bed over healthy garden soil | No-dig or minimum-dig preparation |
| Established bed with loose soil | No tilling necessary |
| Established bed with surface crusting | Shallow hand cultivation if needed |
| Compacted soil several inches deep | Loosen carefully with a garden fork |
| Bed containing growing vegetables | Avoid tilling near roots |
| Bed filled with fresh raised bed mix | Usually no tilling needed |
| Bed over concrete or pavement | Maintain the growing mix without digging into the base |
Key Takeaway: Till only when the soil actually needs loosening or preparation. An established raised bed shouldn’t automatically be tilled every spring.
How to Till a Raised Bed Garden Step by Step
For a small raised bed, hand tools usually provide enough control to loosen soil without unnecessarily disturbing its structure.
The following method is suitable for an empty bed that has become compacted or needs initial preparation.
Step 1: Choose the Right Time to Till
The best time to till a raised bed is before planting, when the soil has the correct moisture level.
Spring and fall are both possible preparation periods.
However, soil condition matters more than the calendar date.
Don’t till wet soil.
Wet soil can compress into dense clods when worked.
This may create long-term problems with drainage and root growth.
How to Check Soil Moisture
Use this simple test:
- Take a handful of soil from several inches below the surface.
- Squeeze it gently.
- Open your hand.
- Press the soil clump with a finger.
If the soil forms a sticky, firm ball that doesn’t break apart easily, it is too wet.
If it crumbles into smaller pieces with gentle pressure, the moisture level is generally suitable for working.
If the soil is extremely dry and powdery, lightly moisten it and allow moisture to distribute before working.
The Oregon State University Extension’s gardening guide recommends tilling when soil crumbles readily rather than forming wet clods or becoming excessively dusty.
Step 2: Remove Old Plants and Surface Debris
Clear the planting area before loosening the soil.
Remove:
- Spent annual vegetable plants.
- Large plant stems.
- Stakes and supports.
- Irrigation tubing that could be damaged.
- Plastic mulch.
- Large weeds.
- Other objects that interfere with cultivation.
Healthy, disease-free plant material may be composted when appropriate.
Plants showing serious disease symptoms may require different disposal methods, depending on the disease.
Remove perennial weeds with spreading roots or underground stems as completely as practical.
Chopping certain perennial weed roots into pieces can make the infestation worse.
Don’t automatically remove every fine root from a previous crop.
Small, healthy roots can decompose and contribute organic matter to the soil.
Step 3: Inspect the Raised Bed Soil
Before using a tool, determine whether the soil actually needs loosening.
Push a garden fork or hand trowel into several locations.
Look for:
- Dense, compacted layers.
- Poor drainage.
- Hard clumps.
- Restricted rooting depth.
- Unusually dry or waterlogged areas.
Healthy raised bed soil should generally have a workable, crumbly structure.
It doesn’t need to look like finely sifted potting mix.
Natural soil aggregates help maintain pores that hold air and water.
If the fork penetrates easily and the soil already has good structure, skip deep tilling.
A light surface preparation may be enough.
Step 4: Choose the Right Tilling Tool
For most home raised beds, a garden fork is a practical choice.
It can loosen compacted soil without completely turning over each layer.
Other useful tools include:
- Garden fork: Suitable for loosening soil and breaking moderate compaction.
- Broadfork: Useful for loosening deeper soil while minimizing inversion.
- Hand cultivator: Suitable for shallow surface work.
- Garden rake: Useful for smoothing the planting surface.
- Spade: Useful for initial bed preparation and localized digging.
- Small electric tiller: An option for larger beds or severely compacted soil when necessary.
Avoid using oversized equipment inside narrow wooden or metal raised beds.
Mechanical tillers can damage edging, irrigation systems, liners, or nearby plants.
Step 5: Loosen the Soil Gently
Insert the garden fork into the soil.
For compacted areas, aim to loosen approximately 6–8 inches where the bed depth allows.
Use the following technique:
- Stand beside the raised bed rather than stepping inside.
- Insert the garden fork vertically.
- Push the tines into the compacted soil.
- Pull the handle backward slightly.
- Lift and crack the soil gently.
- Avoid completely flipping the soil layer.
- Move the fork approximately 6–8 inches to the next position.
- Repeat until the compacted area is loosened.
The objective is to create openings for air, water, and roots.
You don’t need to pulverize every soil clump.
The University of Maryland Extension’s raised bed guide, updated March 26, 2026, recommends a minimum-dig approach using a garden fork or spade.
Its method involves inserting the tool, rocking it back and forth, and repeating every 6–8 inches without turning the soil upside down.
This approach preserves more of the existing soil structure than aggressive rototilling.
Step 6: Add Compost if the Soil Needs Improvement
Finished compost can improve soil structure and contribute organic matter.
However, adding compost isn’t always necessary.
If your raised bed already contains a high-quality soil mix with adequate organic matter, additional compost may provide little benefit.
For compacted mineral soil that needs improvement, spreading approximately 1–2 inches of finished compost and incorporating it into the upper 6–8 inches may be appropriate.
The University of Minnesota Extension’s soil health guidance describes this method for improving compacted flower and vegetable garden soil.
For established, healthy raised beds, top-dressing with a smaller amount of compost when needed is often preferable.
Avoid adding large quantities every season without considering soil test results.
Excessive compost use can increase phosphorus and soluble salts.
Step 7: Break Apart Large Clumps Carefully
After loosening the soil, inspect the surface.
Break apart large clumps with a garden fork or rake when necessary.
Don’t crush the entire bed into a powder.
Excessive cultivation can destroy natural aggregates that help maintain water infiltration and soil aeration.
If the soil is still forming hard clods, reconsider whether its moisture level is appropriate.
Working wet clay aggressively often makes the problem worse.
Step 8: Rake the Soil Surface Level
Use a garden rake to smooth the planting area.
Remove large stones, remaining weed roots, and other debris.
A reasonably level surface helps distribute irrigation water.
However, don’t repeatedly rake until the soil becomes extremely fine.
For direct-seeded vegetables, prepare only the surface texture needed for the particular seed.
For larger transplants, a less finely worked surface is usually acceptable.
Step 9: Water and Allow the Soil to Settle
After preparation, water gently if the soil needs moisture.
Use a watering can, soaker hose, or drip irrigation system.
Avoid a strong stream that displaces newly loosened soil.
Allow the water to infiltrate.
The soil may settle slightly after its first thorough watering.
This is normal.
If settling exposes a major low area, add suitable soil mix rather than compacting the planting surface with your feet.
Step 10: Plant and Protect the Soil
Once the bed is ready, plant according to the crop’s requirements.
After seedlings establish or transplants are placed, use an appropriate mulch where practical.
Mulch can help:
- Reduce surface crusting.
- Limit weed germination.
- Moderate soil temperature.
- Reduce evaporation.
- Protect soil from heavy rainfall.
Keep mulch away from plant stems and crowns to avoid trapping excess moisture against them.
Key Takeaway: The safest tilling method for a small raised bed is usually gentle loosening with a garden fork, followed by limited amendments and light surface preparation.
How Deep Should You Till a Raised Bed Garden?
The appropriate tilling depth depends on the bed’s construction, soil condition, and intended purpose.
There is no single depth that applies to every raised bed.
Recommended Tilling Depth by Situation
| Situation | Approximate working depth | Recommendation |
| Loose established raised bed | No deep tilling | Rake or top-dress if necessary |
| Minor surface crusting | 1–2 inches | Shallow hand cultivation |
| Compacted upper soil | 4–6 inches | Loosen with a garden fork |
| New bed over compacted native soil | 6–8 inches | Loosen before adding raised bed soil |
| New unframed raised bed requiring soil incorporation | Around 6 inches | One-time mixing may be appropriate |
| Raised bed over a hard surface | Only within the growing mix if needed | Do not disturb the underlying surface |
These depths are practical guidelines, not mandatory specifications.
For example, Oregon State University Extension recommends initial tilling to approximately 6 inches when constructing certain unframed raised beds.
However, it also states that rototilling should become unnecessary once those beds are established.
Should You Till the Full Depth of a Raised Bed?
Usually not.
A raised bed that is 18 inches deep doesn’t automatically need to be tilled to 18 inches.
Deep, repeated disturbance can disrupt established root channels and soil structure.
If the upper soil is loose and the bed drains properly, there may be no reason to disturb lower layers.
When compaction is localized, loosen only the affected area.
How Deep Should You Loosen Soil for Root Vegetables?
Carrots, parsnips, and other root crops benefit from soil that allows roots to develop without severe physical obstruction.
However, that doesn’t mean the entire growing area must be rototilled.
Use a garden fork to gently loosen compacted areas when necessary.
Remove large stones or other obstacles that could interfere with root development.
A deep, well-maintained raised bed may already provide adequate rooting conditions without annual tilling.
Best Tools for Tilling a Raised Bed Garden
The best tool is usually the one that loosens the soil with the least unnecessary disturbance.
Small, contained beds often require different equipment from large in-ground vegetable gardens.
| Tool | Best use | Soil disturbance | Main limitation |
| Garden fork | Small raised beds and compacted spots | Low to moderate | Requires manual effort |
| Broadfork | Deeper compaction over a larger area | Low | Needs room to operate |
| Hand cultivator | Surface crusting and small weeds | Shallow | Limited working depth |
| Spade | Initial preparation or localized digging | Moderate to high | Can invert soil layers |
| Garden rake | Leveling and seedbed preparation | Very shallow | Doesn’t fix deep compaction |
| Electric mini tiller | Larger empty beds requiring mixing | High | Can damage structures and soil aggregates |
| Rotary tiller | Initial work in large unframed beds | High | Often excessive for established raised beds |
Garden Fork vs. Rototiller
A garden fork is generally better for an established raised bed.
It provides control over where and how deeply the soil is loosened.
A rototiller mixes soil more aggressively.
This may be useful for initial preparation of a large, compacted area but is generally unnecessary for annual maintenance.
Frequent rototilling can also bring weed seeds to the surface and damage soil structure.
Is a Broadfork Good for Raised Beds?
Yes, when the bed is large enough to accommodate the tool.
A broadfork typically has several long tines and two handles.
It loosens the soil by lifting and cracking compacted layers rather than turning them over.
The University of Minnesota Extension’s guide to reducing tillage recommends broadforks as an alternative for relieving compaction.
For narrow raised beds, a standard garden fork may be more convenient.
Can You Use a Small Electric Tiller in a Raised Bed?
Yes, but only when the bed is large enough, empty, and appropriate for mechanical cultivation.
Before using one:
- Check the tiller’s working width.
- Confirm the bed is deep enough.
- Locate irrigation lines.
- Identify buried barriers or hardware cloth.
- Keep rotating tines away from the frame.
- Follow all equipment safety instructions.
Don’t use a powered tiller inside a bed containing established vegetables or perennial root systems.
For most small residential raised beds, hand cultivation is easier to control.
How to Till a New Raised Bed Garden
New raised beds sometimes benefit from initial soil loosening.
The method depends on what is underneath the bed.
Starting a Raised Bed Over Grass
If you’re installing a raised bed over a lawn, evaluate the existing ground before adding the frame and soil.
Two general approaches are possible.
No-dig approach: Suppress or remove the existing vegetation and add suitable growing material without turning the underlying soil.
Minimum-dig approach: Remove unwanted vegetation and gently loosen compacted native soil with a fork before installing the frame.
If the soil beneath the lawn is heavily compacted, initial loosening may improve root penetration and drainage.
Remove persistent perennial weeds carefully.
Don’t simply chop spreading roots into small pieces and bury them.
Starting a Raised Bed Over Compacted Clay Soil
Compacted clay can restrict water infiltration and root growth.
For a new bed:
- Remove vegetation and debris.
- Wait until the clay is no longer wet and sticky.
- Insert a garden fork into the soil.
- Rock the fork gently to crack compacted areas.
- Repeat across the proposed bed footprint.
- Add suitable raised bed soil and finished compost as needed.
- Avoid walking on the prepared area.
Don’t mix sand into heavy clay without an appropriate soil-specific plan.
Adding small amounts of sand can sometimes make a poorly balanced mix even less workable.
Organic matter and proper soil structure are generally more useful starting points.
Starting a Raised Bed Over Healthy Garden Soil
If the native soil is already loose and well-drained, deep tilling may be unnecessary.
You may be able to install the raised bed and add soil directly.
The University of Maryland Extension recommends no-dig or minimum-dig methods for many raised bed situations.
The goal is to establish a suitable growing area without unnecessary disturbance.
Starting a Raised Bed Over Concrete
A raised bed on concrete or pavement requires a different approach.
There is no native soil underneath to loosen.
The bed needs sufficient growing depth and appropriate drainage.
You can use hand tools to loosen compacted growing media inside the container if needed.
However, don’t attempt to till beneath the bed.
Check drainage arrangements before planting.
How to Till an Established Raised Bed Without Damaging Soil
An established bed usually requires less disturbance than a newly constructed one.
If plants have grown successfully for several seasons, the soil may already contain useful root channels and stable aggregates.
Remove Only Necessary Plant Debris
After harvesting annual vegetables, remove large stems, diseased material, and problem weeds.
Healthy small roots can remain in the soil and decompose.
Avoid pulling up large volumes of soil unnecessarily.
Loosen Compacted Areas Individually
Inspect the bed for specific hard spots.
If compaction is limited to one location, use a garden fork there.
There is little benefit in disturbing the entire bed.
Top-Dress With Finished Compost
When additional organic matter is needed, spread a modest layer of finished compost.
You can leave it on the surface or incorporate it shallowly if justified.
Over time, biological activity and ordinary soil processes help integrate organic matter.
However, don’t add compost automatically if soil testing indicates excessive nutrient levels.
Avoid Walking Inside the Bed
Foot traffic is a major preventable cause of compaction.
Raised beds should be narrow enough to reach the center from the sides.
A commonly used width is approximately 3–4 feet when the bed can be accessed from both sides.
Maintain accessible paths around the bed.
Protect the Soil Between Growing Seasons
Mulch and cover crops help protect the surface.
They can reduce erosion and limit weed growth.
Organic residues also contribute to soil health as they decompose.
This ongoing care can reduce the need for future tilling.
Key Takeaway: In established raised beds, spot-loosening, compost top-dressing, and preventing foot traffic are generally better than turning the entire bed every year.
Should You Till a Raised Bed in Spring or Fall?
Both seasons can be suitable for soil preparation.
However, the best time depends on the condition of the soil and whether tilling is actually necessary.
Tilling in Spring
Spring preparation is common because gardeners want to loosen soil before planting.
However, early spring soil may remain wet after rain or snowmelt.
Working it too soon can create compaction and clods.
Wait until the soil passes the squeeze test.
If the bed is already loose, a light raking may be enough.
Tilling in Fall
Fall can be a good time to address severe compaction in an empty bed.
It may also allow time to prepare soil before the next growing season.
However, don’t till simply because the growing season has ended.
A protective mulch or cover crop may provide greater benefits.
Fall is also a useful time to review drainage problems and prepare new beds.
Is It Necessary to Till Every Year?
No.
Once a raised bed has been established and improved, annual tilling is generally unnecessary.
Oregon State University Extension specifically notes that after the initial improvement process, rototilling should no longer be needed.
A garden fork or light surface preparation can address occasional problems.
Tilling vs. No-Till Raised Bed Gardening
No-till gardening minimizes soil disturbance.
Instead of turning the soil regularly, gardeners maintain fertility and structure through organic matter, mulching, suitable watering, and careful planting.
Benefits of No-Till Gardening
Reducing tillage can help preserve:
- Natural soil aggregates.
- Earthworm channels.
- Root pathways.
- Soil microbial habitats.
- Water infiltration pathways.
- Organic matter near the surface.
It can also reduce the number of buried weed seeds brought to the surface.
These benefits help explain why no-till methods are commonly recommended for established raised beds.
When Tilling May Still Be Useful
A no-till approach doesn’t mean compacted soil must always be left untouched.
For example, a newly constructed bed over heavily compacted ground may benefit from initial loosening.
The University of Minnesota Extension acknowledges that one-time tilling can be appropriate for extremely compacted new garden sites.
However, the goal should be to correct the problem and then maintain the soil without repeated intensive disturbance.
Tilling vs. No-Till Comparison
| Factor | Tilling | No-till |
| Initial compaction relief | Can provide immediate loosening | May take longer without targeted forking |
| Soil structure | Can damage aggregates when excessive | Generally preserves existing structure |
| Weed seeds | May bring buried seeds to the surface | Usually disturbs fewer buried seeds |
| Organic matter | Can mix amendments into soil | Often uses surface applications |
| Equipment | May require forks, spades, or tillers | Often requires simple hand tools |
| Routine maintenance | More soil disturbance | Less soil disturbance |
| Established raised beds | Usually unnecessary | Generally preferable |
Key Takeaway: No-till is a strong long-term strategy for established raised beds, while limited initial tilling may be appropriate for specific soil problems.
What Should You Add to Soil When Tilling a Raised Bed?
Soil amendments should address an identified need.
Adding materials without understanding the soil can create nutrient imbalances or drainage problems.
Finished Compost
Finished compost can improve soil structure and provide organic matter.
Use mature compost that has completed decomposition.
Avoid excessive amounts.
The University of Minnesota Extension’s raised bed guide cautions that repeated heavy compost applications can increase phosphorus and soluble salts.
Composted manure can be particularly high in phosphorus.
Apply amendments according to soil test results and the condition of the bed.
Garden Soil or Raised Bed Mix
If the soil level has dropped, add a suitable raised bed soil mix.
Choose a blend with appropriate drainage, nutrient-holding capacity, and organic matter.
Don’t automatically use pure compost as the entire growing medium.
A good raised bed mix generally contains a substantial mineral soil component or another carefully balanced growing medium.
Fertilizer
Fertilizer provides nutrients rather than simply improving soil looseness.
Choose fertilizer based on soil test results and crop requirements.
Excess fertilizer can harm plants and contribute to nutrient buildup.
There is no need to mix fertilizer deeply into the entire bed unless the product instructions or soil management plan call for it.
Lime or Sulfur
Lime and sulfur may be used to adjust soil pH.
However, they should not be applied without a reason.
A soil test helps determine whether pH adjustment is needed.
Different crops also have different pH preferences.
Avoid attempting to change soil pH based on appearance alone.
How Much Compost Should You Add Before Tilling?
The quantity depends on whether you’re improving poor native soil or maintaining an established raised bed.
For initial improvement of compacted mineral soil, a 1–2-inch layer incorporated into the top 6–8 inches is one possible approach.
However, existing raised beds may need much less.
Compost Calculation for a 4-by-8-Foot Raised Bed
A 4-by-8-foot bed has an area of:
4 × 8 = 32 square feet
If you apply a 1-inch layer of compost:
32 × (1 ÷ 12) = 2.67 cubic feet
If you apply a 2-inch layer:
32 × (2 ÷ 12) = 5.33 cubic feet
| Compost depth | Volume for 4 × 8 ft bed |
| ½ inch | 1.33 cubic feet |
| 1 inch | 2.67 cubic feet |
| 2 inches | 5.33 cubic feet |
These figures describe the amount of compost needed to cover the surface at the stated depth.
They are not automatic annual recommendations.
If the bed already contains a compost-rich mix, adding more may be unnecessary.
How to Till a Raised Bed With Clay Soil
Clay-rich soil requires special attention because it can compact easily when worked at the wrong moisture level.
Wait Until Clay Soil Is Workable
Don’t dig wet, sticky clay.
It can become compressed into large, dense clods.
Wait until it crumbles under moderate pressure.
Use a Garden Fork Instead of Excessive Rototilling
Insert the fork and gently lift the compacted soil.
Avoid turning the entire layer upside down.
Repeat across the affected areas.
A broadfork may be useful in a larger bed.
Add Organic Matter When Needed
Finished compost can help improve the workability of poor mineral soil over time.
However, the amount should reflect the soil’s existing organic matter and nutrient levels.
Avoid adding large quantities without testing.
Protect the Soil From Recompaction
After loosening, avoid stepping inside the bed.
Keep the surface mulched when practical.
Manage irrigation so the soil is moist but not continually saturated.
Persistent drainage problems may require changes beyond tilling, such as correcting the bed’s location or underlying drainage conditions.
Common Mistakes When Tilling Raised Garden Beds
Tilling Soil While It Is Wet
Wet tilling can damage soil structure and create dense clods.
Always check soil moisture before working.
Tilling Too Deep
Deep cultivation can disturb soil layers and root channels unnecessarily.
Loosen only as deeply as needed to address the actual problem.
Using a Rototiller Every Season
Frequent intensive tilling can break down soil aggregates and encourage future compaction.
Established raised beds generally need little or no mechanical tilling.
Adding Too Much Compost
Excessive compost can contribute to nutrient imbalances, phosphorus buildup, and soluble salts.
Use soil tests and apply only what is needed.
Walking Inside the Raised Bed
Foot traffic compresses the soil and can undo the benefits of loosening.
Work from the sides whenever possible.
Chopping Up Perennial Weeds
Some weeds can regrow from root or rhizome fragments.
Identify persistent weeds and remove their spreading structures carefully.
Damaging Irrigation Lines
Drip irrigation tubing and buried connectors can be damaged by forks or tillers.
Move or identify irrigation components before working.
Tilling Around Established Plants
Cultivating too close to actively growing plants can injure roots.
Avoid deep tilling in planted beds.
Pulverizing the Soil
Extremely fine soil isn’t necessarily healthier soil.
Natural aggregates help preserve pore space and improve water movement.
Don’t break down every clump simply to make the surface look smooth.
Ignoring Soil Contamination
If you’re building a new vegetable bed over soil that may contain lead or other contaminants, test the native soil before disturbing it.
Urban sites and areas near older painted structures may require particular attention.
Use an appropriate soil testing laboratory and follow local extension guidance.
How to Keep Raised Bed Soil Loose Without Tilling
The most effective long-term strategy is to prevent compaction and support healthy soil structure.
Add Finished Compost When Needed
Surface applications of finished compost can help replenish organic matter.
Apply only an appropriate amount.
Avoid making heavy compost additions a yearly habit without checking soil conditions.
Use Organic Mulch
Materials such as clean straw, shredded leaves, and other appropriate organic mulches can protect the soil surface.
They help reduce erosion and moisture loss.
As organic mulch decomposes, it contributes to the soil’s organic matter.
Avoid applying mulch directly against plant crowns.
Grow Cover Crops
Suitable cover crops can help protect soil between vegetable plantings.
Their roots can contribute to soil structure and organic matter.
Choose cover crops according to your climate, season, and available growing time.
Plan how you will terminate or manage them before the next planting.
Avoid Foot Traffic
Raised beds work best when gardeners can reach the planting area without stepping inside.
Use permanent walkways.
Keep the center of the bed accessible from the edges.
Water Properly
Raised beds may dry out faster than surrounding garden soil.
Use consistent irrigation to support plant growth.
However, don’t keep the soil continuously saturated.
Poor water management can contribute to root problems and unfavorable soil conditions.
Monitor Soil Health
Check for:
- Healthy root development.
- Good water infiltration.
- Reasonable moisture retention.
- Earthworm activity.
- Crumbly soil structure.
- Persistent compaction.
- Nutrient deficiencies.
A soil test every few years can help guide fertilizer and amendment decisions.
Key Takeaway: Preventing compaction, protecting the soil with mulch, and managing organic matter can reduce or eliminate the need for annual tilling.
Conclusion
Learning how to till a raised bed garden begins with understanding whether tilling is necessary.
For a new raised bed over compacted ground, gently loosening the soil with a garden fork or broadfork can improve the growing environment. Working approximately 6–8 inches deep may be appropriate when correcting compaction, while shallow cultivation is usually sufficient for minor surface problems.
However, established raised beds with healthy, loose soil generally don’t need regular tilling.
Repeated intensive disturbance can damage soil structure and bring unwanted weed seeds to the surface.
I recommend using minimal soil disturbance, adding finished compost only when needed, and avoiding foot traffic inside the bed. For routine seasonal preparation, a rake, a small amount of compost when justified, and suitable mulch may be all that is necessary.
Healthy raised bed soil should remain workable, well-drained, and capable of supporting strong plant roots without requiring complete cultivation every year.
FAQs About How to Till a Raised Bed Garden
Should You Till a Raised Garden Bed Every Year?
No. Most established raised beds don’t need annual tilling.
If the soil remains loose and drains properly, light surface preparation or compost top-dressing may be sufficient.
How Deep Should You Till a Raised Bed?
For compacted areas, approximately 6–8 inches of gentle loosening may be appropriate.
However, healthy established soil may need no deep cultivation at all. Work only as deeply as necessary.
Can You Use a Rototiller in a Raised Garden Bed?
Yes, but a rototiller is generally better suited to initial preparation of a sufficiently large, empty bed.
For small or established raised beds, a garden fork usually provides better control with less soil disturbance.
Is It Better to Till or Not Till a Raised Bed?
No-till is generally preferable for an established raised bed with healthy soil.
However, targeted loosening or one-time tilling may be helpful when constructing a bed over severely compacted ground.
Can You Till a Raised Bed With Plants Growing in It?
Deep tilling around growing plants is not recommended because it can damage their roots.
For planted beds, remove weeds carefully and apply mulch or amendments without disturbing the root zone unnecessarily.
What Is the Best Time to Till a Raised Bed Garden?
Before planting in spring or during fall preparation, provided the soil is workable.
Avoid tilling wet soil. The soil should crumble under gentle pressure rather than forming sticky clods.
Can You Add Compost Without Tilling a Raised Bed?
Yes. Finished compost can be applied to the soil surface when organic matter is needed.
Established raised beds often benefit from this lower-disturbance approach. Avoid excessive compost applications and use soil testing to guide nutrient management.

I’m Maya L. Greenwood, a lifelong plant lover who believes anyone can grow something beautiful with the right guidance. After years of testing soil mixes, pruning methods, irrigation tricks, and pest-safe solutions, I started EasyGardenTips.com to turn hard-won lessons into step-by-step advice. From seed starting and container gardens to composting and seasonal checklists, my goal is to make gardening simple, sustainable, and fun.