How to Make Compost for Raised Beds: Easy Step-by-Step Method
To make compost for raised beds, combine carbon-rich materials such as dry leaves and shredded cardboard with nitrogen-rich materials such as vegetable scraps, grass clippings, and coffee grounds. Keep the mixture moist, allow air to circulate, and turn it periodically until the materials decompose into dark, crumbly compost with an earthy smell.
Homemade compost improves raised bed soil by adding organic matter, supporting beneficial soil organisms, and helping the growing medium retain moisture and nutrients. It is especially useful in vegetable gardens where repeated planting and harvesting gradually change soil conditions.
However, compost must be properly decomposed before being used around young vegetables. Unfinished material can temporarily affect nitrogen availability, attract pests, and create unfavorable conditions for developing roots.
The right balance of ingredients also matters. Too much green material may produce unpleasant odors, while excessive dry leaves or cardboard can slow decomposition.
In this article, I cover the best compost ingredients for raised beds, the correct brown-to-green ratio, step-by-step composting methods, moisture and temperature management, and signs that compost is ready. You’ll also learn how much finished compost to add to new and existing raised beds, when to apply it, and how to avoid common composting problems.
What Is the Best Compost for Raised Garden Beds?
The best homemade compost for most raised vegetable beds is fully decomposed, plant-based compost made from a balanced mixture of kitchen scraps and yard materials.
Finished compost should have a relatively uniform, dark appearance and a loose, crumbly texture. It should smell earthy rather than sour or rotten.
Plant-based compost is particularly useful because it can improve soil structure without relying on large quantities of manure.
A properly managed compost pile contains four essential components:
- Carbon: Provides an energy source for microorganisms and helps maintain a suitable material balance.
- Nitrogen: Supports microbial growth and the decomposition process.
- Moisture: Allows microorganisms to break down organic materials.
- Oxygen: Supports aerobic decomposition and helps prevent unpleasant odors.
Composting works through biological activity rather than simply allowing kitchen scraps to rot.
Microorganisms break down the organic material and gradually transform it into a more stable soil amendment.
Why Homemade Compost Works Well in Raised Beds
Raised beds contain a defined volume of growing soil that needs to support repeated planting.
Finished compost can improve several important properties of that soil.
In dense mineral soil, organic matter helps support soil aggregation and spaces for air and water movement.
In sandy soil, compost can help improve moisture and nutrient retention.
Compost also contributes nutrients, although the amount and availability vary depending on its ingredients and maturity.
For vegetable gardening, the goal is to improve the existing growing medium rather than replace it entirely with compost.
Is Homemade Compost Better Than Store-Bought Compost?
Homemade compost can be an economical alternative to commercially produced compost.
It allows gardeners to control the ingredients and reuse suitable household and yard materials.
However, commercial compost may offer more consistent processing and testing when purchased from a reliable supplier.
Homemade compost quality depends on correct preparation, moisture control, decomposition, and curing.
Neither option is automatically superior.
For raised vegetable beds, properly finished compost from clean, suitable ingredients matters more than whether it was purchased or produced at home.
Best Ingredients for Making Compost for Raised Beds
A productive compost pile needs a mixture of brown materials, which are relatively rich in carbon, and green materials, which generally provide more readily available nitrogen.
These terms describe the materials’ composting functions rather than their actual colors.
For example, coffee grounds are classified as a green compost ingredient even though they are brown.
Brown Materials for Raised Bed Compost
Brown materials provide carbon and help prevent the compost pile from becoming excessively wet or compacted.
Suitable examples include:
- Dry fallen leaves
- Shredded plain cardboard
- Non-glossy shredded paper
- Dry plant stalks
- Small untreated twigs
- Shredded brown paper bags
- Untreated wood chips
- Dry straw from a clean source
Dry leaves are especially convenient because they are widely available and break down readily when shredded.
Cardboard can also be useful, but remove plastic tape, labels, and other noncompostable materials first.
Large wood pieces break down more slowly than soft plant material.
For faster composting, keep coarse woody ingredients to a reasonable amount and break them into smaller pieces.
Green Materials for Raised Bed Compost
Green materials provide nitrogen needed by decomposer organisms.
Useful ingredients include:
- Raw vegetable scraps
- Fruit peels and cores
- Fresh grass clippings
- Coffee grounds
- Used paper coffee filters
- Fresh, healthy plant trimmings
- Soft green garden waste
- Crushed eggshells as a supplementary ingredient
Eggshells can be composted, although they break down slowly and should not be relied upon as a significant nitrogen source.
Avoid placing thick layers of fresh grass clippings in one location.
Wet grass can pack together, restrict oxygen movement, and create unpleasant odors.
Mix green ingredients with dry brown materials instead.
Brown vs. Green Compost Ingredients
| Brown materials | Green materials |
| Dry leaves | Vegetable scraps |
| Shredded cardboard | Fruit scraps |
| Dry straw | Fresh grass clippings |
| Plain shredded paper | Coffee grounds |
| Small dry twigs | Fresh plant trimmings |
| Untreated wood chips | Soft green yard waste |
Both groups are necessary for efficient decomposition.
Adding only kitchen scraps usually creates an unbalanced mixture.
Likewise, a pile containing only dry leaves may eventually decompose, but it often breaks down more slowly without sufficient nitrogen and moisture.
What Is the Right Brown-to-Green Ratio for Compost?
A practical starting ratio is 2–3 parts brown materials to 1 part green materials by volume.
For example:
- 2 buckets of shredded dry leaves
- 1 bucket of vegetable scraps and fresh grass clippings
Or:
- 3 buckets of mixed dry browns
- 1 bucket of fresh greens
According to the U.S. Environmental Protection Agency’s home composting guidance, backyard composters should use approximately two to three times as much brown material as green material by volume.
This helps provide a suitable balance of carbon, nitrogen, moisture, and air.
Does the Ratio Need to Be Exact?
No. The ratio is a practical starting point rather than a precise requirement.
Different ingredients contain different amounts of carbon, nitrogen, and water.
For example, dry wood chips contain considerably more slowly decomposing carbon-rich material than fresh vegetable scraps.
The ratio also refers to approximate material volume, not the scientific carbon-to-nitrogen ratio.
Observe how the compost behaves.
If it smells strongly of ammonia or becomes slimy, add more dry browns and improve aeration.
If it remains dry and barely decomposes, add moisture and an appropriate amount of green material.
Simple Compost Recipe for Beginners
For a small backyard compost pile, start with:
- 3 containers of shredded dry leaves
- 1 container of mixed vegetable scraps and fresh grass clippings
- A little water, as needed
- A few small, coarse pieces of untreated plant material for air circulation
Mix the ingredients rather than leaving all the greens in one dense layer.
This is a starting recipe, not a fixed formula. Adjust the mixture according to its moisture, odor, and rate of decomposition.
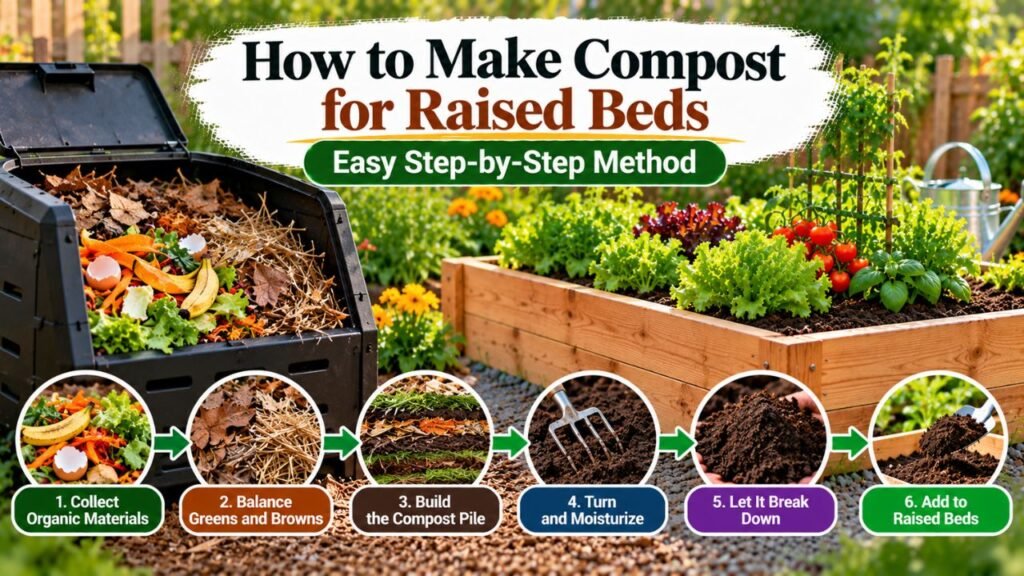
How to Make Compost for Raised Beds Step by Step
The following method uses a separate compost bin or outdoor pile.
Composting outside the raised bed allows the materials to finish decomposing before they are added around vegetable roots.
This provides better control over compost maturity and reduces the risk of disturbing crops.
Step 1: Choose a Suitable Composting Location
Select a convenient outdoor location with adequate drainage.
The composting area should be accessible for adding ingredients, turning the pile, and removing finished compost.
A location with some shade can help reduce excessive drying in hot climates, although composting can work in either sun or shade.
Avoid placing the pile:
- In an area that repeatedly floods
- Directly against a wooden fence or building
- Where runoff may enter a drinking water source
- In a location that makes regular maintenance difficult
The composting area does not have to be directly beside the raised garden bed.
A short distance between the compost pile and planting area can make it easier to manage food scraps without attracting pests toward growing vegetables.
Step 2: Prepare a Compost Bin or Pile
You can compost in an open pile, a ventilated bin, or a suitable compost tumbler.
A simple outdoor bin may be constructed from untreated wood, wire mesh, or other appropriate materials.
The container should allow air movement while keeping materials reasonably contained.
For a larger compost pile, a sufficient volume of material helps retain the heat generated by microbial activity.
Smaller piles can still produce compost, but they may not heat as strongly or decompose as quickly.
If using a closed plastic compost bin, make sure it has suitable ventilation and drainage.
Avoid creating a sealed container where water collects and oxygen becomes limited.
Step 3: Create a Base Layer of Brown Materials
Begin with a loose layer of coarse brown materials at the bottom of the compost pile.
Suitable options include small twigs, dry stalks, and untreated wood chips.
A layer approximately 4–6 inches deep can help provide air spaces near the base of a conventional outdoor pile.
Avoid packing the material tightly.
The goal is to create a loose structure that supports drainage and air movement.
For compost tumblers or specially designed bins, follow the manufacturer’s loading instructions rather than automatically creating a thick bottom layer.
Step 4: Add the Green Compost Ingredients
Place vegetable scraps, fruit peels, coffee grounds, and other suitable green materials into the compost pile.
Spread the ingredients reasonably evenly.
Cut large pieces into smaller sections when practical.
For example, chopping thick broccoli stalks or large vegetable scraps increases the exposed surface area available to decomposer organisms.
Avoid adding large quantities of one wet material in a single compacted mass.
Mix grass clippings and kitchen scraps with dry materials to maintain air spaces.
Step 5: Add More Brown Materials
Cover the green ingredients with dry leaves, shredded cardboard, or another suitable brown material.
Aim to maintain the approximate 2–3:1 brown-to-green volume ratio.
Bury or cover food scraps thoroughly to reduce odors and discourage pests.
For a larger outdoor pile, covering fresh kitchen scraps with several inches of dry browns is a useful approach.
Continue adding alternating portions of greens and browns until the pile reaches a practical size.
Step 6: Add Water Until the Mixture Is Moist
Composting microorganisms need moisture to remain active.
However, excessive water can fill air spaces and restrict oxygen.
A practical moisture test is to squeeze a handful of mixed compost material.
The mixture should feel similar to a wrung-out sponge.
It should be moist without releasing a steady stream of water.
If the pile is completely dry, add water gradually while mixing.
If the material is saturated, add dry brown ingredients and improve drainage or aeration.
Check moisture in different parts of the pile because the surface may be dry while the center remains wet.
Step 7: Turn the Compost to Add Oxygen
Use a garden fork or suitable compost-turning tool to mix the materials periodically.
Move material from the outer edges toward the center.
This redistributes ingredients and introduces oxygen.
Turning can also help reduce excessively wet pockets and improve overall decomposition.
A regularly managed hot compost pile may require more frequent turning than a slow, passive system.
There is no single turning schedule that works for every compost pile.
Watch for changes in temperature, moisture, and odor.
If the pile develops unpleasant smells or becomes compacted, turning and adding dry material may help.
Step 8: Monitor the Compost Temperature
As microorganisms break down organic material, they release heat.
A sufficiently large, well-managed pile can become noticeably warm.
The EPA reports that actively managed backyard compost piles may reach approximately 130–160°F.
These temperatures can help reduce some pathogens and weed seeds.
However, a home compost pile does not automatically reach or maintain these temperatures throughout the entire mass.
Use a compost thermometer if you want to monitor hot composting.
Temperature readings also help identify whether microbial activity is increasing or slowing.
Avoid assuming that a brief high temperature in the center makes every ingredient pathogen-free.
Step 9: Allow the Compost to Finish Decomposing
Continue monitoring the pile as the ingredients break down.
Over time, the material should become darker, finer, and more uniform.
Large recognizable food scraps should gradually disappear.
A properly managed pile may produce usable compost within several months, while a passive pile can take considerably longer.
Do not rush this stage simply because the material looks dark.
Unfinished compost may continue decomposing rapidly after being added to a raised bed.
Step 10: Cure the Compost Before Using It
After the active decomposition stage, allow the compost to cure.
Curing gives the material time to become more biologically stable.
Stop adding fresh ingredients to the batch during this stage.
The EPA recommends allowing compost to cure for at least four weeks after the pile stops reheating and recognizable food scraps are no longer present.
Finished compost should smell earthy and no longer heat noticeably after being mixed.
If the material remains hot, sour, or full of recognizable scraps, allow more time.
Step 11: Screen and Store the Finished Compost
Before using homemade compost, remove large undecomposed pieces.
A garden screen or wire mesh can separate the finer material from larger fragments.
Return unfinished twigs and plant pieces to the active compost pile.
Store finished compost in a sheltered, well-drained location.
Keep it from becoming completely waterlogged or excessively dry.
The compost is now ready to be incorporated into suitable raised bed soil or applied as a surface amendment.
Key Takeaway: The goal is not simply to break down food scraps. Raised bed compost should be mature, stable, and free from large amounts of actively decomposing material before it contacts vegetable roots.
How Long Does It Take to Make Compost for Raised Beds?
Composting time depends on the method, pile size, ingredients, temperature, moisture, and aeration.
A well-managed active compost pile can finish considerably faster than a pile that is left largely undisturbed.
| Composting method | General time expectation | Main consideration |
| Actively managed backyard compost | Approximately 3–5 months | Requires suitable ingredients, moisture, and turning |
| Passive compost pile | Several months to a year or longer | Needs less attention but decomposes slowly |
| Managed hot composting | Can be faster under favorable conditions | Requires sufficient volume and careful temperature management |
| Compost tumbler | Highly variable | Convenient mixing but may not generate sustained heat |
| Worm composting | Often several months | Produces vermicompost under suitable conditions |
These are broad expectations. Actual finishing time should be judged by compost maturity rather than the calendar alone.
Why Some Compost Piles Break Down Faster
Microorganisms work more efficiently when the pile has suitable moisture, oxygen, and material balance.
Smaller ingredient pieces generally provide more surface area for decomposition.
A reasonably large pile can also retain more microbial heat than a small, exposed pile.
Frequent moisture problems or compaction may slow the process even when plenty of green ingredients are available.
Can You Make Compost Faster?
You can encourage faster decomposition by:
- Shredding dry leaves
- Chopping large vegetable scraps
- Maintaining the appropriate brown-to-green balance
- Keeping the mixture evenly moist
- Turning the pile when needed
- Maintaining sufficient pile volume for heat retention
Avoid adding large amounts of fertilizer merely to make the compost heat up.
The materials already provide nitrogen when properly balanced.
Commercial compost activators are not essential for a typical household pile.
How to Know When Compost Is Ready for Raised Beds
Finished compost has several recognizable characteristics.
However, no single visual sign guarantees that every material has fully stabilized.
Appearance of Finished Compost
Mature compost usually has:
- A dark brown to nearly black appearance
- A loose, crumbly texture
- An earthy smell
- Few recognizable original ingredients
- No obvious slimy or wet food deposits
- Little noticeable heating after mixing
Small pieces of wood or eggshell may remain visible even when most of the material is mature.
These can be screened out before application.
Signs Compost Is Not Finished
Compost may need more time when it:
- Smells strongly of ammonia
- Has a rotten or sour odor
- Contains large amounts of fresh food scraps
- Becomes noticeably hot again after mixing
- Has dense, wet, undecomposed sections
- Contains fresh grass clumps or other recognizable green waste
Do not add this material directly around newly planted seedlings.
Continue the composting process until it becomes more stable.
Can Unfinished Compost Harm Vegetables?
Yes, depending on the ingredients and amount used.
Actively decomposing material can affect nitrogen availability, oxygen conditions, and moisture behavior in the growing medium.
It may also attract pests when recognizable food scraps remain.
In raised beds with limited soil volume, these changes can have a greater effect on young roots.
Use mature compost when preparing the main growing layer for vegetables.
How Much Homemade Compost Should You Add to Raised Beds?
The right amount depends on whether you are filling a new raised bed or improving soil that has already supported crops.
A new bed and an established bed should not receive the same amount automatically.
Too much compost can create nutrient imbalances and inconsistent water retention.
Compost Ratio for Filling a New Raised Bed
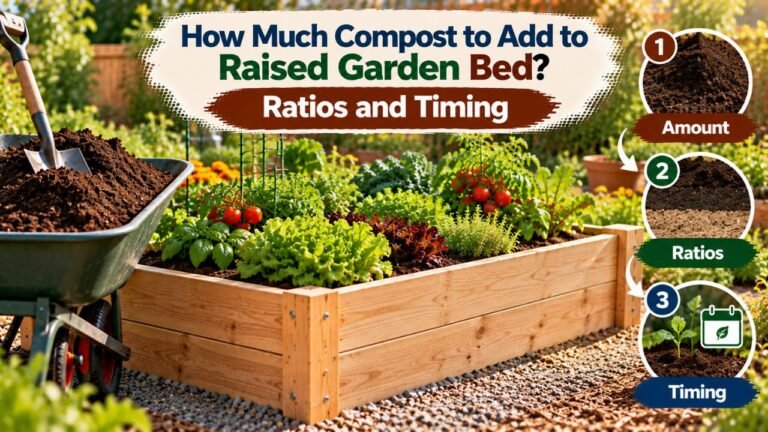
For many open-bottom raised vegetable beds, a practical starting mixture is:
- 2 parts quality topsoil
- 1 part mature plant-based compost
This creates a mix containing approximately two-thirds topsoil and one-third compost by volume.
The University of Minnesota Extension’s raised bed gardening guidance recommends a growing mixture containing approximately one-half to two-thirds topsoil and one-third to one-half plant-based compost, depending on the material.
A blend with two-thirds topsoil is a reasonable starting choice when the topsoil is already suitable.
The exact mixture should be adjusted according to soil texture, drainage, and the condition of the compost.
How Much Compost to Add to an Existing Raised Bed
Established raised beds usually need smaller additions than newly filled beds.
A light surface application, such as approximately ½–1 inch of mature compost, can be a practical amendment when the soil needs organic matter.
However, this is not a mandatory annual application rate.
If the soil already contains substantial organic matter or elevated nutrient concentrations, adding more compost may be unnecessary.
A soil test can help determine whether additional nutrients are needed.
Compost Volume for a 4×8 Raised Bed
A raised bed measuring 4 feet wide and 8 feet long has 32 square feet of surface area.
The amount of compost required for a uniform surface layer can be estimated with:
Compost volume (cubic feet) = Bed area (square feet) × Compost depth (inches) ÷ 12
| Compost layer | Compost required for a 4×8 bed |
| ½ inch | 1.33 cubic feet |
| 1 inch | 2.67 cubic feet |
| 1½ inches | 4 cubic feet |
| 2 inches | 5.33 cubic feet |
These figures show material volume, not recommended annual application amounts.
Choose the layer thickness based on the soil’s actual needs.
Can You Fill an Entire Raised Bed With Compost?
Filling an entire raised bed with pure compost is generally not recommended.
Compost is a soil amendment rather than a complete substitute for mineral soil in most traditional raised beds.
A compost-only mixture may:
- Dry unevenly
- Become difficult to rewet when extremely dry
- Settle considerably
- Contain excessive available nutrients
- Accumulate soluble salts
- Provide an unsuitable physical structure for some crops
A balanced mixture of topsoil and finished compost usually offers more predictable growing conditions.
How to Add Finished Compost to Raised Bed Soil
The application method depends on whether the bed is empty or already planted.
Adding Compost Before Planting
For an empty raised bed:
- Remove old plant debris and weeds.
- Inspect the soil for compaction and drainage problems.
- Spread the required amount of mature compost evenly.
- Gently incorporate the compost into the upper soil when appropriate.
- Rake the surface level.
- Water lightly and allow the soil to settle.
- Plant seeds or transplants at the recommended depth.
Avoid excessive digging when the soil is wet.
For established beds managed with minimal tillage, surface application may be sufficient.
Adding Compost Around Growing Vegetables
Mature compost can be added around established plants without disturbing their roots.
Spread a modest layer over the soil surface.
Keep the compost away from sensitive plant crowns and avoid burying stems that should remain exposed.
Gently water after application when needed.
Do not dig deeply around established tomatoes, peppers, or other vegetables merely to incorporate the compost.
Using Compost as a Surface Amendment
Compost may also be applied to the surface of raised bed soil.
This allows organic matter to gradually interact with the underlying growing medium through watering and biological activity.
A separate mulch layer can be used when additional protection against evaporation or weeds is needed.
However, compost and mulch do not always serve identical purposes.
Coarse straw or shredded leaves often provide better surface coverage than fine compost when the primary goal is moisture conservation and weed suppression.
When Is the Best Time to Add Compost to Raised Beds?
Compost can be applied at several points during the growing year.
The most convenient timing depends on the vegetables, climate, and soil condition.
Before Spring Planting
Early spring is a common time to prepare raised beds.
If the soil needs organic matter, spread mature compost before sowing seeds or transplanting vegetables.
Avoid applying unfinished compost immediately before planting.
Check soil moisture and drainage before working the bed.
After Harvesting
The period after harvesting is another practical time to add compost.
Remove unwanted plant debris and assess the soil condition.
Apply mature compost where needed.
This is also an opportunity to prepare the bed for cover crops or the next planting season.
During the Growing Season
A light compost application may be useful around established plants when additional organic matter is appropriate.
However, applying compost repeatedly throughout the season is not automatically beneficial.
The soil may already contain sufficient nutrients.
For plants showing signs of nutrient deficiency, use soil testing and crop-specific guidance rather than assuming more compost will solve the problem.
Can You Make Compost Directly Inside a Raised Garden Bed?
Yes, organic materials can decompose directly in a raised bed, but this method requires more planning than using a separate compost bin.
In-bed composting is generally better suited to an empty bed between growing seasons than to soil containing actively growing vegetables.
Trench Composting in an Empty Raised Bed
Trench composting involves burying suitable plant-based scraps beneath the soil surface.
Microorganisms gradually break down the materials.
For an empty bed:
- Choose a section away from existing plant roots.
- Dig a trench with enough depth to cover the scraps thoroughly.
- Add suitable chopped vegetable scraps and other approved ingredients.
- Mix with some surrounding soil where practical.
- Cover the material completely with soil.
- Allow sufficient time for decomposition before planting into the area.
This method works best when soil organisms are active and moisture conditions are suitable.
However, the breakdown rate is unpredictable.
Do not plant directly into a concentrated pocket of undecomposed kitchen scraps.
Why a Separate Compost Bin Is Often Better
A separate bin provides better control over ingredient balance, temperature, and moisture.
It also makes it easier to keep fresh scraps away from edible crops.
With a separate pile, the finished material can be inspected before being added to the raised bed.
For gardeners who want consistent planting conditions, this is generally the more reliable approach.
Can You Add Kitchen Scraps Directly Around Vegetables?
Fresh food scraps should not simply be scattered over raised bed soil around growing vegetables.
Exposed scraps may attract rodents, flies, and other animals.
They can also create localized wet areas and unpleasant odors.
Use a managed composting system and add the resulting mature compost instead.
How to Make Compost Without a Large Backyard
A full-sized outdoor compost pile is not the only option.
Gardeners with limited space can use smaller composting systems.
Compost Tumblers
A compost tumbler is a rotating container that allows materials to be mixed without using a garden fork.
It may be convenient for small yards.
However, some tumblers lack enough material volume to sustain high composting temperatures.
Their contents still require an appropriate brown-to-green balance, moisture control, and time to mature.
Do not assume that frequent rotation alone produces finished compost quickly.
Worm Composting for Raised Beds
Worm composting, also called vermicomposting, uses specialized composting worms to break down suitable organic material.
Red wigglers are commonly used for this purpose.
A worm bin requires:
- Appropriate bedding
- Suitable composting worms
- Small amounts of approved food scraps
- Air circulation
- Moisture control
- Protection from extreme temperatures
The resulting worm castings can be used as a soil amendment.
However, worm castings are generally used in smaller quantities than ordinary bulk compost.
They are not intended to replace the full volume of raised bed soil.
Small Outdoor Compost Bins
A compact compost bin can work for gardeners who produce moderate amounts of kitchen and yard waste.
The process may be slower than in a larger active pile, particularly during cold weather.
A small bin is still useful when convenience and gradual compost production matter more than speed.
What Should You Never Put in Compost for Raised Beds?
Not every biodegradable material belongs in a typical backyard compost pile.
Some ingredients may attract pests, introduce harmful substances, or fail to decompose safely under ordinary home composting conditions.
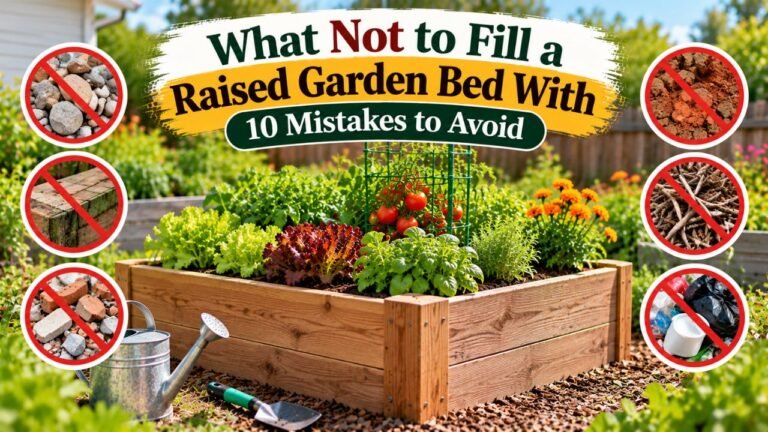
Materials to Avoid
| Material | Why it should be avoided |
| Meat, fish, and bones | Can attract animals and create odors |
| Dairy products | May attract pests and produce unpleasant smells |
| Cooking oils and grease | Can interfere with ordinary composting conditions |
| Dog and cat waste | May contain pathogens and parasites |
| Treated or painted wood | Can introduce unwanted chemicals |
| Plants treated with persistent herbicides | May leave residues harmful to vegetables |
| Diseased plant material | Home piles may not reliably destroy pathogens |
| Mature invasive weed seeds | May survive incomplete composting |
| Glossy or coated paper | May contain unsuitable coatings |
| Plastic packaging and produce stickers | Do not reliably decompose in backyard piles |
Why Herbicide Residues Matter
Some herbicides can remain active in plant materials or manure for extended periods.
Contaminated compost may damage sensitive vegetables even when it looks fully decomposed.
Tomatoes, beans, and peas can be particularly sensitive to certain persistent herbicide residues.
Avoid composting grass clippings or plant material when their treatment history is uncertain.
If compost contamination is suspected, stop applying the material and seek advice from a local extension service or appropriate testing provider.
Should You Add Animal Manure?
Animal manure can be composted, but it requires additional attention to pathogen risks, nutrient concentrations, and treatment history.
Fresh manure should not be treated as equivalent to mature plant-based compost.
For ordinary home vegetable gardens, a plant-based compost pile is often easier to manage safely.
If using manure-based compost, choose properly processed material from a reliable source and follow applicable food-safety guidance.
Composted manure may also contribute substantial phosphorus and salts.
Avoid repeated applications without considering soil test results.
Common Composting Problems in Raised Bed Gardens
Compost piles rarely decompose at exactly the same rate.
Moisture, ingredient balance, and temperature can create different problems.
| Problem | Possible cause | Practical solution |
| Rotten smell | Excess moisture or insufficient oxygen | Add dry browns and turn the pile |
| Ammonia smell | Too much nitrogen-rich material | Add dry leaves or shredded cardboard |
| Very slow decomposition | Too dry, too cold, or insufficient nitrogen | Check moisture and ingredient balance |
| Slimy grass clumps | Green material packed too tightly | Break up clumps and mix with browns |
| Food scraps remain visible | Decomposition incomplete | Continue composting and turning as needed |
| Rodents or flies | Exposed food scraps or unsuitable ingredients | Remove attractants and cover scraps |
| Pile never warms | Small size, low activity, or poor balance | Check moisture, greens, and pile volume |
| Compost dries rapidly | Excess sun or inadequate moisture | Add water and protect from excessive drying |
Why Does Compost Smell Bad?
A healthy aerobic compost pile should have an earthy odor.
Strong rotten smells commonly indicate conditions that lack sufficient oxygen.
Excess moisture and compacted materials can contribute to the problem.
Add dry brown ingredients and turn the pile to restore air circulation.
Why Is My Compost Not Decomposing?
Decomposition may slow when the pile is too dry, contains mostly coarse woody material, or lacks sufficient nitrogen.
Cold temperatures can also reduce microbial activity.
Check the moisture first.
If the material is dry, moisten it.
If it contains mostly dry leaves or cardboard, adding an appropriate amount of green material may help.
Why Are There Flies Around the Compost Bin?
Flies may appear when food scraps remain exposed.
Bury fresh scraps beneath dry brown materials.
Avoid adding meat, greasy foods, and other ingredients that commonly attract animals.
Keep the compost bin properly managed and use a suitable lid when pest pressure is high.
Can Compost Be Too Rich for Raised Beds?
Yes. Repeated heavy applications can contribute to excessive nutrient levels.
The University of Minnesota Extension warns that large compost additions over time may increase phosphorus and soluble salts in raised garden beds.
High soluble salt concentrations can damage young roots, while excess phosphorus can contribute to nutrient imbalances.
Use soil tests to guide additional compost or fertilizer applications rather than assuming that more compost always produces better vegetables.
How to Maintain Healthy Soil After Adding Compost
Finished compost is one part of raised bed soil management.
Vegetable plants also need suitable drainage, moisture, nutrients, and root space.
Monitor Soil Moisture
Compost can help improve moisture retention in mineral soil, but it does not eliminate the need for watering.
Raised beds may dry out relatively quickly during hot weather.
Check moisture below the surface rather than watering on a rigid schedule.
Avoid keeping the soil continuously saturated.
Avoid Soil Compaction
Do not walk directly on raised bed soil.
Use permanent pathways and reach into the growing area from the sides.
Compaction reduces air spaces and can interfere with water movement and root growth.
Test Soil Periodically
A soil test can help identify pH and nutrient conditions.
For established raised beds, testing every few years is a useful approach, particularly when compost and other amendments are applied regularly.
Use the results to decide whether additional compost, fertilizer, or other soil amendments are necessary.
Maintain a Balanced Growing Mix
As organic materials decompose, raised bed soil may gradually settle.
When the soil level falls significantly, add an appropriate growing mix rather than automatically filling the entire missing volume with compost.
A balanced mixture containing mineral soil and mature organic matter provides a more predictable environment for vegetable roots.
Conclusion
Understanding how to make compost for raised beds begins with combining suitable brown and green materials in the right proportions and maintaining adequate moisture and oxygen.
A mixture of approximately 2–3 parts dry brown materials to 1 part green materials by volume provides a practical starting point. Turning the compost, monitoring moisture, and allowing enough time for curing help produce a stable amendment suitable for vegetable gardening.
For new raised beds, mature plant-based compost can be incorporated into quality topsoil. Established beds generally need smaller, soil-test-guided additions.
I recommend making compost in a separate bin when possible because it provides better control over decomposition and keeps unfinished kitchen scraps away from growing vegetables.
Use only fully matured compost, avoid questionable materials, and add amendments according to actual soil needs.
With consistent management, homemade compost can improve raised bed soil structure, support beneficial soil organisms, and reduce the need to purchase organic amendments.
FAQs About How to Make Compost for Raised Beds
Can You Make Compost With Only Kitchen Scraps?
Kitchen scraps alone are not ideal for ordinary aerobic composting.
Most kitchen scraps contain considerable moisture and relatively high amounts of nitrogen.
Mix them with dry leaves, shredded cardboard, or other carbon-rich ingredients to improve the balance and allow air to circulate.
How Much Compost Should You Put in a 4×8 Raised Bed?
The amount depends on whether the bed is new or established.
For an existing 4×8-foot bed, a 1-inch layer requires approximately 2.67 cubic feet of compost.
However, that amount is not necessarily required every year. Follow the soil’s organic matter and nutrient needs.
Is Homemade Compost Safe for Vegetable Seeds?
Mature, properly prepared compost can be used as a component of raised bed soil where vegetable seeds are planted.
However, coarse or unfinished compost may interfere with germination.
For small seeds, use a fine, stable planting surface and avoid concentrated amounts of fresh organic waste.
Can You Add Too Much Compost to Raised Beds?
Yes. Excessive compost can create problems with moisture behavior, nutrient balance, and soluble salt accumulation.
Use compost as an amendment rather than the only growing medium.
For established beds, additional compost should be guided by soil condition and testing.
Should You Turn Compost Every Day?
Daily turning is not necessary for most backyard compost piles.
The appropriate frequency depends on pile size, temperature, moisture, and composting method.
Turn the pile when additional oxygen or mixing is needed, particularly if it becomes compacted or develops unpleasant odors.
Can You Use Grass Clippings to Make Compost for Raised Beds?
Yes. Fresh grass clippings are a useful nitrogen-rich ingredient when mixed with sufficient dry brown materials.
Avoid adding thick, compacted layers of grass.
Do not compost clippings from lawns treated with persistent herbicides or other products that make the material unsuitable for composting.
Should Compost Be Mixed Into Raised Bed Soil or Left on Top?
Both methods can work.
Before planting a new raised bed, mature compost can be mixed with suitable topsoil.
For an established bed, compost may be spread over the surface and allowed to interact gradually with the soil.
Avoid digging deeply around active plant roots.
Can You Compost Directly in Raised Beds During Winter?
Yes. An empty raised bed can be used for controlled decomposition of suitable organic materials during the off-season.
However, cold temperatures may slow the process considerably.
Do not assume the material will be fully decomposed by spring. Check maturity before planting vegetables into the amended area.

I’m Maya L. Greenwood, a lifelong plant lover who believes anyone can grow something beautiful with the right guidance. After years of testing soil mixes, pruning methods, irrigation tricks, and pest-safe solutions, I started EasyGardenTips.com to turn hard-won lessons into step-by-step advice. From seed starting and container gardens to composting and seasonal checklists, my goal is to make gardening simple, sustainable, and fun.