How to Fix Compacted Soil in Raised Beds and Improve Plant Growth
To fix compacted soil in raised beds, gently loosen the soil with a garden fork, incorporate finished compost when needed, improve drainage, and avoid putting pressure on the planting surface. Work only when the soil is moist enough to crumble rather than stick together.
Compacted soil restricts root growth by reducing the air spaces between soil particles. Water may drain slowly, roots may struggle to spread, and vegetables can develop poorly even when they receive enough sunlight and nutrients.
This problem can appear in established raised beds that previously had loose, healthy soil. Repeated watering, working the soil while wet, unsuitable soil mixes, and physical pressure can all contribute to declining soil structure.
However, hard soil doesn’t always mean severe compaction. Dry clay, surface crusting, and natural settling can produce similar symptoms. Identifying the actual problem helps prevent unnecessary digging or excessive amendments.
The following methods explain how to recognize compacted raised bed soil, restore a healthier soil structure, improve conditions around established plants, and prevent the problem from returning.
How to Tell if Raised Bed Soil Is Compacted
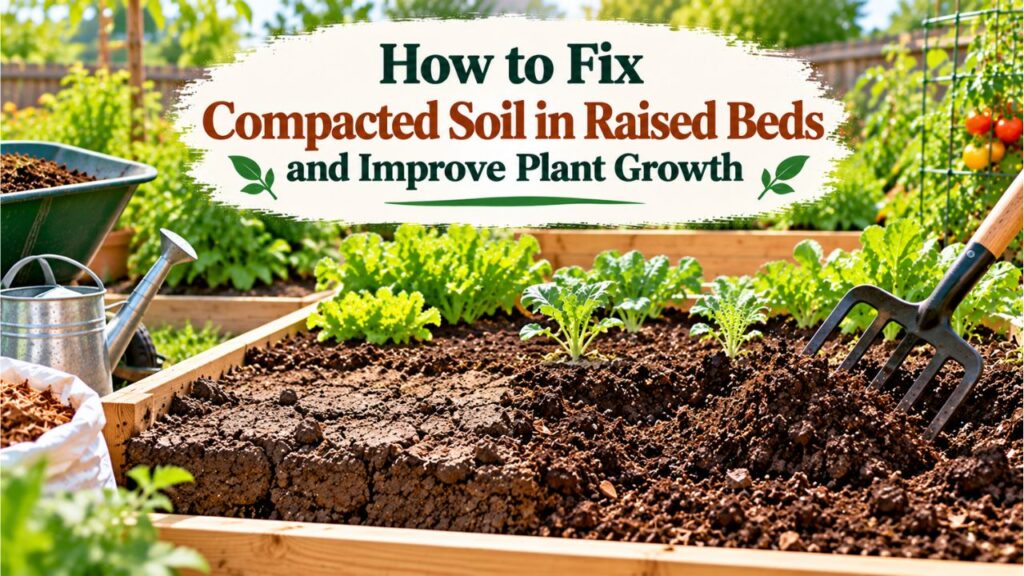
Compacted raised bed soil feels unusually dense and resists penetration even when moderately moist. It may also drain poorly, restrict root development, or form hard layers beneath the surface.
Healthy garden soil generally has a crumbly structure with spaces that allow water, oxygen, and plant roots to move through it.
Several signs can help identify compaction.
Hard Soil That Resists a Garden Fork
A practical way to check for compaction is to push a garden fork or narrow hand trowel into the soil.
Choose an area away from established plant roots and test the soil after excess moisture has drained.
If the tool meets strong resistance beneath the surface, the soil may contain a compacted layer.
Compare several locations within the raised bed. Compaction may affect the entire growing area or appear only in particular sections.
However, extremely dry soil can also resist penetration. If the bed is dry, moisten it and check again before deciding that compaction is the problem.
Water Pooling or Draining Slowly
Compacted soil contains fewer large pores through which water can move.
Signs of restricted drainage include:
- Water collecting on the surface after ordinary irrigation.
- Soil remaining saturated longer than expected.
- Water running toward the edges instead of soaking in.
- A dense, wet layer beneath relatively dry surface soil.
- Plants wilting even though their root zones remain wet.
These symptoms don’t prove compaction by themselves. Poor drainage beneath an open-bottom raised bed, blocked drainage openings, or excessive watering can produce similar conditions.
Check the soil moisture below the surface before changing the soil mixture.
Restricted Roots and Poor Vegetable Growth
Plant roots need oxygen as well as water. Dense soil can limit both oxygen availability and physical root penetration.
When examining a plant removed after harvest, look for roots that appear concentrated near the surface or grow sideways above a dense layer.
Other possible signs include slow growth, smaller plants, and reduced development of root vegetables.
These symptoms can also result from nutrient deficiencies, disease, temperature stress, or irrigation problems.
Important: A lower soil level isn’t necessarily evidence of compaction. Organic materials naturally decompose, and newly filled raised beds often settle over time.
What Causes Soil Compaction in Raised Garden Beds?
Understanding the cause helps determine whether a raised bed needs gentle aeration, soil amendments, or a more extensive correction.
Walking or Applying Pressure to the Planting Area
Standing, kneeling, or repeatedly pressing down on raised bed soil compresses the spaces between particles.
Pressure is particularly damaging when the soil is wet.
Even small raised beds can develop localized compaction when gardeners lean heavily on the surface while planting or harvesting.
A properly sized bed should allow access to the center without stepping into the growing area.
Working Raised Bed Soil While It Is Wet
Wet soil is more vulnerable to structural damage during digging and cultivation.
When soil is saturated, turning or squeezing it can push particles together and create dense clods.
Clay-rich soils are especially susceptible because their fine particles can smear and stick when handled wet.
Repeatedly tilling wet soil may temporarily make the surface look loose while damaging the underlying structure.
Using a Dense or Poorly Balanced Soil Mix
A raised bed filled with heavy clay soil, poorly screened topsoil, or a dense commercial mix may have limited pore space from the beginning.
Soil structure also changes as organic materials break down.
A mix containing excessive fine particles can become dense after repeated wetting and settling.
The solution isn’t necessarily adding large amounts of compost. The existing soil’s texture, organic matter, drainage, and nutrient levels should guide the correction.
How to Fix Compacted Soil in Raised Beds Step by Step
The most effective approach is to loosen compacted areas with minimal disturbance, add suitable organic matter, and correct the conditions that caused the soil to become dense.
For a raised bed with no actively growing crops, follow these steps.
Step 1: Check Soil Moisture Before Loosening
Choose a time when the soil is slightly moist but not saturated.
Take a handful of soil from a few inches below the surface and gently squeeze it.
- Too wet: The soil feels sticky, smears easily, or stays in a dense lump.
- Suitable moisture: The soil holds together lightly but breaks apart with gentle pressure.
- Too dry: The soil feels powdery or extremely hard and resists penetration.
If the soil is too wet, allow it to drain and dry before working.
If it is extremely dry, water lightly and give the moisture time to spread through the soil.
Avoid forcing tools into rock-hard ground or repeatedly cultivating saturated soil.
Step 2: Remove Surface Debris and Identify Compacted Areas
Clear away weeds, spent vegetable plants, and large debris.
Move existing mulch aside temporarily so you can see and access the soil surface.
Use a garden fork to check several locations.
Pay attention to areas that resist penetration or remain unusually wet.
If only the upper inch has formed a crust, shallow surface loosening may be sufficient. Deeper resistance suggests the root zone needs attention.
Step 3: Loosen the Soil With a Garden Fork
A sturdy digging fork or broadfork is useful for breaking up compacted soil without repeatedly turning the entire bed.
Follow this process:
- Insert the fork vertically into the compacted soil.
- Push the tines down as far as practical without damaging the bed or buried irrigation components.
- Pull the handle gently backward to lift and fracture the compacted soil.
- Return the handle toward its original position and remove the fork.
- Move approximately 6–8 inches to the next location.
- Repeat until the affected growing area has been loosened.
Avoid lifting large sections of soil and flipping them over.
The objective is to create openings within the soil, not destroy its existing structure.
The University of Maryland Extension’s raised bed guidance recommends using a garden fork or spade to gently loosen compacted ground, moving the tool 6–8 inches between insertions rather than turning the soil over.
This method is especially useful when the raised bed has a compacted layer beneath the surface.
Pro Tip: If the fork encounters resistance throughout the bed, work in smaller sections. Avoid forcing the tool against buried stones, irrigation lines, or a solid bed bottom.
Step 4: Add Finished Compost to Improve Soil Structure
After loosening the soil, assess whether additional organic matter would be beneficial.
Finished compost supports soil organisms and helps improve the arrangement of soil particles over time.
For an established vegetable bed, a modest compost application is generally preferable to adding several inches every season.
The Oregon State University Extension compost guide recommends applying approximately ¼–1 inch of compost annually to existing vegetable beds, with larger initial applications appropriate when preparing new garden soil.
To amend an established raised bed:
- Spread a suitable layer of mature, screened compost over the soil.
- Gently incorporate it into the loosened upper soil when necessary.
- Break apart remaining large clods without pulverizing the soil.
- Rake the surface level while keeping it relatively loose.
Use compost with a dark, crumbly texture and an earthy smell.
Avoid unfinished compost, excessive fresh manure, and large quantities of amendments with high soluble salt content.
If the bed already contains substantial organic matter, adding more compost may not help. Consider a soil test before making repeated amendments.
Step 5: Level the Soil Without Packing It Down
Use a rake to spread the loosened soil evenly throughout the raised bed.
Break apart large clumps gently, but avoid turning the soil into fine powder.
Do not press the surface down with a shovel, board, or your feet.
Some natural settling will occur after watering, and that is normal.
If the soil level has dropped significantly, add a suitable raised bed soil mix rather than filling the missing space entirely with compost.
Step 6: Water Gently and Protect the Surface
After loosening and amending the soil, water gently to settle it around existing roots or prepare it for planting.
Use a watering can with a gentle sprinkler head, a soaker hose, or drip irrigation.
Avoid strong water streams that displace soil and create surface crusting.
Once the bed is prepared, apply a light layer of suitable organic mulch.
Shredded leaves, clean straw, and other appropriate garden mulches can help protect the soil surface from direct rainfall and rapid moisture changes.
Keep mulch away from direct contact with plant stems.
How to Loosen Compacted Raised Bed Soil Without Removing Plants
Compaction can develop during the growing season, when removing established vegetables isn’t practical.
In this situation, focus on improving the soil between plants while protecting their root systems.
Gently Aerate Open Areas Between Plants
Use a narrow hand fork in spaces where roots are less likely to be disturbed.
Insert it carefully into the soil and apply gentle pressure to create small openings.
Avoid deep cultivation close to stems or within dense root zones.
Large plants such as tomatoes, peppers, and squash may have roots extending well beyond their visible stems.
For beds with extensive root systems, surface improvements are often safer than deep digging.
Apply Compost as a Surface Top Dressing
Spread a thin layer of mature compost over exposed soil around the plants.
Keep the material from piling against stems or crowns.
Light watering will help the compost settle into contact with the soil surface.
Soil organisms can gradually incorporate organic material into the upper soil layers without extensive digging.
This approach generally produces gradual improvement rather than immediately breaking a deeply compacted layer.
Wait Until Harvest for Major Soil Repairs
If a raised bed contains actively producing vegetables, aggressive loosening may cause more harm than the compaction itself.
Avoid disturbing established roots unless the soil problem is severe enough to require immediate action.
After harvesting, remove spent plants and inspect the soil more thoroughly.
That is usually the better time to break up deeper hard layers, correct the growing mix, and prepare for the next planting.
Which Soil Amendments Help Fix Compacted Raised Beds?
Different soil amendments serve different purposes. Some help develop better soil structure, while others change the physical texture or water-holding behavior of a growing mix.
Choosing the correct material matters more than adding a large quantity.
Finished Compost for Organic Matter and Soil Structure
Mature plant-based compost is often the most practical amendment for mineral soil with low organic matter.
It provides material for soil organisms and contributes to the formation and stability of soil aggregates.
Soil aggregates are groups of particles bound together in a way that creates spaces for water and air movement.
Compost can support gradual structural improvement, but it cannot instantly eliminate a severely compacted layer.
Avoid using compost as the only filling material in an ordinary raised garden bed.
Loamy Topsoil for an Overly Dense or Poor-Quality Mix
If the existing raised bed contains heavy, poorly structured soil, adding suitable topsoil may help when a larger repair is necessary.
Look for a crumbly, well-drained loam rather than dense clay fill.
A balanced mixture of mineral soil and finished compost provides a more stable growing medium than excessive organic material alone.
When adding new soil, blend it with the existing material where appropriate instead of creating sharply separated layers.
If the original soil is unsuitable or contaminated, replacing the growing medium may be more appropriate than mixing it.
Sand, Perlite, and Vermiculite
These amendments aren’t interchangeable.
- Sand: Can change soil texture when properly selected and blended in suitable proportions. Adding a small amount to dense clay soil is rarely a reliable compaction repair.
- Perlite: Creates air spaces in many container-style growing mixes but doesn’t correct pressure-related compaction throughout a mineral-soil raised bed.
- Vermiculite: Holds moisture and can be useful in certain prepared mixes, but it isn’t a direct solution for severe compaction.
For an established raised bed, checking drainage and gently loosening the soil are usually more useful first steps than buying large quantities of these materials.
Should You Add Gypsum to Compacted Soil?
Gypsum is sometimes promoted as a treatment for hard clay soil.
However, it isn’t a universal solution for compacted garden beds.
Gypsum can improve certain sodic soils, where excessive sodium contributes to poor particle structure. Most ordinary compacted raised bed soils don’t require it.
Use gypsum only when soil testing and appropriate recommendations identify a condition it can address.
What if Raised Bed Soil Remains Hard After Loosening?
If the soil becomes dense again quickly, the problem may extend beyond ordinary surface compaction.
Look at the soil beneath the bed, the structure of the growing mix, and how water moves through the system.
Compacted Native Soil Beneath an Open-Bottom Raised Bed
An open-bottom raised bed allows roots to grow into the ground underneath.
However, a dense layer of native clay or construction-compacted soil can restrict root penetration and slow water movement.
If the raised bed is empty, carefully examine the boundary between the added growing mix and the native soil.
Loosen the underlying ground with a garden fork where practical, without turning large soil layers.
This can help connect the raised bed’s root zone to the soil beneath it.
If the underlying ground remains waterlogged because of a high water table or other site drainage problem, loosening alone may not solve it.
Increasing usable growing depth or correcting the surrounding drainage may be necessary.
Drainage Problems in Closed-Bottom Raised Beds
A raised planter with a solid bottom behaves differently from an open-bottom garden bed.
Water must leave through suitable drainage openings.
If those openings become blocked, the growing mix may remain saturated even after loosening.
Check for:
- Drainage holes covered by soil or debris.
- Standing water underneath the planter.
- A liner that prevents water from escaping.
- Drainage outlets positioned above the lowest part of the container.
Correct the outlet problem before adding amendments.
Adding a gravel layer at the bottom isn’t a substitute for proper drainage. Gravel does not remove the need for water to exit the planter.
Soil That Becomes Dense Again After Watering
If soil repeatedly turns hard after watering, examine both the growing mix and irrigation method.
A very fine-textured mix may form a surface crust under heavy rainfall or strong irrigation streams.
Alternatively, the original mix may contain unstable organic materials that have broken down and settled.
Try gentler irrigation and a protective surface mulch.
If the soil remains poorly structured throughout its depth, replacing part of the mix with a suitable mineral-soil-based raised bed blend may be more effective than repeatedly cultivating it.
How to Prevent Raised Bed Soil From Compacting Again
Preventing renewed compaction is generally easier than repeatedly repairing damaged soil structure.
A few consistent gardening habits can protect the bed throughout the growing season.
Keep Foot Traffic Outside the Raised Bed
Never stand or walk directly on the planting area.
Design permanent pathways so that planting, weeding, and harvesting can be completed from outside the bed.
For beds accessible from both sides, a width of approximately 3–4 feet is often practical, depending on the gardener’s reach.
Narrower beds may be necessary when access is available from only one side.
Avoid leaning your full body weight onto the soil while working.
Avoid Cultivating Wet Soil
Wait until excess water has drained before digging, planting, or incorporating amendments.
If the soil sticks heavily to your tools, postpone cultivation.
Working the soil when it crumbles naturally helps preserve its existing pore structure.
Repeated deep tilling isn’t necessary for most established raised beds.
Maintain Soil Organic Matter Without Overapplying Compost
Use finished compost thoughtfully rather than adding a thick layer automatically every year.
The appropriate amount depends on the existing growing mix, previous applications, and soil test results.
Excessive compost can contribute to nutrient imbalances and unwanted salt accumulation.
Organic surface mulches can also provide a gradual source of organic matter as they decompose.
Use Mulch to Protect the Soil Surface
Mulch reduces direct exposure to heavy rainfall and can help prevent surface crusting.
It also moderates soil moisture, reducing extreme wetting and drying cycles.
Choose mulch suitable for the crop and local climate.
For vegetable gardens, clean straw or shredded leaves can work well.
Avoid building excessively thick layers around small seedlings or planting crowns.
Keep Living Roots in the Soil When Possible
Plants contribute to soil structure through root growth and interactions with soil organisms.
After harvesting vegetables, a suitable cover crop can help keep the soil biologically active during an otherwise empty growing period.
Choose cover crops based on your climate, planting schedule, and available growing season.
Where cover cropping isn’t practical, maintaining organic mulch and minimizing disturbance can still help protect the bed.
Check Soil Structure Before Each Planting Season
Before planting, examine soil moisture, texture, and resistance to a garden fork.
Look for signs of drainage restrictions or newly formed hard layers.
Avoid loosening the entire bed automatically when the soil is already in good condition.
Healthy soil doesn’t need to be repeatedly turned just to look fluffy. A stable, crumbly structure is more useful than a finely pulverized surface.
How Long Does Compacted Raised Bed Soil Take to Recover?
The recovery time depends on how severe the compaction is and what caused it.
A shallow surface crust may improve soon after gentle loosening and changes to watering.
A moderately compacted root zone can become easier to work once a garden fork has fractured the dense areas.
However, building a stable soil structure through compost decomposition, biological activity, and root growth takes longer.
Severe compaction in clay-rich soil or beneath an open-bottom bed may require repeated seasonal management or more substantial correction.
Rather than expecting a fixed recovery period, monitor practical signs of improvement:
- Water enters the soil more evenly.
- A garden fork penetrates the root zone with less resistance.
- Soil breaks into small, stable crumbs instead of dense slabs.
- Roots spread more freely through the growing area.
- Plants show healthier growth under otherwise suitable conditions.
If drainage and root development remain poor, investigate the underlying soil or growing mix before adding more amendments.
Conclusion
Understanding how to fix compacted soil in raised beds starts with identifying where the soil has become dense and determining whether moisture, physical pressure, or the growing mix is responsible.
For most established beds, gently loosening the soil with a garden fork, using mature compost appropriately, and maintaining a protective mulch layer provide a practical starting point.
Avoid working saturated soil, stepping into the growing area, or using excessive amendments without checking existing conditions.
If the problem comes from a hard layer beneath the bed or inadequate drainage, correct that restriction rather than repeatedly loosening the surface.
The long-term goal is to maintain a stable, crumbly growing medium that allows roots, water, and air to move freely.
FAQs About How to Fix Compacted Soil in Raised Beds
Can Compacted Raised Bed Soil Loosen Naturally?
Yes, moderately compacted soil can gradually improve through biological activity, root growth, organic matter decomposition, and suitable moisture conditions.
However, severe compaction may persist without mechanical loosening or other corrective work. Natural improvement is usually slower than carefully loosening an empty bed.
Can Earthworms Help Loosen Compacted Raised Bed Soil?
Yes. Earthworms create channels as they move through soil and contribute to organic matter breakdown.
Their activity can improve soil structure over time, but earthworms alone may not overcome a severely compacted layer. Suitable moisture, organic matter, and minimal disturbance help support their activity.
How Deep Should You Loosen Compacted Soil in a Raised Bed?
Loosen the depth of soil that is actually compacted, while protecting roots and the bed structure.
For an empty bed, this may involve working through several inches of the root zone or deeper where a hard layer exists. Use a garden fork carefully rather than assuming the entire bed needs deep cultivation.
Is It Better to Replace Compacted Raised Bed Soil?
Replacement is usually unnecessary when the existing soil is suitable and compaction is moderate.
However, replacing part or all of the growing mix may be appropriate when it is extremely dense, poorly formulated, contaminated, or unable to drain adequately despite corrective measures.
How Often Should You Loosen Soil in Raised Beds?
Loosen raised bed soil only when inspection reveals a genuine problem.
A well-maintained raised bed may not require deep loosening every season. Regular mulch application, appropriate compost use, and avoiding foot traffic can reduce the need for repeated cultivation.
Can Overwatering Make Raised Bed Soil Hard?
Overwatering can contribute to poor soil conditions, particularly when saturated soil is repeatedly disturbed or compressed.
Excess water also reduces the oxygen available to roots and may make an existing compaction problem more noticeable.
Allow the soil to drain before working it, and adjust irrigation based on moisture within the root zone rather than the surface appearance alone.

I’m Maya L. Greenwood, a lifelong plant lover who believes anyone can grow something beautiful with the right guidance. After years of testing soil mixes, pruning methods, irrigation tricks, and pest-safe solutions, I started EasyGardenTips.com to turn hard-won lessons into step-by-step advice. From seed starting and container gardens to composting and seasonal checklists, my goal is to make gardening simple, sustainable, and fun.