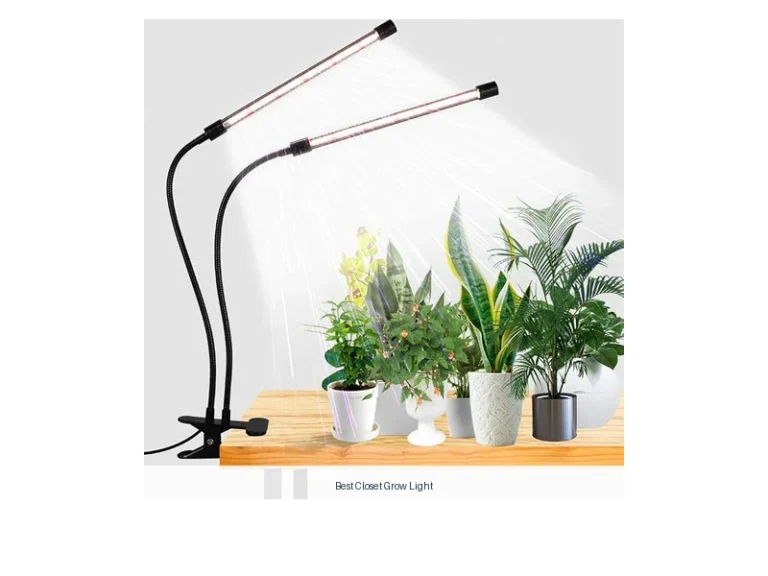
5 Best Grow Lights for Seed Germination: Top Products Compared
Finding the best grow lights for seed germination can be harder than it looks. A suitable light must provide useful coverage, adjustable intensity, dependable positioning, and a schedule that keeps seedlings from stretching toward a window.
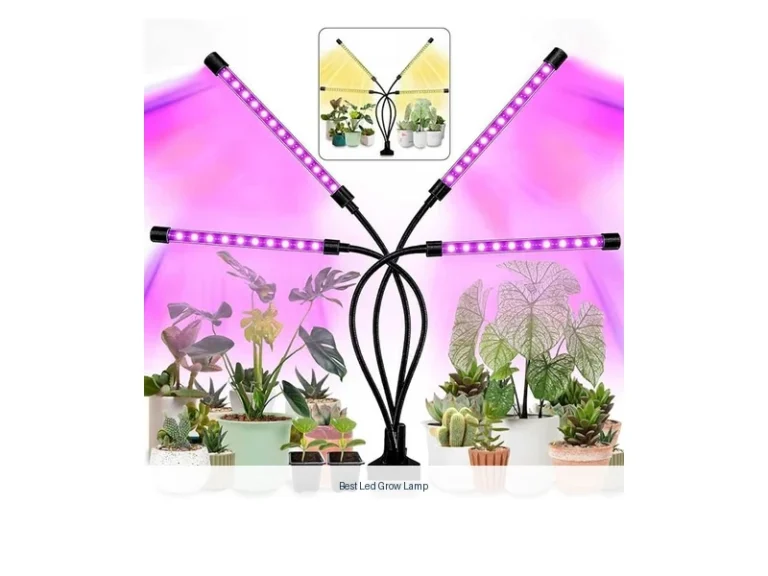
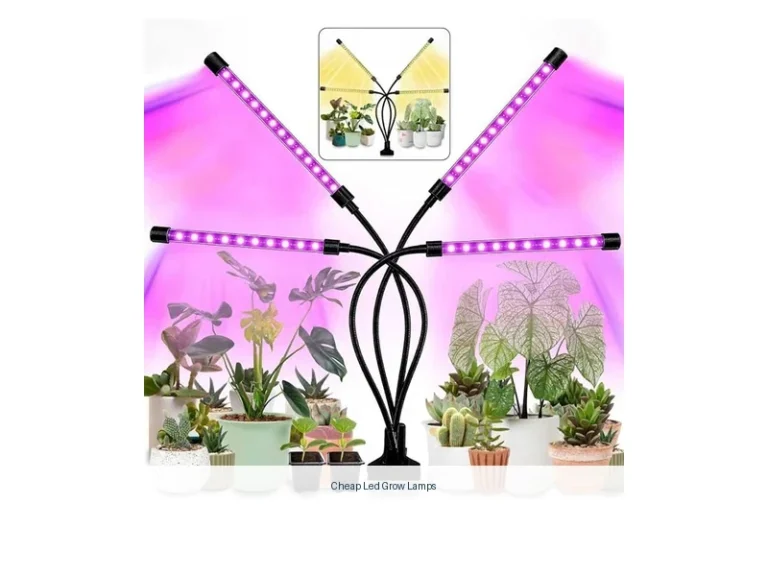
My first choice is SYEIORAOM Six-Head Full-Spectrum Grow Lights. The full-spectrum LEDs, adjustable goosenecks, and telescoping center pole also make it easier to position light from germination through later growth.
My second choice is LEOTER 80-LED Full-Spectrum Grow Light. Its 80 LEDs, three spectrum modes, 10 dimming levels, and memory timer give beginners a practical way to adjust lighting as plants develop.
My third choice is bseah Full-Spectrum Indoor Plant Grow Light. It is a sensible option for a small indoor garden where stable placement and simple daily operation matter more than high-output coverage.
This guide compares all five options by lighting design, adjustability, coverage, controls, installation, and likely ownership trade-offs. It also explains how to position a lamp, establish a useful schedule, avoid common seedling problems, and choose a setup that matches the size of your growing area.
Best Grow Lights for Seed Germination
I selected these products for their direct relevance to indoor seed starting, the usefulness of their listed controls and positioning features, available customer-feedback evidence, and variety of form factors. The comparison considers both multi-head household lamps and a higher-output panel-style option, without claiming hands-on testing.
| # | Image | Product | Price on Amazon |
|---|---|---|---|
| 1 |  |
SYEIORAOM Six-Head Full-Spectrum Grow Lights | Check Price |
| 2 |  |
LEOTER 80-LED Full-Spectrum Grow Light | Check Price |
| 3 |  |
bseah Full-Spectrum Indoor Plant Grow Light | Check Price |
| 4 |  |
VIPARSPECTRA 70-Watt Dimmable LED Grow Light | Check Price |
| 5 |  |
EWPJDK 6500K Full-Spectrum 84-LED Grow Light | Check Price |
SYEIORAOM Six-Head Full-Spectrum Grow Lights
The SYEIORAOM Grow Lights stand out because six separate light heads can illuminate more than one pot, tray, or plant grouping at the same time. That arrangement is especially helpful when seedlings are spread across a shelf rather than concentrated in one narrow row. Instead of forcing every plant beneath one fixed bulb, the heads can be aimed individually toward areas that need more direct coverage.
Each head uses part of a 108-LED full-spectrum system intended to support plants from germination through flowering and fruiting. For a beginner, that broad-use design means the lamp does not need to be replaced as soon as seedlings become established. Full-spectrum output is also a practical choice for mixed indoor growing because flowers, vegetables, and succulents can share the same general light source.
Positioning is the biggest ownership advantage. The 360-degree goosenecks let you change the direction of each head, while the adjustable middle pole changes the overall height. A stable base helps keep the assembly from wobbling or tilting, although six adjustable arms can still require occasional repositioning as plants grow. The trade-off is that this style takes more table space than a single clip-on lamp.
Pros
- Six adjustable heads can cover several plants or containers.
- Full-spectrum LEDs suit seedlings and later growth stages.
- 360-degree goosenecks and an adjustable pole simplify positioning.
- Stable base is useful for a freestanding indoor setup.
Cons
- Multi-head construction needs more surface area than a single lamp.
- Individual heads may require regular adjustment as seedlings grow.
- The supplied data does not identify a timer or dimming control.
My Opinion
This is the most flexible pick for someone starting several kinds of plants indoors. Choose it when coverage and independent aiming matter more than compact storage or advanced scheduling controls.
LEOTER 80-LED Full-Spectrum Grow Light
The LEOTER Grow Light is a well-rounded choice for seedlings because it combines several controls that are genuinely useful during early growth. Its 80 LEDs use red, blue, yellow, and white light elements, with a full-spectrum range listed from 380nm to 800nm. The separate red-and-blue mode gives the owner another setting for plants at different stages, although beginners may find full spectrum the easiest default.
Ten dimming levels provide more control than a basic on-or-off lamp. Newly emerged seedlings can start with a gentler setting, while larger plants may need more intensity. This adjustment is useful when the lamp is close to tender leaves or when the same fixture serves small herbs and more established plants. The three switch modes add flexibility, but extra controls also mean there is a short learning curve.
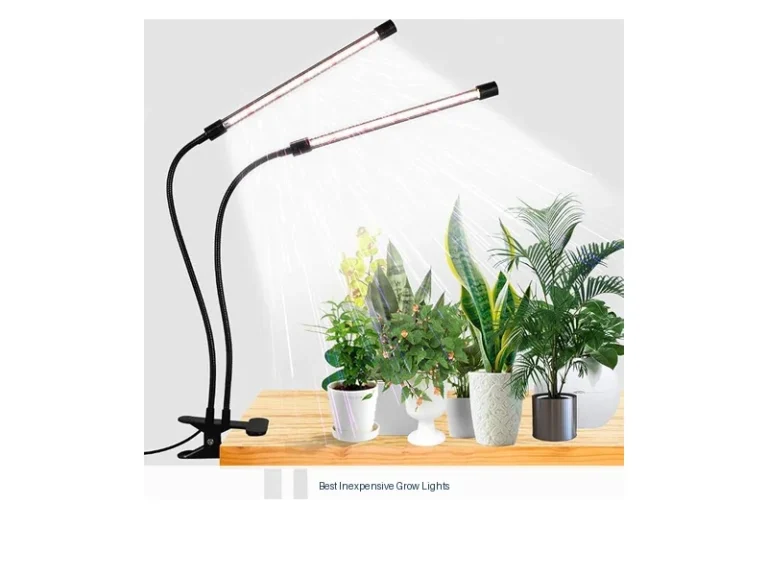
The circular memory timer can automatically turn the light on and off every day for a selected three-, nine-, or 12-hour cycle. It requires continuous power, and the supplied information notes that the timer needs to be reset if the grow light is unplugged. That is an important ownership detail for anyone who moves the fixture or uses a switched power strip. A metal clamp and four 360-degree goosenecks support shelf, desk, or countertop placement, while the USB connector and included adapter make power options convenient.
Pros
- 80-LED combination offers full-spectrum and red-blue modes.
- Ten intensity levels support gradual adjustment.
- Three timer choices automate a daily schedule.
- Clamp and flexible goosenecks suit compact indoor spaces.
- Heat sink is intended to help dissipate operating heat.
Cons
- Timer settings must be reset after unplugging.
- Clamp mounting may be less suitable for large trays.
- Several light modes and controls may feel excessive for one small pot.
My Opinion
LEOTER is the best alternative for buyers who value control. Its timer and dimmer make it easier to create a repeatable routine, provided the lamp remains connected to power.
bseah Full-Spectrum Indoor Plant Grow Light
The bseah Grow Light Plant Lights focus on the controls most useful to a small indoor growing station. It provides full-spectrum LED output with a yellow-and-white combination intended to support photosynthesis, germination, growth, flowering, and fruiting. That broad purpose makes it a reasonable choice for a windowsill collection that includes both seedlings and mature potted plants.
Its 10 dimming levels allow a more gradual approach than simply placing seedlings under maximum brightness. A lower setting can be a practical starting point when sprouts first appear, while stronger settings may be more appropriate as foliage develops. The three lighting modes also provide some flexibility for different plant stages and seasons, though the supplied information does not identify the exact wavelength breakdown for each mode.
The automatic cycle timer offers three nine and 12-hour choices and can repeat the same schedule daily when the lamp has continuous power That feature reduces the chance of forgetting to switch the light on after a busy day The metal gooseneck and non-slip mat are intended to hold the fixture in position which is helpful because changing the angle too often can create uneven growth A USB connector gives it convenient placement near.
One limitation is that this style of lamp is better suited to a focused group of indoor pots than a broad seed-starting rack. The product information also lists a rated life of up to 50,000 hours, but actual ownership will still depend on power use, handling, and operating conditions.
Pros
- Full-spectrum output is suitable for germination and ongoing plant growth.
- Ten dimming levels and three modes support gradual adjustments.
- Automatic timer repeats a daily three-, nine-, or 12-hour cycle.
- Metal gooseneck and non-slip mat help maintain positioning.
- USB connection is convenient for indoor placement.
Cons
- Focused coverage may not suit a large seedling tray.
- Exact output details for the three modes are not supplied.
- Continuous power is needed for the automatic timer cycle.
My Opinion
bseah offers a useful middle ground for beginners who want scheduling and dimming without moving to a larger panel. It fits a modest indoor garden particularly well.
VIPARSPECTRA 70-Watt Dimmable LED Grow Light
The VIPARSPECTRA 70 Watt Grow Light takes a different approach from the multi-head lamps above. It is a higher-output fixture with a diode layout and driver intended for seedlings and vegetative plants, producing a listed 11,000 lumens. The product information identifies a 2-by-2-foot vegetative area, making it more appropriate for a dedicated growing space than for one decorative houseplant.
Its balanced spectrum combines 660nm red with 3000K and 5000K white light That blend is presented as a way to approximate natural sunlight while supporting early growth For someone starting a larger batch of seedlings the broader more centralized light source can be easier to manage than aiming several small heads The trade-off is that a.
A four-level dimmer provides useful control over brightness. That matters when seedlings are young or when the fixture must be positioned closer to the growing surface. The fanless design and large aluminum heat sinks are intended to move heat away without adding fan noise. Even so, seedlings should not be placed closer than necessary, and the surrounding area should allow airflow around the fixture.
The listed 70-watt draw is described as delivering performance comparable to a 150W HPS/MH light while using less energy, but buyers should treat that comparison as product positioning rather than a promise that every growing result will match another lighting system. This is also the only option here with a clearly identified professional-style coverage target, so authentic purchasing and correct installation deserve attention.
Pros
- 11,000-lumen output is suited to a more substantial growing area.
- 2-by-2-foot vegetative coverage is clearly identified.
- 660nm red and 3000K/5000K white spectrum supports seedling and vegetative use.
- Four-level dimmer allows brightness changes.
- Fanless aluminum heat sinks avoid fan noise.
Cons
- Higher output may be unnecessary for a single tray or windowsill.
- It needs more intentional placement than a flexible gooseneck lamp.
- The supplied information does not identify a built-in timer.
My Opinion
VIPARSPECTRA is the strongest fit for a dedicated 2-by-2-foot growing area or a larger batch of seedlings. For very small spaces, its output and panel format may be more than needed.
EWPJDK 6500K Full-Spectrum 84-LED Grow Light
The EWPJDK Grow Light uses 84 LEDs, including 74 white LEDs and 10 red LEDs, to create a 6500K full-spectrum lamp. That daylight-style color is a familiar choice for starting herbs, flowers, and vegetables indoors. It is also described as soft and flicker-free, which can make the fixture more comfortable in a room where people spend time, although comfortable light should not be confused with sufficient intensity for every plant.
This is a compact clip-on option with one lamp head rather than a multi-head arrangement The thickened flexible gooseneck lets the owner aim the light toward a tray or pot and the padded clamp is intended to hold securely without slipping That format works well when shelf space is limited but it.
The three lighting modes—white, red, and white plus red—give beginners a simple way to experiment with plant stages and room conditions. Ten dimming levels make fine adjustments easier, especially when the lamp is close to emerging seedlings. The three-, nine-, and 12-hour auto cycle can repeat daily as long as power remains connected, so an unplugged lamp will interrupt the routine.
At about 10 watts, it is the lowest-consumption choice in this selection according to the supplied information. That can be appealing for a small setup, but lower energy use does not automatically indicate broad coverage or high intensity. Measure the growing area and plan for one lamp per focused section if a single fixture cannot illuminate all leaves evenly.
Pros
- 6500K white and red LED combination suits indoor plants and seedlings.
- Ten dimming levels provide gradual brightness control.
- Three modes allow white, red, or combined lighting.
- Clip and flexible gooseneck are easy to position on a shelf.
- Uses about 10 watts according to the supplied information.
Cons
- Single-head design offers limited coverage compared with multi-head lamps.
- Timer needs continuous power to maintain its daily cycle.
- May require additional lamps for a wide tray or multiple shelves.
My Opinion
EWPJDK is a sensible budget-conscious format for one small growing area. Pick it when low stated power use and easy clip-on placement matter more than maximum coverage.
How I Selected These Grow Lights for Seed Germination
The selection centers on the needs that matter most when starting seeds indoors: dependable positioning, useful coverage, adjustable brightness, spectrum options, scheduling, and compatibility with the available growing space. I also considered whether a product could remain useful after germination rather than becoming unnecessary once the first leaves appear.
Customer-feedback volume and ratings supplied for these products provided additional context, but they were not treated as proof of identical performance in every home. A high number of customer responses can show that a product has broad buyer interest, while the listed specifications help explain why a lamp may suit one setup better than another.
The right fixture is not automatically the brightest one. A small tray needs even, controllable coverage; a larger growing area may benefit more from a centralized panel with a clearly stated coverage target.
Brand variety also matters because these lamps represent different ownership styles. SYEIORAOM emphasizes multiple adjustable heads, LEOTER and bseah focus on dimming and timing, VIPARSPECTRA provides a more powerful panel format, and EWPJDK keeps the design compact and low-power.
Timer memory, power continuity, and physical stability are easy to overlook. They can affect daily consistency just as much as the number of LEDs printed on the product listing.
How to Choose the Best Grow Lights for Seed Germination
When choosing the best grow lights for seed germination, begin with the growing area rather than the lamp’s appearance. Count the trays or pots that need illumination, check how much shelf or table space is available, and decide whether the light must support only seedlings or mature plants too. Then compare output, adjustment range, mounting method, and scheduling.
- Match the coverage style to the number and spacing of seed trays.
- Choose dimming when seedlings will remain under the same lamp as they grow.
- Prefer a timer if maintaining a daily routine may be difficult.
- Check whether the fixture needs a clamp, base, shelf clearance, or hanging space.
- Confirm that power connections will remain continuous for timer operation.
Coverage and tray size
Coverage is more important than simply counting LEDs. A multi-head lamp can distribute light across separate pots, while a panel can cover a defined area more uniformly when positioned correctly. A single clip-on lamp may work well for a narrow row but leave the outer edges of a wide tray weaker.
Before ordering, measure the length and width of the seed-starting area. If seedlings are packed closely together, a centered light may be efficient. If plants are arranged around a shelf, independent heads can reduce dark corners. Leave room to move the light upward as stems and leaves develop.
Brightness and dimming
Seedlings need enough light to grow compactly, but a strong fixture placed too close can create unnecessary heat or stress. Dimming gives a beginner more room for adjustment than a fixed-output lamp. The LEOTER, bseah, and EWPJDK options list 10 levels, while VIPARSPECTRA lists four. SYEIORAOM emphasizes head positioning rather than a supplied dimming specification.
Use the lowest setting only as a starting point, not as a permanent rule. Watch the plants: thin, elongated stems can indicate insufficient light, while bleached or visibly stressed leaves may signal excessive intensity or heat. Make one change at a time so the result is easier to understand.
Spectrum and color choices
Full-spectrum lighting is a convenient general-purpose choice because it can remain in use from germination into vegetative growth and, with suitable plants, later stages. Red and blue modes can offer additional control, but switching modes is not automatically better than using a consistent full-spectrum setting.
The listed products vary in how specifically they describe their light. LEOTER identifies red and blue wavelengths as well as a full-spectrum range. VIPARSPECTRA lists 660nm red with 3000K and 5000K white. EWPJDK lists 6500K and a red-white LED arrangement. If a listing does not provide a complete technical measurement, avoid assuming that two lamps with similar names produce identical intensity.
Timer and power requirements
A timer can make indoor seed starting easier because plants receive a repeatable daily schedule. However, the timer only works as expected when the light remains connected to power. The supplied information for LEOTER specifically notes that its timer must be reset after unplugging; the other timer-equipped products also require continuous power for their automatic cycle.
Place the power adapter where it will not be splashed during watering. Avoid routing cords across walkways or beneath containers where moisture can collect. If a power strip is used, make sure its switch will not be accidentally turned off.
How to Set Up a Seedling Grow Light
Start with a stable surface and place the fixture so the light reaches the full seed-starting area. A lamp that is slightly off-center can leave one side of the tray weaker, encouraging uneven growth. Flexible heads should be adjusted so they illuminate from above rather than shining across the side of the stems.
- Clear a dry, stable area with enough room for the tray and light base or clamp.
- Install the light according to its mounting style and check that it cannot tip.
- Center the light over the tray or aim individual heads at separate plant groups.
- Set a moderate brightness and a consistent timer schedule if available.
- Observe seedlings for several days before making small height or intensity changes.
Do not let leaves touch hot surfaces or place the fixture where water can drip onto electrical connections. Even fanless products need reasonable clearance around heat-dissipating parts. Keep the lamp at a distance that gives even coverage, then adjust based on plant response and the product’s controls.
Creating a Useful Daily Light Schedule
Consistency is more valuable than constantly changing settings. A timer-equipped lamp can repeat a three-, nine-, or 12-hour cycle, but the best choice depends on the plants, the amount of natural daylight, and whether the light is supplementing a window or serving as the primary source.
For a first setup, choose a schedule that fits the household routine and can remain uninterrupted. A lamp that turns on while nobody is home can still work well, provided it has safe clearance and continuous power. Give seedlings a predictable dark period rather than leaving the light on indefinitely.
Natural sunlight through a window may supplement the fixture, but it can change significantly with weather and season. If seedlings lean strongly toward the glass, rotate the tray or improve overhead coverage. Avoid assuming that a bright room provides the same usable light as a purpose-positioned grow lamp.
Positioning Lights as Seedlings Grow
Newly emerged seedlings and older plants do not always need the same lamp position. As stems and leaves develop, raise or redirect the fixture so the entire canopy remains illuminated. Moving only one edge of a multi-head lamp can create uneven growth, so check the whole tray after each adjustment.
Watch plant shape rather than relying on a universal distance recommendation. Long, thin stems suggest that the light may be too weak, too far away, or not covering the tray evenly. Pale or stressed foliage may indicate that intensity is too high, the fixture is too close, or heat is accumulating.
The goal is not to keep the lamp as close as possible. The goal is even, usable light across the growing surface without excessive heat. Dimming can be preferable to moving a fixed-output lamp repeatedly, while adjustable goosenecks make directional corrections easier.
Heat, Airflow, and Seedling Safety
Seedlings are vulnerable to drying and temperature swings, so place the light in a location where the tray can be monitored. VIPARSPECTRA uses a fanless design with large aluminum heat sinks, while LEOTER lists a heat-dissipation design. These features address fixture heat, but they do not eliminate the need for clearance around the lamp.
Keep fabric, paper, plastic covers, and other heat-sensitive items away from the light body and power adapter. Do not cover ventilation or heat-sink surfaces. If a humidity dome is used, keep moisture contained within the tray and away from electrical parts.
Use dry hands when changing settings, and disconnect power before moving a lamp that is clamped or positioned close to water. A stable base, non-slip pad, or secure clamp reduces the chance of accidental movement during watering.
Cleaning and Maintaining a Grow Light
Dust on a light surface can reduce the amount of illumination reaching seedlings, especially in a dry indoor room. Disconnect the fixture before cleaning, then use a soft, dry cloth to remove dust from accessible surfaces. Avoid spraying cleaner directly onto LEDs, controls, connectors, or adapters.
Inspect goosenecks, clamps, bases, and cables occasionally. A loose clamp or gradually drooping arm can change coverage without being obvious at first. Tighten or reposition components only as the product design permits; forcing a flexible neck can shorten its useful life.
Keep the timer settings documented if the fixture is unplugged for storage or rearrangement. Since several products depend on continuous power for automatic cycling, checking the schedule after reconnection prevents an unlit tray from going unnoticed.
Using These Lights with Different Growing Spaces
Windowsills and desks
Clip-on models such as EWPJDK, bseah, and LEOTER are convenient where a desk, shelf edge, or windowsill provides a secure attachment point. Confirm that the clamp has enough material to grip and that the lamp does not block normal access to the plants.
Plant shelves and mixed containers
SYEIORAOM’s six-head structure is better suited to several containers arranged across a surface. Aim each head at a plant grouping, then make small corrections as heights vary. A freestanding base also avoids relying on a particular shelf edge.
Dedicated seed-starting areas
VIPARSPECTRA is the better match for a defined 2-by-2-foot vegetative area. It makes more sense when a grower has a dedicated shelf or growing zone and wants centralized coverage rather than several small directional lamps.
Common Mistakes When Starting Seeds Under Lights
Most early problems come from mismatched coverage, inconsistent schedules, or positioning that changes from day to day. A few simple checks can prevent a small lighting setup from producing uneven or stretched seedlings.
- Using one narrow lamp over a wide tray: Check the outer seedlings for weaker or uneven growth.
- Leaving the light at one height forever: Reassess position as stems and foliage develop.
- Forgetting timer power requirements: Keep timer-equipped fixtures continuously connected and verify settings after interruptions.
- Choosing brightness by appearance alone: Judge coverage and plant response, not just how bright the room looks.
- Placing cords near water: Route cables away from watering and keep adapters dry.
- Assuming full spectrum means unlimited coverage: Spectrum describes light composition, not necessarily the area one lamp can illuminate.
Do not solve every seedling problem by increasing brightness. First check whether the light is centered, whether the tray is evenly covered, and whether the schedule is consistent.
When to Add Another Light
Consider a second lamp when the growing area expands beyond the fixture’s practical coverage or when plants are visibly competing for overhead light. Adding another small lamp can be more flexible than moving a single light constantly, especially on a long shelf.
For a single-head clip-on fixture, a second unit may help cover the far side of a tray. With SYEIORAOM, unused heads may already provide enough expansion. With VIPARSPECTRA, first check whether the defined growing area is being used efficiently before adding more output.
More light also means more cords, heat, and adjustment points. Expand gradually and keep the schedule consistent across fixtures when possible.
FAQS About Best Grow Lights for Seed Germination
What type of light is best for seed germination?
A full-spectrum LED is a practical general-purpose choice because it can support seedlings and remain useful as plants grow. Adjustable brightness and even coverage are often more important than choosing a lamp with the most complicated spectrum settings.
How many hours should grow lights run for seed germination?
There is no single schedule for every plant or room, but the products in this selection offer automatic three-, nine-, or 12-hour cycles where timers are included. Choose a repeatable schedule appropriate to the plant and natural daylight, and provide a consistent dark period.
Are dimmable lights better for starting seeds?
Dimming can make adjustment easier because newly emerged seedlings and larger plants may not need the same intensity. It is especially useful when one lamp will stay in use as plants develop.
Can a clip-on grow light cover a seed tray?
It can cover a narrow or compact tray if the lamp is centered and positioned correctly. A wide tray may need multiple heads or more than one fixture to avoid darker edges.
Do grow-light timers work if the lamp is unplugged?
Timer-equipped products generally need continuous power for their automatic cycle. The LEOTER information specifically notes that its timer needs to be reset after unplugging, so check the schedule whenever power has been interrupted.
Should seedlings be placed directly under a grow light?
They should generally receive light from above, but not necessarily touch the fixture. Leave suitable clearance, keep heat-dissipating areas uncovered, and adjust height or intensity if plants become stretched or visibly stressed.
Final Thoughts
The best grow lights for seed germination depend on coverage and control more than marketing language. I would choose SYEIORAOM Six-Head Full-Spectrum Grow Lights for flexible coverage, LEOTER 80-LED Full-Spectrum Grow Light for the strongest combination of dimming and scheduling, and bseah Full-Spectrum Indoor Plant Grow Light for a balanced small-garden setup.

I’m Maya L. Greenwood, a lifelong plant lover who believes anyone can grow something beautiful with the right guidance. After years of testing soil mixes, pruning methods, irrigation tricks, and pest-safe solutions, I started EasyGardenTips.com to turn hard-won lessons into step-by-step advice. From seed starting and container gardens to composting and seasonal checklists, my goal is to make gardening simple, sustainable, and fun.