Best 2×4 Grow Tent: 5 Durable Models for Serious Indoor Growing
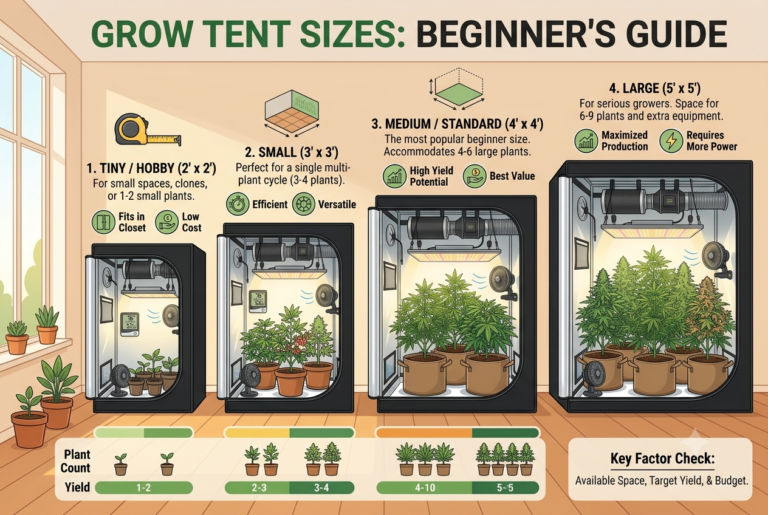
A 2×4 grow tent offers eight square feet of canopy space while using a narrow rectangular footprint that fits naturally against a wall. It provides twice the growing area of a 2×2 tent without creating the lighting, cooling, and access challenges associated with much larger enclosures.
The best 2×4 grow tent should provide enough height for containers, plants, lighting, and ventilation equipment while maintaining dependable light control. Strong poles, smooth zippers, reflective walls, correctly positioned duct ports, and a removable floor tray are more important than unnecessary accessories.
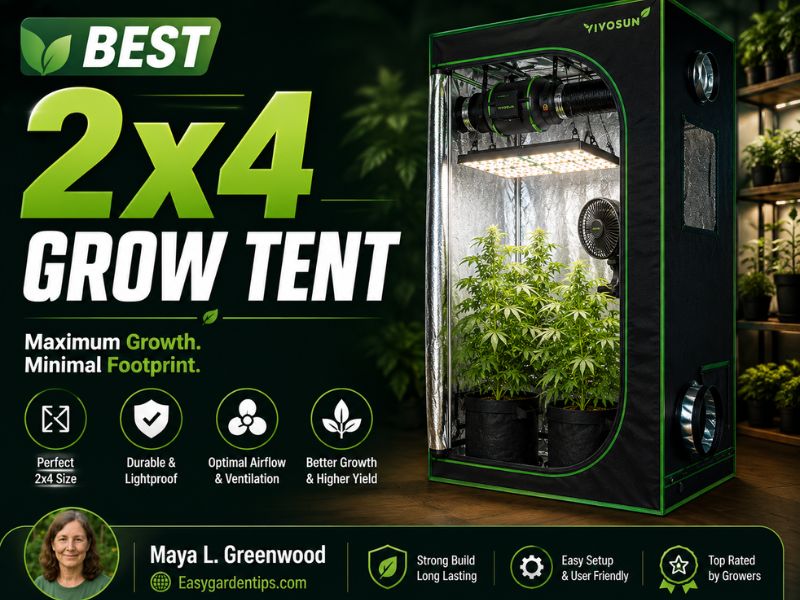
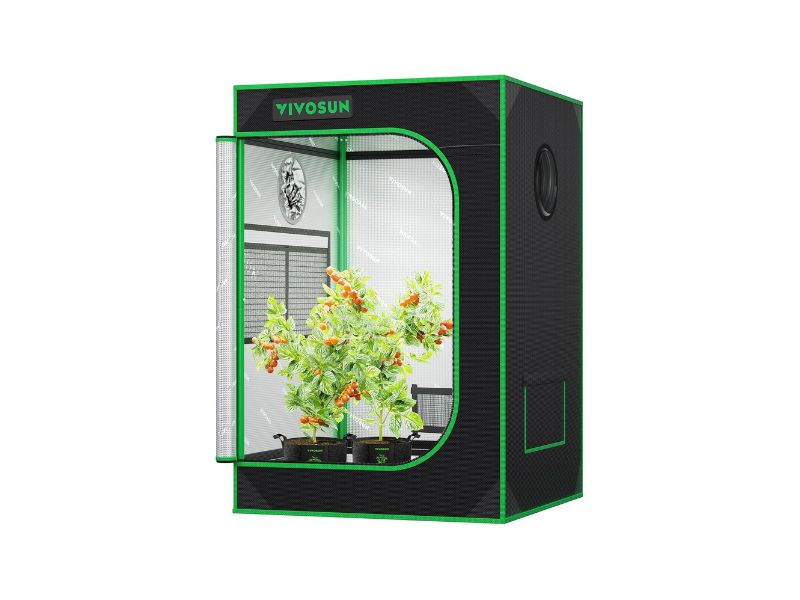
My primary recommendation is the VIVOSUN G425 2×4 Grow Tent. It combines a widely used 48-by-24-inch footprint with accessible doors, reflective walls, observation access, and a practical frame capacity.
The AC Infinity CLOUDLAB 642 is the better premium option for heavy equipment and environmental-controller integration. The Mars Hydro 4×2 Advanced Grow Tent combines a taller frame with dense 1680D canvas.
Growers requiring additional width and height can consider the Spider Farmer 4.6×2.3 Grow Tent. The VEVOR 2×4 Grow Tent provides an exact 48-by-24-inch alternative with a conventional steel-frame design.
5 Best 2×4 Grow Tents
| Image | Product Name | Check Price |
|---|---|---|
Best Choice | VIVOSUN G425 2×4 Grow Tent | Check Price |
Second Best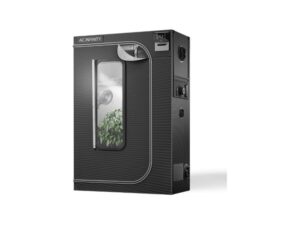 | AC Infinity CLOUDLAB 642 Advance Grow Tent | Check Price |
Third Choice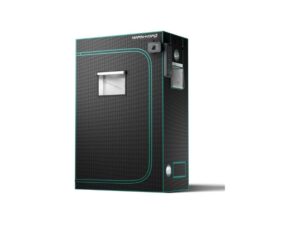 | Mars Hydro 4×2 Advanced Grow Tent | Check Price |
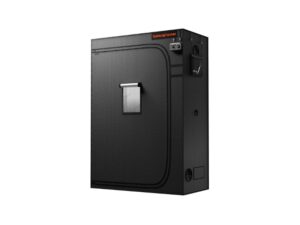 | Spider Farmer 4.6×2.3 Grow Tent | Check Price |
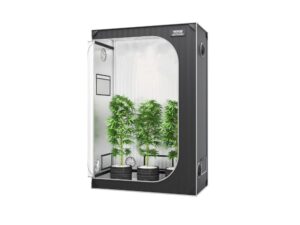 | VEVOR 2×4 Grow Tent | Check Price |
1. VIVOSUN G425 2×4 Grow Tent
Key Features
- 48 × 24 × 60-inch dimensions
- Eight-square-foot floor area
- Reflective Mylar interior
- Recycled woven outer material
- Metal support frame
- Approximately 165-pound stated capacity
- Multiple access points
- Observation window
- Ventilation and electrical ports
- Removable floor tray
- Suitable for two to four compact plants
- Compatible with smart-growing accessories
The VIVOSUN G425 ranks first because its dimensions, access layout, and established design make it directly relevant to typical 2×4 indoor gardens.
Its 48-by-24-inch floor accommodates one long LED fixture, two smaller light boards, several fabric pots, or a narrow hydroponic tray. The rectangular shape makes efficient use of wall space and keeps most plants within a reasonable reach from the front or side.
The 60-inch height is workable but requires careful planning. After subtracting container height, the grow light, hanging hardware, ventilation equipment, and a safe canopy gap, the remaining vertical space can become restrictive.
Low-profile LED fixtures and horizontal canopy training are therefore useful. Mounting the carbon filter or inline fan outside the tent can preserve additional internal height.
The reflective interior helps redirect sideward light toward the canopy. Its viewing window allows quick inspections without opening the primary door and disrupting the internal environment.
The frame is rated for substantial equipment, but lights and filters should still be distributed across several support bars. A published load capacity should not be interpreted as permission to concentrate all weight on one roof pole.
The current G425 uses a 48-by-24-by-60-inch format, a metal frame, reflective interior, observation access, and multiple side doors.
What I Like
- Exact 2×4 floor dimensions
- Strong established buyer confidence
- Several access points
- Useful observation window
- Good compatibility with long LED fixtures
- Removable spill tray
- Practical frame capacity
- Efficient against-wall placement
What I Do Not Like
- Sixty-inch height can be restrictive
- Large filters consume valuable ceiling space
- Strong negative pressure may pull walls inward
- Reflective window covers must remain securely closed
- Rear access becomes difficult when placed tightly against a wall
The VIVOSUN G425 is the most balanced option for a conventional 2×4 setup. It provides the essential features needed for a small full-cycle garden without the weight and complexity of a premium professional enclosure.
2. AC Infinity CLOUDLAB 642 Advance Grow Tent
Key Features
- 48 × 24 × 72-inch dimensions
- Heavy-duty 2000D Oxford canvas
- One-inch steel poles
- Approximately 150-pound crossbeam capacity
- Three hanging support bars
- Lab-tested reflective Mylar interior
- Tall viewing window
- Controller mounting plate
- Light-resistant cable passthrough
- Multiple duct openings
- Reinforced corners
- Heavy-duty removable catch tray
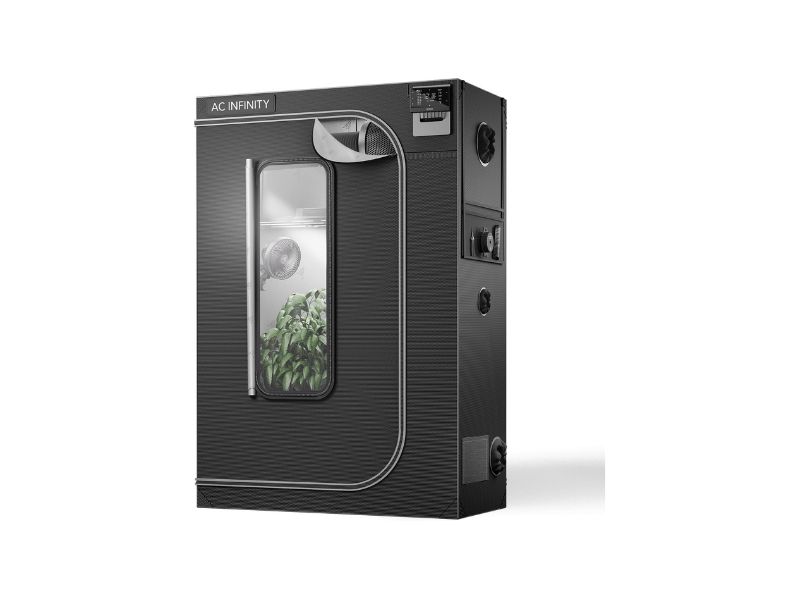
The AC Infinity CLOUDLAB 642 is the strongest premium 2×4 option in this group. Its 2000D canvas and one-inch steel poles provide greater structural support than common entry-level tents.
The 72-inch height provides one additional foot of vertical space compared with the VIVOSUN G425. This creates more flexibility for tall containers, hydroponic buckets, bar-style LED fixtures, carbon filters, and canopy separation.
Its controller mounting plate is especially useful in a coordinated environmental system. A fan or climate controller can remain outside the tent while its sensor and control cables pass through a protected opening.
Keeping the controller outside makes the display easier to read and reduces its exposure to humidity, irrigation water, and condensation.
Three hanging bars provide more options for distributing the light, filter, and fan. Equipment weight should still be spread across the roof rather than concentrated in the center.
The tall viewing window allows more of the canopy to be observed without opening the main door. Front zipper flaps add another layer of light protection around a common leakage area.
AC Infinity specifies 48-by-24-by-72-inch dimensions, 2000D canvas, one-inch steel poles, three hanging bars, controller mounting, and multiple duct ports for the CLOUDLAB 642.
What I Like
- Thick 2000D material
- Strong one-inch poles
- Full 72-inch height
- Controller-ready exterior
- Organized cable routing
- Additional hanging bars
- Strong light-control design
- Heavy-duty floor tray
- Multiple ventilation configurations
What I Do Not Like
- Heavier than standard tents
- Thick cover requires more assembly effort
- Premium construction may exceed a basic setup’s needs
- Large viewing window adds more zipper length
- Controller plate is less useful outside a compatible ecosystem
The CLOUDLAB 642 is the strongest choice for growers who expect to hang heavier equipment or build a controller-based environment. Its additional height also makes it easier to manage a complete ventilation system inside the enclosure.
3. Mars Hydro 4×2 Advanced Grow Tent
Key Features
- 48 × 24 × 71-inch dimensions
- Heavy 1680D canvas
- Diamond-pattern reflective Mylar
- Reinforced alloy-steel frame
- Smooth zipper system
- Additional zipper-light flap
- Observation window
- Multiple ventilation openings
- Cable ports
- Removable floor tray
- Suitable for long LED boards and bar fixtures
- Tool-free primary assembly
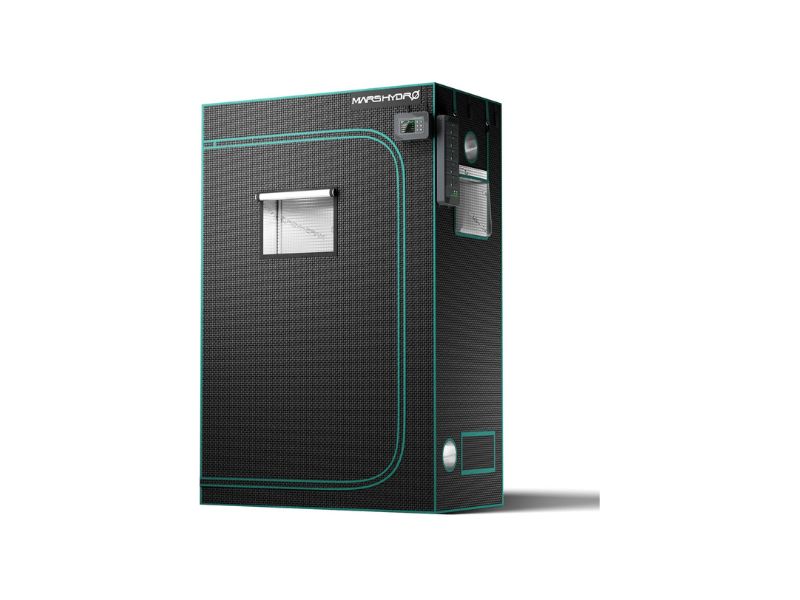
The Mars Hydro 4×2 Advanced tent combines a nearly six-foot height with thick 1680D material. It sits between the standard VIVOSUN design and the heavier AC Infinity enclosure.
Its 71-inch height provides substantially more vertical room than a 60-inch tent. Growers can preserve a safer light-to-canopy distance or install ventilation equipment above the fixture without immediately restricting plant height.
The interior uses reflective diamond Mylar to redirect light toward the growing area. A zipper backing flap helps cover small openings around the primary door seam.
The tent’s rectangular shape pairs naturally with lights designed for 2×4 flowering coverage. One long fixture generally provides a cleaner installation than several small boards, though two separately adjustable lights can provide greater layout flexibility.
The viewing window allows quick inspections, and the removable tray protects the room floor from normal runoff. Large spills still require additional containment.
Mars Hydro identifies this model as a 48-by-24-by-71-inch enclosure with 1680D reflective canvas, an observation window, alloy-steel framing, ventilation ports, and a removable tray.
What I Like
- Strong 1680D material
- Useful 71-inch height
- Good match for 2×4 lighting
- Reinforced light-blocking zipper area
- Observation window
- Removable floor tray
- Multiple duct options
- Balanced weight and durability
What I Do Not Like
- Single long canopy can make rear access difficult
- Heavy fabric requires careful installation
- Roof-load specifications are less extensive
- Observation-window seams require inspection
- Strong exhaust may still require wall-support bars
The Mars Hydro tent is the most balanced mid-tier model. It provides denser fabric and better vertical clearance than many basic 2×4 tents without moving to the weight of a 2000D professional enclosure.
4. Spider Farmer 4.6×2.3 Grow Tent
Key Features
- Approximately 55 × 28 × 80-inch dimensions
- Larger than a conventional 2×4 tent
- 1680D Oxford canvas
- Reflective Mylar interior
- Steel support frame
- Approximately 150-pound stated load capacity
- Eighty-inch height
- Enlarged observation window
- Controller-access opening
- Removable floor tray
- Multiple ventilation ports
- Suitable for two to four full-cycle plants
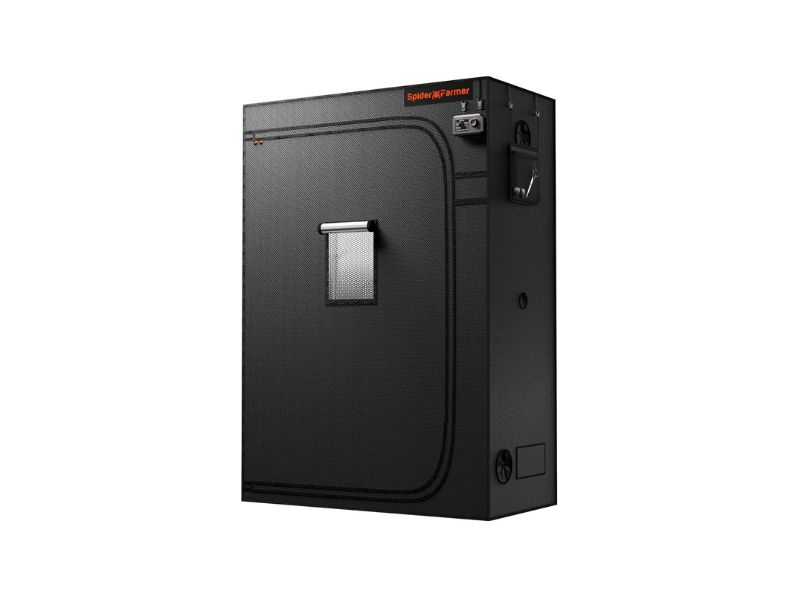
The Spider Farmer model is not an exact 48-by-24-inch tent. Its approximately 55-by-28-inch footprint is slightly wider and longer, making it a relevant alternative for growers who have room for a larger rectangular enclosure.
The main benefit is its 80-inch height. Compared with a 60-inch tent, it provides twenty additional inches for containers, plants, lighting, filters, and suspension hardware.
The added width also gives the canopy more breathing room around the perimeter. A nominal 2×4 light can still work, but its PPFD pattern should be checked because the tent extends several inches beyond a standard 48-by-24-inch footprint.
The 1680D fabric supports light containment and durability, while the controller opening helps organize sensor and equipment cables. Its enlarged window makes inspection easier.
The larger footprint must be measured carefully. A room designed around an exact 24-inch-deep tent may not have enough clearance for a 28-inch enclosure, especially after allowing space for doors and ducting.
Spider Farmer lists the current rectangular model at approximately 55 by 28 by 80 inches, with 1680D fabric, a steel frame, controller access, reflective lining, and an approximate 150-pound capacity.
What I Like
- Excellent 80-inch height
- More canopy space than an exact 2×4
- Heavy 1680D canvas
- Controller-access design
- Large observation window
- Strong frame capacity
- Good room for overhead filtration
- Suitable for taller hydroponic systems
What I Do Not Like
- Not an exact 2×4 footprint
- Requires a larger room area
- Standard 2×4 lighting may not fully cover the edges
- Larger cover increases assembly effort
- Wider depth can reduce front-to-back accessibility
The Spider Farmer tent is the better option when vertical space is more important than maintaining exact 2×4 dimensions. Confirm the available floor area and lighting footprint before choosing it.
5. VEVOR 2×4 Grow Tent
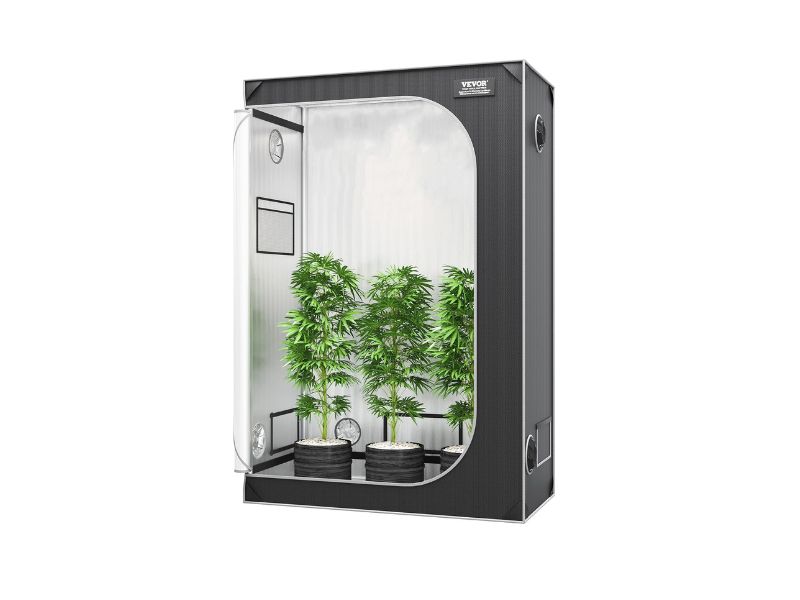
Key Features
- 48 × 24 × 72-inch dimensions
- Exact eight-square-foot footprint
- Reflective interior lining
- Oxford-fabric exterior
- Steel frame
- Reinforced corner connectors
- Observation window
- Multiple duct ports
- Mesh intake openings
- Electrical cable access
- Removable floor tray
- Tool-free frame connection
The VEVOR 2×4 provides exact 48-by-24-inch dimensions with a full 72-inch height. It is a straightforward alternative for growers who need a conventional enclosure without specialized app or controller integration.
The steel frame supports the lighting and filtration equipment commonly used in a small rectangular tent. Roof weight should be distributed between several support points rather than placed entirely on one bar.
The 72-inch height gives more installation flexibility than a short 60-inch tent. A filter and inline fan can remain inside while leaving a reasonable amount of space for the grow light and canopy.
Its observation window allows basic inspections, while the mesh openings provide passive intake options. Passive vents should provide enough area for the exhaust system to draw replacement air without creating excessive negative pressure.
The removable floor tray simplifies cleanup after irrigation. Automatic watering systems still require leak sensors and secondary containment because a reservoir failure can exceed the tray’s capacity.
The VEVOR model uses exact 48-by-24-by-72-inch dimensions with a steel frame, reflective interior, observation access, duct openings, and removable floor protection.
What I Like
- Exact 2×4 footprint
- Full 72-inch height
- Straightforward frame design
- Multiple ventilation openings
- Observation window
- Removable floor tray
- Good compatibility with common 2×4 lights
- Suitable for soil and hydroponic layouts
What I Do Not Like
- Less specialized controller integration
- Canvas density is not its main strength
- Equipment-capacity documentation is more limited
- Large passive vents must remain securely covered
- Support-bar layout is relatively conventional
The VEVOR tent is most appropriate for a standard 2×4 installation with moderate equipment weight. It provides the correct shape and height without adding features that may go unused.
2×4 Grow Tent Comparison Table
| Product | Dimensions | Canvas | Height | Controller Features | Main Strength | Main Limitation |
| VIVOSUN G425 | 48 × 24 × 60 in. | Woven reflective enclosure | 60 in. | Compatible with external smart equipment | Established and accessible design | Limited vertical space |
| AC Infinity CLOUDLAB 642 | 48 × 24 × 72 in. | 2000D | 72 in. | Dedicated controller plate | Strongest frame and canvas | Heavy construction |
| Mars Hydro Advanced | 48 × 24 × 71 in. | 1680D | 71 in. | Standard cable ports | Balanced height and durability | Less specialized mounting |
| Spider Farmer | 55 × 28 × 80 in. | 1680D | 80 in. | Controller-access opening | Maximum height and extra area | Larger than exact 2×4 |
| VEVOR 2×4 | 48 × 24 × 72 in. | Oxford reflective material | 72 in. | Standard cable access | Exact dimensions and simple layout | Basic equipment integration |
Why a 2×4 Grow Tent Is So Practical
A 2×4 tent provides:
2 feet × 4 feet = 8 square feet
Its rectangular shape offers several practical advantages:
- Fits against a wall
- Uses narrow rooms efficiently
- Matches common bar-style LED fixtures
- Keeps most plants close to an access door
- Provides twice the canopy of a 2×2
- Requires less climate-control equipment than a 4×4
- Supports several container layouts
- Can be divided into two smaller zones
The main disadvantage is rear access. If the tent is positioned tightly against a wall and plants fill the complete depth, equipment near the back can become difficult to reach.
Choose a model with side access when the room allows those panels to open.
How Many Plants Fit in a 2×4 Grow Tent?
The correct plant count depends on:
- Final canopy width
- Pot size
- Plant-training method
- Growing medium
- Irrigation layout
- Length of vegetative development
- Required maintenance access
Possible configurations include:
Two larger plants
Two plants can occupy one 2×2 section each. This provides room for broad horizontal training and individual drainage trays.
Three or four medium plants
Containers can be arranged in a single row or staggered pattern. This layout balances canopy coverage with manageable access.
Several compact plants
Smaller containers and shorter growth cycles can support a higher plant count. Irrigation and airflow become more complicated as the tent becomes crowded.
Plant count should never be based only on how many pots physically fit on the floor.
Choosing the Correct Tent Height
Sixty-inch tent
A 60-inch tent is suitable when:
- Containers are low profile
- Plants are trained horizontally
- The light is compact
- The filter is mounted outside
- Ceiling clearance in the room is limited
It offers less room for mistakes and vertical stretching.
Seventy-one- or seventy-two-inch tent
This is the most versatile height for a personal 2×4 setup.
It provides additional room for:
- Carbon filter
- Inline fan
- LED fixture
- Ratchet hangers
- Safe canopy separation
- Taller containers
Eighty-inch tent
An 80-inch enclosure is useful for:
- Deep-water-culture buckets
- Larger plants
- Tall bar lights
- Internal filtration
- Less aggressive training
- Additional sensor and fan placement
The room ceiling must still leave enough clearance to assemble the upper frame and install ducting.
Calculating Usable Plant Height
Use:
Usable plant height = Tent height − container height − fixture depth − hanging hardware − canopy gap − overhead equipment
Example for a 72-inch tent:
- Container: 12 inches
- Grow light: 3 inches
- Hangers: 5 inches
- Canopy gap: 16 inches
- Filter clearance: 8 inches
72 − 12 − 3 − 5 − 16 − 8 = 28 inches
Only 28 inches remain for the plant structure.
This is why tent height should be evaluated after equipment is included.
Lighting a 2×4 Grow Tent
A full 2×4 canopy normally works well with:
- One long rectangular LED fixture
- One multi-bar 2×4 light
- Two compact square fixtures
- Two LED boards mounted side by side
A single long fixture provides:
- Cleaner cable management
- One dimmer
- One driver
- Simple centering
- Fewer hangers
Two separate lights provide:
- Independent height adjustment
- Separate intensity zones
- Partial operation during early growth
- Redundancy
- Better accommodation of uneven plants
For high-efficiency LED systems, approximately 200 to 320 actual watts is a broad practical range. The required output depends on photon efficacy, plant type, canopy density, and desired intensity.
Mapping Light Across a Rectangular Canopy
Do not judge coverage using only one center reading.
Use a grid with at least eight or twelve measurement points:
| Front Left | Front Center | Front Right |
| Middle Left | Middle Center | Middle Right |
| Rear Left | Rear Center | Rear Right |
For a longer canopy, add another row along the four-foot axis.
Compare:
- Highest PPFD
- Lowest PPFD
- Average PPFD
- Center-to-edge variation
- Front-to-rear variation
If the center is excessive while the ends remain weak, raise the fixture to improve blending before increasing output.
Ventilation Requirements
A 48-by-24-by-72-inch tent contains approximately:
4 × 2 × 6 = 48 cubic feet
A basic exhaust calculation might suggest a relatively small fan, but installed airflow is reduced by:
- Carbon filter
- Duct length
- Duct bends
- Silencer
- Dirty prefilter
- Restricted passive intake
- Exhaust termination
A four-inch inline fan is commonly suitable for this enclosure class. A six-inch fan can provide lower-speed reserve, quieter operation at reduced output, and greater capacity for restrictive filtration.
The correct fan should maintain slight negative pressure without pulling the walls deeply inward.
Where to Position the Exhaust System
Filter and fan inside
Advantages:
- Compact filtered route
- Heat removed from the ceiling area
- Cleaner exterior appearance
Disadvantages:
- Reduces internal height
- Adds roof weight
- Competes with lighting space
Filter inside and fan outside
Advantages:
- Preserves some overhead room
- Keeps fan heat and noise partly outside
Disadvantages:
- Requires additional duct routing
- Still places filter weight on the frame
Filter and fan outside
Advantages:
- Maximum internal clearance
- Less roof weight
- Easier equipment servicing
Disadvantages:
- Requires more room around the tent
- Ducting may become longer
- Push-through filter configurations need correct equipment
Choose the arrangement before positioning the tent against a wall.
Canvas Density and Frame Strength
Common canvas ratings include:
- 600D
- 1680D
- 2000D
Higher-density canvas generally provides:
- Better tear resistance
- Greater light containment
- Improved shape stability
- More resistance to negative-pressure deformation
- Greater durability during repeated assembly
It also creates:
- More weight
- More difficult assembly
- Higher cost
- Greater stress if the cover is forced over the frame incorrectly
Frame quality depends on pole diameter, connector design, roof-bar layout, coating, and total structure—not only the stated canvas density.
Access-Door Planning
A 2×4 tent is narrow enough to fit against a wall, but doing so may block valuable side doors.
Before assembly, identify:
- Primary entrance
- Side-access requirements
- Observation-window position
- Exhaust route
- Intake location
- Electrical outlet
- Reservoir placement
- Drainage path
Leave enough room to open the primary door fully. A partially blocked door makes moving containers and equipment unnecessarily difficult.
Floor Protection and Runoff
The included floor tray is intended for:
- Small spills
- Normal runoff
- Loose growing medium
- Easier cleaning
It is not complete protection against:
- Failed reservoir fittings
- Disconnected automatic-watering hoses
- Large hydroponic leaks
- Overflowing humidifiers
- Several gallons of unattended runoff
Additional protection can include:
- Individual saucers
- Elevated drainage stands
- Sloped drain trays
- Secondary waterproof liner
- Water alarms
- Reservoir shutoff valves
- Elevated electrical connections
Electrical Safety
A typical 2×4 system may include:
- Grow light
- Inline fan
- Circulation fan
- Humidifier
- Dehumidifier
- Heater
- Water pump
- Environmental controller
- Automatic watering system
Keep power strips and plug connections above the lowest possible water level.
Use grounded outlets, drip loops, correctly rated timers, and properly secured cables.
Do not place an extension connection beneath a fabric pot, runoff tray, reservoir, or humidifier hose.
Common 2×4 Grow-Tent Mistakes
Choosing a short tent without calculating equipment height
The pots fit, but insufficient room remains for the light and canopy.
Blocking all side access
Rear plants and irrigation equipment become difficult to service.
Installing an undersized light
The center looks bright while the ends remain weak.
Installing one small circulation fan
A long rectangular canopy can develop stagnant air at the opposite end.
Using excessive exhaust speed
The walls pull inward and usable canopy width decreases.
Placing the carbon filter after the light is installed
The fixture may need to be removed and repositioned.
Keeping pots directly on the floor
Drainage and bottom airflow become restricted.
Ignoring the intake side
Replacement air should travel through the complete canopy before reaching the exhaust.
Relying only on an observation window
Plants still require direct inspection for pests, watering, and equipment problems.
Filling every inch of floor space
Maintenance access is as important as physical pot capacity.
Maintenance
Weekly
- Check zipper movement
- Inspect wall pressure
- Review temperature and humidity
- Check fan operation
- Empty runoff
- Inspect irrigation lines
- Confirm the light remains level
- Clean loose debris
Monthly
- Clean intake screens
- Inspect duct clamps
- Remove dust from the light
- Check roof hangers
- Clean the filter prefilter
- Inspect frame connectors
- Review timer and controller settings
Between cycles
- Remove all containers
- Disconnect electrical equipment
- Vacuum the interior
- Wash the floor tray
- Wipe reflective walls
- Inspect zipper flaps
- Check for pinholes
- Clean fans
- Test the empty enclosure
Frequently Asked Questions
What is the best 2×4 grow tent?
The VIVOSUN G425 is my primary recommendation because it combines an exact 2×4 floor, practical access, reflective walls, and strong established buyer confidence.
The AC Infinity CLOUDLAB 642 is the better premium option for thicker canvas, stronger poles, and controller integration.
Is a 2×4 grow tent big enough?
Yes. It provides eight square feet of growing area and can support several compact plants or a smaller number of broad trained plants.
It is large enough for a productive personal garden while remaining manageable in an ordinary room.
How many plants fit in a 2×4 tent?
Two to four medium plants are common, but the correct number depends on canopy size, container volume, and training.
More smaller plants can fit physically, though irrigation and airflow become more complicated.
What size light is needed?
Approximately 200 to 320 efficient LED watts is a broad practical range.
Evaluate the fixture’s flowering footprint and PPFD distribution rather than wattage alone.
Is a 60-inch tent tall enough?
It can work with compact equipment, low-profile containers, and horizontal plant training.
A 71- or 72-inch tent provides greater flexibility for full-cycle growth.
Is a 2×4 tent better than a 3×3?
A 2×4 tent fits against walls more efficiently and pairs naturally with rectangular lights.
A 3×3 provides a square footprint and slightly more total floor area.
What size inline fan should I use?
A four-inch fan is commonly suitable for a 2×4 tent.
A six-inch model can provide more reserve and quieter reduced-speed operation when a restrictive carbon filter is installed.
Does a 2×4 tent need two circulation fans?
Two small fans can provide better coverage along the four-foot length than one fan.
One can move air above the canopy while another prevents stagnant air near the pots.
Should I choose 1680D or 2000D canvas?
Both provide heavy-duty construction.
The frame, zippers, access layout, height, and pole strength should also influence the choice.
Can a 2×4 tent use hydroponics?
Yes. It can accommodate several buckets, a narrow tray, or a compact recirculating system.
Reservoir height, plumbing access, and leak containment must be included in the layout.
Can the tent sit directly against a wall?
It can, but wall placement may block side doors, intake openings, or duct ports.
Leave access to every feature you plan to use.
How much room should be left between pots?
Leave enough space for airflow, runoff access, and inspection.
Fabric pots should not remain pressed tightly together because their sidewalls need air exposure.
Do I need an observation window?
It is convenient but not essential.
It allows quick checks without opening the tent, but direct plant and equipment inspection is still necessary.
Can I use two lights in a 2×4 tent?
Yes. Two smaller lights can provide independent control over each half of the canopy.
Confirm that their combined pattern does not create an excessive overlap hotspot in the middle.
How do I stop the tent walls pulling inward?
Increase intake area, reduce unnecessary exhaust speed, or install high-CFM support bars.
Slight negative pressure is desirable; severe wall collapse is not.
Conclusion
Choosing the best 2×4 grow tent requires balancing exact floor dimensions with height, canvas density, frame capacity, access, and ventilation layout.
The VIVOSUN G425 is the strongest general recommendation for a practical conventional setup. Its established design and accessible rectangular footprint make it suitable for many personal indoor gardens.
The AC Infinity CLOUDLAB 642 is the premium choice for growers who need thicker material, stronger poles, extra hanging bars, and organized controller mounting.
The Mars Hydro 4×2 Advanced tent provides an effective middle position with 1680D canvas and nearly six feet of height. The Spider Farmer model provides the most vertical clearance and a slightly larger canopy, while the VEVOR tent offers exact 2×4 dimensions in a straightforward 72-inch design.
Before selecting a model, measure the available room, calculate usable vertical space, choose the lighting footprint, and determine which doors and ports will remain accessible. The best enclosure is not merely the one that fits the pots—it must also leave enough room to manage the plants, equipment, airflow, and runoff safely.

I’m Maya L. Greenwood, a lifelong plant lover who believes anyone can grow something beautiful with the right guidance. After years of testing soil mixes, pruning methods, irrigation tricks, and pest-safe solutions, I started EasyGardenTips.com to turn hard-won lessons into step-by-step advice. From seed starting and container gardens to composting and seasonal checklists, my goal is to make gardening simple, sustainable, and fun.