How to Compost in a Raised Bed: Trench and No-Dig Techniques
To compost in a raised bed, bury chopped vegetable scraps, fruit peels, coffee grounds, and dry leaves in an unused section of soil, then cover them thoroughly and allow them to decompose naturally. This method, called trench composting, turns organic kitchen waste into soil-enriching material without requiring a separate compost bin.
You can also improve raised bed soil by applying finished compost to the surface or allowing suitable plant residues to decompose between growing seasons. Each approach works differently, so choosing the right method matters.
Burying fresh scraps too close to vegetable roots can interfere with growing conditions. Exposed food waste may also attract rodents, flies, and other pests, while excessive moisture can cause unpleasant odors.
The depth of your raised bed is especially important. Shallow planters may not provide enough room to bury organic waste properly.
In this article, I explain how to compost directly in a raised bed, which kitchen scraps and garden materials to use, and how deeply to bury them. You’ll also learn about decomposition time, composting around existing vegetables, pest prevention, and maintaining healthy soil without adding too much organic matter.
How to Compost in a Raised Bed Using the Trench Method
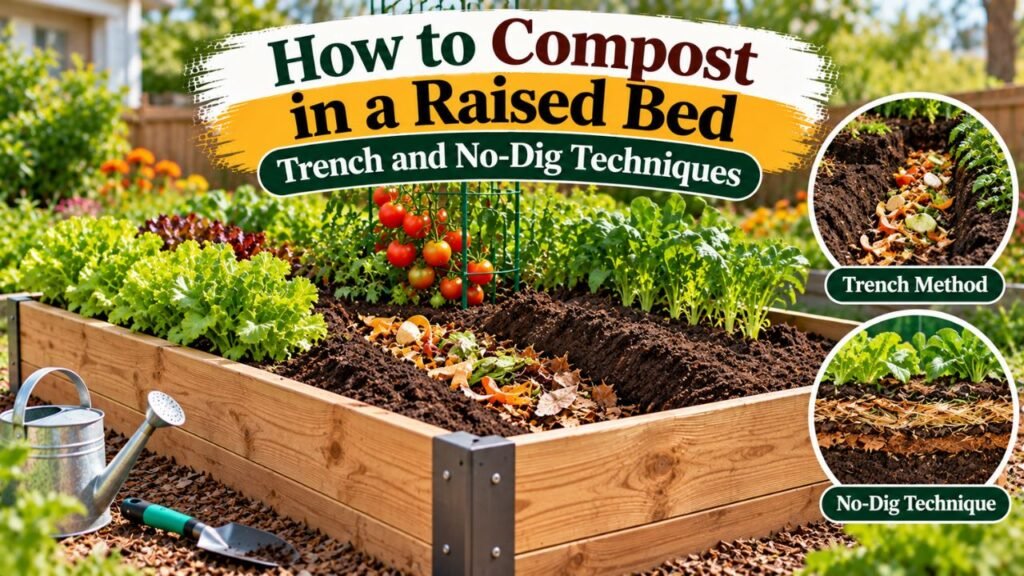
Trench composting is one of the simplest ways to decompose kitchen scraps directly in garden soil.
Instead of collecting organic waste in a separate compost pile, you bury suitable materials in a designated section of the raised bed.
Microorganisms and other soil organisms gradually break down the material.
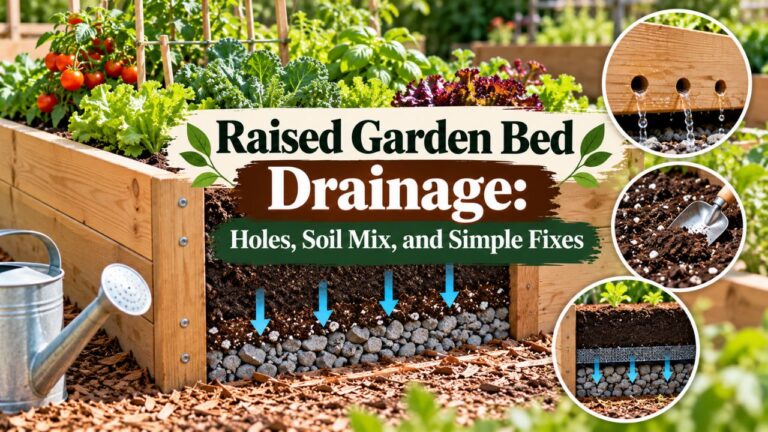
The process works best when the raised bed has enough usable soil depth and the composting area is separated from actively growing plant roots.
Step 1: Choose an Empty Section of the Raised Bed
Start by selecting a location where you aren’t currently growing vegetables.
An unused corner, recently harvested section, or area reserved for a future planting is ideal.
Avoid digging immediately beside established tomatoes, peppers, carrots, or other plants with developed root systems.
Their roots may extend farther than the visible foliage.
If the bed is small and completely planted, wait until part of it becomes available or use a separate composting container.
For open-bottom raised beds, the native soil underneath can provide additional digging depth when it is suitable and free from contamination.
Step 2: Dig a Compost Trench or Hole
Use a hand trowel or shovel to create a hole in the selected area.
The University of Maryland Extension’s guide to making compost at home recommends digging a trench or hole approximately 8–12 inches deep for direct garden composting.
The available depth determines how much material you can bury.
Leave enough room to cover the scraps thoroughly with soil.
For shallow raised beds, particularly those with solid bottoms, this method may not be practical.
Don’t excavate through a planter’s waterproof liner or drainage structure.
If you have an open-bottom bed, you may be able to dig into suitable native soil below the frame without disturbing its sides.
Step 3: Collect Suitable Organic Materials
Gather small quantities of plant-based kitchen waste and garden debris.
Useful materials include:
- Vegetable peels
- Fruit scraps
- Coffee grounds
- Plastic-free tea leaves
- Crushed eggshells
- Chopped vegetable trimmings
- Dry leaves
- Small amounts of untreated grass clippings
- Shredded, uncoated paper
Avoid collecting excessive quantities of one ingredient.
For example, a large mass of wet fruit scraps can become compacted and poorly aerated.
Mixing moist materials with suitable dry organic matter generally supports better decomposition.
Step 4: Chop the Kitchen Scraps
Cut larger scraps into smaller pieces before burying them.
A whole apple core or large vegetable stem generally takes longer to decompose than the same material chopped into smaller pieces.
Smaller particles provide more surface area for microorganisms to work on.
You don’t need to turn everything into a fine paste.
Simply chop tough or bulky materials into manageable pieces.
Crushing eggshells can also help them break down more gradually, although they remain relatively slow to decompose.
Step 5: Add Food Scraps and Brown Materials
Place a modest amount of chopped organic waste in the bottom of the trench.
Add some dry leaves, shredded paper, or another suitable carbon-rich material.
Composting microorganisms use carbon for energy and nitrogen for growth.
Food scraps are often moist and relatively nitrogen-rich, while dry leaves and paper supply more carbon.
Combining them helps avoid a dense, wet mass.
You don’t need to calculate an exact carbon-to-nitrogen ratio for each small trench.
The main goal is to avoid burying a thick concentration of wet, easily compacted material.
Step 6: Cover the Organic Materials Completely
Replace the excavated soil over the scraps.
The buried materials should be covered by a substantial layer of soil rather than sitting just beneath the surface.
Press the soil down lightly to eliminate large openings through which animals might reach the scraps.
Avoid compacting the surrounding planting soil excessively.
If the hole is too shallow to provide adequate cover, remove some material or use another composting method.
Important: Don’t leave fruit peels, vegetable scraps, or other food waste exposed on the surface of an active raised vegetable bed.
Exposed scraps can attract animals and create odor problems.
Step 7: Maintain Suitable Soil Moisture
Composting microorganisms need moisture to remain active.
However, saturated soil can restrict oxygen movement and encourage unpleasant anaerobic decomposition.
Check the surrounding soil periodically.
It should be moist but not constantly waterlogged.
Water only when necessary.
An established raised bed with normal irrigation may already provide sufficient moisture for buried organic materials.
Avoid adding extra water just because you’ve buried kitchen scraps.
Step 8: Allow the Materials to Decompose
After burying the scraps, leave the area undisturbed.
Decomposition occurs gradually through microbial activity and the work of soil organisms.
The process depends on temperature, moisture, material size, and soil conditions.
Keep track of the composting location so you don’t accidentally dig into unfinished material while planting.
Use a small garden marker if necessary.
Once the original scraps have substantially broken down and the soil has returned to a normal, earthy condition, the area can be used again.
Step 9: Rotate Composting Locations
Avoid repeatedly burying kitchen waste in the same small section.
Move the next compost trench to another available area of the raised bed.
Rotating the location distributes organic inputs more evenly and reduces the chance of creating an overly concentrated decomposing layer.
For a small raised bed, divide the growing area into several sections and compost only in sections that aren’t actively planted.
Key Takeaway: Trench composting works best when organic scraps are buried deeply enough, mixed with suitable dry materials, and kept away from established vegetable roots.
What Are the Best Ways to Compost in a Raised Bed?
There are several methods for adding decomposing organic material to a raised garden bed.
The most suitable choice depends on soil depth, available space, and whether vegetables are currently growing.
| Composting Method | How It Works | Best Application |
| Trench composting | Buries raw plant scraps in soil | Empty sections of sufficiently deep beds |
| Sheet composting | Allows organic materials to break down in surface layers | Preparing beds between seasons |
| Finished compost topdressing | Spreads fully decomposed compost over soil | Established vegetable beds |
| In-bed compost basket | Contains scraps in a partially buried container | Suitable beds with room for a managed system |
Trench Composting
Trench composting is particularly useful when you produce small amounts of kitchen scraps and have available planting space.
It requires minimal equipment and doesn’t involve maintaining a large compost pile.
However, it is less suitable for very shallow beds or locations with serious burrowing animal problems.
Sheet Composting
Sheet composting involves placing suitable organic materials over the soil and allowing them to decompose gradually.
It is often used when preparing an unplanted garden area for the next growing season.
Materials may include shredded leaves, chopped plant residues, and other appropriate organic matter.
Unlike trench composting, this method doesn’t require digging individual holes.
However, sheet composting takes time and shouldn’t be confused with leaving fresh kitchen waste exposed around vegetables.
For active raised beds, finished compost or suitable mulch is generally more appropriate for surface application.
Finished Compost Topdressing
Topdressing means spreading mature compost over the existing soil surface.
This is one of the easiest ways to improve an established raised bed.
Unlike trench composting, the decomposition process has already taken place elsewhere.
Finished compost can be applied between growing plants without burying raw food waste near their roots.
In-Bed Compost Baskets
Some gardeners use perforated containers or compost baskets placed partly inside a raised bed.
Small quantities of suitable organic waste are added through an accessible opening.
Soil organisms may enter through the openings and help break down the material.
However, these systems require careful management.
A container that becomes overloaded with wet scraps can smell or attract pests.
Choose a suitable design, provide adequate ventilation, and keep the container accessible for maintenance.
A compost basket isn’t necessary for successful raised bed gardening.
What Can You Compost Directly in a Raised Garden Bed?
Not every biodegradable material is appropriate for direct in-bed composting.
Small quantities of clean, plant-based materials are usually the easiest to manage.
Green Materials for Raised Bed Composting
Green materials generally contain more moisture and relatively more nitrogen.
Suitable examples include:
- Raw fruit and vegetable scraps
- Coffee grounds
- Fresh plant trimmings from healthy plants
- Small amounts of untreated grass clippings
- Soft green leaves
- Spent vegetable plants without signs of serious disease
These materials usually decompose more readily when chopped.
Avoid burying large masses of wet material without enough soil and dry organic matter around them.
Brown Materials for Raised Bed Composting
Brown materials are generally more carbon-rich.
Examples include:
- Shredded dry leaves
- Chopped straw
- Shredded uncoated paper
- Small pieces of dry plant stems
- Plain, shredded cardboard
Brown materials help balance wetter kitchen scraps.
However, large amounts of woody material can decompose slowly.
Don’t bury thick layers of fresh wood chips or sawdust directly in the active root zone and expect them to become finished compost quickly.
Materials You Should Not Compost Directly in a Raised Bed
Avoid adding:
- Meat and bones
- Dairy products
- Cooking oils and greasy foods
- Large quantities of cooked food
- Pet feces
- Diseased plant material
- Weeds containing mature seeds
- Plants treated with unsuitable persistent herbicides
- Plastic or plastic-coated packaging
- Chemically contaminated materials
- Large quantities of raw manure
These materials can create food-safety concerns, attract pests, introduce contaminants, or remain undecomposed for long periods.
A small in-bed compost trench doesn’t reliably reach the temperatures needed to destroy weed seeds or plant pathogens.
Safety Note: Avoid raw animal manure in an active vegetable bed, particularly around crops eaten raw. Use appropriately processed composted manure and follow food-gardening safety guidance.
How Deep Should a Raised Bed Be for Direct Composting?
Soil depth is one of the most important limitations of in-bed composting.
A raised bed may be suitable for growing vegetables but still lack enough space to bury food scraps safely.
Composting in an 8-Inch Raised Bed
An 8-inch-deep contained bed is generally too shallow for ordinary trench composting.
There isn’t enough room to bury substantial food waste and maintain an adequate covering of soil.
An open-bottom bed may provide additional depth if the native ground underneath is suitable for digging.
Otherwise, compost scraps in a separate container and apply the finished material later.
Composting in a 12-Inch Raised Bed
A 12-inch raised bed can support trench composting when it has access to suitable native soil below the frame.
However, a 12-inch contained planter may not have enough usable depth for adequate burial and soil coverage.
Avoid creating a large decomposing layer immediately beneath the planting surface.
For shallow contained beds, finished compost topdressing is usually the easier approach.
Composting in an 18- to 24-Inch Raised Bed
Deeper beds provide more room for small compost trenches.
However, depth alone doesn’t guarantee success.
You still need enough space between the decomposing material and plant roots.
The bed must also drain properly.
If the lower part of the bed stays saturated, buried scraps may decompose poorly and produce odors.
Can You Compost in a Raised Bed With a Solid Bottom?
Yes, but there are limitations.
A deep contained bed may allow carefully managed in-bed composting if it has sufficient soil depth and effective drainage.
However, shallow elevated planters and solid-bottom containers are often better managed using finished compost rather than buried raw scraps.
Do not dig through a liner or damage the planter’s bottom to create additional composting space.
Can You Compost in a Raised Bed While Vegetables Are Growing?
Yes, but the safest approach depends on whether you’re adding finished compost or fresh organic waste.
Adding Finished Compost Around Growing Plants
Finished compost can be applied around established vegetables.
Spread a thin layer over exposed soil without covering plant crowns or burying sensitive stems.
Avoid digging through established root systems.
Soil organisms and normal watering gradually help incorporate organic material from the surface.
This is generally more practical than burying raw scraps in a densely planted bed.
Burying Scraps in an Unused Section
Small compost trenches can be made in vacant areas while other vegetables are growing.
However, keep the trench away from root systems.
Tomatoes, cucumbers, and other established vegetables may have roots extending much farther than their stems.
Don’t assume a space is root-free simply because no plant is growing directly above it.
If you’re unsure, wait until the crop has been harvested.
Why Fresh Composting Materials Should Stay Away From Roots
Fresh organic matter undergoes active decomposition.
During this process, microorganisms use oxygen and nutrients.
If large amounts of unfinished material are concentrated around roots, local growing conditions may become unfavorable.
Fresh woody material can also temporarily tie up available nitrogen during decomposition.
For healthy vegetable growth, keep the primary root zone filled with suitable, stable growing medium.
Use dedicated composting areas for unfinished materials.
How Long Does Compost Take to Decompose in a Raised Bed?
Buried kitchen scraps can take several weeks to many months to break down, depending on the materials and conditions.
There is no guaranteed schedule.
Small, soft vegetable scraps generally break down faster than thick stems, woody materials, or large pieces of fruit.
Temperature Affects Decomposition
Microorganisms are generally more active under suitable warm conditions.
During cool weather, the decomposition process slows.
Materials buried in late fall may remain recognizable for much of winter in colder U.S. regions.
Do not assume that scraps buried a fixed number of weeks earlier have completely decomposed.
Moisture and Air Matter
Soil that’s excessively dry can slow microbial activity.
Saturated soil can restrict oxygen and encourage odor-producing decomposition.
Proper drainage and moderate moisture help create a better environment.
Avoid sealing the composting area beneath impermeable plastic without a specific reason.
Material Size Influences Decomposition
Chopped vegetable scraps usually break down faster than large whole pieces.
Dry leaves take longer when left intact in thick layers.
Woody materials can take substantially longer.
For faster in-bed composting, use small pieces of relatively soft organic material rather than bulky branches.
How to Tell When Buried Compost Is Ready
Inspect the composting location before planting.
Signs of substantial decomposition include:
- Original scraps are mostly unrecognizable.
- The soil smells earthy rather than rotten.
- There are no large pockets of wet food waste.
- The area has returned to a stable soil texture.
- There is no noticeable heat or unusual odor from active decomposition.
A few remaining fibrous fragments aren’t necessarily a problem.
However, if the area still contains substantial undecomposed material, allow more time before planting directly into it.
When Is the Best Time to Compost in a Raised Bed?
Different seasons offer different advantages.
The best timing depends on your crop schedule and whether you have available soil space.
Fall Composting After Harvest
Fall is a convenient time for composting in raised beds.
After removing spent vegetables, sections of the bed become available for adding suitable organic material.
Trench composting can be started in these unused areas.
Alternatively, shredded leaves and other appropriate plant residues can be used in a managed sheet-composting system.
Cold temperatures may slow decomposition, so some material may remain when spring arrives.
Spring Composting Before Planting
Spring composting requires more attention to timing.
If you’re planting soon, finished compost is generally preferable.
Freshly buried scraps may still be decomposing when seedlings begin developing roots.
Use trench composting only in areas that won’t be planted until the materials have adequately broken down.
Summer Composting Between Crops
Warm soil conditions can support active decomposition.
If you harvest radishes, lettuce, or other short-season vegetables, the vacant space may be suitable for a small compost trench.
However, the soil must retain suitable moisture.
Don’t disturb the roots of neighboring vegetables.
Rotate composting locations as space becomes available.
How to Add Finished Compost to Raised Bed Soil
Direct composting creates decomposing material inside the bed.
Adding finished compost is a separate method used to maintain soil structure and fertility.
For most established vegetable beds, applying finished compost is easier to manage than repeatedly burying raw scraps.
How Much Finished Compost Should You Add?
According to Oregon State University Extension’s recommendations for using compost, established vegetable garden beds generally benefit from an annual surface application of approximately ¼–1 inch of finished compost.
The actual amount should depend on the soil’s condition and previous compost applications.
A soil test can help identify whether additional nutrients or organic matter are needed.
Adding too much compost can create nutrient imbalances, particularly when using manure-based materials.
Calculate Compost for a Raised Bed
Use this formula:
Compost volume (cubic feet) = Bed length (ft.) × Bed width (ft.) × Compost depth (in.) ÷ 12
For example, a 4 × 8-foot raised bed has a surface area of 32 square feet.
| Compost Layer | Compost Required |
| ¼ inch | 0.67 cubic feet |
| ½ inch | 1.33 cubic feet |
| 1 inch | 2.67 cubic feet |
These calculations apply to finished compost spread evenly over the surface.
They are not recommended volumes of raw kitchen waste to bury.
How to Apply Finished Compost
- Remove weeds and unwanted garden debris.
- Check that the compost is mature and has an earthy smell.
- Spread the appropriate amount over the soil.
- Keep the material away from sensitive plant crowns.
- Gently incorporate it if soil preparation requires mixing.
- Water normally afterward.
When vegetables are already growing, surface application usually avoids unnecessary root disturbance.
Key Takeaway: Finished compost can improve established raised bed soil without the additional space, decomposition time, and pest-management considerations of trench composting.
How to Prevent Pests and Bad Smells During In-Bed Composting
Poorly managed food scraps can attract unwanted animals or create unpleasant odors.
Most problems begin when too much wet organic material is added, scraps are left exposed, or the soil lacks sufficient oxygen.
Prevent Rodents and Other Animals
Use only suitable plant-based materials and bury them thoroughly.
Avoid meat, dairy, and greasy waste.
Don’t place a compost trench close to an exposed edge where animals can easily dig into it.
If raccoons, rats, or other digging animals are common, direct food-scrap burial may not be the best composting method.
A secure composting container may offer better control.
Prevent Fruit Flies
Fruit flies are attracted to exposed or fermenting organic waste.
Cover food scraps completely with soil.
Don’t leave fruit peels around the soil surface or inside an uncovered compost basket.
Keep collection containers closed and transfer scraps into the composting area regularly.
Prevent Rotten or Sour Odors
A foul smell often indicates excessive moisture, poor airflow, or an overloaded composting area.
To correct the problem:
- Stop adding wet scraps temporarily.
- Avoid saturating the soil.
- Add suitable dry materials when managing an accessible composting pocket.
- Reduce the amount of waste added at one time.
- Check whether drainage is blocked.
If the bed contains a large, foul-smelling mass of food waste, it may be better to remove that material to a managed compost system rather than continuing to bury more scraps.
Avoid Overloading a Small Raised Bed
A small raised bed has limited space.
Trying to compost all household food waste inside it can create excessive concentrations of unfinished organic material.
Use modest amounts and rotate locations.
If your household produces more compostable waste than the garden can reasonably accommodate, maintain a separate bin or another suitable composting system.
Common Raised Bed Composting Mistakes to Avoid
Several common practices can reduce compost quality or interfere with vegetable growth.
Burying Scraps Immediately Below Seeds
Fresh organic scraps shouldn’t be concentrated directly beneath a newly seeded row.
Decomposition changes the local moisture, oxygen, and nutrient conditions.
Prepare a separate composting location and allow the material to break down before planting directly into it.
Adding Too Much of One Material
A thick layer of fruit waste can become overly wet.
A large amount of fresh sawdust can temporarily reduce nitrogen availability.
Mix appropriate materials and apply them in manageable quantities.
Expecting Hot Composting Inside a Small Trench
Ordinary trench composting is generally a relatively cool, gradual decomposition process.
It doesn’t reliably reach the sustained high temperatures associated with properly managed hot compost piles.
Therefore, it shouldn’t be used as a method for sanitizing diseased plants, animal waste, or weed seeds.
Filling the Entire Raised Bed With Raw Organic Waste
A raised bed requires suitable growing soil.
Filling most of the bed with raw food scraps or undecomposed plant waste creates an unstable growing medium.
The material settles as it breaks down and may interfere with root growth.
Use composting areas within an established bed rather than replacing the entire rooting zone with fresh waste.
Adding Fresh Manure Without Proper Treatment
Fresh manure can contain harmful microorganisms and may introduce excessive nutrients or soluble salts.
Do not use untreated manure as a routine composting material within an active edible garden bed.
Appropriately processed and properly handled composted manure is more suitable when soil conditions justify its use.
Using Compost Instead of Correcting Drainage
Adding organic matter won’t automatically solve waterlogging caused by an impermeable planter bottom or blocked drainage outlet.
If the soil remains saturated, correct the drainage problem first.
Adding Compost Every Time Plants Look Weak
Poor vegetable growth isn’t always caused by insufficient organic matter.
Inadequate sunlight, excessive water, pests, and nutrient imbalances may cause similar symptoms.
Examine the growing conditions and use soil testing when appropriate before adding more compost.
Is Composting Directly in a Raised Bed Better Than Using a Compost Bin?
Both methods can work, but they serve different gardening situations.
Advantages of In-Bed Composting
Direct composting offers several benefits:
- No separate compost pile is required.
- Small quantities of kitchen scraps can be used locally.
- Organic matter decomposes where it will eventually benefit the soil.
- Less finished compost needs to be transported.
- Trench composting usually requires little turning.
These benefits make it useful for gardeners who have available soil space and produce relatively small amounts of plant-based waste.
Limitations of In-Bed Composting
The main disadvantages include:
- Requires unused planting space
- Difficult in shallow raised beds
- May attract digging animals
- Decomposition can take considerable time
- Cannot reliably destroy weed seeds or pathogens
- May disturb established roots
- Difficult to manage large quantities of food waste
When a Separate Compost Bin Is Better
A separate bin is generally preferable when you have several raised beds but limited unused space.
It also allows you to manage larger quantities of leaves, garden debris, and kitchen scraps without disturbing vegetable roots.
A properly managed compost bin can make it easier to control moisture, mix ingredients, and monitor the composting process.
Finished compost can then be distributed to whichever raised beds need it.
For most gardeners, using a separate compost system for bulk waste and applying finished compost to established beds is a dependable long-term approach.
Conclusion
Understanding how to compost in a raised bed begins with choosing the right method for the available soil depth and planting schedule.
Trench composting is a practical option when you have unused growing space. Bury small quantities of chopped vegetable scraps with suitable dry materials, cover them thoroughly, and allow them to decompose before planting directly in that location.
For shallow planters or beds already full of vegetables, finished compost topdressing is generally easier and less disruptive.
Avoid adding meat, dairy, diseased plant material, or excessive amounts of fresh organic waste.
The best approach is to compost manageable quantities, protect plant roots, maintain appropriate moisture, and monitor soil fertility rather than assuming that more organic matter always produces healthier plants.
FAQs About How to Compost in a Raised Bed
Can You Put Kitchen Scraps Directly Into a Raised Bed?
Yes. Suitable plant-based kitchen scraps can be buried in an unused section of a sufficiently deep raised bed.
Chop the scraps, mix them with suitable dry organic materials, and cover them thoroughly with soil. Avoid meat, dairy, oil, and other materials that can attract pests or create food-safety concerns.
Do You Need Worms to Compost in a Raised Garden Bed?
No. Soil microorganisms naturally break down buried organic matter without purchased composting worms.
Earthworms and other soil organisms may also contribute to decomposition when conditions are suitable.
Adding special composting worms isn’t necessary for ordinary trench composting.
Can You Compost Directly in a 12-Inch Raised Bed?
Yes, in some circumstances.
An open-bottom bed may provide enough digging depth when roots and composting materials can extend into suitable native soil underneath.
A 12-inch bed with a solid bottom may not provide enough space for adequate burial and soil coverage, making finished compost topdressing a better option.
Can You Plant Vegetables Immediately After Burying Compost Scraps?
It’s better to avoid planting directly into an area containing substantial fresh, undecomposed material.
Allow the scraps to break down until the soil has a normal texture and earthy smell.
The required time depends on the materials, temperature, moisture, and soil conditions.
Can You Compost Eggshells and Coffee Grounds in a Raised Bed?
Yes. Coffee grounds and crushed eggshells can be added in modest amounts.
Coffee grounds contribute organic matter, while eggshells decompose relatively slowly.
Neither should be considered a complete fertilizer or a guaranteed solution for soil pH and calcium problems.
Can You Use Leaves to Make Compost in a Raised Bed?
Yes. Shredded leaves can be used as a carbon-rich ingredient in trench composting or as part of a managed surface decomposition method.
They can also serve as mulch around established plants.
Avoid using leaves contaminated with unsuitable chemicals or adding large quantities of plant material affected by serious diseases.
How Often Should You Add Compost to a Raised Garden Bed?
For established vegetable beds, a modest annual application of finished compost is often sufficient when additional organic matter is needed.
The appropriate amount depends on soil conditions, previous additions, and soil test results.
Trench composting can be done when unused space is available, but there’s no need to bury kitchen scraps continuously throughout the growing season.

I’m Maya L. Greenwood, a lifelong plant lover who believes anyone can grow something beautiful with the right guidance. After years of testing soil mixes, pruning methods, irrigation tricks, and pest-safe solutions, I started EasyGardenTips.com to turn hard-won lessons into step-by-step advice. From seed starting and container gardens to composting and seasonal checklists, my goal is to make gardening simple, sustainable, and fun.