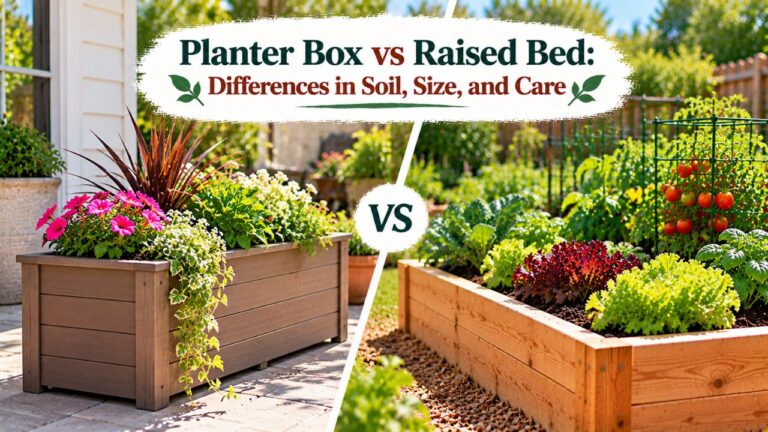
How to Prepare the Ground for a Raised Garden Bed: Step-by-Step
To prepare the ground for a raised garden bed, choose a sunny, well-drained location, remove or suppress existing grass and weeds, check the native soil, loosen compacted areas if necessary, and level the ground before installing the frame. The goal is to create a stable foundation that allows water to drain and plant roots to grow.
You don’t always need to dig up the entire area. If the existing soil is healthy and drains well, a raised bed can be installed directly on top with minimal disturbance. However, compacted clay, persistent weeds, uneven terrain, and contaminated soil require different preparation methods.
The condition of the ground underneath matters because most raised garden beds have open bottoms. Vegetable roots can extend through the added growing medium into the native soil below.
Skipping important preparation steps may cause drainage problems, weed growth, unstable frames, or restricted root development.
This guide explains how to prepare grass, bare soil, clay, and sloped ground for a raised garden bed, including what to put underneath and which materials to avoid.
How to Prepare the Ground for a Raised Garden Bed Step by Step
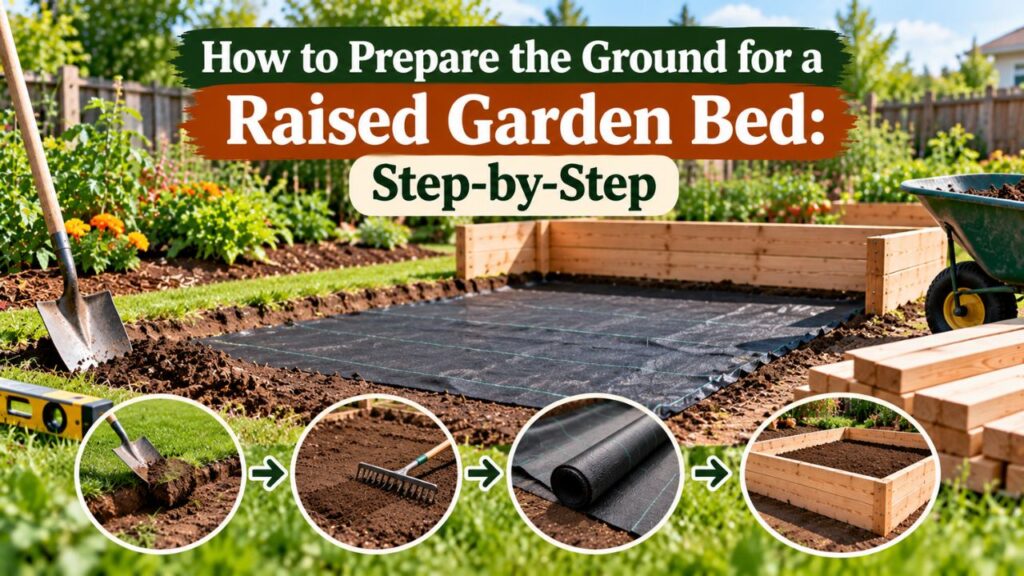
Preparing the ground before assembling your raised bed makes installation easier and helps prevent problems after the frame is filled with soil.
The following steps work for most open-bottom wooden, metal, and plastic raised garden beds.
Step 1: Choose a Suitable Location
Start by selecting an area with enough sunlight for the plants you intend to grow.
Most fruiting vegetables, including tomatoes, peppers, and cucumbers, perform best with approximately 6–8 hours or more of direct sunlight daily.
Some leafy greens tolerate partial shade, particularly during warm weather.
The location should also have:
- Good natural drainage
- Convenient access to water
- Enough room to walk around the bed
- Limited competition from large tree roots
- Stable ground for supporting the frame
- No known soil contamination problems
Observe the area after heavy rain.
If water collects in the proposed location and remains for an extended period, investigate the drainage problem before installing the bed.
Avoid placing a vegetable bed beneath large trees unless the selected crops can tolerate the available light and root competition.
Step 2: Measure and Mark the Raised Bed Area
Decide the dimensions of the raised garden bed before disturbing the ground.
A 4 × 8-foot bed is a practical size for many vegetable gardens because it provides substantial growing space while allowing access from both long sides.
For a smaller yard, a 3 × 4-foot or 4 × 4-foot bed may be more manageable.
Use a measuring tape, stakes, and string to outline the bed.
Make sure the layout allows enough room for walking, watering, and harvesting.
A pathway approximately 2 feet wide can work for basic access, while wider pathways may be needed for wheelbarrows or mobility equipment.
Check the corners using a framing square or diagonal measurements if you’re constructing a rectangular wooden frame.
Practical Tip: Mark the surrounding pathways at the same time. Once the frame is filled, changing its location becomes much more difficult.
Step 3: Test and Inspect the Existing Soil
Before changing the ground, check the native soil’s condition.
Remove a small amount from several locations within the planned bed footprint.
Look for:
- Dense or compacted soil
- Excessive moisture
- Large stones and buried debris
- Thick grass roots
- Unusual odors or discoloration
- Signs of construction waste or other contamination
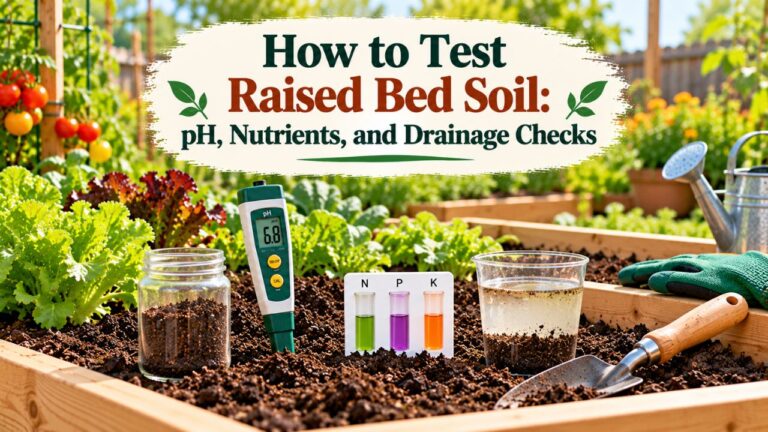
A laboratory soil test can help identify soil pH and nutrient levels.
For vegetable gardening, consider testing for lead, especially near older buildings, former industrial areas, or locations with an unknown land-use history.
The University of Maryland Extension’s raised bed gardening guidance recommends testing native soil before establishing raised beds and explains how to prepare locations with existing turf, compacted soil, or hard surfaces.
If the ground is contaminated, adding a few inches of new soil may not provide adequate separation.
A contained bed with an appropriate barrier and verified clean growing medium may be necessary.
Step 4: Remove or Suppress Grass and Weeds
If the proposed location is covered with grass, prevent it from growing through the new bed.
There are two practical approaches.
Method 1: Remove the Grass
Use a flat shovel, spade, or sod cutter to remove the existing turf.
Cut beneath the grass roots and lift the sod away.
This method is useful when:
- You want to install and plant the bed immediately.
- The lawn contains persistent weeds.
- You need to expose the ground for inspection.
- The soil underneath requires loosening.
Remove large perennial weed roots and rhizomes when possible.
Avoid removing excessive amounts of valuable topsoil along with the grass.
Method 2: Smother the Grass
For a no-dig approach, cover the lawn with plain, overlapping cardboard or suitable newspaper layers.
Remove plastic tape, labels, and other non-biodegradable materials from the cardboard.
Cover the material with finished compost or suitable growing medium to hold it in place.
Smothering takes time, and the cardboard gradually decomposes.
This approach is most suitable when the underlying soil is healthy and the existing vegetation can be controlled without extensive digging.
Persistent rhizomatous weeds may require more thorough removal because they can survive beneath temporary coverings or spread from surrounding areas.
Step 5: Loosen Compacted Native Soil
Once the surface vegetation is cleared, check whether the ground is compacted.
Try inserting a garden fork into soil that is moist but not saturated.
If the fork enters easily and the soil has a crumbly structure, extensive digging may be unnecessary.
If the ground is hard and compacted, gently loosen it.
- Insert a garden fork into the ground.
- Push the tines into the compacted layer.
- Pull the handle backward slightly to lift and fracture the soil.
- Avoid completely turning over the soil.
- Repeat across the proposed planting area.
Loosening approximately the upper 6–8 inches can be useful when compaction is present, although the depth needed depends on the actual restrictive layer.
The goal is to create spaces for root growth, air, and water movement.
Do not dig saturated clay soil. Working excessively wet soil can damage its structure and create hard clumps after drying.
Step 6: Level the Ground for the Raised Bed Frame
The frame needs a reasonably stable, level foundation.
Uneven ground can create gaps beneath the boards, cause soil to escape, and place unnecessary stress on the corners.
Use a long level and a straight board to identify high and low spots.
Remove small amounts of soil from high areas or use suitable compacted foundation material where needed to support the frame.
For a wooden or metal bed, check that all sides sit firmly without rocking.
You don’t need to compact the entire planting area. The ground supporting the frame needs stability, while the soil inside should remain suitable for root growth.
For a significantly sloped yard, consider a properly supported terraced or stepped raised bed rather than attempting to force a large frame onto uneven terrain.
Step 7: Prepare the Ground Beneath the Frame
After leveling, decide whether any material is needed beneath the raised bed.
For most open-bottom beds placed over healthy garden soil, no permanent bottom barrier is necessary.
Roots can grow into the native soil, and excess water can move downward.
Depending on your conditions, you may use:
- Plain cardboard for temporary grass suppression
- Suitable metal mesh for protection against burrowing pests
- Finished compost where soil improvement is needed
- A site-specific separation barrier where contamination has been identified
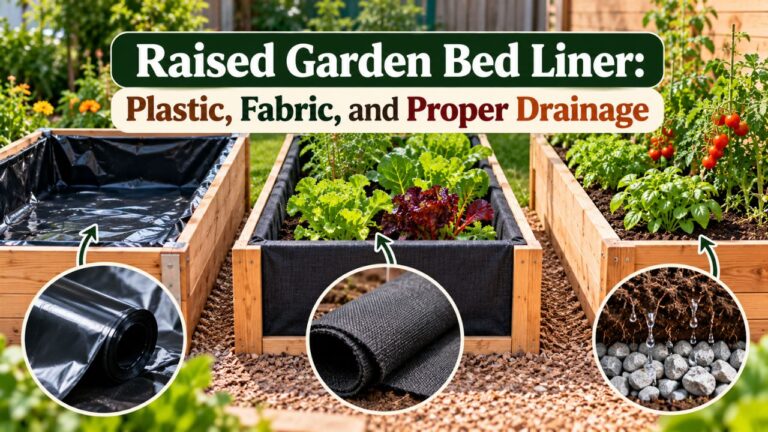
Avoid installing an impermeable plastic sheet across the bottom of an ordinary open-bottom raised bed.
A permanent barrier can interfere with drainage and restrict root growth.
Step 8: Install the Frame and Prepare for Filling
Position the raised bed frame over the prepared ground.
Check that the corners remain square and the sides are level.
Secure the frame according to its construction method.
Long sidewalls may require bracing to prevent outward bowing once the bed is filled.
The Oregon State University Extension’s raised bed gardening guide recommends reinforcing framed beds longer than 6 feet or taller than approximately 18 inches to resist pressure from the soil.
Before filling, inspect the base for remaining weeds, sharp debris, or drainage restrictions.
Add a suitable raised bed soil mixture and water it gently to settle the material.
How to Prepare Different Types of Ground for a Raised Garden Bed
Not every garden location requires the same preparation.
The existing ground determines whether you should remove vegetation, loosen soil, improve drainage, or use a different bed design.
| Ground Condition | Recommended Preparation |
| Existing grass or lawn | Remove sod or suppress vegetation with biodegradable covering |
| Healthy garden soil | Remove weeds and level the frame area |
| Compacted ground | Loosen the restrictive layer with a garden fork |
| Heavy clay soil | Check drainage and loosen compacted soil when workable |
| Sandy soil | Preserve the existing structure and add suitable organic matter if needed |
| Sloped ground | Create a stable, level foundation or terrace |
| Concrete or pavement | Use a contained growing system with suitable drainage |
| Suspected contaminated soil | Test the site and use appropriate separation if necessary |
Preparing Grass for a Raised Garden Bed
Grass is one of the most common surfaces used when installing a new raised bed.
You can remove the turf manually or suppress it with cardboard.
For immediate preparation, removing the sod provides direct access to the native soil.
This makes it easier to inspect compaction and remove troublesome perennial weeds.
If you choose the cardboard method, overlap the pieces so grass cannot easily grow through the gaps.
Add suitable material on top to keep the cardboard in place.
For a shallow bed, waiting until the vegetation has died may be preferable to planting immediately above a dense layer of living turf.
Preparing Clay Soil for a Raised Bed
Clay soil can support productive gardens, but severely compacted clay may restrict drainage and root growth.
Before installing the frame, inspect how the ground behaves after watering or rainfall.
If the clay is compacted, loosen it when the soil is slightly moist and workable.
Avoid aggressive digging when it is wet and sticky.
Finished compost may help improve soil structure over time.
However, adding compost won’t automatically correct an underlying drainage restriction.
Don’t mix a small amount of sand into heavy clay as a quick solution. A poorly designed mixture may not improve the soil’s structure.
Preparing Sandy Ground for a Raised Bed
Sandy soil usually allows water to pass through relatively quickly.
If the native ground is loose and drains well, extensive digging may not be necessary.
Remove existing weeds and prepare a stable foundation for the frame.
Suitable finished compost can improve moisture retention when the soil has low organic matter.
However, adding large quantities of organic material isn’t always beneficial.
The raised bed should have enough soil volume and an appropriate watering plan to prevent excessive drying.
Preparing an Existing Garden Area
An existing vegetable garden may already have healthy, workable soil.
If the ground drains properly and isn’t compacted, preparation can be minimal.
Remove weeds, inspect the area, and level the frame location.
Avoid unnecessary deep tilling.
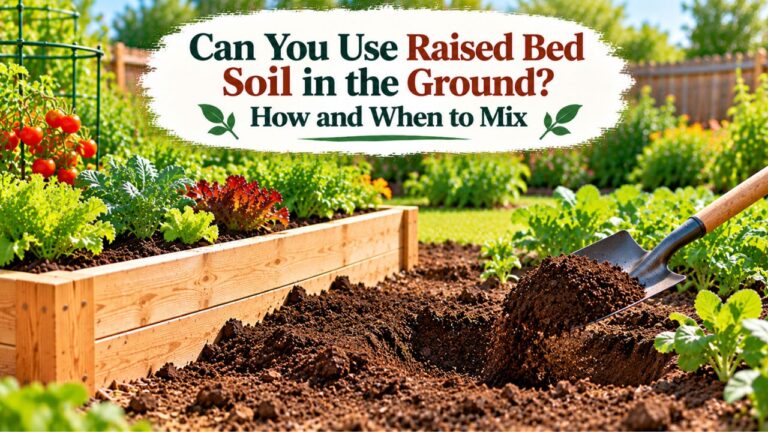
You may be able to use some of the existing garden soil to fill the raised bed, provided it is suitable and free from contamination.
Should You Put Anything Under a Raised Garden Bed?
For most raised beds placed directly over healthy garden soil, an open bottom is preferable to a permanent solid barrier.
However, certain materials can serve useful purposes when specific problems exist.
Cardboard Under a Raised Garden Bed
Plain cardboard is commonly used for suppressing grass and annual weeds.
It blocks light while gradually decomposing.
Use non-waxed cardboard and remove plastic tape or labels.
Overlap the pieces to reduce gaps.
Cardboard is not a permanent weed barrier.
It also doesn’t reliably eliminate persistent perennial weeds with deep underground rhizomes.
If you need immediate root access to the native soil, removing the vegetation and leaving the base open may be more practical.
Landscape Fabric Under a Raised Bed
Landscape fabric is often used to control weeds in pathways.
However, placing non-biodegradable fabric directly beneath an open-bottom vegetable bed can interfere with root growth and complicate later soil maintenance.
It may also become difficult to remove after roots and soil accumulate around it.
For most beds over healthy native soil, skip permanent landscape fabric beneath the growing area.
Use appropriate pathway materials outside the frame instead.
Hardware Cloth for Burrowing Animals
If gophers or other burrowing animals are a serious problem, suitable galvanized metal hardware cloth can be installed across the bottom.
Secure it to the frame so animals cannot easily enter around the edges.
A sturdy mesh with openings appropriate for the target pest is generally more useful than lightweight plastic netting.
Keep in mind that a mesh barrier may still interfere with some large roots as they grow.
Use it when pest pressure justifies the restriction.
Plastic Sheeting Under a Raised Bed
A waterproof plastic sheet generally isn’t suitable beneath an ordinary open-bottom garden bed.
It can trap water and prevent roots from reaching native soil.
If you need a contained system because of contamination or a hard surface, design it with an appropriate drainage outlet and separation barrier.
Simply placing plastic underneath an open frame doesn’t create a properly drained planter.
Gravel Under a Raised Garden Bed
A gravel layer is generally unnecessary beneath a raised bed sitting on natural ground.
It doesn’t automatically improve drainage through the growing medium.
In contained planters, a coarse gravel layer can also reduce usable rooting depth without correcting a blocked drainage outlet.
Address the actual drainage problem rather than adding rocks as a routine preparation step.
How to Check Ground Drainage Before Building a Raised Bed
Drainage is one of the most important site conditions to evaluate.
Even a raised bed filled with loose soil can experience problems if water cannot move away from the growing area.
Observe the Ground After Rain
Examine the proposed site after moderate or heavy rainfall.
Look for areas where water collects, flows across the surface, or remains long after nearby ground has drained.
Persistent puddles may indicate compacted soil, poor grading, a high water table, or another drainage restriction.
Avoid installing the bed in a location that regularly receives concentrated runoff from roofs or paved surfaces.
Check for a Compacted Layer
Use a garden fork to examine the ground below the surface.
If a dense layer prevents the tool from entering, roots may also have difficulty penetrating it.
Gently loosening the affected area may improve water infiltration where compaction is the main problem.
However, if the site remains saturated because of a high water table or surrounding drainage conditions, loosening alone may not solve the problem.
Correct Drainage Problems Before Filling
Depending on the cause, practical solutions may include:
- Choosing a naturally better-drained location
- Loosening compacted soil
- Redirecting concentrated surface runoff
- Improving site grading
- Using a properly designed contained or elevated growing system
Avoid relying on a shallow layer of gravel, sand, or compost to correct every drainage issue.
A deeper bed may offer additional growing space above wet native soil, but prolonged saturation still requires careful management.
How to Level Uneven Ground for a Raised Garden Bed
A raised bed frame should be supported evenly.
Small changes in ground elevation are usually manageable, but larger slopes require additional planning.
Leveling a Slightly Uneven Area
For minor height differences:
- Position the empty frame on the intended site.
- Place a level across the top edges.
- Identify the highest and lowest points.
- Adjust the ground beneath the frame as needed.
- Check the level again in both directions.
- Confirm that the frame sits firmly without rocking.
Avoid building the frame over large gaps that could allow soil to wash out.
The foundation should remain stable after rainfall and watering.
Preparing a Raised Bed on a Slope
For moderately sloped ground, a stepped or terraced design may be necessary.
The upper side of the bed may require some excavation, while the lower side needs adequate support.
Don’t rely on loose, uncompacted fill to support a heavy frame on a steep slope.
Large or tall retaining structures can require engineered support and may be subject to local building requirements.
If the slope is substantial, moving the bed to a flatter location is often simpler and safer.
How Much Ground Space Should You Prepare?
The ground preparation area should include the raised bed footprint and enough surrounding space for access.
For example, a 4 × 8-foot raised bed occupies 32 square feet.
If you want approximately 2-foot pathways on every side, the overall rectangular area becomes:
- Total width: 4 + 2 + 2 = 8 feet
- Total length: 8 + 2 + 2 = 12 feet
- Total area: 96 square feet
You don’t need to cultivate all 96 square feet.
Only the planting area requires soil preparation.
The surrounding space can be maintained as grass, covered with wood chips, or finished with another suitable pathway material.
Preparing Pathways Around Raised Beds
Good pathways help prevent soil compaction because gardeners can reach plants without stepping into the beds.
Before installing several beds, decide where wheelbarrows, watering equipment, and other tools will need access.
Remove or suppress unwanted vegetation in the pathway areas.
Suitable surfaces include wood chips, shredded bark, gravel over an appropriate path base, pavers, or maintained grass.
Choose materials that remain reasonably stable and safe when wet.
How Deep Should You Dig Before Installing a Raised Garden Bed?
You don’t necessarily need to dig down before installing an open-bottom raised bed.
The amount of ground disturbance depends on the condition of the native soil.
When No Digging Is Necessary
If the ground already has healthy soil structure and drains properly, you can prepare the surface by removing or suppressing vegetation and leveling the frame location.
There is little reason to disturb deeper soil without a specific problem.
A no-dig approach can help preserve existing soil structure and reduce weed seed exposure.
When Shallow Digging Helps
If the soil is compacted, gently loosening the upper layer may improve root access.
The goal is to fracture the compacted material, not necessarily remove it.
A garden fork often provides sufficient control for smaller raised bed areas.
When Deeper Preparation May Be Needed
Deep compaction, buried construction debris, or unsuitable soil may require more extensive preparation.
Identify the restriction before digging.
If you plan to excavate deeply, install posts, or drive stakes into the ground, check for buried utilities first. In the United States, contact the local utility-marking service, commonly reached through 811, before excavation.
Do not assume that deeper digging is automatically better for garden soil.
How to Prepare the Ground Before Filling the Raised Bed With Soil
Once the frame is positioned, make a final inspection of the growing area.
The bottom should be free from large obstacles and have an appropriate connection to the underlying ground where an open-bottom design is intended.
Check Root Access
For an ordinary open-bottom bed, make sure there is no permanent impermeable layer preventing roots from entering the native soil.
This is particularly helpful for tomatoes, peppers, and other crops that may develop extensive root systems.
Choose the Correct Soil Mixture
A suitable raised bed mixture should retain moisture while allowing excess water to drain.
For beds on natural ground, a mixture of quality topsoil and finished compost can provide a practical growing medium.
The appropriate proportions depend on the existing soil and compost composition.
Avoid filling the entire bed with pure compost or poor-quality fill dirt.
Calculate the Soil Volume
For a rectangular raised bed:
Soil volume (cubic feet) = Length (feet) × Width (feet) × Fill depth (inches) ÷ 12
A 4 × 8-foot raised bed filled with 12 inches of soil requires:
4 × 8 × 12 ÷ 12 = 32 cubic feet
That equals approximately 1.19 cubic yards.
Use the interior dimensions and actual planned fill depth when calculating material requirements.
After filling, gently water the soil to help it settle.
When Is the Best Time to Prepare Ground for a Raised Bed?
Ground preparation can take place during much of the year, but soil moisture and weather conditions matter.
Preparing Ground in Fall
Fall is a convenient time to establish a raised bed for the following spring.
You can remove vegetation, prepare the site, and address drainage problems before the planting season.
It’s also a useful time for longer-term grass suppression using cardboard or another appropriate method.
If the bed is filled in fall, protect exposed soil with suitable mulch or a cover crop when appropriate.
Preparing Ground in Spring
Spring works well for gardeners planning to plant soon.
However, wait until the native soil is dry enough to work without becoming sticky or forming dense clumps.
This is especially important with clay-heavy ground.
Preparing the site while it is saturated can create compaction that persists through the growing season.
Preparing Ground in Summer
Summer preparation is possible, particularly when establishing beds for fall crops.
Dry soil may be difficult to loosen, while hot conditions can make plant establishment more challenging.
If the ground is extremely dry and hard, moderate watering followed by time for moisture to distribute may make preparation easier.
Avoid working soil while it is excessively wet.
Common Ground Preparation Mistakes to Avoid
Several mistakes can reduce the performance of a raised bed even when the frame and purchased soil are high quality.
Installing a Raised Bed Over Persistent Weeds
Grass and perennial weeds may grow through the new soil if they aren’t adequately controlled.
Remove troublesome underground roots or use a suitable suppression method before filling the bed.
Pay particular attention to weeds that spread through rhizomes.
Ignoring Compacted Soil Underneath
A raised bed provides an improved growing layer, but roots may still encounter dense native soil below.
If the soil is severely compacted, loosen it before installing the frame.
Don’t assume that adding loose soil above a restrictive layer completely solves the problem.
Leaving the Frame Unstable
A frame installed on uneven ground may shift or allow soil to escape through gaps.
Check the base and level the structure before adding heavy growing media.
For tall or long beds, use suitable reinforcement.
Covering the Bottom With Waterproof Plastic
A solid plastic sheet can interfere with drainage and root access.
Use an open bottom where appropriate.
If a barrier is required for contamination control, design the raised bed as a contained growing system with reliable drainage.
Adding Gravel Instead of Fixing Drainage
A layer of rocks won’t correct standing water caused by compacted ground, poor grading, or an obstructed drainage outlet.
Identify and address the underlying problem before filling the bed.
Removing Too Much Native Topsoil
Healthy topsoil contains useful organic matter, minerals, and soil organisms.
When clearing sod or leveling the ground, avoid unnecessarily excavating large quantities of suitable topsoil.
Preserve and reuse it when appropriate.
Placing the Bed Too Close to Trees
Large trees can compete with vegetables for moisture and nutrients.
Their roots may also enter raised bed soil over time.
Choose a location outside areas of heavy root competition whenever possible.
Final Ground Preparation Checklist Before Installing the Raised Bed
Before filling your raised bed, confirm the following:
- The location receives enough sunlight for the intended vegetables.
- The frame has enough surrounding access space.
- The ground has been checked for drainage problems.
- Soil testing has been considered, including contamination testing where relevant.
- Existing grass and weeds have been removed or controlled.
- Compacted soil has been loosened when necessary.
- The frame rests on a stable, reasonably level foundation.
- No unnecessary waterproof barrier blocks the bottom.
- Pest barriers are installed only when appropriate.
- The frame is properly secured and reinforced where needed.
- The selected soil mixture is suitable for vegetable gardening.
Once these conditions are met, the raised bed is ready to be filled and planted.
Conclusion
Knowing how to prepare the ground for a raised garden bed helps prevent weed problems, poor drainage, unstable frames, and restricted root growth.
Start by choosing a sunny, well-drained location and checking the condition of the native soil. Remove or suppress existing grass, loosen compacted areas only when necessary, and level the frame’s foundation before filling.
For most open-bottom raised beds over healthy garden soil, extensive digging and permanent bottom liners aren’t necessary.
However, heavy clay, persistent weeds, sloping ground, and suspected soil contamination may require additional preparation.
The most practical approach is to preserve healthy native soil, correct actual site problems, and create a stable foundation that supports the raised bed for many growing seasons.
FAQs About How to Prepare the Ground for a Raised Garden Bed
Can I Put a Raised Garden Bed Directly on Grass?
Yes, but the existing grass should be removed or adequately suppressed.
You can strip away the sod or use plain cardboard as part of a no-dig preparation method. Persistent perennial weeds may require more thorough removal.
Should I Dig Up the Ground Before Installing a Raised Bed?
Not always. If the existing soil is loose, healthy, and well-drained, extensive digging may be unnecessary.
If the ground is compacted, gently loosening the restrictive layer can improve water movement and root access.
Can I Put a Raised Garden Bed on Uneven Ground?
Yes, but the frame needs a stable foundation.
Small height differences can often be corrected with minor grading. Steeper slopes may require a terraced design or another properly supported structure.
Do I Need a Weed Barrier Under My Raised Bed?
A permanent weed barrier is generally unnecessary beneath an open-bottom raised bed.
Plain cardboard can temporarily suppress grass, while non-biodegradable landscape fabric may restrict roots and complicate future soil maintenance.
Can I Put a Raised Garden Bed on Concrete?
Yes. Raised beds can be installed on concrete when designed as contained growing systems with sufficient soil depth and suitable drainage.
Because roots cannot grow into native soil, provide enough growing-medium volume for the intended crops.
Should I Remove Tree Roots Before Building a Raised Bed?
Avoid cutting large roots from established trees without understanding the potential effects on tree health and stability.
If substantial roots occupy the proposed site, choosing another location is often better.
Small competing roots can eventually grow into raised bed soil even after initial removal.
How Long Should I Wait After Covering Grass With Cardboard?
Grass suppression using cardboard may take approximately 8–12 weeks under suitable conditions, although results depend on vegetation type, moisture, and temperature.
A deep no-dig growing layer can sometimes be planted while the underlying material decomposes, but shallow beds and persistent weeds may require more preparation before planting.

I’m Maya L. Greenwood, a lifelong plant lover who believes anyone can grow something beautiful with the right guidance. After years of testing soil mixes, pruning methods, irrigation tricks, and pest-safe solutions, I started EasyGardenTips.com to turn hard-won lessons into step-by-step advice. From seed starting and container gardens to composting and seasonal checklists, my goal is to make gardening simple, sustainable, and fun.