How to Make Raised Garden Beds Without Wood: 7 Practical Ideas
You can make raised garden beds without wood by using galvanized steel, concrete blocks, natural stone, bricks, recycled plastic, fabric planters, or simply mounding soil above ground level. For a durable, easy-to-assemble bed, a galvanized metal kit is a practical choice. Concrete blocks work well for straightforward DIY construction, while an unframed soil mound is one of the least expensive options.
Wood isn’t required to create a productive raised vegetable garden. Its main purpose in a traditional raised bed is to hold the soil in place, and several other materials can perform that function.
Some alternatives also avoid problems associated with wooden frames, such as rot, insect damage, and periodic board replacement. However, each material has different requirements for stability, drainage, installation, and maintenance.
The right method depends on whether you’re building on natural soil, concrete, or another surface. Bed height, soil weight, available space, and the vegetables you intend to grow also affect the design.
The following methods explain how to build wood-free raised beds, choose suitable materials, prepare the foundation, and fill the growing area properly.
Best Materials for Making Raised Garden Beds Without Wood
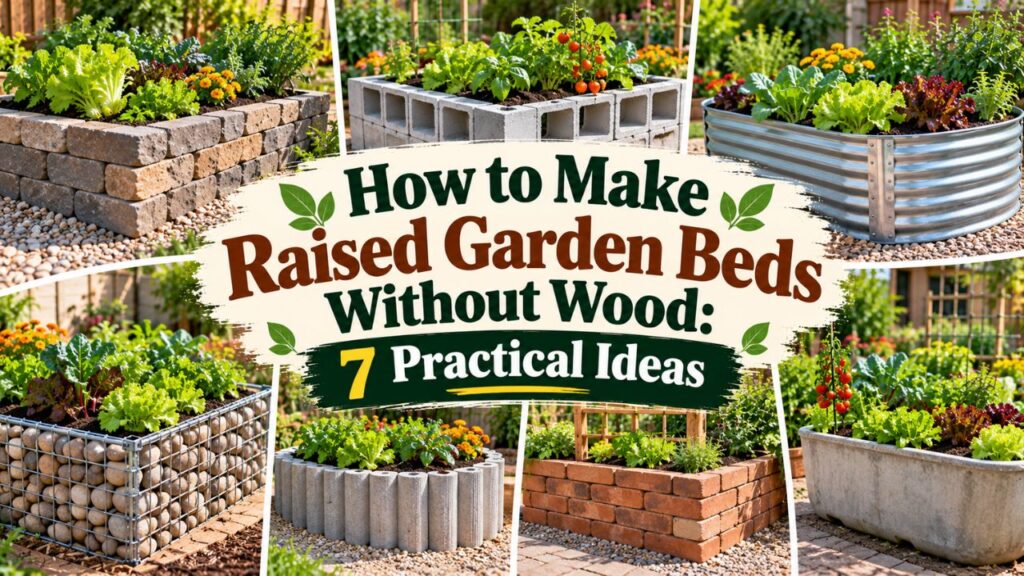
Several materials can replace wooden boards without changing the basic purpose of a raised bed.
The main differences involve structural strength, cost, installation difficulty, and how well the materials withstand outdoor conditions.
| Material | Relative Cost | Installation Difficulty | Best Use |
| Galvanized steel | Moderate | Easy with a kit | Long-lasting vegetable beds |
| Concrete blocks | Low to moderate | Easy for low beds | Simple rectangular gardens |
| Natural stone | Moderate to high | Moderate to difficult | Permanent landscape beds |
| Bricks or retaining-wall pavers | Moderate to high | Moderate | Formal raised garden borders |
| Recycled plastic or composite | Moderate to high | Easy to moderate | Low-maintenance garden frames |
| Fabric raised planters | Low to moderate | Very easy | Small gardens and patios |
| Mounded soil | Very low if soil is available | Easy | Budget gardens without frames |
Costs vary by region, bed size, and whether materials are already available.
According to the University of Minnesota Extension’s raised bed gardening guidance, raised beds can be constructed from metal, bricks, concrete blocks, plastic, and fabric. It also describes raised soil mounds that require no retaining frame.
For most home vegetable gardens, galvanized metal and concrete blocks offer a useful balance of durability and straightforward construction.
However, an inexpensive soil mound may be the better option when the main goal is growing vegetables without purchasing building materials.
How to Make Raised Garden Beds Without Wood Step by Step
Regardless of the material, a successful raised bed begins with proper planning.
Before building the walls or arranging the soil, determine where the bed will go, how large it should be, and how water will drain.
Step 1: Choose a Suitable Garden Location
Select a reasonably level area with convenient access to water.
For vegetables such as tomatoes, peppers, and cucumbers, choose a location that receives approximately 6–8 hours of direct sunlight daily.
Leafy greens and certain herbs may tolerate less sunlight.
Check the ground for standing water, large roots, and other obstacles.
If the area is covered with grass, plan to remove or suppress unwanted vegetation before filling the raised bed.
Avoid placing an edible garden over soil with known or suspected hazardous contamination without an appropriate assessment.
Step 2: Decide the Raised Bed Dimensions
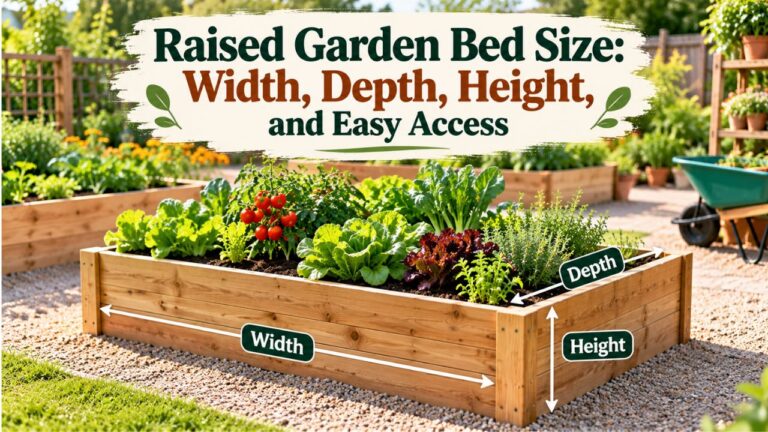
A practical raised bed should be narrow enough to reach its center without stepping on the growing soil.
Common dimensions include:
- 3 feet wide by 6 feet long.
- 4 feet wide by 4 feet long.
- 4 feet wide by 8 feet long.
- Approximately 8–12 inches high for many open-bottom beds.
- Taller designs when additional root depth or easier access is needed.
A width of approximately 4 feet works well when you can reach the bed from both sides.
For a bed accessible from only one side, a narrower design is generally more comfortable.
Height matters because taller beds hold more soil, increasing the pressure on their walls.
Choose the frame material and its structural design according to the intended filling depth.
Step 3: Select a Wood-Free Construction Method
Choose a material based on your priorities.
For example, galvanized steel is convenient when you want a manufactured structure that can be assembled without cutting boards.
Concrete blocks are useful when you prefer a straightforward layout using locally available masonry materials.
Stone or brick may be more appropriate when the bed is intended as a permanent landscape feature.
If your goal is to avoid purchasing framing materials entirely, choose a mounded raised bed.
Step 4: Prepare the Foundation
Remove weeds, loose debris, and unwanted vegetation from the construction area.
For an open-bottom bed on natural soil, gently loosen compacted ground where necessary.
For stone and masonry, prepare a stable base appropriate to the wall design.
For a metal kit, follow the manufacturer’s site preparation and leveling instructions.
Don’t ignore slopes or uneven ground. A poorly supported frame may twist, lean, or shift after filling.
Step 5: Assemble the Border or Shape the Soil
Install your chosen material according to its construction requirements.
Check that corners, joints, and supports remain secure.
If you’re building an unframed raised bed, shape the soil into a stable mound with sloping sides.
For framed beds, inspect the structure before adding soil.
Step 6: Fill the Bed and Prepare for Planting
Use a growing medium suited to the location and type of bed.
For many open-bottom beds, quality topsoil mixed with finished compost is a practical starting point.
Spread the material evenly without heavily compacting it.
Water gently to help the soil settle and check whether the frame moves or leaks excessive soil.
Add mulch after planting to reduce moisture loss and protect the surface.
How to Build a Raised Garden Bed With Galvanized Metal
Galvanized metal is one of the most convenient alternatives to wood.
The material is typically steel protected by a zinc coating that helps resist corrosion.
Metal raised bed kits are available in rectangular, square, oval, and other configurations.
For a completely wood-free project, choose a kit with metal corners and fasteners rather than one that requires wooden corner posts.
Materials Needed for a Metal Raised Bed
For a typical kit-based project, gather:
- Galvanized steel raised bed panels.
- Metal corner connectors or supplied joining pieces.
- Manufacturer-approved bolts, washers, and nuts.
- A wrench or socket set.
- Measuring tape.
- A level.
- Work gloves.
- Suitable raised bed soil.
Some kits include reinforcing bars or braces.
Use these components as directed because they help control outward movement when the bed is filled.
Step 1: Lay Out the Metal Panels
Choose a level location and lay the panels on the ground.
Arrange them according to the manufacturer’s assembly diagram.
For a rectangular bed, identify the long sides, short sides, and corner sections before attaching anything.
Check the intended orientation of panel overlaps and finished edges.
Step 2: Connect the Corners
Join the panels using the supplied metal connectors and fasteners.
Start by loosely installing the bolts.
This allows minor adjustments before the frame is fully tightened.
Once the sections align correctly, tighten the connections according to the manufacturer’s instructions.
Avoid leaving exposed sharp edges where hands or legs may contact the bed.
Use the supplied edge trim when included.
Step 3: Install Structural Supports
Some raised bed kits require cross braces or reinforcement rods.
These prevent long sidewalls from spreading outward under soil pressure.
Install every required support before filling the bed.
Don’t omit a brace simply because the empty frame feels sturdy.
Soil places considerably more pressure on the walls after filling, especially when wet.
Step 4: Position and Level the Frame
Place the completed frame in its final location.
Check that it sits evenly on the ground and doesn’t rock.
Adjust the base as needed without leaving unsupported sections.
If the manufacturer specifies anchoring, follow those requirements.
Step 5: Fill With Soil
For an open-bottom metal bed on suitable natural ground, add a prepared topsoil and compost mixture.
Fill in stages, spreading the soil evenly.
Avoid pushing the panels outward with a wheelbarrow or shovel.
Check the sides and corners as the soil level rises.
Once filled, water gently and inspect the frame again.
Are Galvanized Metal Raised Beds Safe for Vegetables?
Galvanized steel is commonly used in raised bed construction.
Its protective zinc coating can be affected by highly acidic conditions, so material quality and soil chemistry matter.
Choose products intended for gardening from reputable manufacturers.
Avoid panels with unknown coatings, industrial residues, or questionable manufacturing origins.
A galvanized metal bed can also become warm in direct sunlight, although the effect on the root zone depends on bed size, soil moisture, insulation, and climate.
In very hot locations, mulch and appropriate watering help manage soil temperatures.
How to Make Raised Garden Beds With Concrete Blocks
Concrete blocks provide a straightforward way to build a wood-free raised garden bed.
They are widely available, have consistent shapes, and can be arranged into rectangular or square borders.
For a beginner, a low bed made with a single course of suitable blocks is much simpler than constructing a tall masonry wall.
Materials Needed for a Concrete Block Raised Bed
Gather:
- New or known-source concrete masonry blocks.
- Measuring tape.
- Stakes and string for marking the layout.
- Shovel or garden hoe.
- Level.
- Appropriate base material if required.
- Work gloves.
- Suitable growing soil and compost.
Concrete blocks are heavy. Wear suitable footwear and use safe lifting methods.
The number of blocks depends on their actual dimensions and whether your measurements refer to the inside or outside of the bed.
Step 1: Mark the Bed Dimensions
Choose the length and width of the raised bed.
Use stakes and string to mark the perimeter.
For example, a nominal 4-by-8-foot bed has a perimeter of 24 feet.
However, blocks occupy space, so the actual soil area will be smaller if those measurements describe the outside of the finished wall.
Measure the blocks before purchasing the required quantity.
Step 2: Clear and Level the Ground
Remove grass, weeds, stones, and loose materials.
Prepare a firm base where the blocks will sit.
On uneven ground, the blocks may lean or separate as the soil pushes outward.
A compacted, appropriately prepared foundation helps maintain stability.
If the ground slopes significantly, don’t build a tall retaining wall using loosely stacked blocks.
Step 3: Arrange the First Course of Blocks
Position the first blocks along the marked perimeter.
Start at a corner and continue around the bed.
Check the level frequently.
Adjust individual blocks so they sit firmly without rocking.
For a simple low bed, a single course may provide enough edging height when combined with suitable soil below.
Step 4: Decide Whether Additional Courses Are Needed
If the bed requires more height, use a construction method appropriate for a soil-retaining masonry wall.
Additional courses may require reinforcement, bonding, drainage measures, and a suitable foundation.
Ordinary concrete blocks stacked several courses high without appropriate support can become unstable.
For a tall bed, use an engineered retaining-wall system or obtain qualified construction guidance.
Step 5: Fill the Raised Bed
Once the structure is stable, prepare the soil inside.
Loosen the underlying ground if appropriate.
Add quality growing soil and spread it evenly.
Avoid filling the bed by repeatedly dropping heavy soil loads against one side of the block wall.
Check for movement as the soil level increases.
Are Concrete Blocks Safe for Vegetable Gardens?
Concrete blocks are commonly used for raised beds, but their composition can vary.
Some products contain fly ash or other industrially derived aggregates.
The University of Maryland Extension’s raised bed construction guidance describes intact concrete blocks as generally safe for food gardening while acknowledging limited research and differences in manufacturing materials.
If you’re concerned about the composition, purchase blocks from a reputable supplier and ask about their ingredients.
Avoid using salvaged blocks with unknown industrial or chemical exposure.
Gardeners who prefer to avoid uncertainty about concrete aggregates can choose stone, suitable metal, or another material.
How to Build Raised Garden Beds With Natural Stone
Natural stone creates a durable raised bed that blends into traditional and rustic landscapes.
It is particularly useful for permanent flower beds, herb gardens, and decorative vegetable gardens.
However, stone construction generally requires more effort than assembling a metal kit.
Choose Suitable Stones
Flat stones are usually easier to arrange securely than rounded river rocks.
Common choices include:
- Flagstone.
- Fieldstone with stable faces.
- Flat landscaping stones.
- Suitable natural retaining-wall stone.
Choose material based on the desired wall height and construction method.
Small rounded stones may work as decorative borders but are not appropriate for every soil-retaining wall.
Prepare a Stable Base
Mark the raised bed perimeter.
Excavate and prepare the base according to the stone size, wall height, soil conditions, and local climate.
Use a suitable foundation rather than placing a heavy stone wall directly on loose grass or uncompacted fill.
In cold regions, freeze-thaw movement can affect poorly supported stonework.
A permanent masonry wall may require a substantial foundation.
Arrange the Stones
Place larger, stable stones in the lowest course.
Arrange successive stones to create secure contact surfaces.
For dry-stacked construction, stagger vertical joints and avoid unstable gaps.
Don’t build a tall wall by balancing loose stones without an appropriate retaining-wall design.
For higher or heavily loaded structures, professional advice may be necessary.
Add Growing Soil
After completing the border, check that the stones remain stable.
Fill the raised bed with a suitable soil mixture.
Keep the soil level below the intended finished height of the border.
Water gently and inspect for shifting stones.
Stone is an excellent choice for permanence, but it isn’t necessarily the easiest option for a first-time DIY project.
How to Make Raised Beds With Bricks or Retaining-Wall Pavers
Bricks and manufactured pavers offer a more uniform appearance than irregular natural stone.
They are useful for formal garden layouts, small kitchen gardens, and raised beds near patios.
The construction method depends on whether you’re creating a low decorative border or a higher soil-retaining wall.
Use Bricks for Low Raised Garden Borders
For a shallow raised bed, suitable outdoor bricks can define the planting area.
Mark the shape and prepare a stable, level base.
Arrange the bricks in the desired pattern.
A single low course can work as a decorative border, but a tall freestanding brick wall needs proper masonry construction.
Don’t assume that loose bricks will safely retain a deep bed simply because they are heavy.
Use Interlocking Blocks for Taller Beds
Some landscape retaining-wall blocks are designed with interlocking features or other systems that improve stability.
These may be more appropriate than ordinary loose bricks for beds requiring substantial soil retention.
Follow the product’s installation instructions for:
- Foundation preparation.
- Maximum wall height.
- Block orientation.
- Drainage.
- Backfill.
- Reinforcement requirements.
For a raised bed built on a slope or intended to retain a significant soil height, use a design appropriate for the site and local construction requirements.
How to Make Raised Garden Beds With Recycled Plastic
Rigid recycled plastic and composite garden boards provide another alternative to natural lumber.
Some products resemble wooden boards but are manufactured from recycled plastic or composite materials.
Others are molded into complete modular raised bed systems.
Choose a Garden-Rated Plastic System
Select materials specifically intended for outdoor planting beds.
Check the manufacturer’s information about:
- Structural strength.
- Outdoor exposure.
- Soil contact.
- Temperature limitations.
- Required connectors.
- Maximum unsupported spans.
Not all plastic boards are appropriate for retaining soil.
Avoid repurposing unknown industrial plastic containers or materials that may have held hazardous substances.
Assemble the Plastic Frame
Most modular systems use corner connectors, stakes, or interlocking components.
Lay out the pieces and check the desired dimensions.
Connect each section according to the manufacturer’s instructions.
Install any required supports before filling.
Plastic materials can expand and contract with temperature changes, so use the recommended joints and fasteners.
Fill and Maintain the Bed
Place the assembled frame on a level surface.
Add the growing medium in stages.
Check that the sidewalls remain straight and the connections stay secure.
Although suitable plastic products resist biological rot, they can still become brittle, warp, or deteriorate with exposure over time.
Inspect the structure periodically.
How to Make Raised Garden Beds With Fabric Planters
Large fabric growing containers can provide a raised planting area without wooden framing.
They are convenient when you want a lightweight, easy-to-install alternative.
However, they function more like containers than traditional open-bottom raised beds.
Select a Suitable Fabric Raised Planter
Choose a planter intended for outdoor gardening.
Check its dimensions, material quality, and intended soil capacity.
Some fabric planters are circular, while others have rectangular shapes resembling small raised beds.
The fabric should be designed to support the growing medium without excessive stretching.
Position the Planter
Place the fabric bed on a suitable surface.
Make sure it can drain properly and won’t sit in standing water.
On a patio, consider where drainage water will flow.
Fabric containers may also stain certain surfaces or allow water to escape through their sides and bottoms.
Fill With an Appropriate Growing Medium
Unlike an open-bottom bed over natural soil, a fabric planter has a limited rooting volume.
Use a growing medium suited to container cultivation.
Avoid filling a shallow fabric planter entirely with dense, compacted garden soil.
Add the growing mixture and spread it evenly.
Manage Moisture Carefully
Fabric walls allow moisture exchange with the surrounding air.
This can help with aeration but may also increase drying.
Check moisture regularly, particularly during hot or windy weather.
The fabric itself may eventually deteriorate and require replacement.
Fabric raised planters are convenient for small spaces, but they are not a direct replacement for a permanent, open-bottom raised bed.
How to Make Raised Garden Beds Without Any Frame
If your goal is to build raised beds without wood, metal, stone, or plastic, consider creating a mounded raised garden bed.
This method involves forming the growing soil into a raised, flat-topped mound with gently sloping sides.
It doesn’t require a retaining wall.
For suitable garden locations, this can be one of the simplest and least expensive approaches.
Step 1: Mark the Planting Area
Choose a sunny, accessible location.
Mark the desired bed dimensions using a hose, rope, or temporary stakes.
A width of approximately 3–4 feet is convenient for many gardeners when both sides are accessible.
Leave enough space around the bed for walking and maintenance.
Step 2: Remove Unwanted Vegetation
Clear persistent weeds and unwanted plant material.
If the existing soil is healthy and suitable for gardening, it can form the base of the raised mound.
Avoid transferring soil from areas with known contamination or severe plant disease problems.
Step 3: Loosen the Existing Soil
Use a garden fork to loosen compacted ground where necessary.
Work when the soil is moist enough to crumble but not saturated.
Avoid repeatedly walking on the future planting area.
Step 4: Add Soil to Create the Mound
Add quality topsoil or a suitable topsoil and compost mixture.
Build a raised planting area approximately 6–8 inches above the surrounding ground as a practical starting design.
Keep the top relatively level.
Slope the sides gradually rather than creating steep, unsupported edges.
This helps reduce soil movement during rainfall and watering.
Step 5: Shape the Edges
Use a rake or hoe to smooth the surface.
Round or slope the mound’s sides so they remain stable.
Avoid creating vertical soil walls because unsupported soil can collapse or wash into the pathways.
Very sandy soil may be more difficult to maintain in this form.
Step 6: Mulch and Plant
Water the mound gently and check for settling.
Add suitable organic mulch to help protect the surface.
Plant vegetables according to their spacing and rooting requirements.
Keep the surrounding pathways clear so you don’t need to walk across the growing soil.
Is an Unframed Raised Bed as Good as a Framed Bed?
An unframed raised bed can grow vegetables successfully when it has suitable soil, drainage, and access.
It also eliminates the cost and maintenance of frame materials.
However, soil mounds occupy more ground space because their sides slope outward.
They may also require occasional reshaping after heavy rain or repeated watering.
For gardeners with adequate yard space and a limited budget, this is often a practical alternative.
What Is the Cheapest Way to Make Raised Garden Beds Without Wood?
The least expensive method is often an unframed soil mound, especially when healthy garden soil is already available.
It requires minimal construction equipment and no purchased walls.
Concrete blocks may also be relatively economical when you need a contained bed and can obtain suitable materials locally.
Fabric planters offer another convenient starting option, although their replacement needs and growing-medium costs should be considered.
The lowest-cost method depends on what you already have.
For example, a gardener with suitable existing soil may spend little on a soil mound. Someone working with poor ground may need to purchase a substantial amount of growing soil regardless of the framing material.
Can Recycled Materials Reduce Construction Costs?
Yes, but material history matters.
Suitable leftover masonry blocks, landscape pavers, or garden-rated metal components may be useful.
Inspect recycled materials for damage and contamination.
Avoid using:
- Old railroad ties.
- Unknown industrial containers.
- Materials with peeling, unidentified coatings.
- Salvaged components exposed to hazardous chemicals.
- Sharp or structurally damaged metal.
- Cracked blocks that cannot safely support the intended load.
A free material isn’t a good bargain if it creates contamination or structural problems.
How Deep Should a Wood-Free Raised Garden Bed Be?
The necessary depth depends on what you’re growing and whether the bed sits over natural soil.
Open-Bottom Raised Beds on Garden Soil
An open-bottom bed allows roots to grow into the existing ground underneath.
For many gardens, an 8–12-inch raised layer provides a useful starting point when the underlying soil is healthy and suitable for root growth.
A shallower bed can also work for some crops when roots have access to additional soil below.
However, compacted or contaminated ground may require a different approach.
Raised Beds on Concrete or Patios
Beds on hard, impermeable surfaces need enough growing medium within the structure.
For example, the University of Maryland Extension’s guidance distinguishes between approximately 8 inches for certain crops such as leafy greens and 12–24 inches for larger vegetables such as tomatoes and peppers.
The exact choice should reflect crop needs and the bed’s design.
Make sure excess water can drain from the growing medium.
A waterproof, sealed bottom can cause waterlogging if it has no appropriate outlet.
Tall Raised Beds
Beds 18–24 inches high or taller may be useful when reducing bending is important.
However, greater height means more growing medium, more weight, and greater pressure on the walls.
Use a structure designed for the intended depth.
Don’t rely on loosely stacked masonry, thin decorative edging, or weak plastic panels to retain a deep bed.
How Much Soil Do You Need for a Wood-Free Raised Bed?
Soil requirements are based on the usable interior dimensions and filling depth.
For a rectangular bed:
Soil volume (cubic feet) = Length (feet) × Width (feet) × Depth (feet)
For a 4-foot by 8-foot raised bed filled 12 inches deep:
4 × 8 × 1 = 32 cubic feet
That’s approximately 1.19 cubic yards.
If buying soil in 2-cubic-foot bags:
32 ÷ 2 = 16 bags
The actual requirement may be slightly less if the frame walls reduce the internal dimensions.
Soil Requirements by Bed Size
| Interior Bed Size | Filling Depth | Required Soil |
| 3 × 3 feet | 8 inches | 6 cu ft |
| 3 × 6 feet | 12 inches | 18 cu ft |
| 4 × 4 feet | 12 inches | 16 cu ft |
| 4 × 8 feet | 12 inches | 32 cu ft |
| 4 × 8 feet | 18 inches | 48 cu ft |
These calculations don’t include extra material for settling.
For irregularly shaped beds, use the appropriate volume calculation based on the actual shape.
What Soil Should You Use in Raised Beds Without Wood?
The frame material doesn’t determine the best soil mixture.
The appropriate growing medium depends more on whether the bed has an open bottom and what lies underneath it.
Soil Mix for Open-Bottom Raised Beds
For many beds placed over suitable garden soil, a simple starting blend is:
- Two parts quality topsoil.
- One part mature, plant-based compost.
This creates a mixture containing approximately two-thirds topsoil and one-third compost by volume.
The ratio can be adjusted according to the original topsoil’s composition and a soil test.
Avoid using large quantities of unfinished organic material in the main rooting zone.
Mix the growing medium rather than creating thick, separate bands of topsoil and compost.
Soil Mix for Raised Beds on Hard Surfaces
Beds on concrete or other impermeable surfaces have different drainage conditions.
A suitable soilless growing medium blended with mature compost may be more appropriate than a heavy mineral-soil mixture.
Choose a mix with adequate moisture retention and aeration.
Make sure the planter provides a reliable route for excess water to escape.
What Should Go Under a Raised Bed Without Wood?
The correct base depends on where the bed will sit.
On Healthy Natural Ground
For an open-bottom bed on suitable soil, the existing ground is usually the best base.
Remove unwanted vegetation and loosen compacted soil when necessary.
A permanent solid barrier is generally unnecessary.
Keeping the bottom open allows excess water and plant roots to move into the underlying soil.
On Ground With Burrowing Animals
If burrowing rodents are a recurring problem, galvanized hardware cloth may help restrict access.
Install the mesh securely at the base without blocking drainage.
Choose a product suitable for outdoor soil contact and inspect it periodically.
The mesh should be secured so sharp cut edges aren’t exposed.
On Concrete or Pavement
Raised beds on hard surfaces need appropriate drainage.
Use a suitable planter or structural bed designed for that location.
A permeable liner may help retain growing medium while allowing water to pass through.
Don’t install a solid waterproof barrier without drainage outlets.
Also consider the direction of water runoff and whether the surface can safely support the filled bed.
Safety Note: Soil-filled raised beds can be extremely heavy. For balconies, elevated decks, rooftops, or other load-sensitive surfaces, obtain confirmation of the structure’s load capacity before installation.
Common Problems With Wood-Free Raised Garden Beds
Metal Panels Bow Outward
Metal sidewalls may spread if a bed is overfilled or required braces are missing.
Check the manufacturer’s support requirements.
Don’t remove reinforcement rods simply to create more planting space.
Concrete Blocks Become Uneven
Poorly prepared ground can cause blocks to settle or tilt.
Inspect the base before construction.
If movement occurs after filling, correct the underlying stability problem rather than continuing to stack additional blocks.
Stone Borders Shift
Loose stones may move when soil presses outward or the ground settles.
Use stable stones and suitable foundations.
For taller walls, proper retaining-wall construction becomes necessary.
Fabric Raised Beds Dry Out Quickly
Fabric containers can lose moisture through their exposed sides.
Check moisture more frequently during hot weather.
Mulch and an appropriate growing medium may help reduce rapid drying.
Unframed Soil Mounds Erode
Heavy rainfall may wash soil from steep or exposed sides.
Shape the mound with gentle slopes and protect the surface with suitable mulch.
Occasional reshaping may be needed to maintain its original form.
Which Wood-Free Raised Bed Is Best for Your Garden?
There isn’t one material that’s ideal for every location.
For a beginner who wants a contained vegetable bed with relatively simple assembly, a quality galvanized steel kit with an all-metal frame is often a convenient choice.
For a lower-cost DIY project, a low concrete block bed may be appropriate when the materials have a known source and the base is stable.
Natural stone and masonry are better suited to gardeners who want a permanent landscape feature and are prepared for more demanding construction.
Recycled plastic systems can reduce some maintenance associated with wood, although product quality and structural support remain important.
Fabric planters work well when a container-style growing area is acceptable.
For the lowest-cost approach on healthy natural ground, an unframed soil mound avoids the need for a border entirely.
Choose your method based on the intended soil height, material availability, ground conditions, and how much maintenance you’re willing to perform.
Conclusion
Learning how to make raised garden beds without wood opens up several practical alternatives for growing vegetables, herbs, and flowers.
Galvanized steel provides a durable, straightforward option when you select a complete metal-framed system. Concrete blocks offer simple DIY construction for low beds, while natural stone and brick can create attractive permanent borders.
Recycled plastic and fabric planters are useful in certain settings, and an unframed soil mound is an economical solution when suitable garden ground is available.
Whichever material you choose, focus on stable construction, adequate growing depth, appropriate drainage, and healthy soil.
For most beginners seeking a conventional raised vegetable bed without wooden boards, a properly designed metal kit or low concrete block frame is a practical starting point.
FAQs About How to Make Raised Garden Beds Without Wood
Can You Build a Raised Garden Bed Without Any Frame?
Yes. You can create a raised garden bed by mounding suitable soil above the surrounding ground.
Shape the top into a level planting area and slope the sides to reduce erosion.
This method works best where the existing ground is suitable for gardening and there is enough room for the sloping edges.
Can You Use Concrete Blocks Instead of Wood for Raised Beds?
Yes. Concrete blocks can form the walls of a raised garden bed.
They work particularly well for simple rectangular designs.
Use intact materials with a known source, prepare a stable base, and avoid building unsupported tall walls.
Are Metal Raised Beds Better Than Wooden Ones?
Metal raised beds avoid biological wood rot and can last a long time when properly manufactured and maintained.
However, they may cost more initially, and their performance depends on material quality, coatings, and construction.
Wood can still be appropriate for some projects, but metal is a practical alternative when avoiding lumber is the main priority.
Can I Make a Raised Bed With Bricks Without Cement?
A low decorative brick border may sometimes be constructed without mortar when the bricks are stable and appropriately installed.
However, a taller soil-retaining wall generally needs a more substantial construction method.
Don’t assume loosely stacked bricks can safely support a deep raised bed.
What Is the Cheapest Material for a Wood-Free Raised Bed?
If healthy soil is available, making an unframed raised soil mound may be the least expensive option because no wall material is required.
For a contained bed, concrete blocks or a suitable fabric planter may be economical depending on local prices.
Do Wood-Free Raised Beds Need Drainage Holes?
Open-bottom raised beds placed directly on suitable ground generally don’t need separate drainage holes because water can move into the soil below.
Raised beds with solid bottoms, including some metal troughs and plastic planters, require appropriate drainage outlets.
Never assume that a sealed container will drain properly without a designed escape route for water.
Can You Make Raised Garden Beds Without Wood on a Patio?
Yes. Metal raised bed kits, suitable plastic planters, and fabric growing containers can be used on patios when the surface can safely support their weight.
Provide adequate drainage, enough soil depth for the intended crops, and protection against unwanted water runoff.
On elevated structures, confirm load capacity before filling the bed with soil.

I’m Maya L. Greenwood, a lifelong plant lover who believes anyone can grow something beautiful with the right guidance. After years of testing soil mixes, pruning methods, irrigation tricks, and pest-safe solutions, I started EasyGardenTips.com to turn hard-won lessons into step-by-step advice. From seed starting and container gardens to composting and seasonal checklists, my goal is to make gardening simple, sustainable, and fun.