How to Hang a Grow Light in a Grow Tent: Complete Guide
Hanging a grow light correctly is one of the most important steps when setting up an indoor grow tent. Even a high-quality grow light will not perform well if it is placed too close, too far away, or positioned unevenly.
The right light height and placement help plants receive the proper amount of light for healthy growth, while preventing common problems like stretching, heat stress, and leaf damage.
Many beginners focus only on choosing the right wattage but overlook how the light is installed inside the tent. Factors like hanging height, light coverage, growth stage, and fixture type all affect how effectively your plants use the light.
In this guide, you’ll learn how to properly hang a grow light in a grow tent, including the equipment you need, installation steps, ideal hanging distance, and how to adjust your light as your plants grow.
What You Need Before Hanging a Grow Light
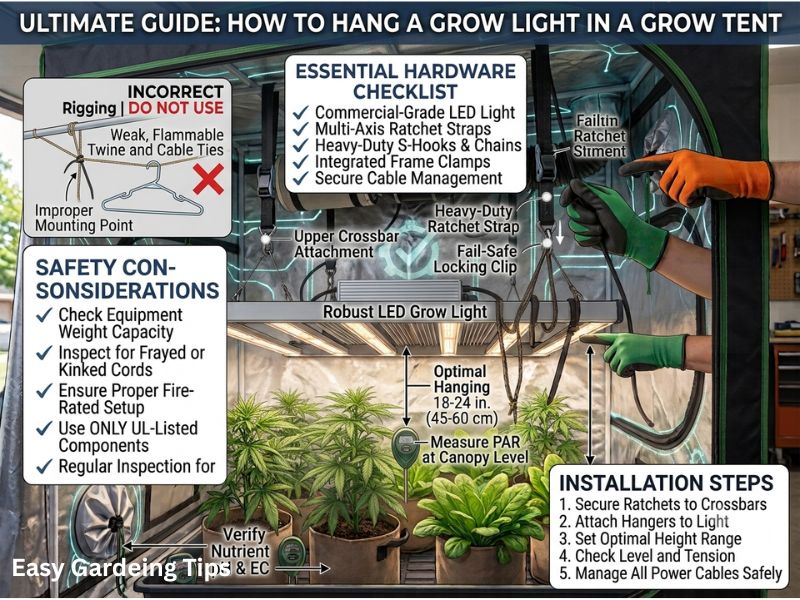
Before installing your grow light, prepare the right tools and accessories to ensure a safe and adjustable setup.
Grow Light Fixture
First, choose a suitable grow light for your tent size. Common options include:
- LED panel lights
- LED bar-style lights
- HPS grow lights
Make sure the fixture provides enough coverage for your growing area.
Adjustable Hanging System
An adjustable hanging system makes it easier to change the light height as plants grow.
Common options include:
- Rope ratchet hangers: Easy height adjustment and strong support
- Adjustable pulleys: Allow quick raising and lowering of lights
- Hanging hooks: Used to attach lights to tent support bars
Avoid fixed mounting methods because you will need to adjust the distance throughout the growing cycle.
Safety Accessories
For a safe grow tent setup, also consider:
- Timer for automatic light schedules
- Properly rated power strip
- Cable clips for wire management
- Temperature monitoring tools
A secure and organized setup helps prevent electrical issues and makes future adjustments easier.
Step-by-Step: How to Hang a Grow Light in a Grow Tent
Follow these steps to install your grow light properly.
Step 1: Install the Hanging Hardware
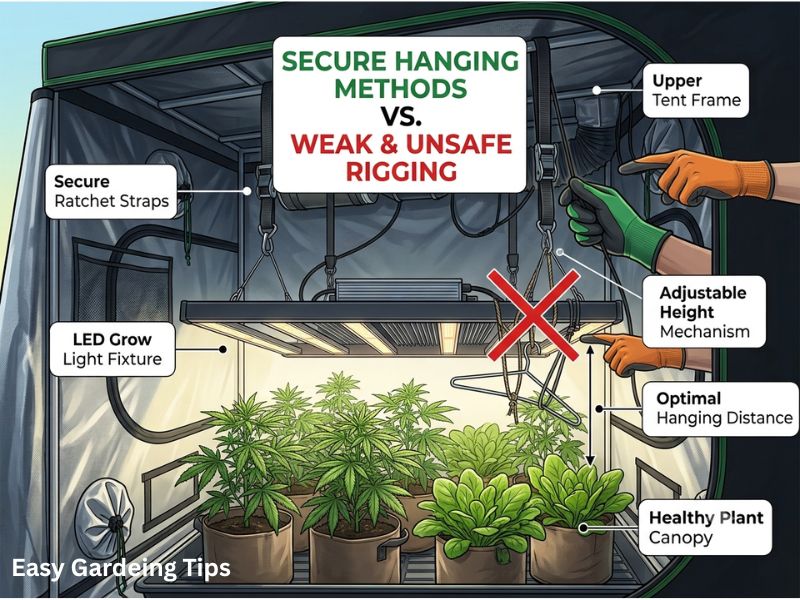
Start by attaching your hanging system to the grow tent’s top support bars.
Make sure:
- The hooks are securely attached
- The weight of the light is supported properly
- Both sides are balanced evenly
For heavier fixtures, use strong ratchet hangers designed to hold the light’s weight.
Step 2: Attach the Grow Light
Connect the hanging straps or ratchets to the grow light fixture.
Before turning the light on:
- Check that the fixture hangs level
- Make sure it is stable
- Confirm cables are not pulling on the light
A balanced fixture provides more even light distribution across the plant canopy.
Step 3: Position the Light in the Center of the Tent
Place the grow light above the main growing area.
Center placement helps:
- Spread light evenly
- Reduce dark spots
- Improve overall plant coverage
For larger tents, multiple lights may be needed to achieve consistent coverage across the entire canopy.
Step 4: Adjust the Initial Hanging Height
After installing the grow light, set the initial height based on your light type, wattage, and plant growth stage.
For a new setup, it is usually better to start with the light slightly higher and gradually adjust it downward. This helps prevent plants from experiencing excessive light intensity before they adapt.
Consider these factors when setting the height:
- Light power: Higher wattage lights usually need more distance from plants.
- LED efficiency: More efficient fixtures can produce stronger light output.
- Plant stage: Young plants need less intensity than mature plants.
- Manufacturer recommendations: Always check the light manufacturer’s guidelines.
Once the light is running, monitor your plants and make small adjustments when needed.
How High Should You Hang an LED Grow Light?
The ideal hanging distance for an LED grow light depends on the fixture’s power, design, and plant growth stage. There is no single height that works for every setup, but these ranges provide a good starting point.
| Growth Stage | Recommended Distance |
| Seedlings | 24–36 inches above plants |
| Vegetative Stage | 18–30 inches above plants |
| Flowering Stage | 12–24 inches above plants |
These measurements are general guidelines. A powerful LED fixture may need to be placed higher, while a lower-powered light can usually be positioned closer.
Always watch your plants rather than relying only on measurements. If leaves show signs of stress, adjust the height or reduce the light intensity.
How to Adjust Grow Light Height During Different Growth Stages
Plants need different levels of light throughout their growth cycle. Adjusting the height as plants develop helps provide the right amount of intensity at each stage.
Seedling Stage
Young seedlings are sensitive to strong light. Keep the grow light higher or use a dimmer setting to avoid stress.
Signs the light may be too strong include:
- Leaf curling
- Yellowing leaves
- Slow growth
Vegetative Stage
During vegetative growth, plants can handle more light intensity. Gradually lower the fixture or increase brightness to encourage stronger growth.
Maintain enough distance to provide even coverage without creating excessive heat.
Flowering Stage
Flowering plants generally require higher light intensity. The grow light can usually be positioned closer to the canopy, depending on the fixture specifications.
During this stage, monitor plants closely for signs of light stress and adjust when necessary. Proper positioning helps maximize light exposure across the entire canopy.
How to Position Multiple Grow Lights in a Tent
Larger grow tents often require more than one light fixture to achieve even coverage. Using multiple lights can help eliminate dark areas and provide more consistent light distribution across the entire plant canopy.
For larger tents like:
- 4×4 grow tents
- 4×8 grow tents
- 5×5 grow tents
multiple smaller fixtures may perform better than one extremely powerful light.
When positioning multiple grow lights:
- Spread fixtures evenly across the tent area
- Keep equal distance between lights
- Avoid creating overlapping hotspots
- Make sure all plants receive similar light intensity
For example, a 4×8 tent may benefit from two separate LED fixtures instead of one large fixture because each section receives more balanced coverage.
Using a PPFD meter can help identify areas with weak or excessive light intensity and allow you to fine-tune the placement.
Should Grow Lights Hang Directly Above Plants?
Yes, grow lights should generally be positioned directly above the plant canopy. Overhead placement provides the most efficient light distribution and allows plants to receive light evenly from above.
Benefits of placing lights directly above plants include:
- Better photosynthesis
- More uniform plant growth
- Reduced stretching
- Improved canopy coverage
Avoid using side lighting as the primary light source because plants naturally grow toward light, which can create uneven growth patterns.
The light should be centered over the main growing area, with enough coverage to reach the edges of the canopy. For larger setups, multiple fixtures can be arranged to ensure the entire tent receives adequate light.
How to Tell If Your Grow Light Is Too Close
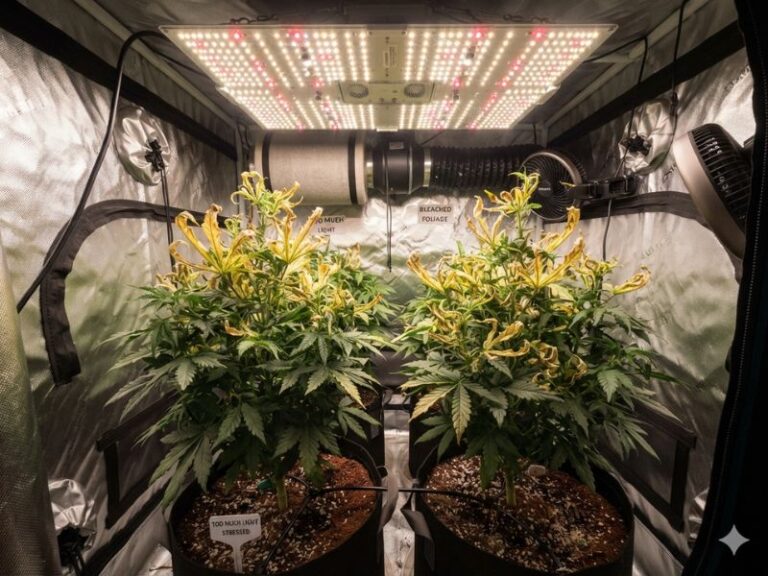
A grow light that is positioned too close can deliver excessive light intensity and heat to plants. This can cause stress and damage, especially in young plants.
Common signs that your grow light is too close include:
- Leaf bleaching or pale spots
- Curling leaves
- Yellowing leaves near the top of the plant
- Dry or crispy leaf edges
- Heat stress symptoms
If you notice these issues:
- Raise the light several inches
- Reduce brightness if the fixture has a dimmer
- Improve airflow around the plants
Making small adjustments gradually is better than moving the light dramatically, as sudden changes can also stress plants.
How to Tell If Your Grow Light Is Too Far Away
A grow light that is positioned too far from plants may not provide enough intensity for healthy growth. When plants do not receive enough usable light, they often stretch toward the light source and develop weak structures.
Common signs that your grow light is too far away include:
- Tall, stretched plants
- Long spaces between leaves
- Weak stems
- Slow growth
- Smaller leaves
If you notice these signs, you can improve light intensity by:
- Lowering the grow light gradually
- Increasing brightness if your fixture has a dimmer
- Checking that the light covers the entire canopy
Avoid moving the light too close too quickly. Make small adjustments and observe how plants respond over several days.
How to Manage Grow Light Heat in a Tent
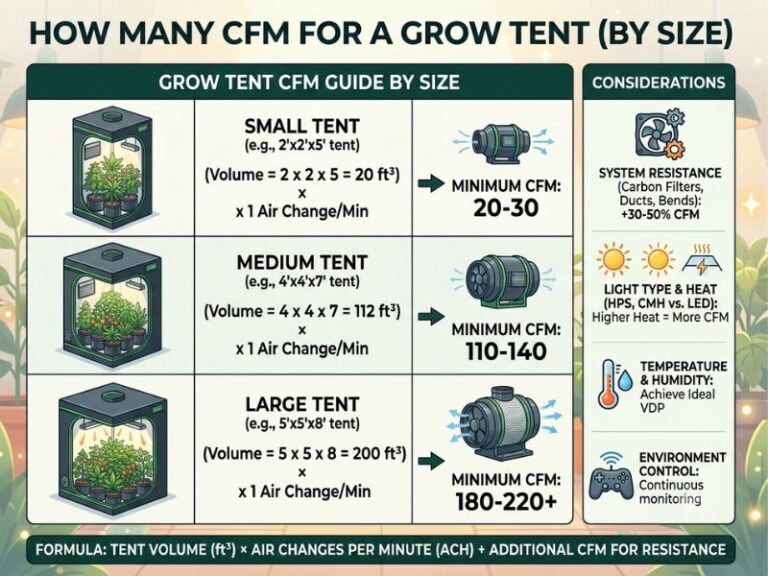
Although LED grow lights produce less heat than traditional HPS fixtures, they still generate heat that needs to be managed inside a grow tent.
Proper heat control helps maintain a stable growing environment and prevents plant stress.
Improve Ventilation
Use proper airflow systems, including:
- Exhaust fans to remove hot air
- Intake vents or fans for fresh air
- Circulation fans to move air around plants
Monitor Temperature
Keep track of the temperature near the plant canopy because the area directly under the light can become warmer than the rest of the tent.
Maintain Proper Airflow Around the Light
Avoid blocking airflow around the fixture. Heat buildup can reduce light performance and increase stress on plants.
A balanced combination of ventilation, airflow, and proper light placement helps create a healthier grow environment.
Common Mistakes When Hanging Grow Lights
Many beginners make simple installation mistakes that reduce light efficiency and plant growth.
Hanging the Light Too Close
Placing a powerful light too close can cause:
- Leaf bleaching
- Heat stress
- Plant damage
Always adjust height based on your light strength and plant stage.
Using Fixed Hangers
Plants grow continuously, so the light distance needs regular adjustment. Fixed hanging systems make it difficult to maintain the correct height.
Adjustable rope ratchets are usually a better option.
Ignoring Light Coverage
A strong light does not help if it only covers the center of the tent. Make sure the fixture matches your tent footprint.
Not Leveling the Fixture
A tilted light can create uneven intensity, causing some plants to receive too much light while others receive too little.
Keep the fixture level for consistent coverage.
How to Hang Different Types of Grow Lights
Different grow light designs require slightly different hanging methods. The basic principles remain the same: keep the fixture secure, maintain proper height, and ensure even coverage across the plant canopy.
LED Panel Lights
LED panel lights are commonly used in small and medium grow tents because they are lightweight and efficient.
Best practices:
- Use adjustable ratchet hangers
- Keep the panel level
- Center it above the growing area
- Adjust height as plants grow
LED panels work well for tents like 2×2, 2×4, and 3×3 setups where a single fixture can often provide enough coverage.
LED Bar Lights
LED bar-style fixtures are designed to spread light over a wider area. They are especially useful for larger grow tents because they provide more uniform coverage.
Benefits include:
- Better edge-to-edge coverage
- Fewer dark spots
- More even light distribution
For larger tents such as 4×4, 4×8, and 5×5, bar-style lights or multiple fixtures often provide better results than a single central light.
HPS Grow Lights
HPS fixtures are heavier and produce more heat compared to modern LEDs, so they require extra consideration when hanging.
Important factors:
- Use strong hanging hardware
- Maintain proper distance from plants
- Ensure good ventilation
- Monitor heat levels regularly
Because HPS lights generate significant heat, they often need more space between the fixture and plant canopy compared to LED lights.
Frequently Asked Questions About Hanging Grow Lights
How far should an LED grow light be from plants?
The distance depends on the fixture’s wattage, efficiency, and plant stage. Generally, LED lights are kept around 12–36 inches above plants, with seedlings needing more distance and mature plants requiring stronger intensity.
Can a grow light touch the tent ceiling?
No. A grow light should not be pressed against the tent ceiling. Leave enough space around the fixture for proper airflow and heat dissipation.
Do grow lights need to be centered?
Yes. Centering the light usually provides the most even coverage. For larger tents, multiple fixtures can be spaced evenly to cover the entire growing area.
How often should I adjust my grow light height?
Adjust the height whenever plants grow closer to the light or show signs of too much or too little intensity. Check the plants regularly and make small changes when needed.
What is the best hanger for grow lights?
Adjustable ratchet hangers are one of the most popular options because they make it easy to raise and lower lights while providing secure support.
Conclusion
Hanging a grow light correctly is essential for creating an efficient and healthy indoor growing environment. The right placement, height, and positioning help plants receive consistent light while reducing problems like stretching, heat stress, and light damage.
When installing a grow light in a grow tent, focus on:
- Using a secure and adjustable hanging system
- Keeping the fixture level and centered
- Maintaining the correct distance based on plant growth stage
- Adjusting height as plants grow
- Ensuring proper airflow and heat management
There is no single perfect height for every grow light because every setup is different. The best approach is to start with the manufacturer’s recommendations, monitor your plants, and make gradual adjustments when needed.
A properly hung grow light will provide better coverage, improve plant growth, and help you get the most performance from your indoor grow tent setup.

I’m Maya L. Greenwood, a lifelong plant lover who believes anyone can grow something beautiful with the right guidance. After years of testing soil mixes, pruning methods, irrigation tricks, and pest-safe solutions, I started EasyGardenTips.com to turn hard-won lessons into step-by-step advice. From seed starting and container gardens to composting and seasonal checklists, my goal is to make gardening simple, sustainable, and fun.