
A malfunctioning or leaking garden hose spigot can turn simple watering tasks into a frustrating experience. Over time, improper spigot replacement can cause leaks, water waste, and even damage to pipe threads, affecting the efficiency of your entire outdoor plumbing system.
Replacing a garden hose spigot correctly is essential for maintaining reliable water flow and protecting plumbing infrastructure. Understanding the proper installation process ensures leak-free connections, prevents costly repairs, and promotes efficient irrigation for gardens, lawns, and outdoor spaces.
Mistakes during replacement are common and can have significant consequences. According to the EPA, household plumbing leaks contribute to nearly 14% of indoor water waste in the U.S. (EPA WaterSense). Even a small drip from an improperly installed spigot can waste thousands of gallons of water per year.
Gardeners and homeowners who follow correct spigot replacement procedures can save time, avoid unnecessary frustration, and maintain optimal water delivery. Properly installed spigots also reduce the likelihood of damage to hose connections, outdoor faucets, and surrounding plumbing.
What Is a Garden Hose Spigot?
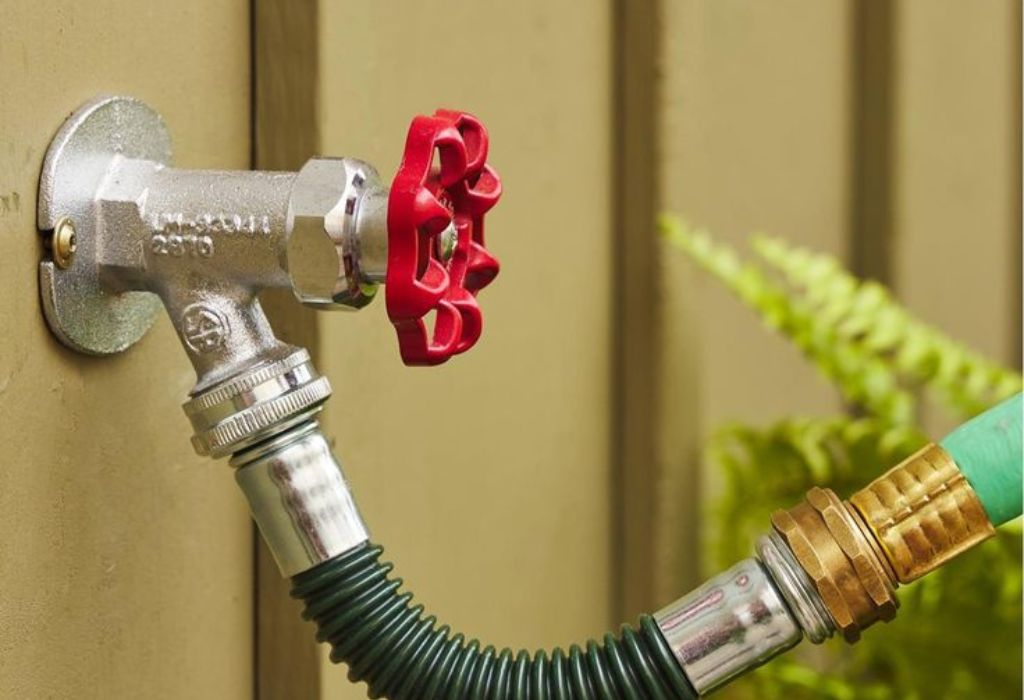
A garden hose spigot is an outdoor faucet that connects your water supply to garden hoses. It regulates water flow and provides a secure point for irrigation or other outdoor water needs.
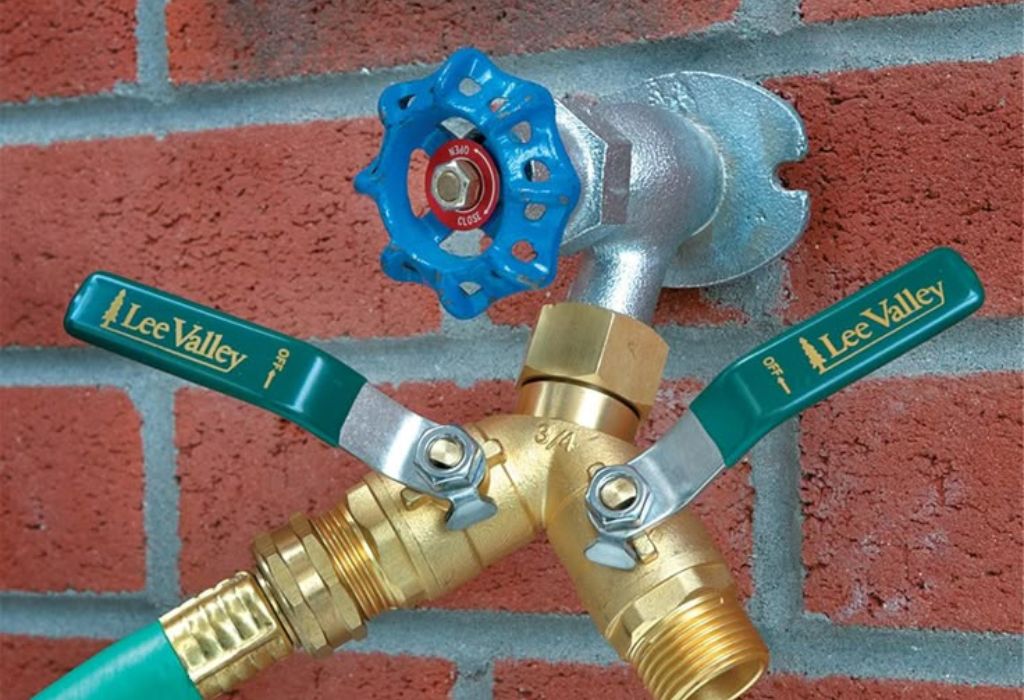
Spigots come in a variety of designs and materials. Common types include standard compression spigots, frost-free spigots for cold climates, and anti-siphon spigots to prevent backflow contamination.
The primary function of a spigot is to ensure a controlled, leak-free connection between the water supply and a hose. A well-installed spigot maintains consistent water pressure and efficient flow, supporting all types of garden watering tasks.
Material selection and durability are important considerations. Brass and stainless steel spigots are resistant to corrosion, while vinyl or plastic spigots are more affordable but may wear faster under prolonged exposure to sunlight and harsh weather.
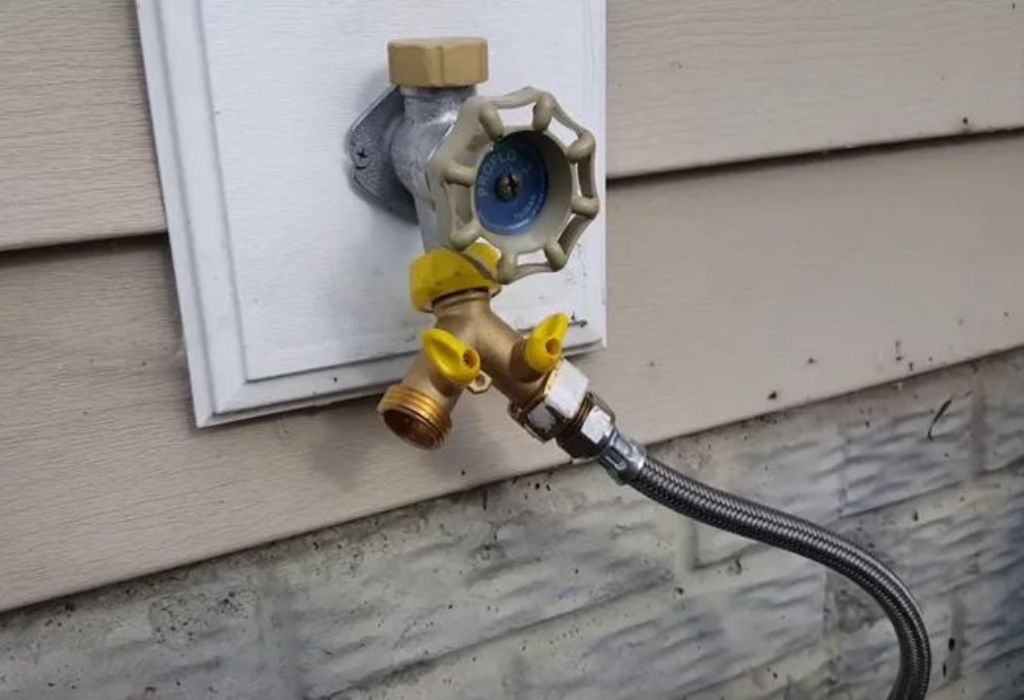
Frost-free spigots are specifically designed to protect pipes in regions with freezing temperatures. These spigots extend the valve mechanism inside the heated portion of the wall, preventing water from freezing and avoiding burst pipes.
Anti-siphon spigots are ideal for preventing backflow, which can contaminate the main water supply. They include a built-in vacuum breaker that ensures water only flows outward through the hose, keeping your system safe and compliant with local regulations.
Proper spigot functionality impacts both convenience and efficiency in the garden. Spigots that leak, freeze, or fail to deliver consistent water flow can reduce irrigation effectiveness, damage plants, and increase water waste.
Understanding the role and types of garden hose spigots provides the foundation for safe replacement. Choosing the right spigot and installation method ensures reliable performance, leak-free operation, and long-term durability of both the spigot and the connected plumbing.
Tools and Materials Needed for Spigot Replacement
Replacing a garden hose spigot requires specific tools and materials to ensure a safe, leak-free installation. Having everything prepared beforehand reduces the risk of errors and simplifies the replacement process.
Essential Tools include an adjustable wrench, pipe wrench, and pliers. These provide the necessary grip and torque to remove the old spigot and secure the new one without damaging pipe threads.
Sealing Materials such as Teflon tape or plumber’s tape are critical for preventing leaks. They create a tight seal around the threads of the spigot, ensuring water flows only through the intended outlet.
Replacement Spigot must match the pipe type, diameter, and function required. Standard compression spigots, frost-free spigots, and anti-siphon models are available, each suited for specific applications and climates.
Optional Tools and Materials include a pipe cutter for removing damaged sections, thread sealant for additional leak protection, and penetrating oil for loosening stuck or corroded spigots. Safety gloves and eye protection are also recommended.
Additional Considerations involve checking the pipe condition before replacement. Corroded or weakened pipes may require section replacement or reinforcement to prevent future leaks and ensure a secure connection.
Preparation of the Work Area helps prevent accidents and water damage. Ensure the area around the spigot is clear, the water supply is turned off, and any nearby hoses or fixtures are disconnected.
Planning for Maintenance is wise. Keeping spare washers, connectors, and Teflon tape on hand can simplify future repairs and prevent prolonged downtime in watering schedules.
By gathering the correct tools and materials, homeowners can replace garden hose spigots efficiently, reduce the risk of damage, and ensure long-lasting, reliable performance. Preparation is key to a smooth and successful spigot replacement process.
Preparing for Spigot Replacement
Proper preparation is essential before replacing a garden hose spigot to avoid leaks, water damage, and pipe damage. Taking these steps ensures a smooth, efficient replacement process.
Shutting Off the Water Supply is the first step. Closing the main water valve prevents flooding, leaks, or accidental water flow during spigot removal and installation.
Draining the Pipe ensures that any remaining water is released from the system. Open the existing spigot to allow water to flow out, minimizing spills and keeping the work area dry.
Inspecting the Existing Spigot and Pipe is critical for safety and functionality. Check for corrosion, cracks, or damaged threads that could compromise the new spigot installation.
Cleaning the Pipe Threads removes dirt, rust, or mineral deposits. Clean threads provide a better seal for the new spigot and reduce the risk of leaks or misalignment.
Gathering Tools and Materials nearby ensures efficiency. Keep the replacement spigot, wrenches, Teflon tape, and other necessary items within reach to avoid interruptions during installation.
Planning for Safety helps prevent accidents. Wear gloves to protect your hands from sharp edges and use eye protection when working with old, corroded spigots or tools.
Double-Checking Measurements ensures the new spigot fits properly. Verify pipe diameter, thread type, and length of spigot to avoid compatibility issues.
By thoroughly preparing, homeowners can minimize complications, reduce installation time, and ensure that the new garden hose spigot operates efficiently and reliably. Preparation lays the foundation for a successful replacement that protects both the spigot and the plumbing system.
Removing the Old Spigot
Removing an old garden hose spigot requires care to prevent pipe damage and ensure a clean installation for the new spigot. Proper techniques reduce the risk of leaks and costly repairs.
Loosening the Spigot begins with applying the correct wrench to the spigot body. Use an adjustable or pipe wrench to gradually turn the spigot counterclockwise, avoiding excessive force that could strip threads.
Applying Penetrating Oil can help with stubborn or corroded spigots. Allow the oil to soak for a few minutes to loosen rust and debris, making removal easier and reducing the chance of pipe damage.
Using Proper Leverage is important. Avoid twisting the pipe itself; instead, apply force directly to the spigot using the wrench. This preserves the integrity of the water line.
Cutting Severely Damaged Spigots may be necessary when threads are stripped or the spigot is seized. Use a pipe cutter carefully, taking care not to damage surrounding plumbing.
Cleaning the Pipe End after removal ensures a smooth surface for the new spigot. Remove corrosion, dirt, or remaining sealant to allow proper sealing and prevent leaks.
Inspecting the Pipe after spigot removal is essential. Check for cracks, weakened areas, or corrosion that may require repair or reinforcement before installing the replacement spigot.
Safety Considerations include wearing gloves and eye protection. Handling corroded metal or applying penetrating oil can pose hazards if precautions are not taken.
By following these steps, homeowners can safely and effectively remove an old garden hose spigot. Proper removal preserves the pipe threads, minimizes water leaks, and ensures a successful installation of the new spigot.
Installing the New Spigot
Installing a new garden hose spigot requires careful attention to ensure a leak-free connection and proper water flow. Correct installation protects both the spigot and the plumbing system from damage.
Wrapping Threads with Teflon Tape helps create a tight seal. Apply tape clockwise around the pipe threads, covering the threads completely without overlapping excessively, to prevent leaks.
Positioning the Spigot Correctly ensures proper alignment. Hand-tighten the spigot onto the pipe threads first, making sure it sits flush and straight to avoid cross-threading.
Using the Wrench Properly is essential for final tightening. Apply moderate pressure, turning the spigot with an adjustable or pipe wrench until snug, avoiding overtightening that could crack the threads or spigot body.
Checking the Handle Operation ensures smooth function. Turn the spigot on and off to verify that the valve operates without resistance or leaks before connecting a hose.
Applying Pipe Sealant if Needed provides additional leak protection. Some spigots benefit from a small amount of plumber’s sealant along the threads, particularly in older pipes or high-pressure systems.
Testing Connections Under Pressure confirms installation success. Turn the water supply back on gradually and observe the spigot for any drips, adjusting the connection or reapplying Teflon tape if necessary.
Inspecting Surrounding Pipe ensures no hidden damage occurred during installation. Check for cracks, leaks, or misalignment that could affect long-term performance.
By following these steps, homeowners can install a new garden hose spigot efficiently and safely. Proper installation guarantees consistent water flow, prevents leaks, and extends the lifespan of both the spigot and the plumbing system.
Testing and Troubleshooting
After installing a new garden hose spigot, testing and troubleshooting are critical to ensure a leak-free and reliable connection. Proper checks prevent water waste and protect plumbing from damage.
Turning on the Water Supply Gradually allows observation of the spigot under pressure. Opening the main valve slowly reduces the risk of sudden leaks or pipe stress during the initial test.
Inspecting for Leaks involves checking all connections and threads. Look for drips around the spigot body, handle, and pipe interface, which can indicate a need for tightening or resealing.
Adjusting Tightness Carefully resolves minor leaks. Avoid overtightening, which can crack the spigot or strip threads; instead, gently re-secure the connection or apply additional Teflon tape.
Checking Water Flow ensures the spigot operates correctly. Turn the handle fully on and off to confirm smooth operation without resistance, irregular flow, or leaks under normal pressure.
Applying Additional Sealant if Necessary addresses stubborn leaks. A small amount of pipe sealant or plumber’s paste on the threads can reinforce the seal without damaging the spigot or pipe.
Inspecting for Hidden Issues helps prevent long-term problems. Check for hairline cracks in the pipe, corrosion around the spigot, or loosened fittings that could compromise performance over time.
Regular Monitoring After Installation ensures ongoing reliability. Periodically inspect the spigot during the first few uses to catch minor issues early and maintain efficient water flow.
By carefully testing and troubleshooting a new garden hose spigot, homeowners can ensure a durable, leak-free installation. This step guarantees consistent water delivery, protects pipe integrity, and maximizes the lifespan of the spigot and connected plumbing.
Maintenance Tips for Garden Hose Spigots
Regular maintenance ensures that garden hose spigots remain leak-free, functional, and long-lasting. Proper care reduces water waste, prevents damage, and keeps irrigation efficient.
Inspect Spigots Regularly for leaks, corrosion, or loose fittings. Early detection of minor issues prevents major problems and extends the spigot’s lifespan.
Lubricate Handles and Seals to maintain smooth operation. A small amount of plumber’s grease on the valve or handle prevents stiffness and reduces wear on moving parts.
Winterize Frost-Free or Standard Spigots in cold climates. Drain water completely and cover outdoor faucets to prevent freezing and potential pipe bursts during winter months.
Clean the Threads and Connections periodically. Dirt, debris, and mineral buildup can reduce the effectiveness of Teflon tape and sealants, causing leaks or uneven flow.
Replace Washers and Seals as Needed to maintain a tight, leak-free connection. Over time, rubber washers can degrade, compromising the spigot’s seal and efficiency.
Avoid Excessive Force During Use to prevent damage. Gentle handling of the spigot handle and connected hoses minimizes stress on pipe threads and prevents cracking or stripping.
Check for Pipe Integrity around the spigot. Corrosion, cracks, or weakened pipes can affect performance and may require repair or replacement before problems escalate.
By following these maintenance tips, homeowners can ensure that garden hose spigots continue to operate efficiently and reliably. Routine care promotes consistent water flow, prevents leaks, and extends the life of both spigots and connected plumbing.
Common Mistakes to Avoid
Even experienced homeowners can make mistakes when replacing a garden hose spigot. Avoiding these errors ensures leak-free operation and protects both the spigot and pipe.
Overtightening Connections can crack pipe threads or damage the spigot body. Applying only moderate pressure prevents stripping threads while maintaining a secure seal.
Failing to Shut Off the Water Supply before replacement may cause flooding or leaks. Always close the main water valve to ensure a safe and controlled installation process.
Using the Wrong Spigot Type for the climate or pipe material can lead to premature failure. Frost-free spigots are essential in cold regions, while anti-siphon spigots prevent contamination in certain water systems.
Neglecting Thread Sealing causes persistent leaks. Proper use of Teflon tape or plumber’s sealant on the threads ensures a tight, leak-free connection.
Ignoring Pipe Condition can compromise the replacement. Corroded, cracked, or weakened pipes may fail under pressure if a new spigot is installed without inspection or repair.
Skipping Regular Maintenance reduces the lifespan of the spigot. Cleaning, lubrication, and seasonal checks prevent corrosion, stiffness, and leaks over time.
By being aware of these common mistakes, homeowners can replace garden hose spigots efficiently and safely. Avoiding these pitfalls protects plumbing, ensures consistent water flow, and prolongs the life of the spigot and connected pipes.
Conclusion
Replacing a garden hose spigot correctly is essential for leak-free operation, efficient water flow, and long-lasting plumbing. Proper preparation, careful removal of the old spigot, and precise installation of the new one prevent damage and costly repairs.
Understanding spigot types, selecting the right tools and materials, and using Teflon tape or plumber’s sealant ensures secure, durable connections. Following correct techniques minimizes the risk of leaks and maintains consistent water pressure for irrigation.
Regular maintenance, including inspecting for leaks, lubricating handles, and winterizing in cold climates, extends the lifespan of the spigot. Attention to pipe condition and periodic care prevents corrosion, stiffness, and unnecessary water waste.
Avoiding common mistakes such as overtightening, failing to shut off the water supply, or using the wrong spigot type protects both the plumbing and the new spigot. Correct installation and proper handling ensure long-term efficiency and reliability.
By following the guidelines in this article, homeowners and gardeners can replace garden hose spigots safely and efficiently. Proper installation and ongoing maintenance safeguard pipes, promote efficient irrigation, and provide reliable water flow for years to come.
I’m Maya L. Greenwood, a lifelong plant lover who believes anyone can grow something beautiful with the right guidance. After years of testing soil mixes, pruning methods, irrigation tricks, and pest-safe solutions, I started EasyGardenTips.com to turn hard-won lessons into step-by-step advice. From seed starting and container gardens to composting and seasonal checklists, my goal is to make gardening simple, sustainable, and fun.